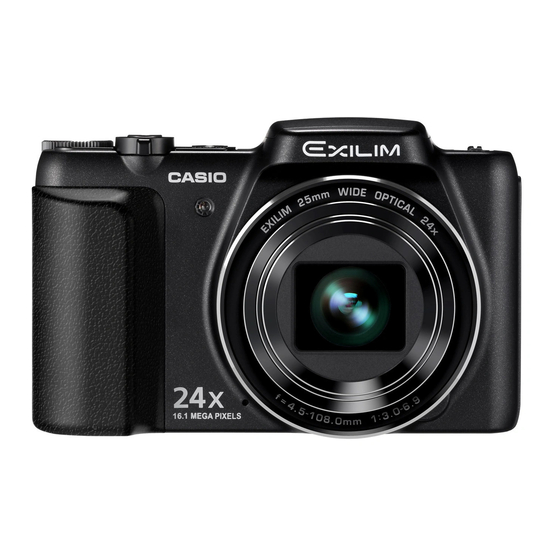
Digital Camera User’s Guide Thank you for purchasing this CASIO product. • Before using it, be sure to read the precautions contained in this User’s Guide. • Keep the User’s Guide in a safe place for future reference. • For the most up-to-date information about this product, visit the official EXILIM...
Accessories As you unpack your camera, check to make sure that all accessories shown below are included. If anything is missing, contact your original retailer. Rechargeable lithium ion USB-AC adaptor USB cable battery (NP-80) (AD-C53U) To attach the strap to the camera Attach strap here.
CASIO COMPUTER CO., LTD. is forbidden under copyright laws. • CASIO COMPUTER CO., LTD. shall not be held liable for any damages or lost profits suffered by you or any third party due to the use or malfunction of this product.
General Guide The numbers in parentheses indicate the pages where each item is explained. Front Back bo 8 6 7 8 [ SET ] bt bs Zoom controller Microphone ] (Delete) button (pages 25, 42, 68, 68) (pages 48, 77) (page 29) Mode dial (page 32) [r] (REC) button...
Monitor Screen Contents and How to Change Them The monitor screen uses various indicators, icons, and values to keep you informed of the camera’s status. • The sample screens in this section are intended to show you the locations of all the indicators and figures that can appear on the monitor screen in various modes.
. Shutter Button Half-pressed Recording mode (page 24) Flash (page 36) ISO sensitivity (page 66) Aperture value Shutter speed Focus frame (pages 25, 57) NOTE • Depending on recording settings, the aperture, shutter speed, and ISO sensitivity values may not appear on the monitor screen. These values will be orange if the Auto Exposure (AE) is not correct for some reason.
. Movie Playback File type Protect indicator (page 75) Folder name/file name (page 92) Movie recording time (page 47) Movie image quality (page 36) Date/time (page 98) Battery level indicator (page 17) Eye-Fi (page 90) . Configuring Monitor Screen Settings You can turn display information on and off by pressing [8] (DISP).
Quick Start Basics What you can do with your CASIO camera Your CASIO camera is packed with a powerful selection of features and functions to make recording of digital images easier, including the following main functions. Premium Auto Select Premium Auto recording and the camera automatically determines whether you are shooting a subject or scenery, and other conditions.
Note that the battery of a newly purchased camera is not charged. Perform the steps below to load the battery into the camera and charge it. • Your camera requires a special CASIO rechargeable lithium ion battery (NP-80) for power. Never try to use any other type of battery.
To replace the battery Stopper Open the battery cover and remove the current battery. Load a new battery. Charge the Battery You can use either of the two following methods to charge the camera’s battery. • USB-AC adaptor • USB connection to a computer .
Page 15
IMPORTANT! • Make sure that you insert the cable connector into the USB/ AV port until you feel it click securely into place. Failure to insert the connector fully can result in poor communication or malfunction. • Note that even while the connector is fully inserted, you still will be able to see the metal part of the connector as shown in the illustration.
Page 16
IMPORTANT! • The first time you connect the camera to your computer with the USB cable, an error message may appear on your computer. If this happens, disconnect and then reconnect the USB cable. • Depending on the setup of your computer, you may not be able to charge the camera’s battery over a USB connection.
Page 17
Checking Remaining Battery Power As battery power is consumed, a battery indicator on the monitor screen indicates remaining power as shown below. Remaining Power High Battery Indicator Indicator Color Cyan * Amber indicates battery power is low. Charge the battery as soon as possible. Recording is not possible when is indicated.
Configuring Basic Settings the First Time You Turn On the Camera The first time you load a battery into the camera, a screen appears for configuring the display language, date, and time settings. Failure to set the date and time correctly will cause the wrong date and time data to be recorded with images.
If you make a mistake configuring display language, date, or time settings with the above procedure, refer to the following pages for information about how to correct the settings. – Display language: Page 99 – Date and time: Page 98 NOTE •...
• Never insert anything besides a supported memory card (page 19) into the memory card slot. • Should water or any foreign object ever get into the card slot, immediately turn off the camera, remove the battery, and contact your retailer or nearest CASIO authorized service center. Quick Start Basics...
To replace the memory card Press the memory card and then release it. This will cause it to pop out of the memory card slot slightly. Pull the card out the rest of the way and then insert another one. •...
Turning the Camera On and Off . To turn power on Pressing [ON/OFF] (Power) enters the REC mode so [ON/OFF] (Power) you can record images. Pressing [p] (PLAY) while in the REC mode enters the PLAY mode, which you can use to view snapshots and movies (pages 28, 67).
Holding the Camera Correctly Your images will not come out Horizontal Vertical clearly if you move the camera when you press the shutter button. When pressing the shutter button, be sure to hold the camera as shown in the illustration below, and keep it still by pressing your arms firmly against your sides as you shoot.
Shooting a Snapshot To select an auto recording mode You can select one of two auto recording modes (Auto or Premium Auto) according to your digital imaging needs. REC Screen Setting Description Icon Display Auto This is the standard Auto recording mode. With Premium Auto recording, the camera automatically determines whether you are shooting a subject or scenery, and other conditions.
To shoot a snapshot Point the camera at the subject. If you are using Premium Auto, text will appear in the lower right corner of the monitor screen describing the type of shot the camera has detected. • You can zoom the image, if you want. w Wide Angle z Telephoto Zoom controller...
Continuing to keep the camera still, press the shutter button the rest of the way down. This records the snapshot. Recording a Movie ] (Movie) Full-press Press [0] (Movie) to start movie recording. Press [0] (Movie) again to stop movie recording. See page 47 for details.
Page 27
. Shooting with Premium Auto • In addition to shutter speed, aperture, and ISO sensitivity, the camera automatically executes the following operation as required when shooting with Premium Auto. – Auto Focus is normally performed until you half-press the shutter button. –...
Viewing Snapshots Use the following procedure to view snapshots on the camera’s monitor screen. • For information about how to play back movies, see page 67. Press [p] (PLAY) to enter the PLAY mode. • This will display one of the snapshots currently stored in memory.
Deleting Snapshots and Movies If memory becomes full, you can delete snapshots and movies you no longer need in order to free up storage and record more images. • In either the REC mode or PLAY mode, you can delete files simply by pressing [ ] (Delete).
. To delete specific files Press [ ] (Delete). Use [ ] and [2] to select “Delete Files” and then press [SET]. • This displays a file selection screen. Use [ ], [2], [4], and [6] to move the selection boundary to the file you want to delete, and then press [SET].
. Auto Focus Restrictions • Any of the following can make proper focus impossible. – Solid color wall or other very low contrast subject – Strongly back lit subject – Very shiny subject – Blinds or other subject with a repeating horizontal pattern –...
Snapshot Tutorial Selecting the Recording Mode Your camera has a variety of different recording Mode dial modes. Before recording an image, rotate the mode dial to select the recording mode that suits the type of image you are trying to record. Auto Standard Auto recording mode.
Using the Control Panel The Control Panel can be used to configure camera settings. In the REC mode, press [SET]. • You can also display the Control Panel by pressing [2]. Available settings Control Panel [SET] [8] [2] [4] [6] Use [8] and [2] to select the setting you want to change.
NOTE • No icon is displayed for any Control Panel option (page 9) that is set to its initial default (reset) setting. An icon will appear only if you change the setting of the corresponding Control Panel option. The following are the initial defaults for Control Panel options.
. To select the snapshot image size In the REC mode, press [SET]. Use [8] and [2] to select the “Snapshot Image Size” Control Panel option (page 33). Use [ ] and [6] to select an image size and then press [SET]. Suggested Image Size REC Screen...
. Specifying Movie Image Quality Movie image quality is a standard that determines the detail, smoothness, and clarity of a movie during playback. Shooting with the high-quality (HD) setting will result in better image quality, but it also shortens the amount of time you can shoot. In the REC mode, press [SET].
Page 37
Use [4] and [6] to select the flash setting you want and then press [SET]. • If there are no indicators on the monitor screen, you can cycle through the flash modes by pressing [2] ( ). You can turn display information on or off by pressing [8] (DISP) (page 11).
Page 38
IMPORTANT! • Even if you have the Control Panel setting configure for flash, the flash will not fire unless the flash unit is open. • When not using flash, press down on the flash unit until it locks into place with a click.
Using the Self-timer (Self-timer) With the Self-timer, pressing the shutter button starts a timer. The shutter is released and the image is shot after a fixed amount of time. In the REC mode, press [SET]. Use [8] and [2] to select the “Self-timer” Control Panel option (page 33).
Recording Beautiful Portraits (Make-up) Make-up smoothes the skin texture of the subject and softens facial shadows caused by harsh sunlight for better looking portraits. In the REC mode, press [SET]. Use [8] and [2] to select the “Make-up” Control Panel option (page 33).
Optimizing Image Brightness (Lighting) You can use this setting to optimize the balance between bright areas and dark areas when shooting images. In the REC mode, press [SET]. Use [8] and [2] to select the “Lighting” Control Panel option (page 33).
Use [4] and [6] to select “On” and then press [SET]. This enters the Silent mode, which is indicated by m (Silent Mode) on the monitor screen. • The settings shown below are fixed and cannot be changed while in the Silent mode.
NOTE • The higher the digital zoom factor, the coarser the recorded image. Note that the camera also has a function that lets you record using digital zoom without image deterioration (page 44). • Use of a tripod is recommended to protect against image blur due to camera movement when shooting with telephoto.
• The image deterioration point Image Maximum Undeteriorated depends on the image size (page Size Zoom Factor zoom limit 34). The smaller the image size, the higher the zoom factor you can use before reaching the 96.0X 24.0X image deterioration point. 16:9 •...
Select the ART SHOT scene you want to use and then press [SET]. Select from among : Toy Camera, Soft Focus, Light Tone, Pop, Sepia, Monochrome, Miniature, Fisheye. Press the shutter button to shoot. NOTE • You cannot view the result of an effect on the camera’s monitor screen while composing the image.
Page 46
About audio data • Audio files can be played back on a computer with Windows Media Player or QuickTime. – Audio Data: WAVE/IMA-ADPCM (WAV extension) . To play back an audio recording In the PLAY mode, use [4] and [6] to display the Voice Recording file you want to play.
Recording Movie Images To record a movie Configure the quality setting for the movie (page 36). The length of the movie you can record will depend on the quality setting you select. In the REC mode, point the Remaining recording time camera at the subject and then (page 125) [0] (Movie)
Page 48
NOTE • Spending a long time using movie recording will cause the camera to become slightly warm to the touch. This is normal and does not indicate malfunction. • The camera also records audio. Note the following points when shooting a movie. –...
Using BEST SHOT BEST SHOT provides you with a collection of sample “scenes” that show a variety of different types of shooting conditions. When you need to change the setup of the camera, simply find the scene that matches what you are trying to achieve, and the camera sets up for it automatically.
Page 50
Press [SET] to configure the camera with the settings for the currently selected scene. This returns to the REC mode. • The settings of the scene you selected remain in effect until you select a different scene. • To select a different BEST SHOT scene, repeat the above procedure from step 1.
• Images shot using a BEST SHOT scene may not produce the results you expected due to shooting conditions and other factors. • You can modify the camera settings that are made after you select a BEST SHOT scene. Note, however, that the BEST SHOT settings revert to their defaults when you select another BEST SHOT scene or turn off the camera.
Advanced Settings The following are menu operations you can use to configure various camera settings. • REC mode menu contents and operations are different from those in the PLAY mode. This section explains operations using the REC menu screen. See page 71 for information about PLAY menu screen operations.
Page 53
NOTE • [ ] (Delete) provides a helpful way to navigate around tabs and menus. – Pressing [ ] (Delete) while a tab is selected will display the viewfinder screen. – Pressing [ ] (Delete) while menu item or setting is selected will “back step” in the following sequence: Settings Menu items Tab.
REC Mode Settings (REC) Selecting a Focus Mode (Focus) Procedure [r] (REC) * [SET] * MENU * “REC” Tab * Focus Auto Focus is the only focus mode available while Make-up (page 40) or Face Detection (page 58) is enabled. To select another focus mode, first turn off Make-up and Face Detection.
Page 55
To focus with manual focus On the monitor screen, compose the image so the subject you want to focus on is within the yellow boundary. Watching the image on the monitor screen use [4] and [6] to adjust focus. • At this time the image that is within the boundary will enlarge and fill the monitor screen, which aids Yellow boundary in focusing.
Keeping the shutter button half-pressed (which maintains the focus setting), move the camera to compose the image. When you are ready to shoot the image, press the shutter button the rest of the way down. NOTE • Focus lock also locks exposure (AE). Changing the Focus Frame Shape (Focus Frame) Procedure [r] (REC) * [SET] * MENU * “REC”...
Specifying the Auto Focus Area (AF Area) Procedure [r] (REC) * [SET] * MENU * “REC” Tab * AF Area This mode takes readings of a small area in the center of the Spot image. This setting works well with focus lock (page 55). When you half-press the shutter button while this setting selected, the camera will select the optimum Auto Focus area from among Multi...
Using the Auto Focus Assist Light (AF Assist Light) Procedure [r] (REC) * [SET] * MENU * “REC” Tab * AF Assist Light Half-pressing the shutter button while this setting is selected Front lamp causes the front lamp to light, which provides illumination for focusing in areas where lighting is dim.
IMPORTANT! • The camera performs center focus if it cannot detect a face. • The only focus mode available while face detection is enabled is Auto Focus (AF). • Face detection may take a bit longer when you hold the camera sideways. •...
Reducing the Effects of Camera and Subject Movement (Anti Shake) Procedure [r] (REC) * [SET] * MENU * “REC” Tab * Anti Shake You can turn on the camera’s Anti Shake feature to reduce image blur due to subject movement or camera movement when shooting a moving subject using telephoto, when shooting a fast-moving subject, or when shooting under dim lighting conditions.
Assigning Functions to the [ ] and [ ] Keys (L/R Key) Procedure [r] (REC) * [SET] * MENU * “REC” Tab * L/R Key You can assign one of the four functions listed below to the [ ] and [ ] keys.
Using Icon Help (Icon Help) Procedure [r] (REC) * [SET] * MENU * “REC” Tab * Icon Help While Icon Help is turned on, a textual description will appear on the display for certain icons when you switch between REC functions. Functions Supported by Icon Help •...
Image Quality Settings (Quality) Specifying Snapshot Image Quality (T Quality (Snapshot)) Procedure [r] (REC) * [SET] * MENU * “Quality” Tab * T Quality (Snapshot) REC Screen Icon Setting Description Display Fine Gives image quality priority. Normal Normal • The “Fine” setting helps to bring out details when shooting a finely detailed image of nature that includes dense tree branches or leaves, or an image of a complex pattern.
Press [SET]. This applies the exposure compensation value. The exposure compensation value you set remains in effect until you change it or turn off the camera (which causes it to revert to “0.0”). NOTE • When shooting under very dark or very bright conditions, you may not be able to obtain satisfactory results even after performing exposure compensation.
Page 65
REC Screen Setting Description Icon Display For configuring the camera manually to suit a particular light source Select “Manual”. Blank white paper Under the lighting conditions you plan to use when shooting, point the camera at Manual a blank white piece of paper so it fills the entire monitor screen and then press the shutter button.
Specifying ISO Sensitivity (ISO) Procedure [r] (REC) * [SET] * MENU * “Quality” Tab * ISO ISO sensitivity is a measure of sensitivity to light. REC Screen Setting Description Icon Display Auto None Adjusts sensitivity automatically according to conditions. Lower Slow shutter speed Less noise ISO 64...
Viewing Snapshots and Movies Viewing Snapshots See page 28 for the procedure for viewing snapshots. Viewing a Movie Press [p] (PLAY) and then use [4] and [6] to display the movie you want to view. Press [0] (Movie) to start Movie icon: »...
Zooming an On-screen Image In the PLAY mode, use [4] and [6] to scroll through the images until the one you want is displayed. Rotate the zoom controller towards z ( ) to Zoom factor zoom. Image area You can use [8], [2], [4], and [6] to scroll the zoomed image on the monitor screen.
Viewing Snapshots and Movies on a TV Screen Use an optionally available AV cable (EMC-7A) to connect it to the TV. White Yellow Video Audio [USB/AV] port AUDIO IN jacks (white) AV cable VIDEO IN jack (yellow) • For details about connecting to the camera and precautions when connecting, see page 15.
Page 70
Recording Camera Images to a DVD Recorder or Video Deck Use one of the following methods to connect the camera to the recording device using an optionally available AV cable (EMC-7A). – DVD recorder or video deck: Connect to the VIDEO IN and AUDIO IN terminals. –...
Other Playback Functions (PLAY) This section explains menu items that you can use to configure settings and perform other playback operations. Using the PLAY Panel Pressing [SET] in the PLAY mode will display the PLAY Panel. . Example PLAY Panel Operation In the PLAY mode, press [SET].
Page 72
Displays the PLAY menu. You can perform the following operations on the PLAY menu. Use [4] and [6] to select the tab Tabs where the menu item you want to configure is located. Use [8] and [2] to select the menu item you want, and then press [6].
Playing a Slideshow on the Camera (Slideshow) In the PLAY mode, press [SET]. Use [8] and [2] to select the “Slideshow” PLAY Panel option and then press [SET] (page 71). Start Starts the slideshow. Time from the start to the end of the slideshow Time 1 to 5 minutes, 10 minutes, 15 minutes, 30 minutes, 60 minutes Amount of time each image remains displayed...
Performing Playback without Disturbing Others (Silent Mode) The Silent mode turns off camera operation sounds so you can avoid disturbing others around you when play back images. In the PLAY mode, press [SET]. Use [8] and [2] to select the “Silent Mode” PLAY Panel option and then press [SET] (page 71).
Resizing a Snapshot (Resize) Procedure [p] (PLAY) * Snapshot Screen * [SET] * MENU * “PLAY” Tab * Resize You can reduce the size of a snapshot and save the result as a separate snapshot. The original snapshot is also retained. You can select resize an image to one of three image sizes: 10M, 5M, VGA.
Adding Audio to a Snapshot (Dubbing) Procedure [p] (PLAY) * Snapshot Screen * [SET] * MENU * “PLAY” Tab * Dubbing You can add audio to a snapshot after you shoot it. You can re-record a snapshot’s audio whenever you want.
Voice Recording Playback Controls Fast forward/fast reverse [4] [6] Play/pause [SET] Press [2] and then Volume adjustment press [8] [2]. Display content switching [8] (DISP) Stop playback [0] (Movie) • Audio of an Audio Snapshot also can be played back on a computer with Windows Media Player or QuickTime.
Printing Printing Snapshots Professional Print Service* You can take a memory card that contains the images you want to print to a professional print service and have them printed. Printing on a Home Printer* You can use a printer equipped with a memory card slot to print images directly from a memory card.
Page 80
. Configuring DPOF Settings Individually for Each Image Procedure [p] (PLAY) * Snapshot Screen * [SET] * MENU * “PLAY” Tab * DPOF Printing * Select images Use [4] and [6] to scroll through the files until the image you want to print is displayed.
. Date Stamping You can use one of the following three methods to include the recording date in the printout of an image. Configuring camera settings Configure DPOF settings (page 79). You can turn date stamping on and off each time you print. You can configure settings so some images include the date stamp and some don’t.
YouTube YouTube” BEST SHOT scene can be easily uploaded to YouTube (YouTube Uploader for CASIO*). Windows only The procedures you need to perform when using the camera with your computer and when using the software are different for Windows and the Macintosh.
YouTube • Download the user Windows XP (SP3) documentation for this software from the website below. http://www.exilim.com/manual/ Photo Transport and YouTube Uploader for CASIO will not run under 64-bit versions of Windows OS. Using the Camera with a Computer...
. Precautions for Windows Users • The software requires Administrator privileges to run. • Operation on a self-made computer is not supported. • Operation may not be possible under certain computer environments. Viewing and Storing Images on a Computer You can connect the camera to your computer in order to view and store images (snapshot and movie files).
Page 85
Double-click “Removable Disk”. • Your computer recognizes the memory card loaded in the camera (or built-in memory if there is no card) as a removable disk. Right-click the “DCIM” folder. On the shortcut menu that appears, click “Copy”. Windows 7, Windows Vista users: Click “Start” and then “Documents”. Windows XP users: Click “Start”...
. To view images you copied to your computer Double-click the copied “DCIM” folder to open it. Double-click the folder that contains the images you want to view. Double-click the image file you want to view. • For information about file names, see “Memory Folder Structure” on page 93. •...
. Movie Playback Precautions • Be sure to move the movie data to the hard disk of your computer before trying to play it. Proper movie playback may not be possible for data accessed over a network, from a memory card, etc. •...
Connecting the Camera to Your Computer and Saving Files Never use your computer to modify, delete, move, or rename any image files that are in the camera’s built-in memory or on its memory card. Doing so can cause problems with the camera’s image management data, which will make it impossible to play back images on the camera and can drastically alter remaining memory capacity.
After the copy operation is complete, drag the drive icon to Trash. On the camera, press [ON/OFF] (Power) to turn off the camera. After checking to make sure that the back lamp is unlit or lit red, disconnect the USB cable. .
. Movie Playback Precautions Proper movie playback may not be possible on some Macintosh models. If you experience problems, try the following. – Change the movie image quality setting to “STD”. – Upgrade to the latest version of QuickTime. – Shut down other applications that are running. Even if proper playback is not possible on your Macintosh, you can use an optionally available AV cable (EMC-7A) to connect to the video input terminal of a TV or Macintosh and play back movies that way.
Page 91
IMPORTANT! • Recorded images are transferred over wireless LAN. Do not use the Eye-Fi card or turn off Eye-Fi card communication (page 95) when on an aircraft or in any other location where use of wireless communication is limited or prohibited. •...
Files and Folders The camera creates a file and saves it each time you shoot a snapshot, record a movie, or perform any other operation that stores data. Files are grouped by storing them in folders. Each file and folder has its own unique name. •...
File System (DCF). . About DCF The following operations are supported for DCF-compliant images. Note, however, that CASIO makes no performance guarantees concerning these operations. • Transferring this camera’s DCF-compliant images to another manufacturer’s camera and view them. • Printing this camera’s DCF-compliant images on another manufacturer’s printer.
. Supported Image Files • Image files shot with this camera • DCF-compliant image files This camera may not be able to display an image, even if it is DCF-compliant. When displaying an image recorded on another camera, it may take a long time for the image to appear on this camera’s monitor screen.
Other Settings (Set Up) This section explains menu items that you can use to configure settings and perform other operations in both the REC mode and PLAY mode. See the following for more information. – REC Menu (page 52) – PLAY Menu (page 71) Turning off Eye-Fi Card Communication (Eye-Fi) Procedure [SET] * MENU * “Set Up”...
Configuring a Startup Image (Startup) Procedure [SET] * MENU * “Set Up” Tab * Startup Display the image you want to use as your startup image and then select “On”. • The startup image does not appear when you turn on the camera by pressing [p] (PLAY).
Configuring World Time Settings (World Time) Procedure [SET] * MENU * “Set Up” Tab * World Time You can use the World Time screen to view the current time in a zone that is different from your Home City when you go on a trip, etc. World Time displays the current time in 162 cities in 32 time zones around the globe.
Time Stamping Snapshots (Timestamp) Procedure [SET] * MENU * “Set Up” Tab * Timestamp You can configure the camera to stamp the recording date only, or date and time in the lower right corner of each snapshot. • Once date and time information is stamped into a snapshot, it cannot be edited or deleted.
Specifying the Date Style (Date Style) Procedure [SET] * MENU * “Set Up” Tab * Date Style You can select from among three different styles for the date. Example: July, 10, 2015 YY/MM/DD 15/7/10 DD/MM/YY 10/7/15 MM/DD/YY 7/10/15 Specifying the Display Language (Language) Procedure [SET] * MENU * “Set Up”...
Configuring Auto Power Settings (Auto Power Off) Procedure [SET] * MENU * “Set Up” Tab * Auto Power Off Auto Power Off turns off the camera whenever no camera operation is performed for a preset amount of time. Trigger Time Settings: 1 min, 2 min, 5 min (The trigger time is always 5 minutes in the PLAY mode.) •...
Disabling File Deletion (Ü Disabled) Procedure [SET] * MENU * “Set Up” Tab * Ü Disabled The camera will not start the image delete operation when you press [ ] (Delete) while “Ü Disabled” is turned on. You can protect against accidental deletion of images by selecting “On” for “Ü...
Formatting Built-in Memory or a Memory Card (Format) Procedure [SET] * MENU * “Set Up” Tab * Format If a memory card is loaded in the camera, this operation will format the memory card. It will format built-in memory if no memory card is loaded. •...
Also, remove the battery from the camera, taking care to protect yourself against burn injury. 3. Contact your retailer or nearest CASIO authorized service center. . Keep Away From Fire • Never expose the camera to fire, which can cause it to explode and creates the risk of fire and personal injury.
Page 104
• Should the power cord or power plug become damage, contact your retailer or nearest CASIO authorized service center. • Do not use the USB-AC adapter or power cord in areas where liquids might spill on them. Liquids create the risk of fire and electric shock.
Page 105
Also, remove the battery from the camera, taking care to protect yourself against burn injury. 3. Contact your retailer or nearest CASIO authorized service center. . Disassembly and Modification • Never try to take the camera apart or modify it in any way. Doing so creates the risk of electric shock, burn injury, and other personal injury.
• The battery is intended for use with a CASIO Digital Camera only. Use with any other device creates the risk of the battery damage, or deterioration of battery performance and service life.
Page 107
. Rechargeable Battery • If battery charging does not end normally within the specified charging time, stop charging anyway and contact your local CASIO authorized service center. Continued charging creates the risk of battery overheating, fire, and explosion.
CAUTION . Connections • Never plug any devices that are not specified for use with this camera into connectors. Connecting a non-specified device creates the risk of fire and electric shock. . Unstable Locations • Never place the camera on an unstable surface, on a high shelf, etc. Doing so can cause the camera to fall, creating the risk of personal injury.
Page 109
CAUTION . Memory Protection • Whenever replacing the battery, be sure to follow the correct procedure as described in the documentation that comes with the camera. Incorrectly replacing the battery can result in corruption or loss of data in camera memory. .
Precautions During Use . Data Error Precautions Your digital camera is manufactured using precision digital components. Any of the following creates the risk of corruption of data in camera memory. – Removing the battery or memory card while the camera is performing some operation –...
. Lens • Never apply too much force when cleaning the surface of the lens. Doing so can scratch the lens surface and cause malfunction. • You may sometimes notice some distortion in certain types of images, such as a slight bend in lines that should be straight.
Page 112
Note that CASIO COMPUTER CO., LTD. shall not be held liable for use of this product in any way that infringes on the copyrights of others or that violates copyright laws.
USB connection. If problems continue to occur after you perform the above steps, it could mean that the battery is faulty. Contact your nearest CASIO authorized service center. Battery Precautions . Precautions during Use •...
Using the Camera in another Country . Precautions during Use • The bundled USB-AC adaptor is designed for operation with any power supply in the range of 100V to 240V AC, 50/60Hz. Note, however, that the shape of the power cord plug depends on each country or geographic area. Before taking the camera and USB-AC adaptor along on a trip, check with travel agent about the power supply requirements in your destination(s).
. Memory Card Handling Precautions • Certain types of memory cards can slow down processing speed. Whenever possible use an Ultra High-Speed Type memory card. Note, however, that not all operations can be guaranteed even if an Ultra High-Speed Type memory card is used.
2)The battery may be dead. Charge the battery (page 14). If the battery goes dead soon after being charged, it means the battery has reached the end of its life and needs to be replaced. Purchase a separately available CASIO NP-80 rechargeable lithium ion battery. The camera 1)Auto Power Off may have activated (page 100).
Page 118
(page 36) or select a different BEST SHOT scene (page 49). The red ? (Flash The flash unit may be malfunctioning. Contact a CASIO Off) icon is authorized service center or your original retailer. Note that...
Page 119
Problem Possible Cause and Recommended Action A recorded image 1)Camera power may have been turned off before the save was not saved. operation was complete, which will result in the image not being saved. If the battery indicator shows , charge the battery as soon as possible (page 17).
Page 120
Problem Possible Cause and Recommended Action Playback The color of the Sunlight or light from another source may be shining directly playback image is into the lens when you are shooting. Position the camera so different from what sunlight does not shine directly into the lens. appears on the monitor screen when shooting.
Page 121
If the same message appears after you turn power back on, contact your retailer or a CASIO authorized service center. There are various The monitor screen shows indicators and other information indicators and about shooting conditions and the image you are recording.
If the same LENS ERROR message appears after you turn power back on, contact a CASIO authorized service center or your original retailer. Memory is full with images you recorded and/or files saved Memory Full by editing operations.
Page 123
Your camera system is corrupted. Contact your retailer or a SYSTEM ERROR CASIO authorized service center. The LOCK switch of the SD, SDHC, or SDXC LOCK memory card loaded in the camera is in the The card is locked. locked position. You cannot store images to or delete images from a memory card that is locked.
Movies Maximum Built-in Continuous Image Recording File Size of Approximate Data Maximum Memory Recording Size/Pixels Time with 1-minute Rate (Frame Rate) File Size Recording Time per (Audio) SD Memory Movie Capacity Movie Card 30.2 Megabits/ 1 hour 17 minutes 1280 second 9 seconds 5 minutes...
Page 127
White Balance Auto, Daylight, Overcast, Shade, Day White Fluorescent, Daylight Fluorescent, Tungsten, Manual WB Sensitivity (Standard Snapshots: Output Sensitivity) Auto, ISO 64, ISO 100, ISO 200, ISO 400, ISO 800, ISO 1600 equivalent Movies: Auto Flash Modes Auto, Off, On, Red-eye reduction Flash Range Wide Angle: 0.4 m to 3.2 m (1.3' to 10.5') (ISO Sensitivity: Auto)
Page 128
Approximate Battery Life All of the values provided below represent the approximate amount of time under normal temperature (23°C (73°F)) before the camera turns off. These values are not guaranteed. Low temperatures shorten battery life. Number of snapshots (Operating Time) 145 shots Actual movie recording time (HD movie) 35 minutes...
Page 129
The power cord set is not supplied. The power cord used must comply with relevant national and/or international standards. Declaration of Conformity According to EU Directive Manufacturer: CASIO COMPUTER CO., LTD. 6-2, Hon-machi 1-chome, Shibuya-ku, Tokyo 151-8543, Japan Responsible within the European Union: CASIO EUROPE GmbH Casio-Platz 1, 22848 Norderstedt, Germany Appendix...
Page 130
CASIO COMPUTER CO., LTD. 6-2, Hon-machi 1-chome Shibuya-ku, Tokyo 151-8543, Japan MA1209-A 2012...
Need help?
Do you have a question about the EXILIM EX-H50 and is the answer not in the manual?
Questions and answers