
Related Manuals for Vodavi Triad-S 1-2-3


Summary of Contents for Vodavi Triad-S 1-2-3
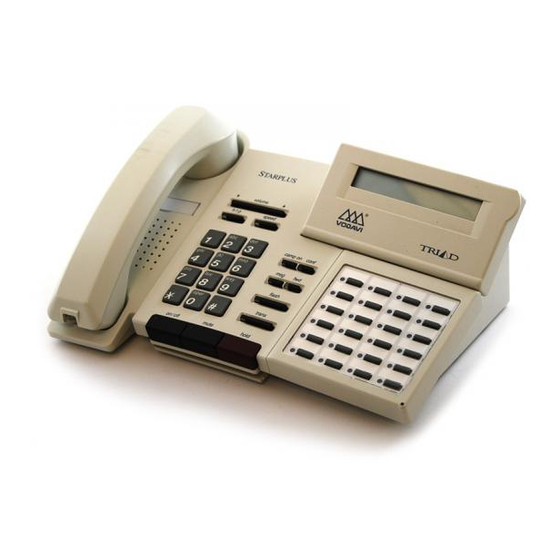
- Page 1 Feature Package 3 TRIAD -S, 1/2/3 Station User Guide Includes Attendant Features a new dimension in business communications...
- Page 2 STARPLUS Triad Digital Systems Quick Reference Card FIXED FEATURE BUTTONS • MSG (MESSAGE WAIT) Button -- Allows you to initiate a message waiting indication at stations • CAMP-ON Button -- Enables you to alert a busy that are busy, unattended, or in Do Not Disturb. party that an outside line is on hold and waiting Mess age Waiting Callback request left at your for them.
- Page 3 STARPLUS Triad Quick Reference Card Digital Systems PLACING AN OUTSIDE LINE ON HOLD To transfer a call usi ng Directory Dialing • If your system is programmed for Exclusive 1. Press the TRANS button. Hold Preference, pres s the HOLD button once 2.
- Page 4 TRIAD -S, 1/2/3 Digital Telephone Systems (Feature Package 3) Station User Guide with Attendant Features Issue 3.2 - March 2001 P/N: 8052-10...
- Page 5 Copyright Laws of the United States (17 U.S.C. Section 101 et. seq.). VODAVI reserves the right to make changes in specifications at any time and without notice. The information furnished by VODAVI in this material is believed to be accurate and reliable, but is not warranted to be true in all cases.
-
Page 6: Table Of Contents
Contents Account Codes ................1 Using Account Codes............1 Verified Account Codes............2 Answering Machine Emulation ..........2 Notification Methods ............2 Ring Mode ............... 3 Speaker Mode ..............3 Attendant Features..............4 911 Feature (Attendant Alert).......... 4 Attendant Override ............. 5 Attendant Unavailable (Alternate Position) ....5 Disable Outgoing CO Access ........... - Page 7 March 2001 Call Park................... 20 System..................20 Personal ...................20 Station ..................21 Retrieving a Station Park Call........21 Call Pickup..................21 Directed Pickup..............21 Group Pickup .................22 Call Transfer ...................22 Answering a Screened Transfer ........22 Executive/Secretary Transfer ........... 23 Incoming CO Transfer............
- Page 8 March 2001 Activating Do Not Disturb..........33 One-Time Do Not Disturb ..........33 Executive Override..............34 Flash ....................34 Flash Key on Intercom ............34 Flexible Button Programming ..........35 Group Listening ................35 Headset Mode ................36 Intercom Buttons .................36 Intercom Calls ................37 Answering an Intercom Call ..........
- Page 9 March 2001 Placing an Outside Call............48 Placing an Outside Line on Hold ........48 Paging....................48 Personalized Messages.............. 49 Custom Messages ..............50 Selecting a Custom Message........50 Date and Time Entry Messages ........51 Personalized Msg Codes on a Flex Key......52 Using 2-Digit Code ............
- Page 10 March 2001 DEFAULT NUMBERING PLAN........... 64 Digital Telephone Features VOLUME SPEED CAMP ON CONF FORWARD FLASH TRANS...
- Page 11 March 2001 Digital Key Telephone Buttons Number Feature Description Display (Executive Displays information about telephone Models only) status, d ialing directories, and text message information. h t p Used to select mode of operation: Handsfree, Tone, or Privac y. msg Key Used for Auto-CallBack to a phone that has left a text message or to access voice messages.
-
Page 12: Account Codes
Account Codes … A B O U T T H I S U S E R G U I D E FLEXIBLE BUTTONS -- Most of the features described in this user guide may be set up on a flexible button for one-button “Flexible Button Programming”... -
Page 13: Verified Account Codes
Answering Machine Emulation ❑ Flex Verified Account Codes To enter an account code prior to a CO call: 1. Press the pre-programmed ACCOUNT CODE flexible button before accessing a CO line. Dial the account code, up to 12 digits. If the account code matches a verified account code, an intercom dial tone will be returned. -
Page 14: Ring Mode
Answering Machine Emulation Ring Mode The pre-programmed flexible button flashes at 480 ipm red while the caller is in your mailbox. You can press the flashing button and the audio is broadcast over the speaker of the keyset. The MUTE key is also enabled and the LED lights solid red. -
Page 15: Attendant Features
Attendant Features Attendant Features If your station is designated as the attendant station, the following features are available to assist you in efficiently operating your telephone. ❑ Flex 911 Feature (Attendant Alert) When enabled, and a flexible button has been programmed (programming code = 608), the 911 Alert feature affects a flashing flexible button and audible tone to notify the Attendant of a 911 call in progress. -
Page 16: Attendant Override
Attendant Features To delete logged 911 alert messages: 1. Press the 911 ALERT flexible button to display the 911 call you want to delete. 2. Press the FLASH button to delete that message. Dialing 911 from any station overrides previously enabled features such as: Do Not Disturb. -
Page 17: Disable Outgoing Co Access
Attendant Features After the first programmed Attendant presses the UNAVAILABLE flexible button, or dials the Attendant Unavailable code [607]: The LED on the pre-programmed flexible button lights solid. Recalls and dial “0” calls that were ringing at the first Attendant station now ring at the second Attendant. If the second Attendant places their phone in unavailable mode, the third Attendant receives recall and dial “0”... -
Page 18: Co Lines Off-Net Fwd - Incoming (Via Speed Dial)
Attendant Features CO Lines Off-Net Fwd - Incoming (via Speed Dial) CO Lines Off-Net Forward feature lets the first Attendant station forward incoming CO calls to an off-net location. In a speed dial bin, store the number of the off-net location where calls are to forward. -
Page 19: Day/Night/Special Mode
Attendant Features ❑ Flex Day/Night/Special Mode Any designated attendant may place the system into night service. The NIGHT SERVICE (DND by default) button cycles through the choices as follows: day, night, and then special mode. Press the pre-programmed NIGHT SERVICE (DND by default) button once to activate Night mode (LED solid). - Page 20 Attendant Features The first entry (000) in the Directory List is shown on the display. D IR LST A AA BIN / ICM: XXX n n n n n n n n nn n n n n n n nn n n n n n AAA = Directory List entry number (000-199) XXX = numbers for Station Intercom, System Spee d dial bin, or Entry in Local Number/Name Translation Table...
-
Page 21: Local Number/Name Translation Table
Attendant Features 3. Press the SPEED button when finished. A confirmation tone sounds and the display shows the new or changed name. 4. Press HOLD, use [ ] or [#] to scroll to next entry. Local Number/Name Translation Table This method is used to enter names that will be associated to the Local Number/Name Translation Table only. -
Page 22: System Speed Dial Bin
Attendant Features 3. Press the SPEED button when finished. A confirmation tone sounds and the display shows the new or changed name. 4. Press HOLD, use [ ] or [#] to scroll to next entry. System Speed Dial Bin This method may be used to enter names that will be associated to a system speed dial bin only. -
Page 23: Software Version Display
Attendant Features 3. Press the SPEED button when finished. A confirmation tone sounds and the display updates. 4. Press HOLD, use [ ] or [#] to scroll to next entry. 5. Hang up to end programming. Software Version Display The current system software can be viewed by the first programmed Attendant. -
Page 24: Background Music (Optional)
Background Music (Optional) To use the following speed dial options, enter as shown: Initiate a Pulse-To-Tone Switchover -- Press the TRANS button during number entry. Insert a Pause -- Press the HOLD button during number entry. Insert a Flash into the Speed Number -- Press the FLASH key. -
Page 25: Call Back
Call Back To deactivate Background Music: 1. Dial [632] again or press the BGM flexible button. 2. Enter a [0]. A confirmation tone sounds and the music discontinues. ❑ Call Back Flex If you dial a telephone number that is busy and you want to leave a Call Back indication: 1. -
Page 26: Call Forwarding
Call Forwarding When a call rings in (and a flexible button has been assigned): The coverage station hears ringing for the coverage station after a five-second delay. A message is displayed on the Coverage Station LCD as shown. CALL FO R STA MMM D D Y Y H H: MM a m The coverage station then presses their flashing... -
Page 27: Busy
Call Forwarding The call types affected are: Call Forwarding Allowed -- ACD, UCD, Voice Mail, Hunt group pilot numbers, and speed dial bins for off-net forwarding. Calls Cancelled (when forwarding is activated) -- Line Queue, Call Back requests, Message Wait requests, and pre-selected messages. -
Page 28: Follow-Me
Call Forwarding Follow-Me If you have been given the ability to forward your calls: 1. Lift the handset or press the ON/OFF button. 2. Dial the Follow-Me Forward code [642] on the key pad. 3. Dial the station number of the station from which forwarding is desired. -
Page 29: Forward Override
Call Forwarding 4. Dial the appropriate forwarding condition code: [6] = All [7] = No Answer [8] = Busy [9] = Busy/No Answer 5. Dial the three-digit destination number where calls are to be forward. (Station, Voice Mail, ACD/UCD groups, or Hunt group. -
Page 30: Station Off-Net Call Forwarding (Via Speed Dial)
Call Forwarding 4. Press the pre-programmed DSS button, or dial the intercom number where calls are to be forwarded. A confirmation tone sounds. 5. Replace the handset or press the ON/OFF button. Station Off-Net Call Forwarding (via Speed Dial) Allows stations to forward intercom and transferred calls to an off-net location. -
Page 31: Call Park
Call Park Call Park The Call Park feature allows you to place an outside call in park and consult with, page, or call an internal party. System While connected to an outside line: 1. Press the pre-programmed TRANS flexible button. The caller is put on Exclusive Hold. -
Page 32: Station
Call Pickup To retrieve a parked call from the station that parked the call: Dial the Personal Park Code [438], -or- Press the pre-programmed PERSONAL PARK flexible button. A talk path is established between both parties. When dialing the personal park location and that location is already occupied, the initiating station receives the previously parked call and the second call is parked. -
Page 33: Group Pickup
Call Transfer 2. Press the PICK-UP flexible button to answer the call. You MUST have access to the specific outside line or a LOOP button to do a directed call pickup. Group Pickup When intercom tone ringing, transferred outside line ringing, recall ringing, or initially ringing call is heard at an unattended telephone: 1. -
Page 34: Executive/Secretary Transfer
Call Transfer Executive/Secretary Transfer If you are designated the Executive station and your phone is busy or in DND, all calls will be routed to the Secretary station. If you are the designated Secretary station, you can signal the Executive that is busy or in DND by using the Camp- On feature. -
Page 35: Transfer Search
Caller ID Name/Number 2. When that extension answers, announce the transfer. 3. Hang up to complete transfer. Transfer Search When attempting to locate a party: 1. Press a station DSS button to signal the station or press the TRANS button and dial desired station. 2. -
Page 36: Calling Station Tone Mode
Calling Station Tone Mode Calling Station Tone Mode The calling station tone mode option allows a calling station to override a called station’s “H” or “P” intercom button settings. When placing a call to a station and Tone ringing is desired: 1. -
Page 37: Co Line Queuing
CO Line Queuing If you do not have a CAMP-ON button, either: Go on-hook with present call and Camp-On will ring through. -or- Place outside CO call on hold, then go on-hook. Camp-On will ring through. ❑ CO Line Queuing Flex If you see that a particular outside line is busy and you wish to be placed on a list waiting for that line to become available:... -
Page 38: Co Ring Tones
CO Ring Tones CO Ring Tones The ring tone signal used to notify stations of an incoming call can be changed by each station user to provide distinctive ringing among a group of stations. To select a distinctive ring tone for a station: 1. -
Page 39: Conference
Conference 3. When the desired tone is selected, press the SPEED button to save this as the tone to be presented when the station is tone rung. The two-digit tone number will display in the lower left corner of LCD display. Conference Conference Combinations A maximum of five 8-party conferences can be established in... -
Page 40: Exiting A Conference (Controller Only)
Conference Exiting a Conference (Controller Only) There are three (3) methods of exiting a conference: Press the ON/OFF button to ON. Press the MUTE button, and replace the handset (to monitor a conference). -or- Press HOLD button to place outside parties on hold. Hold timer starts. -
Page 41: Dial-By-Name
Dial-By-Name Dial-By-Name The system will allow you to dial extension numbers by entering a name of a person that has been programmed for that station. The system database allows entry of a name (alphanumeric) up to 24 characters in length for each station. This programmed name can be used for dialing-by-name station users and in some cases LCD displays. -
Page 42: Directory Dialing
Directory Dialing Directory Dialing Stations Display telephones may view a list, of up to 200 names from the System Directory on the station’s LCD display. You can dial the station or speed dial bin by pressing a single button. Names placed in the Directory List may be associated to intercom numbers, System Speed dial bins, or entries in the Local Number/Name Translation Table. -
Page 43: Transferring A Call Using Directory Dialing
Do Not Disturb 3. Dial an [ ] to scroll up (next entry) through the list, or dial a [#] to scroll down (previous entry) through the list, or press another button to view the list for a different letter of the alphabet. -
Page 44: Do Not Disturb
Executive Override To cancel DND: Press the DND flexible button again (DND button LED extinguishes), or dial [631] on the 8-button keyset. A confirmation tone sounds. One-Time Do Not Disturb Allows you to prevent calls from ringing at your station while you are on a call. -
Page 45: Flash
Flash If you call a busy station: 1. Press the pre-programmed EXECUTIVE OVERRIDE flexible button. The Executive station will be bridged onto the CO conversation in progress at the called station. An optional warning tone is heard and presented to all parties prior to cut-thru. -
Page 46: Flexible Button Programming
Group Listening To erase a flexible button: 1. Press the SPEED button twice. 2. Press the flexible button to be erased. 3. Press the FLASH button. A confirmation tone sounds. 4. Replace the handset or press the ON/OFF button. Group Listening All digital key stations have built in speakerphones. -
Page 47: Intercom Buttons
Intercom Buttons While Headset mode is active, the ON/OFF button will activate the headset and disable speakerphone and intercom call announce operation at your station. To deactivate Headset Mode: Dial [634] or press the pre-programmed HEADSET MODE flexible button; LED extinguishes. ❑... -
Page 48: Intercom Calls
Intercom Calls 4. The called station then presses the flashing intercom button to answer the incoming intercom call. Once the call is answered, the following message displays on the called station LCD as shown. CALL FR OM S TA XXX MMM D D Y Y H H: MM a m Intercom Calls... -
Page 49: Placing An Intercom Call
Keyset Mode Intercom transfer using DSS buttons: 1. Receive or make an intercom call using a DSS button. 2. Press the TRANS button. Intercom dial tone is heard. 3. Press the DSS button where call is to be transferred. 4. Replace the handset. (Station 1 and 2 are connected) Placing an Intercom Call 1. - Page 50 Keyset Mode When telephone is set to AT command mode, these AT commands are supported. Table 1: AT Command Modes Mode Description Inactive No CTI information is sent/received by the telephone. Modem Dialing Command -- The telephone will recognize the ATD and accept digits after the command.
-
Page 51: Lcr Operation
LCR Operation 3. Press the [#] key to scroll through the baud rates. Available Baud rates are: 1200, 2400, and 4800. 4. Press the HOLD button to save the desired entries. Select the CKTU Mode for Wanderer Cordless Handset operation. The baud rate is not used in this mode; no changes are necessary. -
Page 52: Lcr Queuing (Automatic)
Mailbox Buttons LCR Queuing (Automatic) 1. Dial [9]. 2. Dial the desired 7-digit telephone number (e.g., 1 + area code + number). 3. Wait for answer. If all lines available to you are busy, remain off-hook for four (4) seconds to automatically be queued onto LCR for an available line. -
Page 53: Answering A Meet Me Page
Message Waiting Answering a Meet Me Page Go to the nearest phone: Dial [770] or press the pre-programmed MEET ME flexible button. You will be connected to party that paged you. ❑ Message Waiting Flex Answering a Message Waiting If your MSG button LED is flashing at a slow rate, you have a message waiting for you. -
Page 54: Mute
Mute Mute The MUTE button provides privacy during speakerphone or handset operation by disabling the microphone. 1. Press the MUTE button while off-hook on speakerphone or handset to activate. (MUTE button LED lights steady.) 2. Press the MUTE button again to deactivate. Name In Display Every extension (Key or SLT) has the capability to program your name so that people using display telephones will see your... -
Page 55: Off-Hook Preference
Off-Hook Preference To erase your name: 1. Dial [690]. 2. Press the SPEED button to complete the erasing process. A confirmation tone sounds and your name is erased. ❑ Off-Hook Preference Flex If your phone has been programmed for Off-Hook Preference, you will access an outside line or a feature by going off-hook or pressing the ON/OFF button. -
Page 56: Off-Hook Voice Over (Ohvo)
Off-Hook Voice Over (OHVO) To disable Off-Hook Preference: 1. Dial [691]. 2. Then dial [00]. Off-Hook Voice Over (OHVO) While off-hook on a call (CO or Intercom), this feature allows you to receive a voice announcement through the handset receiver without interrupting the existing call. You may then respond to the calling party using CAMP-ON procedures to talk to the calling party or use Silent Text Messaging to respond to the calling party via LCD Displays. -
Page 57: Responding To An Off-Hook Voice Over (Ohvo)
One-Touch Recording Responding to an Off-Hook Voice Over ❑ Fle x (OHVO) To reply to an OHVO announcement, the OHVO receiving station may respond to calling station in one of three (3) ways: 1) Using the MUTE Button -- The OHVO receiving station can then speak to the station that initiated the OHVO. -
Page 58: Outside Calls
Outside Calls While on an external call: 1. Press the pre-programmed VM RECORD flexible button. The LED flutters red at 240 ipm during the setup and the LCD displays as shown: R ECOR D IN G S ETU P M MM DD Y Y H H :M M am 2. -
Page 59: Answering An Outside Call
Paging Answering an Outside Call 1. Lift the handset or press the ON/OFF button. 2. Press slow flashing OUTSIDE LINE button or LOOP button. (If your telephone is programmed with Preferred Line Answer, you may answer an outside line by lifting the handset or pressing the ON/OFF button.) Placing an Outside Call To access an outside line for dialing out:... -
Page 60: Personalized Messages
Personalized Messages Code Zone Code Zone Int/Ext All Call Internal Zone 7 Internal Zone 1 Internal Zone 8 Internal Zone 2 Internal All Call Internal Zone 3 76[O] External All Call (Triad 1/2/3) Internal Zone 4 76[P] External Page Zones 1-2 ( Triad 1/2/3) Internal Zone 5... -
Page 61: Custom Messages
Personalized Messages 2. Dial the two-digit code for the message to display. A confirmation tone sounds; the DND button LED flashes. Code Message Code Message Clear Message On Trip On Vacation In Meeting Return AM At Home Return PM On Break Return Tomorrow At Lunch Return Next Week... -
Page 62: Date And Time Entry Messages
Personalized Messages To use a unique custom message: 1. Dial [633] on the dial pad. 2. Dial a valid code (18-20) for desired custom message. To cancel the message: 1. Dial the Message Access code [633]+[00]. 2. Replace handset or press ON/OFF button. Date and Time Entry Messages You can activate certain messages used to enter a specific time or a date of return. -
Page 63: Personalized Msg Codes On A Flex Key
Personalized Messages To cancel the message: 1. Dial the Message Access code [633]+[00]. The DND button LED extinguishes. 2. Replace the handset or press the ON/OFF button. Personalized Msg Codes on a Flex Key You can program code [633] on a flexible key to speed access of pre-selected messages. -
Page 64: Scrollable Canned Messages
Personalized Messages The scroll is a “rolodex” type of scroll; it forwards through the messages in the following order: Text Messages 1. Clear Messages 5. On Break 9. Return PM 2. At Home 6. On Trip 10. Return Next Week 3. -
Page 65: Pbx/Centrex Codes On A Flex Button
PBX/Centrex Codes on a Flex Button 3. When the desired message is shown on the LCD display, press HOLD to activate that message on your station. A confirmation tone sounds; the DND button LED flashes. ❑ Flex PBX/Centrex Codes on a Flex Button For easy one-button access to Centrex or PBX features, perform the following steps: 1. -
Page 66: Speakerphone
Speakerphone To activate a redial: Press the REDIAL button, press the ON/OFF button, or lift the handset. The line is seized and the number is dialed. To cancel the operation: Press the REDIAL flexible button (if pre-programmed). A confirmation tone sounds and the Redial function is canceled. -
Page 67: Last Number Redial
Speed Dial Last Number Redial 1. Press the SPEED button. 2. Press the pound [#] key. The last number dialed over an outside line will be automatically redialed. Save Number Redial If you wish to save the last number you dialed: 1. -
Page 68: To Dial A Saved Number
Text Messaging (Silent Response) To clear an existing speed bin: 1. Press the SPEED button twice. 2. Dial the speed bin location. 3. Press the SPEED button again. A confirmation tone sounds. To Dial a Saved Number 1. Press the SPEED button. 2. -
Page 69: Uniform Call Distribution (Ucd)
Uniform Call Distribution (UCD) Code Text Message Code Text Message I Will Take Call Is It Important? Take Message Is It Urgent? Transfer To Secretary Send Call To Voice Mail Put Call On Hold Park Call Call Back Out Of Service One Moment Please Put Call Through I Will Call Back... -
Page 70: Display Calls In Queue For Ucd Groups
Uniform Call Distribution (UCD) To go Available: Dial [566] or press pre-programmed AVAILABLE/ UNAVAILABLE flexible button. You may now receive calls. Display Calls in Queue for UCD Groups From an idle display key telephone: 1. Dial [567], followed by the three-digit UCD Group number (55X), or press the pre-programmed QUEUE flexible button. -
Page 71: Universal Day/Night Answer
Universal Day/Night Answer 4. Dial the three-digit destination number where calls are to be forwarded (Station, Voice Mail, ACD/UCD groups, Hunt group). A confirmation tone sounds. 5. Replace the handset or press the ON/OFF button. Universal Day/Night Answer When the system is in Day or Night mode and you hear an outside line ringing at another station, and you wish to answer the call: Dial [#5], then the connected outside line can be... -
Page 72: Retrieving Voice Messages
Voice Mail 4. Dial the three-digit Voice Mail group pilot number (440– 447) for the group (1–8) where calls are to be forwarded. A confirmation tone sounds. 5. Replace handset or press ON/OFF button. ❑ Flex Retrieving Voice Messages To enter the Voice Mail system to check for mail: Dial the Voice Mail group number, or press the pre-programmed VM GROUP flexible button or flashing MESSAGE WAIT button. -
Page 73: Volume Control Bar (Dkt Only)
Voice Mail Volume Control Bar (DKT Only) A volume control bar is located below the keypad to control the ringing, handset, and speakerphone volumes. While on an Intercom Call: (Speakerphone) -- Press Volume Bar to change volume. LCD displays as shown. S PE AK ER CALL [ ## ### ### #] M MM DD Y Y H H :M M am... -
Page 74: Worksheets
Worksheets Worksheets Flexible Button Programming Worksheet Speed Dial Bin Programming Worksheet BIN 000 BIN 010 BIN 001 BIN 011 BIN 002 BIN 012 BIN 003 BIN 013 BIN 004 BIN 014 BIN 005 BIN 015 BIN 006 BIN 016 BIN 007 BIN 017 BIN 008 BIN 018... -
Page 75: Default Numbering Plan
DEFAULT NUMBERING PLAN DEFAULT NUMBERING PLAN Function Code Function Code 911 List Call Coverage Account Code Call Coverage Ring ACD Calls in Queue Call For ward ACD Call Factor Call For ward (Follow-Me) 642 ACD Group 1-16 550-565 Call For ward - Off-Net ACD Group Status Call Park Group 1-8 430-437... - Page 76 DEFAULT NUMBERING PLAN Function Code Function Code ICLID Answered Call Program Name ICLID Name/Number Release ICLID Unanswered Call Repeat Redial Ignore CFW Ring Tone Int Page Zone 1-8, All 701-709 Set Clock Intercom Button SLT Call Pickup Keyset Mode SLT Callback SLT Conf Park Loop SLT Speed Dial...
- Page 77 DEFAULT NUMBERING PLAN...
-
Page 78: Using The Soft Keys
Elite Large Screen Telephone Quick Reference Card Large Screen Display Features Using the Soft Keys The Elite digital 30-button model provides a 7- From the main menu, us e the s oft keys to acces s line by 16-character display with 10 SOFT keys, a the options lis ted. -
Page 79: Call Forward
Elite Large Screen Telephone Quick Reference Card After selecting FEATURES on the main menu, the Voice Mail following options will display: Press… Th en select… Call Forward VOICE MAIL the desired VM group (1-5). Press… Then select … Display will show… To access group 6-8, pr ess the PG DOWN key. - Page 80 VODAVI is a registered trademark of Vodavi Technology, Inc. 8052-10...
Need help?
Do you have a question about the Triad-S 1-2-3 and is the answer not in the manual?
Questions and answers