Table of Contents
Advertisement
Quick Links
Advertisement
Table of Contents

Subscribe to Our Youtube Channel
Related Manuals for Teac DVDPublisher/2


Summary of Contents for Teac DVDPublisher/2
-
Page 1: User Manual
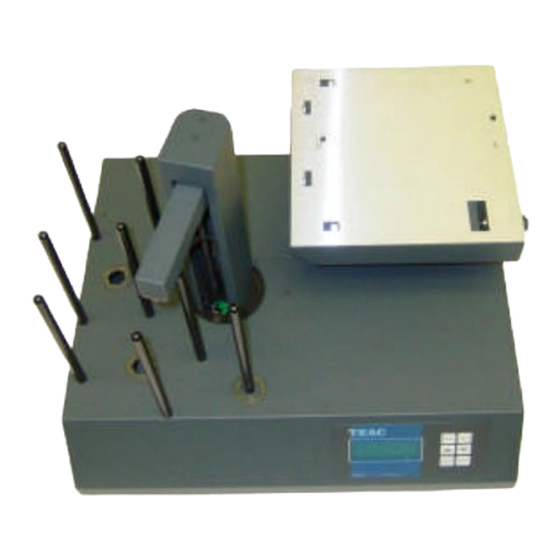
CD\DVD Disc Publisher System Model DVDPublisher/2 User Manual Revision 1.0... -
Page 2: Limited Warranty
You are responsible for all risk of damage to or loss of merchandise in transit to TEAC. TEAC reserves the right to reject any merchandise that is not packaged and/or marked as instructed herein. You must pay any shipping charges if it is necessary to ship the product for service. - Page 3 / or other remedies. TEAC accepts no responsibility for the use or misuse of this equipment for illegal purposes. If you are uncertain about your rights, contact your legal advisor.
-
Page 4: Table Of Contents
TABLE OF CONTENTS QUICK START ............................1 ............................1 ONTENTS ........................3 PERATING NVIRONMENT ..............................3 OWER ............................3 RINTER ETUP (110 M )................... 5 UICK TART OPYING DISC CAPACITY ......................... 6 UICK TART OMPARING OPERATION ..............................7 ............................... 7 URNING .............................. -
Page 5: Quick Start
Please ensure safe manual handling procedures are followed. Carefully remove your Disc Publisher from its shipping carton and verify that all parts are present. If there are missing or damaged parts contact TEAC or an authorized distributor immediately to correct any miss-packed or missing parts. - Page 6 NOTE: If your Disc Publisher is damaged during shipment, please contact the freight carrier first, then contact your distributor or TEAC. You should save your shipping materials so that if the need arises you can return your Disc Publisher for service. This packaging was designed specifically for shipping your Autoloader.
-
Page 7: Operating Environment
Operating Environment Your Disc Publisher system should be used in a climate controlled environment free of dirt, dust, excess humidity, excessive heat or electro-magnetic interference. Your Disc Publisher system should be placed on a sturdy level surface – away from sources of vibration. Allow at least four (4) inches of clearance around the sides and back of the unit for ventilation. - Page 8 Once position is correct, press the ENTER key to save changes (to cancel without saving changes, press the STOP key). Close the printer tray, and remove the disc from the pick arm. Fig. 6 The system will now be ready for use.
-
Page 9: Quick Start Copying (110 Max . Disc Capacity )
Quick Start Copying (220 Max. disc capacity) This quick start section assumes the Duplication Options (Setup Menu | Duplication Options) set as for use with either P-55 Thermal Printer of FlashJet Inkjet Printer (described earlier). If they are not or if these instructions do not work then go to the Operation chapter of this manual for detailed operating instructions. -
Page 10: Quick Start Comparing
Put the Master Disc in the Input Hopper on top of the Blank disc and press the key. ENTER The Autoloader will pick the Master Disc, and place it in the drive tray, the tray will close and the Master Disc will be analysed and then read. When the Master read is complete, the tray will open and Autoloader will remove the disc from the tray, and place it into the Accept pile. -
Page 11: Operation
Operation This chapter provides detailed operating instructions for your Disc Publisher. Your Disc Publisher has many options and features designed to make it more productive and easier to use. Please read through this chapter carefully so that you can take full advantage of all the features of your system. -
Page 12: Keyboard
Keyboard Following is the function of each key on the keyboard: < YES Key Left arrow or YES – If being prompted to enter a number or character this key moves the cursor 1 character to the left. If prompted with a question this key answers YES. >... -
Page 13: Menu Structure
Menu Structure Use the up /\ and down \/ arrow keys to position the cursor (a > character on the left most column of the display) to the desired menu item. Then use the ENTER key to select it. Following is a description of each menu selection. Start Copying Use this menu option to start copying discs by reading the master to the hard disk and then copy from the hard disk image. -
Page 14: Utilities
Network Mode The Network Mode allow you to connect to PC using the TrueNet software. Giving you additional options you have use (See TrueNet Manual for details). Utilities Menu The utilities menu provides several useful functions required to maintain and set up your Disc Publisher system. - Page 15 Turning off the power before the Duplicator has completed the drive upgrade may leave your Disc Publisher in a state where it no longer functions correctly. If you are in any doubt about this, please contact TEAC, or an authorized TEAC distributor before using this feature.
-
Page 16: Setup Menu
Enter a new installed options Key String. Entering this Key String can change your installed options. Contact TEAC or an authorized TEAC distributor to get a new key string. See the Entering Text section of this chapter for instructions on entering text. - Page 17 Duplication Options These functions set up options used during the duplication process. Use the up arrow /\ key to scroll up or press the down arrow key \/ to scroll down. Press the YES or NO key to select the desired values. When the displayed selections are correct press the ENTER key to save or press the STOP key to exit and leave the options unchanged.
- Page 18 Available only on TrueNET enabled systems, setting this to YES will cause the system to enter network mode immediately on power on. Set to NO, the system will run in stand-alone mode. Multi Image HD If set to YES discs read will be named and stored on the hard drive for future use.
- Page 19 Max Consec.bad Default Setting for this should be OFF. Master Drive This option allows the user to select which drive (recorder or CD-ROM drive if installed) will be used to read the master. Use the left and right arrow keys to select the desired drive.
- Page 20 Speed Setup These settings select the drive speeds to use for each type of drive I/O. To select higher speeds press the up arrow key /\. To select lower speeds press the down arrow key \/. Only those speeds supported by the installed drive will be displayed. When the displayed speeds are the desired speeds press the ENTER key to save or press the STOP key to leave the speeds unchanged at their original values.
-
Page 21: Password Menu
Password Menu The TCP series copiers allow access to be restricted by passwords. A different password can also be set for general use (Operator Password), and for system setup (Setup Password). The passwords operate independently of each other, so it is possible, for instance, to have a password required for setup, but no password required for Operator use. -
Page 22: Disc Image Name
Disc Image Name Image names can be up to 14 characters long. Available characters are A-Z, 0-9 and space (blank). Key String Key Strings are 14 characters long. Available characters are 0-9 and A-F. Numbers Numbers are 4 digits long. Available digits are 0-9. D i s c I m a g e n a m e s c a n b e e n t e r e d u s i n g t h e ‘... - Page 23 Place the desired number of blank discs into the input stack of the loader. Then, using the /\, \/, < & > keys enter the required quantity to copy (see Entering Numbers). When the display shows the required count, press the key.
-
Page 24: Comparing Discs
Comparing Discs Comparing Discs allows a copy to be compared against a master image, to make sure there are no detectable differences. This feature is not available for Audio or Video tracks, because Audio/Video tracks do not have ECC (error correction codes) to guarantee data integrity. -
Page 25: Appendix A - Error Messages
Check that the power cable is correctly installed on the hard disk, and that the data cable is correctly connected between the hard disk and the copy electronics. If in doubt, contact your TEAC authorised dealer. !! ERROR !! No Writers Found This suggests that either no writers are installed, or that they are incorrectly installed. - Page 26 The system tried to read a master disc, but found an error. Try reading at a slower speed, try cleaning the master or replace the master with a new one. Disc Format Not Supported The system does not currently support this kind of disc format. Contact an authorised TEAC dealer for possible firmware upgrades.
-
Page 27: Appendix B - Setup
Appendix B - Setup Default Setup Following is the default or as shipped from the factory configuration. Duplication Options Setup This menu is located at Setup Menu | Duplication Options. The factory defaults are: Speed Setup This menu is located at Setup Menu | Speed Setup The above speeds may change depending on the DVD Recorder being used. -
Page 28: Supported Formats
Supported Formats Following are supported formats as of this writing. Contact your authorized distributor or TEAC for an updated list. CD-ROM Mode 1, Form 1 (ISO 9660, UFS, HFS etc) CD-XA Mode 2, Form 1 & 2 CD-DA (Audio – with ISRC, UPC and Sub Indexes) CD-I (Green Book –... -
Page 29: Menu Structure
Menu Structure Following is the Disc Publisher menu structure. TrueCopy... -
Page 32: Appendix C -Cd Creation Hints & Tips
CDs for Distribution Many users ask how they should make CDs suitable for mass distribution. There are many software packages available for CD mastering. TEAC does not recommend any specific package over another. However there are some basic recommendations. These... -
Page 33: Technical Support
Technical Support For technical support, please contact the TEAC America Support Center TEAC America, Inc. (USA) Technical Support Telephone: (323) 727-4 8 6 0 • F a x : ( 3 2 3 ) 8 6 9 -8751 Monday - Friday 8:00 a.m. - 5:00 pm PST http://www.teac.com/DSPD/techsupport-America.htm...
Need help?
Do you have a question about the DVDPublisher/2 and is the answer not in the manual?
Questions and answers