Tripp Lite NetCommander B070-016-19-IP User Manual
Ip console kvm switch
Hide thumbs
Also See for NetCommander B070-016-19-IP:
- Quick reference manual (1 page) ,
- Owner's manual (29 pages) ,
- Owner's manual (58 pages)
Table of Contents
Advertisement
Available languages
Available languages
Quick Links
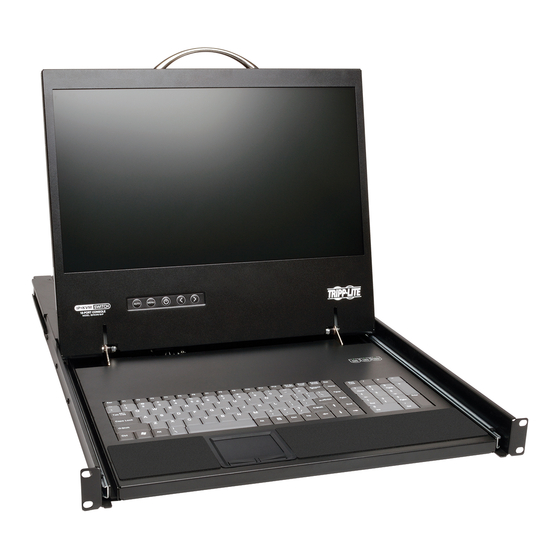
NetCommander™ IP Console KVM Switch
Table of Contents
1 – Introduction
2 – Important Safety Instructions
3 – System Components
4 – Compatibility
5 – Features
6 – Rackmount Installation
7 – Connection (Single KVM Switch)
8 – Connection (Cascading Multiple KVM Switches) 7
9 – Initial Settings (Default IP Address)
9.1 Networks with a DHCP Server
9.2 Networks without a DHCP Server
10 – Static IP Addresses for Multiple KVM Switches 7
11 – Logging into the Web Configuration Interface 8
12 – Network (Configuration Screen)
13 – Network (SNMP Settings)
14 – Administration (User Settings)
15 – Administration (Switch Configuration)
16 – Administration (User Targets)
17 – Security (Settings)
18 – Security (SSL Certificate)
19 – Maintenance (Firmware Upgrade)
User's Guide
Model: B070-016-19-IP
Page 2
2
3
3
4
5
6
7
7
7
9
10
10
11
11
12
12
13
1111 W. 35th Street, Chicago, IL 60609 USA
(773) 869-1234 • www.tripplite.com
Copyright © 2008 Tripp Lite. All trademarks are the property of their respective owners.
20 – Restore Factory Settings
21 – Saving Changes & Logging Out
22 – Starting a Remote Session
23 – Taking Over a Busy Remote Session
24 – Toolbar
25 – Safe Mode
26 – On Screen Display (OSD)
27 – Port Settings
28 – Security
29 – User Settings
30 – Scanning Computers (F4)
31 – Tuning (F5)
32 – Moving the Label (F6)
33 – Upgrading the NetCommander IP Firmware
34 – Troubleshooting
35 – Specifications
36 – Storage and Service
37 – Warranty & Warranty Registration
Español
Français
1
Page 13
13
14
14
15
19
20
22
24
24
25
25
25
25
28
29
29
30
31
61
Advertisement
Chapters
Table of Contents

Subscribe to Our Youtube Channel
Related Manuals for Tripp Lite NetCommander B070-016-19-IP


Summary of Contents for Tripp Lite NetCommander B070-016-19-IP
-
Page 1: English
17 – Security (Settings) Français 18 – Security (SSL Certificate) 19 – Maintenance (Firmware Upgrade) 1111 W. 35th Street, Chicago, IL 60609 USA (773) 869-1234 • www.tripplite.com Copyright © 2008 Tripp Lite. All trademarks are the property of their respective owners. -
Page 2: Introduction
1. Introduction Tripp Lite’s NetCommander™ IP Console KVM Switch is ideal for controlling multiple servers over inexpensive Cat5e cable from a single console (keyboard, mouse and display). It includes the following premium features: • 16-port IP KVM switch with built-in keyboard, monitor and touch pad console •... -
Page 3: System Components
• Rackmount hardware • 1 serial download cable (DB9 Female to RJ11 Male) for firmware upgrades Accessories, available separately from Tripp Lite, include: • Server interface units (SIU)–PS/2 (model # B078-101-PS2) or USB (model # B078-101-USB) • Cat5 cables (model # series: N001-, N002-, N201- or N105-) 4. -
Page 4: Features
* The B070-016-19-IP comes with a jumper cable connecting the KVM Console Ports and the Integrated Console Ports. Do not remove the Jumper Cable unless you are installing a Tripp Lite B050-000 IP Remote Access Unit. For details, consult the B050-000 installation instructions. -
Page 5: Rackmount Installation
6. Rackmount Installation The B070-016-19-IP is designed for mounting in a 1U rack system. For convenience, a rack mounting kit is included with your B070-016-19-IP for quick installation. The various mounting options are explained in the sections that follow. Standard Rackmounting The standard rackmounting brackets that come attached to the B070-016-19- IP allow the unit to be installed in standard 1U racks by a single individual. -
Page 6: Connection (Single Kvm Switch)
KVM CONSOLE PORTS UPGRADE PS2* or B078-101-USB* Server Interface Unit (SIU), and a Cat5e Patch To LAN port Cable. (For best results, use a Tripp Lite N001-, N002-, N201- or N105- series cable.*) *Available Separately from Tripp Lite. hp workstation b2600... -
Page 7: Connection (Cascading Multiple Kvm Switches)
10. Static IP Addresses for Multiple KVM Switches When you want to connect more than one B070-016-19-IP KVM Switch to the same network, and there is no DHCP server; or, you want to use static IP addresses, do the following:... -
Page 8: Logging Into The Web Configuration Interface
11. Logging into the Web Configuration Interface Windows Vista Instructions In order to operate the NetCommander IP using Windows Vista, you must run Internet Explorer as an Administrator. To run Internet Explorer as an Administrator, right click on the Internet Explorer Icon on the Quick Launch toolbar or in the All Programs start menu and select Run as asministrator. -
Page 9: Network (Configuration Screen)
LOgging In When first connecting to the NetCommander IP Web Configuration Interface, a browser security warning appears requesting you to download Tripp Lite’s SSL Security Certificate. Click Yes to proceed. The warning disappears upon first NetCommander IP client installation, when the Tripp Lite root certificate is installed. -
Page 10: Network (Snmp Settings)
13. Network (SNMP Settings) From the menu click SNMP settings. The following appears: From this page you can activate or deactivate SNMP logging. Enable traps: Check to enable SNMP traps of Smart IP Access events and operation. Community: Type the SNMP community SNMP Manager IP: Enter the SNMP Server IP address 14. - Page 11 Also included in the Switch Configuration Screen is a section to install a new switch definition file. In the event that Tripp Lite updates the Switch Definition file, the file will be available in the Support section of our website - www.tripplite.com.
-
Page 12: Security (Ssl Certificate)
17. Security (Settings) The Security Settings Screen allows the Administrator to modify settings such as Account Blocking, Password Policy and Idle Timeout. From the Security section click Setting, the Security Settings Screen appears, see the figure below. Account Blocking: This allows the administrator to adjust the settings that cause a user to be blocked from access after entering an incorrect username and/or password. -
Page 13: Maintenance (Firmware Upgrade)
2. If you are not running the most current firmware, locate the Firmware Upgrade File in the Support section of Tripp Lite’s website and save it to the currently selected computer. 3. In the Firmware Upgrade screen of the Web Configuration Interface, click the Browse button and select the Firmware Upgrade File you just saved. -
Page 14: Starting A Remote Session
Features of the Toolbar are explained in more detail in the sections below. Tripp Lite Icon: Hold the mouse over the icon to view information about current server; connection time and video mode. 23. Taking Over a Busy Remote Session While only one user can control the KVM and server, multiple remote users can connect to the KVM at the same time in a “View Only”... -
Page 15: Toolbar
24. Toolbar Maximize/Minimize the Toolbar Click the arrow to maximize or minimize the Toolbar Dragging the Toolbar to a New Location When maximized, the Toolbar can be dragged and dropped to anywhere on the screen. Simply drag the Toolbar by the icon and place it wherever you like. - Page 16 24. Toolbar (Continued) Adjusting the Video settings Note: The NetCommander IP will not store video settings for all of the computers/servers attached to a cascaded KVM switch. When accessing a computer/server attached to a cascaded KVM Switch, the user must re-adjust the Video Settings for the target server.
- Page 17 24. Toolbar (Continued) To record a New Key Sequence: 1. From the Special Key Manager Box press Record Now. The Add Special Key Dialog box appears, see figure below. 2. Give the key sequence a name in the Label field. 3.
- Page 18 Remote Computer Screen Border, the Video may need to be manually adjusted or you may need to set the Target Server/Computer at a lower refresh rate. Try changing out the Cat5 cable connecting the Target Server/Computer to the KVM switch or use N105 series STP cable by Tripp Lite. Any noise that exists in a faulty cable can have a negative impact on mouse synchronization.
-
Page 19: Safe Mode
To disconnect the session, on the Toolbar, click the button. The Login page appears, allowing you to re-login or close the browser window. Tripp Lite Icon Menu Features Right-clicking the Tripp Lite Icon will pull up a menu. From this menu you can access the connected devices using the following features. -
Page 20: On Screen Display (Osd)
4. Click Reboot to restart the unit. Restoring the Device Firmware Contact Tripp Lite Technical Support at 773-869-1234 to receive the Upgrade firmware required to restore the device firmware. Save the Upgrade firmware on the hard disk of a computer connected to the network. - Page 21 26. On Screen Display (OSD) (Continued) OSD Settings – F2 Press F2 to open the OSD Settings Window. See the figure below. Note: If the OSD is password protected, only the Administrator will be able to get access to the F2 settings window by using the appropriate password.
-
Page 22: Port Settings
26. On Screen Display (OSD) (Continued) Auto Skip The Auto Skip option allows you to choose whether you want Inactive ports to be selectable or not. If the Auto Skip option is turned on, Inactive ports will not be accessible via the OSD Main Menu or the Port Selection Hotkey Commands. If the Auto Skip option is turned on, you will be able to access Inactive ports using either the OSD Main Menu or the Port Selection Hotkey Commands. -
Page 23: Time Settings
27. Port Settings (Continued) Editing the Keyboard (KB) Column The KVM operates with Windows, Linux, HP UX, Alpha UNIX, SGI, DOS, Novell, USB or Open VMS. By default the Keyboard Mode is set to PS for Intel Based computers. For a different keyboard mode, highlight the desired port and press the Tab key to highlight the KB column. Press the space bar to toggle through the following options: U1 - HP UX U2 - Alpha UNIX, SGI or Open VMS... -
Page 24: Security
28. Security The OSD offers an advanced password security system made up of three different security levels, each having its own access rights. Administrator (Status A): The Administrator has access to all features of the KVM, allowing them to Set/Modify all Passwords and Security Profiles and gain full access to any computer connected to the KVM and usage of all OSD features. -
Page 25: Scanning Computers (F4)
With the NetCommander KVM Update software program you can upgrade the firmware for the: • OSD • B070-016-19-IP KVM • Server Interface Units KVM Update enables you to add new features and take advantage of product improvements in a quick and efficient manner. - Page 26 MODEL: B070-016-19-IP KVM CONSOLE PORTS UPGRADE 100-240VAC, 50/60 Hz Serial Firmware Upgrade cable between the B070-016-19-IP and a separate To Flash computer (One not connected to the KVM switch) containing the firmware connector upgrade software. Note: Each cascaded KVM Switch must be updated separately.
- Page 27 33. Upgrading the NetCommander IP Firmware (Continued) The OSD version number To verify the OSD Version Number 1. Open the KVM Switch Update program. 2. In the Switch Unit box, check the NetCommander Cat5 KVM Switch OSD option. 3. Click F/W Version. The version number appears in the Switch box. The H/W Version button is grayed out, as there is no hardware relevant to the OSD.
-
Page 28: Troubleshooting
33. Upgrading the NetCommander IP Firmware (Continued) Resetting the KVM Switch or SIU(s) In the event the KVM Switch or SIU(s) freezes during firmware upgrade or the KVM Console Mouse/Keyboard are not working properly, you can reset the unit using the Upgrade computer. This will not affect any of the settings on the KVM Switch or SIU. Follow the instructions below to reset your KVM Switch or SIU. -
Page 29: Specifications
The KVM switch must be stored in a clean, secure environment with a temperature less than 40° C (104° F) and a relative humidity less than 90% (non- condensing). Store the KVM switch in its original shipping container if possible. Service The KVM switch is covered by the limited warranty described in this manual. For more information, call Tripp Lite Customer Service at (773) 869-1234. -
Page 30: Warranty & Warranty Registration
2 years (except U.S., Canada and Mexico: 1 year) from the date of initial purchase. If the product should prove defective in material or workmanship within that period, Seller will repair or replace the product, in its sole discretion. Service under this Warranty includes parts and Tripp Lite service center labor. On-site service plans are available from Tripp Lite through authorized service partners (in most areas). -
Page 31: Table Of Contents
English 18 – Seguridad (Certificado SSL) Francés 19 – Mantenimiento (Actualización del firmware) 1111 W. 35th Street, Chicago, IL 60609 EE.UU. (773) 869-1234 • www.tripplite.com Copyright © 2008 Tripp Lite. Todas las marcas comerciales son propiedad de sus respectivos dueños. -
Page 32: Introducción
1. Instrucciones El multiplexor KVM NetCommander™ IP de Tripp Lite es ideal para controlar varios servidores mediante un cable Cat5e de bajo costo desde una única consola (teclado, ratón y pantalla), y se destaca por las siguientes características: • Multiplexor Consola KVM IP de 16 puertos. -
Page 33: Componentes Del Sistema
• Accesorios para montaje en bastidor • 1 cable serie (conector hembra DB9 a macho RJ11) para descargar las actualizaciones del firmware Accesorios opcionales, suministrados por separado por Tripp Lite: • Unidades de interfaz de servidor (SIU)–PS/2 (modelo # B078-101-PS2) o USB (modelo # B078-101-USB) •... -
Page 34: Características
* El B070-016-19-IP viene con un cable puente que conecta los puertos de la consola KVM y los puertos de la consola integrada. No quite el cable puente a menos que vaya a instalar una unidad de acceso remoto IP Tripp Lite B050-000. Para obtener detalles,... -
Page 35: Instalación En Rack
6. Instalación en rack El B070-016-19-IP está diseñado para montarlo en un sistema de rack de 1U. Para su conveniencia, con su B070-016-19-IP se incluye un juego para rack para una rápida instalación. En las secciones a continuación se explican las diversas opciones de montaje. -
Page 36: Conexión De Un Solo Multiplexor Kvm
Cat5e. (Para obtener mejores resultados, utilice un To LAN port cable de las series N001-, N002-, N201- o N105- de Tripp Lite.*) * Suministradas por separado por Tripp Lite. Conexión de un teclado, un monitor y un ratón al multiplexor... -
Page 37: Ajustes Iniciales (Dirección Ip Predefinida)
8. Conexión en cascada de varios multiplexores KVM Para conectar en cascada dos o más multiplexores KVM NetCommander al NetCommander IP, siga las instrucciones indicadas a continuación. SERIAL Puede conectar hasta 256 computadoras* usando cualquier combinación 16-PORT KVM SWITCH WITH IP MODEL: B072-016-1-IP 100-240V AC 50/60Hz FLASH... -
Page 38: Procedimiento Para Registrarse En La Interfaz De Configuración Web
11. Procedimiento para registrarse en la interfaz de configuración Web Instrucciones para Windows Vista Para usar el NetCommander IP empleando Windows Vista, debe ejecutar Internet Explorer como Administrador. Para ejecutar Internet Explorer como Administrador, haga clic con el botón derecho del ratón sobre el icono del Internet Explorer, ubicado en la barra de herramientas para inicio rápido o en la pestaña Todos los programas [All the programs] del menú... -
Page 39: Red (Pantalla De Configuración)
La primera vez que se conecte con la interfaz de configuración web del NetCommander IP, aparecerá una advertencia de seguridad del buscador que le pedirá que descargue el certificado de seguridad SSL de Tripp Lite. Haga clic en Sí [Yes] para continuar. La advertencia desaparecerá después de la primera instalación como cliente del NetCommander IP, una vez instalado el... -
Page 40: Red (Ajustes Snmp)
13. Red (Ajustes SNMP) En el menú, haga clic en Ajustes SNMP [SNMP settings]. Aparecerá la página ilustrada a su derecha. Desde esta página, usted puede activar o desactivar el acceso a SNMP. Habilitar capturas [Enable traps]: marque la casilla para habilitar las capturas (trampas) SNMP de los eventos y operación del dispositivo Smart IP Access. -
Page 41: Administración (Configuración Del Multiplexor)
En esta sección, incluida en la pantalla de configuración del multiplexor, se puede instalar un nuevo archivo de definición del multiplexor. En caso de que Tripp Lite actualice el archivo de definición del multiplexor, éste estará disponible en la sección Apoyo [Support] de nuestro sitio web, www.tripplite.com. -
Page 42: Seguridad (Ajustes)
17. Seguridad (Ajustes) La pantalla Ajustes de seguridad [Security Settings] le permite al Administrador modificar ajustes como el Bloqueo de cuentas [Account Blocking], Política de contraseñas [Password Policy] y Tiempo de espera inactivo [Idle Timeout]. En la sección Seguridad [Security], haga clic en Ajustes [Setting]; aparecerá... -
Page 43: Mantenimiento (Actualización Del Firmware)
Actualice el firmware del NetCommander IP para aprovechar las ventajas de sus nuevas características. Cuando el firmware actualizado esté disponible, será publicado en la sección Apoyo [Support] del sitio web de Tripp Lite, www.tripplite.com. Si no hay una actualización del firmware en el sitio web de Tripp Lite, significa que aún no se dispone de una versión actualizada. -
Page 44: Inicio De Una Sesión Remota
HTTPS, no HTTP, antes de la dirección IP). Aparecerá la página de registro. Introduzca su nombre de usuario, la contraseña y pulse Enter. En la primera conexión, instale el certificado Tripp Lite y el control ActiveX. Una vez conectado, aparecerá la pantalla del servidor objetivo con el número más bajo al que el usuario puede acceder. -
Page 45: Barra De Herramientas
24. Barra de herramientas Procedimiento para maximizar / minimizar la barra de herramientas Haga clic en la flecha para maximizar o minimizar la barra de herramientas. Procedimiento para arrastrar la barra de herramientas a una nueva ubicación Si la barra de herramientas está maximizada, puede ser arrastrada y colocada en cualquier punto de la pantalla. Solo debe arrastrar el icono de la barra de herramientas hasta el punto que desee. - Page 46 24. Barra de herramientas (continuación) Configuración de los ajustes de video Nota: el NetCommander IP no almacenará los ajustes de video para todas las computadoras/servidores vinculados a un multiplexor KVM conectado en cascada. Cuando acceda a una computadora/servidor vinculado a un multiplexor KVM conectado en cascada, el usuario deberá...
- Page 47 24. Barra de herramientas (continuación) Para grabar una nueva secuencia de teclas, siga los pasos indicados a continuación: 1. En la ventana del Gestor de teclas especiales, pulse Grabar nueva [Record New]. Aparecerá el cuadro de diálogo Agregar tecla especial [Add Special Key];...
- Page 48 Intente mediante el cambio del cable Cat5 que conecta el servidor objetivo/computadora con el multiplexor KVM o utilice un cable STP serie N105 suministrado por Tripp Lite. Cualquier ruido que haya en un cable fallado puede incidir negativamente en la sincronización del ratón.
-
Page 49: Modo Seguro
Características del menú del logotipo Tripp Lite Haga clic con el botón derecho del ratón sobre el logotipo Tripp Lite ; se desplegará un menú que le permitirá acceder a los dispositivos conectados empleando las opciones indicadas a continuación. -
Page 50: Despliegue En Pantalla (Osd)
Restauración del firmware del dispositivo Comuníquese con el apoyo técnico de Tripp Lite al teléfono 1-773-869-1234 (en EE.UU.) para recibir el programa actualizado que se requiere para restaurar el firmware del dispositivo. Guarde la actualización del firmware en el disco duro de una computadora conectada a la red. - Page 51 26. Despliegue en pantalla (OSD) (continuación) Ajustes del OSD, tecla F2 Pulse la tecla F2 para abrir la ventana de ajustes del OSD; vea la figura superior. Nota: si el OSD está protegido por contraseña, sólo el Administrador podrá acceder a la ventana de ajustes, a través de F2, mediante la contraseña correcta.
-
Page 52: Ajustes Del Puerto
26. Despliegue en pantalla (OSD) (continuación) Salto automático La opción Salto automático [Auto Skip] le permite decidir si los puertos inactivos podrán o no ser seleccionados. Si la opción Salto automático está activada, no podrá acceder a los puertos inactivos a través del menú principal del OSD ni a través de las instrucciones de acceso directo para selección del puerto. - Page 53 27. Ajustes del puerto (continuación) Procedimiento para editar la columna Teclado [KB] El KVM opera con Windows, Linux, HP UX, Alpha UNIX, SGI, DOS, Novell, USB u Open VMS. En la configuración predefinida, el modo del teclado está definido en PS para computadoras con procesadores Intel. Para definir otro modo de teclado, resalte el puerto deseado y pulse la tecla Tab para resaltar la columna KB.
-
Page 54: Seguridad
28. Seguridad El OSD ofrece un avanzado sistema de contraseñas constituido por tres niveles de seguridad, cada uno con sus propios derechos de acceso. Administrador [Administrator] (código A): el Administrador tiene acceso a todas las funciones del KVM, lo cual le permite definir y modificar todas las contraseñas y perfiles de seguridad, tener acceso total a cualquier computadora conectada al KVM y usar todas las características del OSD. -
Page 55: Exploración De Las Computadoras (F4)
30. Exploración de computadoras (F4) La cantidad de tiempo transcurrido en una computadora con autoexploración puede ajustarse. Para activar la exploración, siga los pasos indicados a continuación: 1. Pulse dos veces la tecla [Shift] para activar el OSD. 2. Pulse la tecla [F4]. Cada computadora activa se visualizará... - Page 56 SERIAL INTEGRATED CONSOLE PORTS Para ejecutar el software de actualización del firmware, deberá primero 16-PORT CONSOLE KVM SWITCH MODEL: B070-016-19-IP KVM CONSOLE PORTS UPGRADE 100-240VAC, 50/60 Hz conectar el cable serie RS-232 para actualización del firmware entre el To Flash...
- Page 57 33. Actualización del firmware del NetCommander IP (continuación) versión. Para ello, siga los pasos indicados a continuación para obtener el número de versión del firmware y compárelo con el número de versión que aparece en la página web www.tripplite.com. También necesitará verificar el número de versión del hardware de su multiplexor KVM y su(s) unidad(es) SIU, en caso de que la actualización no sea compatible con la unidad que está...
-
Page 58: Solución De Problemas
33. Actualización del firmware del NetCommander IP (continuación) Procedimiento para reiniciar el multiplexor KVM o la(s) unidad(es) SIU En caso de que el multiplexor KVM o la(s) unidad(es) SIU se bloquee(n) durante la actualización del firmware o de que el ratón o el teclado de la consola del KVM no estén funcionando correctamente, usted podrá... -
Page 59: Especificaciones
(sin condensación). Si es posible, almacene el multiplexor KVM en su embalaje original. Servicio técnico El multiplexor KVM está cubierto por la garantía limitada descrita en este manual. Si desea mayor información, comuníquese con el Servicio de atención al cliente de Tripp Lite, al teléfono 1 (773) 869-1234 (en EE.UU). -
Page 60: Garantía Y Registro De La Garantía
TRIPP LITE, se compromete a reparar, y en caso de que a su juicio no sea posible la reparación, a cambiar el equipo, así como las piezas y componentes defectuosos del mismo sin cargo alguno para el propietario durante el periodo de garantía, así... -
Page 61: Francés
18 - Sécurité (certificat SSL) 19 - Entretien (mise à niveau de microprogramme) 1111 W. 35th Street, Chicago, IL 60609 (É-U) (773) 869-1234 • www.tripplite.com Copyright © 2008 Tripp Lite. Toutes les marques commerciales sont la propriété de leurs titulaires respectifs. -
Page 62: Instructions
1. Instructions Le commutateur KVM NetCommander™ IP de Tripp Lite est idéal pour contrôler plusieurs serveurs sur un câble Cat5e bon marché à partir d'une seule console (clavier, souris et affichage). Il comprend les propriétés de qualité suivantes : • Un commutateur console KVM IP 16 ports •... -
Page 63: Composants Du Système
• 1 câble de série (DB9 (M) à DB9 (F)) pour mise à niveau du microprogramme Les accessoires en option, disponibles séparément chez Tripp Lite, comprennent : • Unités d'interface serveur (SIU)-PS/2 (modèle no. B078-101-PS2) ou USB (modèle no. B078-101-USB) •... -
Page 64: Caractéristiques
à jour du microprogramme. * Le B070-016-19-IP vient avec un câble survolteur connectant les ports de la console KVM et les ports de la console intégrée. Ne retirez pas le câble survolteur sauf si vous installez une unité d’accès à distance Tripp Lite B050-000 IP. -
Page 65: Installation En Étagère
6. Installation en étagère Le B070-016-19-IP est conçu pour être monté sur un système en étagère 1U. Pour votre commodité, une trousse de montage en étagère est incluse avec votre B070-016-19-IP pour une installation rapide. Les différentes options de montage sont expliquées sans les sections qui suivent. -
Page 66: Connexion (Commutateur Kvm Simple)
Serveur (SIU) B078-101-PS2* ou B078-101-USB*, et un câble Pour le port LAN Patch Cat5e. (pour de meilleurs résultats, utilisez les câbles de série N001-, N002-, N201- ou N105.*) *Disponibles séparément chez Tripp Lite. hp workstation b2600 To servers hp workstation b2600 Raccorder un clavier, un écran et une souris au commutateur KVM... -
Page 67: Connexion (Commutateurs Kvm Multiples En Guirlande)
8. Connexion (Commutateurs KVM multiples en guirlande) Pour raccorder en guirlande deux ou plusieurs commutateurs Niveau supérieur Réglez la touche rapide du NetCommander KVM à partir du NetCommander IP, suivez les instructions commutateur à Ctrl-Ctrl SERIAL suivantes. Raccordez jusqu'à 256 ordinateurs* en guirlande à l'aide de la 16-PORT KVM SWITCH WITH IP MODEL: B072-016-1-IP 100-240V AC 50/60Hz... -
Page 68: Connexion À L'interface De Configuration Web
11. Connexion à l'interface de configuration Web Instructions pour Windows Vista Afin d'utiliser NetCOmmander IP avec Windows Vista, vous devez exécuter Internet Explorer en tant qu'Administrateur. Pour exécuter Internet Explorer en tant qu'Administrateur, cliquez avec le bouton droit de la souris sur l'icône d'Internet Explorer à... -
Page 69: Réseau (Ecran De Configuration)
NetCommander IP, un message d'avertissement de sécurité du navigateur s'affiche pour vous demander de télécharger le Certificat de sécurité SSL de Tripp Lite. Cliquez sur Oui pour continuer. Le message d'avertissement disparaît dès l'installation initiale de NetCommander IP, lorsque le certificat racine de Tripp Lite est installé. -
Page 70: Réseau (Paramètres Snmp)
13. Réseau (paramètres SNMP) Dans le menu, cliquez sur les paramètres SNMP. Le message suivant est affiché : A partir de cette page, vous pouvez activer ou désactiver l'enregistrement SNMP. Activer les Traps (Interruption) : Cochez pour activer les SNMP traps (Interruption SNMP) des évenements et fonctionnement de Smart IP Access. -
Page 71: Administration (Configuration Du Commutateur)
L'écran de Configuration du Commutateur comprend aussi une section pour installer un nouveau dossier de définition du commutateur. Au cas où le dossier de définition du commutateur est mis à niveau par Tripp Lite, le dossier sera disponible dans la section Support de notre site Web - www. -
Page 72: Sécurité (Paramètres)
17. Sécurité (Paramètres) L'écran des paramètres de sécurité permet à l'administrateur de modifier les paramètres tels que le Blocage d'un Compte, la Politique des Mots de Passe et la temporisation de veille. A partir de la section Sécurité cliquez sur Paramètres, l'écran des paramètres de sécurité... -
Page 73: Entretien (Mise À Niveau De Microprogramme)
Dès que les mises à niveau de microprogramme seront disponibles, elles seront affichées dans la section Support du site Web de Tripp Lite - www.tripplite.com. Si aucune mise à niveau de microprogramme n'est affiché sur le site Web de Tripp Lite, ceci signifie qu'aucune nouvelle version n'est disponible. -
Page 74: Enregistrer Les Modifications Et Fermer Une Session
Icône Tripp Lite : Tenez le curseur de la souris sur l'icône afin de visualiser les informations au sujet du serveur actuel; le temps de connexion et le mode vidéo. -
Page 75: Barre D'outils
24. Barre d'outils Maximiser/Minimiser la barre d'outils Cliquez sur la flèche pour maximiser ou minimiser la barre d'outils Déplacer la barre d'outils à un nouvel endroit Lorsque la barre d'outils est maximisée, elle peut être glissée et laissée partout sur l'écran. Glissez la barre d'outils près de l'icône et laissez-la où... - Page 76 24. Barre d'outils (Suite) Ajuster les paramètres Vidéo Remarque : Le NetCommander IP ne conserve pas les paramètres Vidéo pour tous les ordinateurs/serveurs attachés à un commutateur KVM en guirlande. Lorsque'un utilisateur accède à un ordinateur/serveur attaché à un commutateur KVM en guirlande, l'utilisateur doit prérégler les paramètres Vidéo du serveur cible.
- Page 77 24. Barre d'outils (Suite) Pour enregistrer une nouvelle séquence de touches : 1. Dans la case Gestion des Touches Spéciales appuyez sur Record Now [Enregistrer]. La case de dialogue Ajouter une Séquence Spéciale apparaît, voir l'illustration ci-dessous. 2. Donnez un nom à la séquence dans le champ Etiquette. 3.
- Page 78 à un taux de rafraîchissement plus faible. Essayez de changer le câble Cat5 qui connecte le serveur/ordinateur cible au commutateur KVM ou d'utiliser un câble STP de série N105 par Tripp Lite. Tout bruit qui existe dans un câble défaillant pourrait avoir un impact négatif sur la synchronisation de la souris.
-
Page 79: Mode Sans Échec
Les caractéristiques de l'icône Tripp Lite. Si vous cliquez sur l'icône Tripp Lite un menu apparaîtra. Dans ce menu vous pouvez accéder aux machines connectées à l'aide des fonctionnalités suivantes. Déconnecter : Déconnectez la session a distance en cliquant sur Disconnect [Déconnectez]. Vous pouvez aussi déconnecter à l'aide du bouton Disconnect dans la barre d'outils. -
Page 80: Affichage À L'écran (A.e)
Restauration du microprogramme : Contactez le support technique de Tripp Lite au 773-869-1234 pour recevoir le microprogramme mis à niveau nécessaire pour restaurer le microprogramme de la machine. Enregistrez le microprogramme mis à niveau sur le disque dur d'un ordinateur connecté au réseau. - Page 81 26. Affichage à l'écran (A.E) (Suite) Réglages A.E. - F2 Appuyer sur la touche F2 pour faire apparaître la fenêtre de réglages A.E. Voir l'illustration ci-dessous. Remarque : Si l'A.E est protégé par un mot de passe, seul l'Administrateur pourra accéder à la fenêtre des réglages F2 à l'aide du mot de passe approprié.
-
Page 82: Paramètres De Ports
26. Affichage à l'écran (A.E) (Suite) Auto Skip L'option Auto Skip vous permet de choisir si vous voulez que les ports inactifs soient sélectionnables ou non. Si l'option Auto Skip est activée, les ports inactifs ne seront pas accessibles via le menu principal de l'A.E. ou les commandes des touches rapides de la sélection de port. Si l'option Auto Skip est désactivée, les ports inactifs seront accessibles via le menu principal de l'A.E. - Page 83 27. Paramètres de ports (Suite) Modifier la Colonne du Clavier (KB) Le KVM fonctionne avec Windows, Linux, HP UX, alpha UNIX, SGI, DOS, Novell, USB ou Open VMS. Par défaut le mode de clavier est réglé à PS pour les ordinateurs basés sur Intel. Pour un mode de clavier différent, surlignez le port désiré et appuyez sur la touche d'étiquette pour surligner la colonne de KB.
-
Page 84: Sécurité
28. Sécurité L'A.E offre un système avancé de sécurité de mot de passe composé de trois niveaux différents de sécurité, chacun avec ses propres droits d'accès. Administrateur (Statut A) : L'administrateur a accès à tous les dispositifs du KVM, lui permettant à Régler/Modifier tous les mots de passe et profils de sécurité... -
Page 85: Balayage D'ordinateurs (F4)
30. Balayage d'ordinateurs (F4) La période de temps passée sur l'ordinateur lorsque l'auto-balayage est réglable. Pour activer le balayage : 1. Appuyez sur la touche [Shift] deux fois pour activer l'A.E. 2. Appuyez sur la touche [F4]. Chaque ordinateur en service sera montré en séquence. Une étiquette de balayage apparaît dans le coin gauche supérieur. Pour désactiver le balayage : Appuyer sur [F4]. -
Page 86: Installation Du Logiciel
1. Téléchargez le logiciel de mise à niveau du microprogramme à partir de www.tripplite.com. 2. Exécutez le logiciel. Si aucune mise à niveau de microprogramme n'est affiché sur le site Web de Tripp Lite, ceci signifie qu'aucune nouvelle version n'est disponible. Lancer et configurer la mise à niveau du KVM. - Page 87 à niveau du microprogramme à moins que vous achetiez une nouvelle unité qui est compatible avec la mise à niveau. * Si aucune mise à niveau de microprogramme n'est affiché sur le site Web de Tripp Lite, ceci signifie qu'aucune nouvelle version n'est disponible.
-
Page 88: Dépannage
33. Mise à niveau du microprogramme NetCommander IP (Suite) Remettre à zéro le commutateur KVM ou SIU(s) Au cas où le commutateur KVM ou le(s) SIU(s) gèle pendant la mise à niveau de microprogramme ou la console Souris/Clavier de KVM ne fonctionne pas correctement, vous pouvez remettre à... -
Page 89: Caractéristiques
à 90% (sans condensation). Entreposez le commutateur KVM dans son emballage d'expédition original si possible. Service Le commutateur KVM est couvert par la garantie limitée décrite dans le présent manuel. Pour de plus amples informations, veuillez contacter le service à la clientèle de Tripp Lite au (773) 869-1234. -
Page 90: Garantie Et Enregistrement De Garantie
Vendeur à sa discrétion absolue, réparera ou remplacera l’unité gratuitement. Le service selon cette garantie comprend les pièces de rechange et la main d’oeuvre au centre de service de Tripp Lite. Les plans de service sur site sont disponibles de Tripp Lite à...
Need help?
Do you have a question about the NetCommander B070-016-19-IP and is the answer not in the manual?
Questions and answers