Table of Contents
Advertisement
Advertisement
Table of Contents

Related Manuals for Canon Mk2500


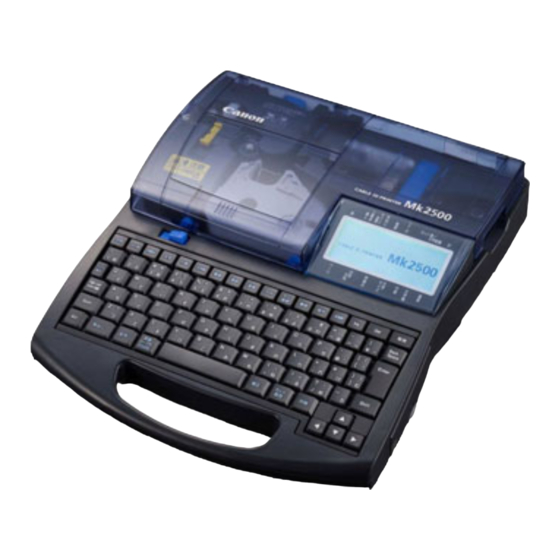
Summary of Contents for Canon Mk2500
- Page 2 Trademarks Microsoft, Windows, Windows 7, Windows Vista and Windows XP are registered trademarks or trademarks of Microsoft Corporation in the United States and/or other countries. Abbreviations Throughout this document the following abbreviations are used in text. • Microsoft Windows 7 is abbreviated as “Windows 7” •...
-
Page 3: Software License Agreement
SOFTWARE LICENSE AGREEMENT Note: Please read the following software license agreement (to be referred to as the "Agreement") carefully. This Agreement is made between Nisca Corporation (to be referred to as "Nisca") and the user for use of software (to be referred to as the "Software," and to include manuals, printed matter and so forth in addition to this Agreement) provided with this Agreement by the user for the purpose of using the applicable printer made by Nisca (to be referred to as the "Printer"). - Page 4 (1). This Agreement shall come into effect at the time the user has taken an action that indicates "Consent" to the terms of the Agreement or at the time the Software has been used, and shall remain in effect until terminated in accordance with clause (2) or (3) below. (2).
-
Page 5: Table Of Contents
Contents Contents SOFTWARE LICENSE AGREEMENT ..........i Contents ..................iii Introduction ..................1 System Requirements ..............2 Installing ................... 3 Installing Mk2500PC and the Printer Driver ..........3 Uninstalling the Software................11 Starting Mk2500PC ..............12 Starting .......................12 Shutting Down ....................13 Screen Structure..............14 Main Screen ....................14 Data List .....................15 Toolbar .......................15... -
Page 6: Contents
Contents Connecting the Printer and Computer ............36 Starting Printing ..................37 Saving Print Data..................40 Saving the Backup Data ................42 Select the Printer ..................46 How to Use the Status Monitor..........48 Setting up the Status Monitor ..............48 Using the Status Monitor ................50 Viewing the Printer Status ................51 Message List ....................52 Appendix ................ -
Page 7: Introduction
Following functions are available with the PC Connection Kit. "PC Connection Kit" consists of a software CD and a USB cable. • Data which is made on a computer can be transmitted to the Mk2500 printer. It will be able to input data more quickly and easily. •... -
Page 8: System Requirements
" Mk2100" printer or not. Then please uninstall the printer driver for an Mk2100 printer according to the message. You can print with "Mk2100" printer by the use of the application software for "Mk2500" printer. -
Page 9: Installing
Installing 1.1 Installing Mk2500PC and the Printer Driver Install Mk2500PC and the printer driver for the Mk2500 into your computer. Close all applications before installing the software. Be sure to log on as a member of Administrators when starting up. - Page 10 Installing • When the User Account Control dialog box appears, click the [Yes]. Install the Mk2500PC. (1) Click the [OK]. (2) Click the [Next].
- Page 11 Installing (3) Read the License Agreement, select “I accept the terms of the license agreement” and then click the [Next]. • To print the the License Agreement out from a default printer, click the [Print]. (4) Specify the destination for installation and then click the [Next]. •...
- Page 12 Installing (5) Click the [Install]. (6) Click the [Finish]. This completes the Mk2500PC installation. Next, Install the Printer Driver. Install the Printer Driver. (1) Click the [Next].
- Page 13 Installing (2) Read the License Agreement, select “I accept the terms of the license agreement” and then click the [Next]. • To print the the License Agreement out from a default printer, click the [Print]. (3) Click the [Install]. (4) Click the [OK].
- Page 14 Installing (5) Select “Yes.Restart computer now” and then click the [Finish]. After restart computer and then press the [PC Conn] key on the printer. This completes the Printer Driver installation. In caase the installation is not completed even by pressing the [PC conn] key after rebooting the PC, please retry to switch on the printer and press the [PC conn] key once again.
- Page 15 Installing If the following screen appears, perform the following operation: Click the “Install this driver software anyway”. ♦ Windows Vista Click the [Continue]...
- Page 16 "Uninstalling the Software (P.11)". With the use of the Mk2500 application and printer driver, the Mk2100 printer operation is possible. Do not install the application and printer driver for Mk2100 after those for Mk2500 is installed.
-
Page 17: Uninstalling The Software
(2) Select [Mk2500PC] from the list of the programs, and then click the [Uninstall]. (3) When the confirmation message appears, click the [OK]. (4) Select [Mk2500 Printer driver] from the list of the programs, and then click the [Uninstall]. (5) When the confirmation message appears, click the [OK]. -
Page 18: Starting Mk2500Pc
Starting Mk2500PC Starting Mk2500PC 2.1 Starting You can start Mk2500PC by one of the following methods: • Double-click the Mk2500PC icon on the desktop. • Click the button (Start), and then select [All Programs] – [Mk2500PC] – [Mk2500PC]. ♦ Windows XP Click the [Start], and then select [All Programs] or [Programs] –... -
Page 19: Shutting Down
Withinn the [Select printer] box, an installed printer driver for a cable ID printer is displayed. • At the [The setting of the device type], please choose a printer to use between Mk2500 and Mk2100. • You can reach this screen by operation of [Select printer] in the [File] menu. -
Page 20: Screen Structure
Screen Structure Screen Structure This section describes details of the tool buttons and menus contained in Mk2500PC. 3.1 Main Screen This appears when you start Mk2500PC. Menu Bar Toolbar Style Settings /Data Display Area Setting button Data List Status Bar f.g.1 Main screen... -
Page 21: Data List
Saves the data you are editing in an existing file. Does the same thing as selecting [Save] from the [File] menu. Sends the data you are editing to the Mk2500. Does the same thing as selecting [Send] from the [File] menu. -
Page 22: Menu Bar
Select printer (E) Select a printer to use. Send data ,and Save Sends the data you are editing to the Mk2500. file/Print. (P) There is also the button that performs this function. Saves the backup data of the files stored in the printer to the Printer data backup (D) computer, or writes backup data to the printer. - Page 23 Screen Structure [Edit] menu Menu item Description Cut (T) Cuts the specified data and pastes it to the clipboard. Copy (C) Copies the selected contents to the clipboard. Paste (P) Pastes the contents of the clipboard. Delete (D) Deletes the selected part. Sets a numbering and adds numbering data to the Numbering (N) specified pages.
-
Page 24: Status Bar
Shows or hides the status bar. [Remote] menu Menu item Description Start Print (P) Sends a print command to the Mk2500. Save Data (S) Sends a save data command to the Mk2500. [Help] menu Menu item Description Help Displays Mk2500PC help. About (A) Displays Mk2500PC version information. -
Page 25: Operating Mk2500Pc
Operating Mk2500PC Operating Mk2500PC 4.1 File Types With Mk2500PC, you can load the following file types into the data list. • Original data files (.md3) • CSV files (Comma separated text files) To load data into the data list, files must meet the following conditions: 1st line: First line of character data 2nd line: Second line of character data... - Page 26 Operating Mk2500PC (E.g.3) data list from E.g.2 printed a list of data. Page 3:Continuous 3 Page 2:Continuous 2 Page 1:Continuous 1 If you select [1 Line] in [Lines], the first line of data in the CSV file is loaded, but the second line and the third line are ignored.
-
Page 27: Basic Operations
Operating Mk2500PC 4.2 Basic Operations This section describes the methods for creating new data lists, creating data lists from existing data and sending data to the Mk2500. Creating a New Data List Click [New] in the [File] menu or click the button. -
Page 28: Opening Existing Files
Operating Mk2500PC Opening Existing Files You can load your own original data files (.md3) or CSV files into the data list. Click [Open] in the [File] menu or click the button. The Open dialog box appears. Select an original data file (.md3) or CSV file, and then click the [Open]. The selected file is loaded and displayed in the data list. - Page 29 Operating Mk2500PC If you attempt to open an existing file with the old format (.mtd / .md2), a message may appear to indicate that it has been replaced with a file with the new format (.md3). The file with the new format (.md3) substitutes for the existing file [OK]: with the old format (.mtd / .md2) and then opens.
-
Page 30: Loading Additional Data
Operating Mk2500PC Loading Additional Data You can add data to a specified position in the data list. Select the file you want to add, and then click the [Open]. The Open dialog box appears. Select the file you want to add, and then click the [Open]. The data in the selected file is added at the cursor position. -
Page 31: Saving A File With A New Name
Operating Mk2500PC Saving a file with a new name Select [Save As] from the [File] menu. The Save As dialog box appears. Input the file name, specify the file type, and then click the [Save]. Select the file type from the following: The contents that are saved depend on the file type. -
Page 32: Sending Data To The Printer
Operating Mk2500PC 4.3 Sending Data to the Printer You can send data you create with Mk2500PC to the Mk2500. This section also describes settings for saving and printing sent data. File Save after the send data. Print after the send data. - Page 33 Operating Mk2500PC Power the printer on. When the character input display appears, press the [PC Conn] key on the printer. From Mk2500PC, open the file you want to send to the printer. To send the existing data, open the file according to “Opening Exiting Files”...
- Page 34 Operating Mk2500PC Set each of the items. [Transfer Mode] [Overwrite internal Clears the document area in the printer, and saves the memory.]: transmitted data at the beginning of the document area. [Add to internal Adds the sent data at the end of the last page in the printer. memory.]: (The printer adds new pages to the data in the printer.) [File Save]...
- Page 35 Operating Mk2500PC [Media Size]: Selects the size of printing media. The sizes you can select depend on the type of printing media used. Tube : 2.5, 3.0, 4.0, 5.0, 6.0 or 6.5mm Shrink Tube : 3.0, 3.2, 4.8, 6.0 or 6.4mm Label : 6.0, 9.0, 12.0mm 4mm I.D.
-
Page 36: Creating Numbering
Operating Mk2500PC 4.4 Creating Numbering This section describes how to incorporate numbering into the current page in the data list, create pages for printing according to these values and add the pages to a data list. Click [Numbering] in the [Edit] menu or click the button. - Page 37 Operating Mk2500PC Click the [OK]. A numbering is created in the data list using the numbering information from the cursor page. • Click the [Cancel] to quit numbering creation and close the dialog box. To delete a numbering, select the page in the data list, and then select [Delete] from the [Edit] menu.
-
Page 38: Format Settings
Operating Mk2500PC 4.5 Format Settings This section describes format setting items and settings procedures. You can set formats for individual pages, and there is also a default format used when creating or inserting new pages. There procedure for setting a format for an individual page is described here. The procedure for setting the default format is the same. - Page 39 Operating Mk2500PC [Set Length]: Selects the length of tube to be cut. With [Specify] selected, you can specify a length from 2- 150mm.(input value 200-15000) Select this to calculate the character string length from the character size, character space, frame and lines and fit the character string within the set length.
- Page 40 Operating Mk2500PC [Lines]: Selects the number of lines. Select either 1 Line,2 Lines or 3 Lines. The default at installation is [1 Line]. When [Character Size] is set to [6mm Half] or [6mm Norm], the number of lines is automatically set to 1 line. (You cannot change the number of lines.) You can select [3 Lines] only when [Character Size] is set to [1.3mm Norm].
- Page 41 Operating Mk2500PC Printing with [Specify] specified for Set length When set length is set to a value less than 8.5 mm and [Terminal I.D. printing area] is [Normal], the specifications for printing are as follows: Specifications applied when Set length is set to a value less than Media 8.5 mm Terminal I.D.
-
Page 42: Remote Operation
Operating Mk2500PC 4.6 Remote Operation You can print characters on the media specified from Mk2500PC or save the data in the printer’s document area. To control the printer remotely, connect it to the computer in advance. Connecting the Printer and Computer Connect the printer to the computer with the USB cable. -
Page 43: Starting Printing
Operating Mk2500PC Starting Printing You can print data maintaining it in a printer. When you print the data which you made in an application, refer to “Sending Data to the Printer” (P.26). Connect the printer to the computer with the USB cable. For how to connect with the USB cable, refer to “Connecting the Printer and Computer”... - Page 44 Operating Mk2500PC Set each of the items. While Mk2500PC is running, the previous settings used are displayed as default settings. [Print Media]: Selects the type of printing media. Select either Tube, Shrink Tube, Label, 4mm I.D. Strip, Clear Tube, Wrap Around or Terminal I.D. [Media Size]: Selects the size of printing media.
- Page 45 Operating Mk2500PC To use the printer after sending data, you need to cancel the standby state (ready for data reception) of the printer. Make sure that the printer is not receiving data, and then press the [Cancel] key. When the character input display appears, you can operate the printer.
-
Page 46: Saving Print Data
Operating Mk2500PC Saving Print Data Go through the procedure for saving the character data you created using the Mk2500PC in the file in the printer. You can save character data and the following character settings: • Format Settings (4.5 Format Settings (P.32)) •... - Page 47 Operating Mk2500PC Set each of the items. [File name]: Inputs the file name. [Folder No.]: Selects the folder number (from 1-3) for saving data. Click the [OK]. The file name you specified, folder number and save command are sent to the printer. •...
-
Page 48: Saving The Backup Data
Operating Mk2500PC Saving the Backup Data Save the backup data of the files stored in the printer to the computer or write backup data to the printer. Saving the Backup Data to the Computer Connect the printer to the computer with the USB cable. For how to connect with the USB cable, refer to “Connecting the Printer and Computer”... - Page 49 Operating Mk2500PC Select [Backup from the printer], and then click [OK]. The [Save As] dialog box appears. Input the file name, and then click the [Save]. [Mk2500PC Printer data File (.mk3)]: Save all files stored in the printer to the computer together. The Mk2500PC Printer data File (.mk3/.mdk) cannot be opened on the computer.
- Page 50 Operating Mk2500PC Writing the Backup Data to the Printer Connect the printer to the computer with the USB cable. For how to connect with the USB cable, refer to “Connecting the Printer and Computer” (P.36). Power the printer on. When the character input display appears, press the [PC Conn] key on the printer.
- Page 51 Operating Mk2500PC The Open dialog box appears. Select the Mk2500PC Printer data File (.mk3/.mdk), and then click [Open]. A message appears to ask whether all files stored in the printer are to be overwritten. [Yes]: Backup data is sent to the printer. [No]: The data is not saved.
-
Page 52: Select The Printer
Power the printer on. When the character input display appears, press the [PC Conn] key on the printer. Start the application of the Mk2500 on the PC, and then select [Select printer] from the [File] menu. The select printer dialog box appears. - Page 53 [Automatic acquisition] A printer acquires information in the case of a communication wait state and distinguish it automatically. [Mk2500 (Terminal I.D. printing area adjustment function)] Set it in Mk2500. [Mk2100 (No Terminal I.D. printing area adjustment function)] Set it in Mk2100.
-
Page 54: How To Use The Status Monitor
(Start), and select [Control Panel] – [Hardware and Sound] – [Printers]. ♦ Windows XP Click the [Start], and select [Printers and Faxes]. Right-click the Mk2500 icon, and then select [Printing Preferences…]. The Printing Preferences dialog box appears. Click the [Status Monitor] tab. - Page 55 Appendix Set each of the items. [Status Monitor] [Use the Status Monitor]: The Status Monitor is displayed. (This is the default setting.) [Not use the Status Monitor]: The Status Monitor is not displayed. [Version]: Follow this procedure to confirm the printer driver version and copyright information. Click [Version…] to open the Version dialog box.
-
Page 56: Using The Status Monitor
Appendix 5.2 Using the Status Monitor Use the Status Monitor to not only monitor the status of print jobs in progress but also monitor the status of the printer and the level of the remaining ink ribbon. [Status]: Messages to inform you about the current status of the printer. [Ribbon type]:... -
Page 57: Viewing The Printer Status
Appendix Viewing the Printer Status There are four types of images to keep you informed about the status of the printer. Displayed to indicate the normal mode. The printer is in the online mode and ready to print. Displayed to indicate that the printer is in the offline mode. -
Page 58: Message List
Remove the jammed printing Media JAM Tube or label tape is jammed. media according to “If a Tube or Label Tape Becomes Jammed” in the Mk2500 User's Guide. Cover is open An operation was attempted while Close the cover. the cover was open.。... -
Page 59: Appendix
Appendix Appendix 6.1 Index A M About.............18 Main Screen .........................16 Media Size..........29, Additional Data ..........24 Message List ..........Alignment .............33 Mode ............. All line centering..........33 N B New........... 15, 16, Backup Data..........42 Numbering ........15, 17, Backup from the printer ......43 O... - Page 60 Appendix Start value ............30 Transfer Mode ..........Status Bar.............18 U Status Monitor ........48, Style Settings /Data Display Area ....15 Uninstall ............T V Terminal I.D. printing area......33 View.............. The setting of the device type....13, Toolbar ............15...
Need help?
Do you have a question about the Mk2500 and is the answer not in the manual?
Questions and answers