Sign In
Upload
Download
Table of Contents
Contents
Add to my manuals
Delete from my manuals
Share
URL of this page:
HTML Link:
Bookmark this page
Add
Manual will be automatically added to "My Manuals"
Print this page
×
Bookmark added
×
Added to my manuals
Manuals
Brands
Celestron Manuals
Telescope
SKY PRODIGY 70
Instruction manual
Celestron SKY PRODIGY 70 Instruction Manual
Computerized telescope
Hide thumbs
1
Table Of Contents
2
3
4
5
6
7
8
9
10
11
12
13
14
15
16
17
18
19
20
21
22
23
24
25
26
27
28
29
30
31
32
page
of
32
Go
/
32
Contents
Table of Contents
Bookmarks
Table of Contents
Table of Contents
Table of Contents
Introduction
Warning
Skyprodigy Models
Assembly
Assembling Skyprodigy
Attaching the Hand Control Holder
Attaching the Fork Arm to the Tripod
Attaching the Telescope to the Fork Arm
The Star Diagonal
The Eyepiece
Focusing
Attaching the Hand Control
Powering Skyprodigy
The Starpointer Finderscope
Starpointer Installation
Starpointer Operation
Hand Control
The Hand Control
Aligning Skyprodigy
Starsense Alignment
Manual Starsense Alignment
Solar Sytem Alignment
Refine Alignment
Object Catalog
Selecting an Object
Slewing to an Object
Skytour Button
Identify Button
Direction Buttons
Motor Speed Button
Help Button
Menu Button
Basic Level Menu Items
Time and Location
View/ GOTO Location
Utility Features
Backlight
LCD Contrast
Get Version Info
Restore Defaults
Menu Level
Advanced Level Menu Items
Backlash Compensation
Cordwrap
Direction Buttons
Slew Limits
Starsense Camera
Telescope Setup
Tracking
Skyprrodigy Menu Tree
Telescope Basics
Focusing
Image Orientation
Calculating Magnification
Determining Field of View
General Observing Hints
Celestial Observing
Observing the Moon
Lunar Observing Hints
Observing the Planets
Planetary Observing Hints
Observing the Sun
Solar Observing Hints
Observing Deep Sky Objects
Seeing Conditions
Transparency
Sky Illumination
Seeing
Telescope Maintenance
Care and Cleaning of the Optics
Collimation
Appendix A - Technical Specifications
Appendix B - Glossary of Terms
Appendix C - Time Zone Map
Advertisement
Quick Links
1
Table of Contents
2
Introduction
3
Skyprodigy Models
4
Assembling Skyprodigy
5
Powering Skyprodigy
Download this manual
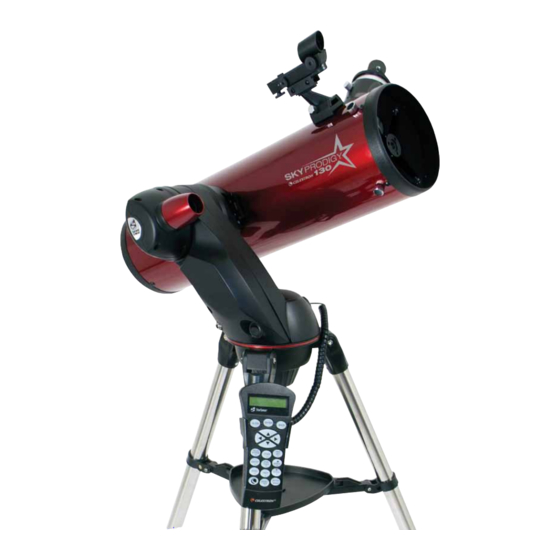
COMPUTERIZED TELESCOPE
SkyProdigy 70
ITEM #22089
SkyProdigy 90
ITEM #22091
INSTRUCTION
MANUAL
Table of
Contents
Previous
Page
Next
Page
1
2
3
4
5
Advertisement
Table of Contents
Need help?
Do you have a question about the SKY PRODIGY 70 and is the answer not in the manual?
Ask a question
Questions and answers
Related Manuals for Celestron SKY PRODIGY 70
Telescope Celestron SKY PRODIGY Instruction Manual
Computerized telescope (32 pages)
Telescope Celestron SKY PRODIGY 102 Quick Setup Manual
(4 pages)
Telescope Celestron skyexpedition 60 Instruction Manual
Computerized telescope (27 pages)
Telescope Celestron SS80 Instruction Manual
Spotting scope (34 pages)
Telescope Celestron StarHopper 10 Instruction Manual
Celestron starhopper 10: instruction manual (27 pages)
Telescope Celestron Travel Scope 50 Instruction Manual
Celestron travel scope 50: user guide (86 pages)
Telescope Celestron 21035 Instruction Manual
Celestron telescope - optical telescope user manual (86 pages)
Telescope Celestron StarSense AutoAlign Manual
(28 pages)
Telescope Celestron C8 Instruction Manual
Celestron c8: user guide (48 pages)
Telescope Celestron TRAVEL SCOPE 70 Quick Setup Manual
Up to 40x magnification full-height tripod with altazimuth mount (8 pages)
Telescope Celestron Travel Scope 60 Quick Setup Manual
(8 pages)
Telescope Celestron Travel Scope 80 Instruction Manual
(60 pages)
Telescope Celestron StarSense Explorer LT Quick Setup Manual
80az (20 pages)
Telescope Celestron StarSense Explorer DX Quick Setup Manual
6” schmidt-cassegrain (20 pages)
Telescope Celestron StarSense Explorer DOBSONIAN Instruction Manual
(100 pages)
Telescope Celestron StarSense Explorer DOB Quick Setup Manual
(60 pages)
This manual is also suitable for:
Sky prodigy 90
Sky prodigy 130
Table of Contents
Print
Rename the bookmark
Delete bookmark?
Delete from my manuals?
Login
Sign In
OR
Sign in with Facebook
Sign in with Google
Upload manual
Upload from disk
Upload from URL


Need help?
Do you have a question about the SKY PRODIGY 70 and is the answer not in the manual?
Questions and answers