
Related Manuals for Celestron StarHopper 10


Summary of Contents for Celestron StarHopper 10
-
Page 2: Table Of Contents
GLOSSARY ... 5 UNPACKING THE TELESCOPE / BASE... 6 SSEMBLING THE OPTICAL TUBE ... 10 NSTALLING THE ARIABLE ENSION ... 10 INDERSCOPE TTACHING THE FINDERSCOPE BRACKET TO THE TELESCOPE TUBE ... 12 NSTALLING THE YEPIECES SING OOLING TARHOPPER ... 13 OLLIMATION... -
Page 3: Introduction
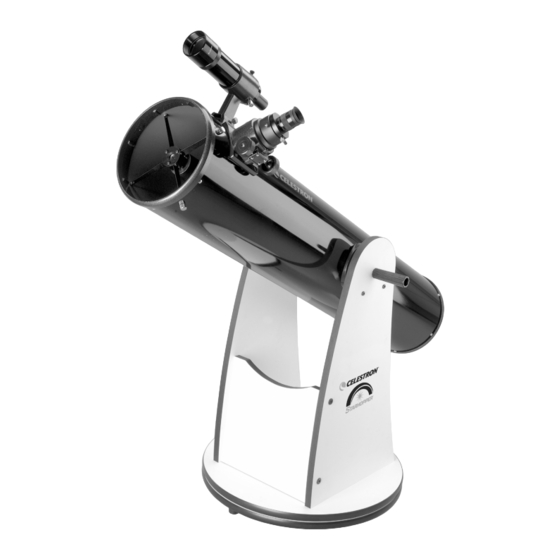
Celestron telescope. This manual is designed to instruct you in the proper use of your Celestron telescope. You’ll also find this instruction manual contains a wealth of useful information on celestial observing, commonly used terms in astronomy, instruction on the care of your telescope, and optional accessories to enhance your viewing experience. - Page 4 Quick Quick Quick- - - - Release Bracket Release Bracket Release Bracket Release Bracket Eyepiece Eyepiece Eyepiece Eyepiece ® Telescope (StarHopper 8” Shown) Focuser Focuser Focuser Focuser Optical Tube Optical Tube Optical Tube Optical Tube Variable Tension Altitu Variable Tension Altitu...
-
Page 5: Glossary
Extended objects - large celestial objects, other than stars, such as nebulae and galaxies. Field of view - the size, in degrees, of the area you can see through the eyepiece of your telescope. Finderscope - a low power telescope with cross hairs mounted to the side of a higher powered telescope, used to locate objects more easily. -
Page 6: Unpacking The Telescope / Base
Base Other Accessories Eyepiece Tray Collimation Cap Before the telescope can be used the mount must be assembled. The box with the mount contains the parts necessary for assembly, including: Two side panels Front panel Base plate (with the four pre-drilled holes) - Page 7 Handle Azimuth Tension Bolt Tension Spring Washer Metal Sleeve Azimuth Roller Bearing Figure 1 – Assembling the Base Side Panels Front Panel Rubber Feet Eyepiece Accessory Tray Base Plate Azimuth Bearing Plates Ground Plate (Triangular on 10” and 12” models)
-
Page 8: Assembling The Base For The Starhopper
Assembling The Base For The StarHopper 1. Locate the front panel and the two side panels of the base (refer to Figure 1 to identify all the parts referred to in these instructions). 2. Align the predrilled holes of the side panels with the holes on the edge of the front panel and attach using four of the 2”... - Page 9 Now that the base is fully assembled you can attach the eyepiece accessory tray, handle and altitude nylon bearing cylinders: Align the eyepiece accessory tray with the holes in the side panel and attach with two ½” wood screws. Align the base handle with the thread holes in the front panel. Insert a bolt through the handle and thread into the front panel.
-
Page 10: The Optical Tube
The Finderscope The finderscope is used to find and center objects in the main eyepiece of the telescope. The finder is attached using two alignment screws and a spring loaded pivot. Secondary... -
Page 11: Attaching The Finderscope Bracket To The Telescope Tube
To install the finderscope onto the telescope you must first mount the finderscope through the finder bracket and then attach it to the telescope. Toward the front of the telescope tube, near the focusing assembly, there is a small bracket with a set screw in it. This is where the finderscope bracket will be mounted. -
Page 12: Installing The Eyepieces
Using The Cooling Fans (Starhopper 10” and 12” Only) The StarHopper 10” and 12” telescopes come with a built-in cooling fan located on the rear cell of the optical tube. This fan greatly reduces the damaging tube currents inside the tube as well as shortening the time it takes for the optics to reach thermal equilibration. -
Page 13: Collimation
(A), located 120 degrees apart, on the rear cell of the telescope tube (See Figure 12). The rear cell also has three mirror support screws (B), that are finger tightened to hold the mirror in one place when transporting the telescope. The support screws need to be loosened before adjusting the collimation screws. -
Page 14: Night Time Star Collimation
The telescope should be set up at night and a star's image should be studied at medium to high power (30-50 power per inch of aperture). - Page 15 IMPORTANT: After making the first, or each adjustment, it may be necessary to re-aim the telescope tube to re-center the star again in the center of the field of view. The star image can then be judged for symmetry by going just inside and outside of exact focus and noting the star's pattern.
-
Page 16: Telescope Basics
Focusing is accomplished by rotating the focuser knobs until a sharp focus is reached. To focus your telescope, begin by putting the eyepiece in the eyepiece holder of the focuser. When doing astronomical viewing, you’ll find that out of focus star images are very diffuse and difficult to see. -
Page 17: Celestial Observing
Now that your telescope is set up, you’re ready to use it for observing. This section covers visual observing for both solar system and deep-sky objects. Observing the Moon In the night sky, the moon is a prime target for your first look because it is extremely bright and easy to area. -
Page 18: Observing Deep-Sky Objects
One way to find deep-sky objects is by star hopping and a finderscope is very helpful. Star hopping is done by using bright stars to "guide" you to an object. For successful star hopping, it is helpful to know the field of view of you telescope. If you’re using the standard Celestron 25mm eyepiece with the Star ®... - Page 19 5. Move about ½° toward Beta ( ) Lyra, while remaining on a line connecting the two stars. 6. Look through the telescope and the Ring Nebula should be in your field of view. The Ring Nebula’s angular size is quite small and, therefore, not visible in the finderscope.
-
Page 20: Seeing" Conditions
Viewing conditions affect what you can see through your telescope during an observing session. Conditions include transparency, sky illumination and “seeing”. Understanding viewing conditions and the affect they have on observing will help you get the most out of your telescope. Transparency Transparency refers to the clarity of the atmosphere and is affected by clouds, moisture, dust and other airborne particles. -
Page 21: Seeing
The StarHopper 10” and 12” telescopes come with a built-in fan behind the primary mirror that shortens the time it takes to reach thermal equilibrium and eliminates tube currents. -
Page 22: Cleaning The Optics
Special care should be taken when cleaning any telescope so as to avoid damaging its optics. You shouldn’t need to clean your optics more than twice a year at the most. Generally, it’s better to leave dust on the mirror, should a small amount accumulate there. -
Page 23: Technical Specifications
TECHNICAL SPECIFICATIONS Aperture Focal Length Eyepieces Magnification Secondary Size Obstruction Primary Mirror Cooling Mirror Cell Azimuth Bearing Altitude Bearing Tension System Highest useful power Lowest useful power Resolution: Rayleigh Criterion Dawes Criterion Field of view with standard eyepiece Exit pupil with standard eyepiece Light gathering power (times the unaided eye) Limiting visual magnitude... -
Page 24: Optional Accessories
Ultima eyepieces. The OMNI Barlow (#93326) is a compact achromatic Barlow lens that is under three inches long and weighs only 4 oz. It works very well with all Celestron eyepieces. Collimation Eyepiece (#94182) – The Celestron Cheshire eyepiece is ideal for precise collimation of Newtonian telescopes. - Page 25 It’s used with both eyes open and features variable brightness control for comfortable viewing. It works by projecting a red dot on the image of the object to be viewed in the sky, which the telescope is then lined up with. This finderscope is compact and lightweight, it weights just 1.5 oz. and is only 4.5” in length, and is easily mounted using the adhesive strip on its base.
-
Page 26: Celestron Two Year Warranty
Celestron warrants this telescope to be free from defects in materials and workmanship for two years. Celestron will repair or replace such product or part thereof which, upon inspection by Celestron, is found to be defective in materials or workmanship. As a condition to the obligation of Celestron to repair or replace such product, the product must be returned to Celestron together with proof-of-purchase satisfactory to Celestron. - Page 27 Celestron 2835 Columbia Street Torrance, CA 90503 U.S.A. Tel. (310) 328-9560 Fax. (310) 212-5835 Web site at www.celestron.com Copyright 2004 Celestron All rights reserved. (Products or instructions may change without notice or obligation.) Item # 10800-INST $10.00 06-04 Printed in Taiwan...
Need help?
Do you have a question about the StarHopper 10 and is the answer not in the manual?
Questions and answers