Table of Contents
Advertisement
Advertisement
Table of Contents

Related Manuals for Celestron StarSense AutoAlign


Summary of Contents for Celestron StarSense AutoAlign
- Page 1 M A N U A L...
-
Page 3: Table Of Contents
TABLE OF CONTENTS INTRODUCTION . . . . . . . . . . . . . . . . . . . . . . . . . . . . . . . . . . . . . . . . . . . . . . . . . . . . . . . . . . . . . . . . . . . . . . . . . 5 Warning . -
Page 5: Introduction
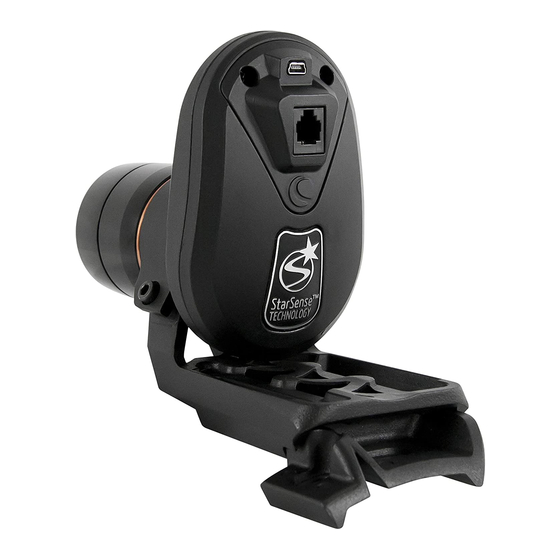
StarSense™ is patented technology that allows your telescope to determine its position and align itself with the night sky automatically . StarSense AutoAlign’s internal camera captures an image of the sky, and then analyzes it to identify the stars in the image . Based on this information, StarSense can determine the coordinates of the center of the image . -
Page 6: System Requirements
CG-5 Computerized (with Aux . splitter) CGEM, CGEM DX NexStar SLT LCM (with Aux . splitter) Mounts with only one port for the hand control, such as the CG-5 Computerized Mount, require an Auxiliary Port Splitter, item #93919, available from Celestron . -
Page 7: Optical Tube Compatibility
NexStar 102SLT Refractor NexStar 4SE Maksutov-Cassegrain NexStar 127SLT Maksutov-Cassegrain NexStar 130SLT Reflector All Celestron Reflectors and Refractors Packaged with the Advanced VX Mount All Celestron Reflectors and Refractors Packaged with the Advanced CG-5 Mount All NexStar GT optical tube assemblies Several other optical tubes from other manufacturers which use a similar finder dovetail base . -
Page 8: Assembly
ASSEMBLY 3. Slide the StarSense camera onto the camera ATTACHING THE STARSENSE CAMERA TO YOUR TELESCOPE base and secure it with the thumbscrew(s) . The camera slides on the large base front to back, 1. Remove the fi nderscope and bracket from your and slides on the small base back to front . -
Page 9: Changing Brackets
Note: If your telescope does not have an auxiliary port, the Auxiliary Port Splitter, (item #93919 available from Celestron), is required . First, plug the splitter into the auxiliary port . Then, plug the hand control into one port and the cable into the other . -
Page 10: Using With A Finder
The large accessory dovetail bar that is used for tab on the cable faces outward . guide scopes on Celestron 8” Schmidt-Cassegrains and EdgeHD telescopes will obstruct the Star- Sense’s Large Camera Bracket . The CPC 800 fork arm also obstructs with the StarSense camera . -
Page 11: Quick Start: Aligning Starsense
QUICK START: ALIGNING STARSENSE Set up your telescope in a relatively unobstructed EQ mounts) . You only need to enter this information area that shows most of the sky . If you have once for a given observing location . obstructions like buildings or trees, StarSense will 6. -
Page 12: First Time Setup: Calibrate Center
FIRST TIME SETUP: CALIBRATE CENTER fine adjustments by looking through the eyepiece . Use the lowest power/widest-angle The first time you use StarSense AutoAlign, eyepiece available . StarSense needs to know the center of the telescope’s field of view in relation to its camera . This 5. -
Page 13: Starsense Manual Align
STARSENSE MANUAL ALIGN StarSense Manual alignment allows you to point the again, use the UP and RIGHT direction buttons telescope in the part of the sky you wish to use for to finish slewing the telescope . Press ENTER . taking alignment images . -
Page 14: Improving Pointing Accuracy With Starsense
IMPROVING POINTING ACCURACY WARNING WITH STARSENSE • Place cap over the camera lens! Since you may wish to use the Sun for your Once your alignment is complete, StarSense can alignment, remember to place the cap over the further enhance the pointing accuracy of your camera lens to protect the imaging sensor . -
Page 15: Tips For Using Solar System Align
. or Solar System database and slew to it . 4. Press OPTION (Celestron logo key on bottom 2. Press the ALIGN button on the hand control . left) and ALIGN simultaneously to load the alignment . -
Page 16: Sync
SYNC 3. The controller will prompt you to add a Cal Star to improve the accuracy, or you may press Syncing on a star will shift the mount model to the BACK to skip this step . star position . It will improve GoTo pointing in the region of sky close to the star you synced on . -
Page 17: Starsense Overview
. STARSENSE HAND CONTROL 4. Catalog Buttons: StarSense has a key on the StarSense AutoAlign’s hand control gives you hand control to allow direct access to each of instant access to the night sky . With automatic the main catalogs in its 40,000+ object database . -
Page 18: Object Catalog
Selecting an Object objects, and others . Now that the telescope is properly aligned, you 7. OPTION (Celestron Logo): Can be used in can choose an object from any of the catalogs in combination with other keys to access more the StarSense’s database . -
Page 19: Slewing To An Object
SLEWING TO AN OBJECT IDENTIFY BUTTON Pressing the I D E NTI FY button will search Once the desired object is displayed on the hand StarSense’s database and display the name and control screen, you have two options: angular distances to the nearest matching objects •... -
Page 20: Motor Speed Button
MOTOR SPEED BUTTON HELP BUTTON The telescope can be controlled at nine different The HELP button gives you instant access to speed rates . Pressing the MOTOR SPEED button helpful information and utilities that can improve allows you to instantly change the speed of the the pointing accuracy of your telescope . -
Page 21: Database Setup
DATABASE SETUP Press ENTER to accept the value . SkyTour Filters: Allows you to set the minimum Allow Sun: Enable the Sun under the Solar System magnitude limit (brightness) for objects that will be object catalog and as an alignment object in Solar displayed when the SKY TOUR button is pressed . - Page 22 • R.A. Limits (For equatorial mounts only): To change the GoTo approach direction, simply Sets the limits that the telescope can slew choose GoTo Approach from the Scope Setup or track in Right Ascension (R .A .) before menu, select either Altitude or Azimuth approach, stopping .
- Page 23 - Negative is the amount of compensation The hand control will sync on the star by asking applied when you release the button, winding you to center the star in the eyepiece and pressing the motors back in the other direction to the Align button .
-
Page 24: Time And Location
TIME AND LOCATION Get Version Info: Displays the current version for the StarSense Hand Controller, StarSense View / Modify Time: Allows you to view and Camera, and the telescope’s motor control board . make changes to the date, time, time zone offset, Restore Defaults: This factory reset restores all and Daylight Savings Time . -
Page 25: Specifications
Objective Lens Focal Ratio/F-stop Control Board 32-bit processor with embedded Linux Operating System USB Port USB 2 .0 Auxiliary Port Connects to Celestron telescopes Hand Controller Specifications Object Database 45,178 Red backlit 4 Line LCD STMicro ARM 32-bit Cortex™-M3 CPU... -
Page 26: Menu Tree
MENU TREE Menu Database Setup StarSense Sky Tour Filters Get Status Catalog Filters Calibrate Identify Filters Reset AIS Camera Filter Limits User Auto Align Allow Sun Time and Location Telescope View/Mode Time Tracking Rate View/Mode Location Sidereal, Solar, Lunar, Off Time/Loc. - Page 27 Align StarSense Auto Add Cal Reference StarSense Manual Review Cal Reference Solar Sys. Align Model Status Quick Align Polar Align Save/Load Align Reset Alignment...
- Page 28 Tel . (310) 328-9560 Fax . (310) 212-5835 Website: www .celestron .com Copyright 2016 Celestron All rights reserved. (Products or instructions may change without notice or obligation.) Designed and intended for those 14 years of age and older. This device complies with Part 15 of the FCC Rule. Operation is subject to the following two conditions: 1) This device may not cause harmful interference, and 2) This device must accept any interference received, including interference that may cause undesired operations.
Need help?
Do you have a question about the StarSense AutoAlign and is the answer not in the manual?
Questions and answers