Table of Contents
Advertisement
Advertisement
Table of Contents

Subscribe to Our Youtube Channel
Related Manuals for Baumatic BDWI640


Summary of Contents for Baumatic BDWI640
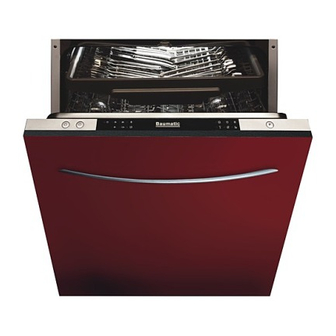
- Page 1 BDWI640 60 cm Fully integrated full height dishwasher...
- Page 2 USER MANUAL FOR YOUR BAUMATIC BDWI640 60 cm Fully integrated full height dishwasher NOTE : This User Instruction Manual contains important information, including safety & installation points, which will enable you to get the most out of your appliance. Please keep it in a safe place so that it is easily available for future reference;...
-
Page 3: Table Of Contents
Connecting to the mains water supply Connecting to the water outlet 39 - 40 Connecting to the power supply Applying the condensation strip Positioning the dishwasher 41 - 42 Levelling the appliance Securing the dishwasher Before first use Baumatic consumables Technical data Contact details... -
Page 4: Environmental Note
This should be undertaken by a competent person. Disable the door lock to make sure that children cannot get stuck inside the appliance. o The packaging materials that Baumatic uses are environmentally friendly and can be recycled. o Please discard all packaging material with due regard for the... -
Page 5: Important Safety Information
General Safety o Repairs to your appliance must only be carried out by a Baumatic engineer or one of its authorised service agents. Any attempt by an inexperienced person to repair the appliance, could result in injury or damage to your dishwasher. - Page 6 This appliance is only designed to wash normal domestic washloads. If you use your dishwasher in any other way or it is incorrectly used, then Baumatic accepts no liability for any damage that might be caused and any guarantee will be void.
- Page 7 o Any packaging that is removed from the machine should be kept away from children. o All detergents should be kept out of children’s reach in a safe place. o Some water will remain inside the dishwasher when it has completed a wash cycle.
-
Page 8: Specifications
Specifications Product dimensions Height: 815 – 865 mm Width: 598 mm Depth: 550 mm Aperture dimensions Height: 820 – 870 mm (MIN) Width: 600 mm Depth: 580 mm (MIN) Product specifications o 14 Place settings o 6 programs: Normal Intensive Economy Rapid Glass... -
Page 9: Electrical Details
o Delay start function o Residual drying o Concealed heating element o Self-cleaning stainless steel micro-filter o Anti-leak device o Anti-flood device o Height adjustable upper basket o Collapsible plate racks o Adjustable feet Energy efficiency details Energy efficiency class: Washing performance class: A Drying performance class: Power consumption... -
Page 10: Description Of The Appliance
Description of the appliance Top spray arm Cutlery basket Upper basket Inner pipe Lower basket Salt container Detergent dispenser Cup shelf Lower spray arm Filter assembly Inlet pipe connector Drain pipe Adjuster... -
Page 11: Control Panel
Control panel ON/OFF button Delay start button Power on indicator Delay start indicators Salt and rinse aid indicators Program indicators Program button Using your dishwasher Before first use o Install the appliance as per the installation instructions contained within this booklet. o Fill the water softener with 1 litre of tap water and then fill with specialist dishwasher salt. -
Page 12: Filling With Dishwasher Salt
IMPORTANT: It is only necessary to do this when you fill the container with salt for the first time. o Pour salt into the water softener, using the funnel that is supplied with the appliance. You should add approximately 1.5 kg of salt into the water softener. -
Page 13: Setting The Water Softener Level
Setting the water softener level It is possible to regulate the amount of salt that the water softener will release during a wash cycle. The water softener should be set to a level that is appropriate for the hardness of your water (please refer to the table below). -
Page 14: Filling With Rinse Aid
Filling with rinse aid The rinse aid is released during the final rinse and it helps to prevent water from forming droplets on your dishes. These droplets will lead to spots and streaks being left on items after the wash program has completed. o Your dishwasher is designed to utilise liquid rinse aid. -
Page 15: Setting The Rinse Aid Level
Setting the rinse aid level The amount of rinse aid that the dishwasher requires also depends on the hardness of your water. You should experiment with the rinse aid setting, until you find a level that gives the best results. o On the first wash cycle, we would recommend that the rinse aid level is set to number 4. - Page 16 o Open the lid that closes over the detergent dispenser by pushing the release button. The lid will spring open. Place the detergent inside of the dispenser. o The section marked A in the diagram is for the main wash cycle detergent.
-
Page 17: Concentrated Detergent
Concentrated detergent o The use of the NORMAL program with concentrated detergents reduces pollution and is good for your dishes. o This wash program is specifically suited to the dirt-dissolving properties of the enzymes of concentrated detergent. For this reason, the NORMAL program, in which concentrated detergent is used, can achieve the same results achieved in the INTENSIVE program. -
Page 18: Adjusting The Upper Basket
o Use the diagram above as a guide to the most appropriate way to load the upper basket. IMPORTANT: Care should be taken when placing long stemmed glassware, such as champagne glasses in the upper basket. If they are not positioned correctly, then there is a risk that they may topple over when the upper basket is pushed in or pulled out. -
Page 19: Loading The Lower Basket
IMPORTANT: Care should be taken to make sure that the spray arms can move freely when items have been loaded into the baskets. Loading the lower basket The lower basket is most suited to washing larger and more heavily soiled items, such as saucepans, saucepan lids and serving dishes. You can also load bowls and a variety of plates into the lower basket. -
Page 20: Folding Spikes Of Lower Basket
Dessert dishes Dinner plates Soup plates Oval platter Folding spikes of lower basket o The bottom rack has prongs that can be folded downwards, to allow for easier loading of larger saucepans and serving bowls. The cutlery basket Cutlery should be placed inside of the cutlery basket, separately from each other. -
Page 21: Loading Dishes And Cutlery
Loading dishes and cutlery Household cloths, sponges or any other object that may absorb water SHOULD NOT be washed in a dishwasher. o Remove leftovers and soften the remnants of burnt food in pans, prior to loading dishes in the appliance. o Once the dishwasher has been loaded, check that the spray arms can move freely. -
Page 22: Program Table
The following items are not always suitable for washing inside a dishwasher:- o Stoneware should only be washed if the manufacturer of the item has marked it as dishwasher safe. o Plastic items (such as lunchboxes) should only be washed if the manufacturer has marked it as dishwasher safe. -
Page 23: Setting A Wash Program
ECONOMY** For lightly Pre-wash 5/25g 1.04 12.5 soiled loads, Wash such as (50°C) plates, Rinse (60°) glasses, Drying 3 in 1 bowls and lightly soiled pans. GLASS For lightly Pre-wash 5/25g 0.91 soiled loads Wash such as (40°C) glasses, Rinse crystal and Rinse 3 in 1... -
Page 24: Changing A Wash Program
o IMPORTANT: Wait for 5 seconds before pressing the program selection button, otherwise the appliance may not function correctly. o Press the program button (7) to choose an appropriate wash program for the load that you are washing. The relevant program indicator (6) will light to show which program you have selected. -
Page 25: At The End Of A Wash Program
o Close the dishwasher door. After about 10 seconds the wash program will continue automatically. At the end of a wash program o The time display will flash for 8 seconds and a buzzer will sound. o Open the door of the appliance. o Use the ON/OFF button (1) to switch the dishwasher off. -
Page 26: Saving Energy Using Your Dishwasher
o Use the delay start button (2) to choose a delay start time of 3, 6, 9 or 12 hours in the future. The relevant delay start indicator (4) will light on the display. o Close the door firmly, so that you hear the door lock click shut. o When the programmed delay start time has elapsed, the dishwasher will automatically begin the chosen wash program. -
Page 27: Cleaning And Maintenance
o Use the shorter and lower temperature cycles for everything but the dirtiest dishes. Shorter cycles use less energy and work just as well. Modern detergents also work just as well at lower temperatures. Cleaning and maintenance IMPORTANT: The appliance should be disconnected from your mains supply before commencing any cleaning process. -
Page 28: Cleaning The Filters
Cleaning the filters For best performance and results, the entire filter assembly should be thoroughly cleaned regularly (ideally after each wash cycle). 1. Turn the coarse filter anti-clockwise and then lift it upwards. Rinse out this section under a tap to remove any food debris that remains in it. -
Page 29: Cleaning The Spray Arms
Cleaning the spray arms The spray arms should be cleaned regularly, to prevent hard water deposits from clogging the spray arm jets and bearings. o To remove the upper spray arm, hold the nut and rotate the arm clockwise to remove it. o To remove the lower spray arm, gently pull it upwards. -
Page 30: Cleaning The Door
Cleaning the door o To clean the edge around the outside of the door, you should use a soft, damp cloth only. o To prevent water from penetrating the door lock or electrical components, DO NOT use a spray cleaner of any kind. o DO NOT use any abrasive cleaner or scouring pads on the inner or outer surfaces, as they may cause damage to them. - Page 31 Or any installation other than the one specified by Baumatic Ltd. has been completed. Please refer to the conditions of guarantee that appear on the...
-
Page 32: General Troubleshooting
General troubleshooting PROBLEM POSSIBLE WHAT TO DO CAUSES Dishwasher Fuse blown or the circuit Replace the fuse or reset the doesn’t start. breaker acted. circuit breaker. Remove any other appliances sharing the same circuit with the dishwasher. Power supply is not Make sure the dishwasher is turned on. - Page 33 dishwashers for the risk of foaming or suds. There are rust The affected items are Avoid washing these items in stains on the not corrosion resistant. the dishwasher and look for cutlery. dishwasher-safe replacements in the future. A RAPID program was Always run a RAPID program not run after dishwasher without any dishes in the...
- Page 34 Detergent left Dishes are blocking the Re-load the dishes properly. in the detergent dispenser. dispenser. The dishes are Improper loading of Load the dishwasher as not drying. crockery. suggested in the relevant instructions. Too little rinse-aid was Increase the amount of rinse-aid used.
-
Page 35: Installation
Installation IMPORTANT: THIS INSTALLATION MUST COMPLETED BY A SUITABLY QUALIFIED PERSON. BAUMATIC ONLY SANCTION INSTALLATION GIVEN THIS INSTRUCTION MANUAL. SHOULD DISPOSE PACKAGING ENVIRONMENTALLY FRIENDLY MANNER. Aperture requirements... -
Page 36: Installation Stages
o The aperture that your dishwasher needs to be installed into should resemble the one shown in the drawings on the previous page. o There should be less than a 5 mm gap between the top of the dishwasher and the underneath of the worktop. The height of the aperture required will vary between 820 –... - Page 37 o Use the installation template supplied with the appliance to mark up and then drill out the necessary holes in the furniture door. o Attach the upper and lower hooks onto the furniture door. o Lift the furniture door towards the dishwasher door, ensuring that the upper and lower hooks locate into the slots on the outside of the dishwasher door.
-
Page 38: Adjusting The Tension Of The Door Spring
Adjusting the tension of the door spring o The door of the dishwasher is attached to springs. These are set at the factory to ensure that they are at the proper tension, so that the door can open and close smoothly. o After the furniture door has been fitted, you will need to adjust the tension of the door spring. -
Page 39: Connecting To The Mains Water Supply
Connecting to the mains water supply IMPORTANT: Do not connect the appliance to your mains water supply using an old or an existing water inlet hose. The inlet hose supplied with the dishwasher is the ONLY one that should be us DO NOT CONNECT THE WATER INLET HOSE TO A HOT WATER TAP. -
Page 40: Connecting To The Power Supply
o Place the end of the drain hose on your drain pipe. Push it a short way down into your drain pipe. The drain pipe must have a minimum diameter of 40 mm. o The top of the drain hose must be no higher than 1000 mm. o IMPORTANT: Do not insert the drain hose too deeply into the pipe, as this may cause siphoning. -
Page 41: Applying The Condensation Strip
Applying the condensation strip o The condensation strip must be fitted to the underside of the worktop to protect it against the ingress of moisture. The strip will deflect steam that rises from your appliance, away from the underneath of the worktop. o The condensation strip will be located inside of your dishwasher. -
Page 42: Levelling The Appliance
Levelling the appliance o IMPORTANT: Your dishwasher must be level for it to operate properly. o Make sure that the dishwasher is supported whilst it is being levelled, otherwise it may tip over. o Rotate the adjustable feet to level the appliance accordingly. o Use a spirit level to check that the appliance is level. -
Page 43: Securing The Dishwasher
Securing the dishwasher The dishwasher must be secured to the worktop, this can be done in one of two ways:- o Standard worktop- Secure dishwasher underside of the worktop by using two wood screws (A). o You should screw through the holes in the brackets at the top of the dishwasher cabinet. -
Page 44: Before First Use
Before first use You should check the following before using the appliance for the first time:- o That the dishwasher is level and fixed in position. o That the water tap is fully open. o That there are no leaks at either end of the drain or inlet hoses. o That the inlet and outlet hose are fully tightened. -
Page 45: Baumatic Consumables
BC005 Stainless Steel Cleaner and Protector (250 ml) o BC007 E-Cloth – General Purpose Cloth o BC008 Microwave Cover To order a Baumatic consumable product please call 0123 5437 244 and quote the product code. You can also order online from eshop.baumatic.co.uk... -
Page 46: Technical Data
Technical Data Manufacturer BAUMATIC LTD Model Number BDWI640 Standard Place Settings Energy Efficiency Class (1) Annual Energy Consumption (2) 299 kWh Energy Consumption of the Standard 1.04 kWh Cleaning Cycle Power Consumption of Off Mode 0.45 W Power Consumption of Left-On Mode 0.55 W... -
Page 47: Contact Details
United Kingdom Baumatic Ltd., Czech Republic Baumatic Buildings, Baumatic CR spol s.r.o. 6 Bennet Road, Lípovà 665 Reading, Berkshire 460 01 Liberec 4 RG2 0QX Czech Republic United Kingdom +420 483 577 200 Sales Telephone www.baumatic.cz (0118) 933 6900 Sales Fax...
Need help?
Do you have a question about the BDWI640 and is the answer not in the manual?
Questions and answers