Table of Contents
Advertisement
IMPORTANT SAFETY INFORMATION: Always read this manual first before attempting to service this
fireplace. For your safety, always comply with all warnings and safety instructions contained in this
manual to prevent personal injury or property damage.
Dimplex North America Limited
1367 Industrial Road Cambridge ON Canada N1R 7G8
1-888-346-7539 www.dimplex.com
In keeping with our policy of continuous product development, we reserve the right to make changes without
notice.
© 2012 Dimplex North America Limited
Service Manual
Model Number
CDS6599 - Celeste
TDS7599 - Rhapsody
7400340000R01
Advertisement
Table of Contents

Related Manuals for Dimplex CDS6599 - Celeste


Summary of Contents for Dimplex CDS6599 - Celeste
- Page 1 Dimplex North America Limited 1367 Industrial Road Cambridge ON Canada N1R 7G8 1-888-346-7539 www.dimplex.com In keeping with our policy of continuous product development, we reserve the right to make changes without notice. © 2012 Dimplex North America Limited 7400340000R01...
-
Page 2: Table Of Contents
Table Of Contents Operation ............3 Maintenance . -
Page 3: Operation
It can be reset by switching the On/Off Switch to OFF and waiting 5 minutes before switching the unit back on. CAUTION: If you need to continuously reset the heater, unplug the unit and call Dimplex North America Limited at 1-800-346-7539. -
Page 4: Maintenance
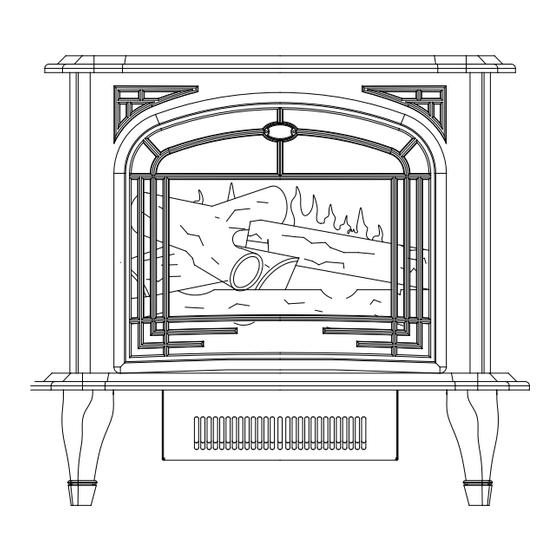
Maintenance Figure 4 WARNINg: Disconnect power before attempting any maintenance or cleaning to reduce the risk of fire, electric shock or damage to persons. LIgHT BULB REPLACEMENT CAUTION: Allow at least 5 minutes for light bulbs to cool off before touching bulbs to avoid accidental burning of skin. Light bulbs need to be replaced when you notice a dark section of the flame or when the clarity and detail of the log exterior disappears. -
Page 5: Exploded Parts Diagram
Exploded Parts Diagram Replacement Parts List MOD Level NONE & MOD. A MOD. B MOD. C MOD. D On/Off Switch 2800070200RP Heater Assembly 2000230100RP 6902430100RP Log Set Not Available 0438200200RP Partially Reflective Glass 6900100600RP 5900060600RP Flicker Rod 6900490100RP 5900080600RP Flicker Motor 2000140300RP Thermostat 2300150100RP... -
Page 6: Wiring Diagram - Mod 0-A
Wiring Diagram - MOD 0-A Wiring Diagram - MOD B & C Wiring Diagram - MOD D... -
Page 7: Switch Replacement - On/Off And Heater
Switch Replacement - On/Off and Heater wiring clips and connections. Reassemble in the reverse order as above. WARNINg: If unit was operating prior to servicing allow at least 10 minutes for light bulbs and heating element to Light Dimmer Replacement (MOD D) cool off to avoid accidental burning of skin. -
Page 8: Flicker Motor/Flicker Rod Replacement (Mod B-D)
top to clear the brackets and pull back. Lift top care- out onto the floor. fully, and place to the side of the stove. Caution should Remove all of the mounting screws on the heater cover be taken as the top mounting brackets may scratch the and separate the cover from the heater and light assem- finish. -
Page 9: Heater Assembly Replacement
Heater Assembly Replacement disconnect the wiring connections, noting their original locations. WARNINg: If unit was operating prior to servicing allow Properly orient the new transformer and reconnect all of at least 10 minutes for light bulbs and heating element to the wiring connections. - Page 10 tions, noting their original locations. With needle nose pliers grasp the power cord strain relief grommet from inside the heater cover and push while twisting to remove. Pull the power cord out through the hole in the heater cover. Install the new power cord through the hole in the heater cover and connect all of the wiring connections in their original locations.
-
Page 11: Troubleshooting Guide
Troubleshooting guide PROBLEM CAUSE SOLUTION general Circuit breaker trips or fuse Short in unit wiring. Trace wiring in unit. blows when unit is turned on Improper circuit current rating Additional appliances may exceed the current rating of the circuit breaker or fuse. Plug unit into another outlet or install unit on a dedicated 15 amp circuit. - Page 12 PROBLEM CAUSE SOLUTION Heater Heater is not turning off Improper operation Refer to Operation Section Defective Heater Switch Replace Heater Switch Defective Thermostat Replace Thermostat Heater is not turning on Improper operation Refer to Operation Section Loose Wiring Trace wiring in unit Defective Heater Switch Replace Heater Switch Defective Thermostat...
Need help?
Do you have a question about the CDS6599 - Celeste and is the answer not in the manual?
Questions and answers