Dimplex CDFI1000P Owner's Manual
Optimyst 1000 cassette
Hide thumbs
Also See for CDFI1000P:
- Service manual (15 pages) ,
- Service manual (18 pages) ,
- Owner's manual (21 pages)
Table of Contents
Advertisement
Quick Links
IMPORTANT SAFETY INFORMATION: Always read this manual first
before attempting to install or use the wall mount unit. For your safety,
always comply with all warnings and safety instructions contained in
this manual to prevent personal injury or property damage.
To view the full line of Dimplex products, please visit
www.dimplex.com
Owner's Manual
Model
CDFI1000P
6909660100
7214300100R04
Advertisement
Table of Contents

Related Manuals for Dimplex CDFI1000P


Summary of Contents for Dimplex CDFI1000P
- Page 1 For your safety, always comply with all warnings and safety instructions contained in this manual to prevent personal injury or property damage. To view the full line of Dimplex products, please visit www.dimplex.com 7214300100R04...
-
Page 2: Table Of Contents
CAUTION: Procedures and techniques which, if not carefully followed, will result in damage to the equipment. W ARNING: Procedures and techniques which, if not carefully followed, will expose the user to the risk of fire, serious injury, or death. www.dimplex.com... -
Page 3: Welcome & Congratulations
Welcome & Congratulations Thank you and congratulations for purchasing an Optimyst cassette ® from Dimplex. Please use our convenient online registration page to record your model and serial numbers for future reference at www.dimplex.com/register Serial Number Rating Label with Label Model Number Please carefully read and save these instructions. -
Page 4: Important Instructions
⑩ Do not modify the unit. Use it unit has been dropped or damaged only as described in this manual. in any manner. Contact Dimplex Any other use not recommended by Technical Service at 1-888-346- the manufacturer may cause fire, 7539. -
Page 5: Save These Instructions
IMPORTANT INSTRUCTIONS is encouraged to try to correct the interfer- WARNING: Remote control con- ence by one or more of the following tains small batteries. Keep away measures: from children. If swallowed, seek • Reorient or relocate the receiving antenna. medical attention immediately. -
Page 6: Installation
A dedicated circuit will be accessory kit - available from your required if, after installation, the cir- local Dimplex dealer, or with stan- cuit breaker trips or the fuse blows dard 1/4 in. (6.4 mm) tubing, using on a regular basis when the heater the information outlined below. -
Page 7: New Construction
Installation ance. Figure 1 1. Locate a cold water line in the vicinity of the desired location of the cassette. NOTE: Normal tap water can To water source Ball Valve be used in the Optimyst as long as ® the tap water is not considered to leaking. -
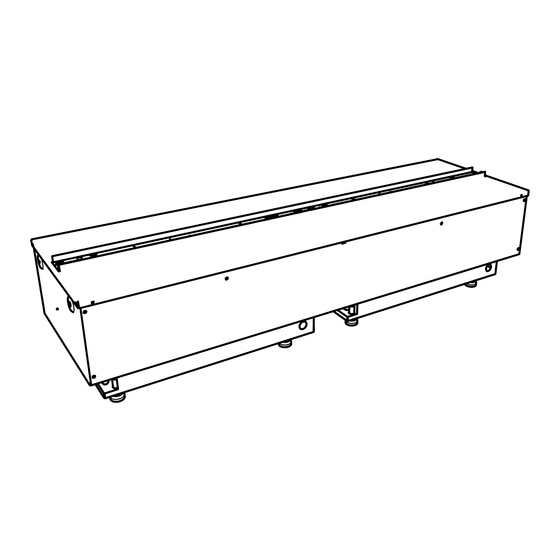
Page 8: Product Dimensions
Adjustable from 9.0 in. (224 mm) to 9.5 in. (241 mm) NOTE: When prepar- 40.08 in. (1018 mm) ing the opening for the unit ¼ in. (6.4 mm) of clearance should be maintained from each surface to ensure easy installation. www.dimplex.com... -
Page 9: Operation Preparation
Installation units in the same vicinity they will and front to back, using the 6 need to be wired in parallel. adjustable feet on the bottom of the unit. NOTE: The Optimyst cassette ® is designed to allow for installa- 10. - Page 10 NOTE: During initial installa- tion, the Refill Container should be refilled after the Reservoir has filled to ensure the max- imum operating time. • Hard Plumbed - prime each of www.dimplex.com...
-
Page 11: Bathroom Installation
Installation Bathroom Installation This firebox must be protected by a GFI circuit. If a receptacle is used it must be readily access- ible. To prevent electrical shock this unit is an electrical appliance that is not watertight and must be installed as to prevent water from entering the unit. -
Page 12: Operation
45 seconds flame effect. This is normal and later. should not be a cause for con- cern. www.dimplex.com... - Page 13 Operation F. Volume Control Standby Adjusts the volume of the wood Puts the unit into standby mode fire sound effects. where control by the tethered controller or remote is possible. On the unit: Pressing the will decrease the volume and Blue tooth Required for initializing the re- pressing the...
- Page 14 Check with your Local 6. If the synchronization was Authority or Retailer for recycling successful the unit will go to advice in your area. Standby. This will synchronize the remote control and the fireplace receiver. NOTE: It is possible to www.dimplex.com...
-
Page 15: Maintenance
Maintenance not producing mist as expected.) WARNING: Disconnect power 5. Screw the cap back on, do not before attempting any main- tenance or cleaning to reduce overtighten. the risk of fire, electric shock 6. Return the refill container to the or damage to persons. -
Page 16: Accessories
Use a warm damp cloth only to should perform any other servic- clean surfaces of the unit. Do not ing. use abrasive cleaners. NOTE: If you need to move Accessories Please contact your local dealer for genuine Dimplex accessories. Example: logsets and piercing kits. www.dimplex.com... -
Page 17: Warranty
Nunavut, or Northwest Territories or in any and, subject to the provisions of this warranty, of the 50 States of the USA (and the District Dimplex warrants such products to be free of Columbia) except for Hawaii and Alaska. from defects in material and workmanship for... - Page 18 What Dimplex will do in the event of a defect this limited warranty entitles the purchaser In the event a product or part covered by this to replacement parts only without charge. If...
- Page 19 Warranty agents are also not responsible for: DIRECT LOSSES, COSTS, OR DAMAGES THAT EXCEED THE PURCHASE PRICE IN NO EVENT WILL DIMPLEX, OR ITS DI- OF THE PRODUCT. RECTORS, OFFICERS, OR AGENTS, BE LIABLE TO THE PURCHASER OR ANY SOME JURISDICTIONS DO NOT ALLOW THIRD PARTY.
Need help?
Do you have a question about the CDFI1000P and is the answer not in the manual?
Questions and answers