Table of Contents
Advertisement
Available languages
Available languages
Advertisement
Chapters
Table of Contents

Related Manuals for Tippmann TANGO ONE


Summary of Contents for Tippmann TANGO ONE
- Page 1 TIPPMANN ® 2955 Adams Center Road, Fort Wayne, IN 46803 USA P) 260-749-6022 • F) 260-749-6619 www.tippmann.com TANGO ONE PAINTBALL MARKER LANCEUR DE PAINTBALL MACADOR PAINTBALL Owner’s Manual Manuel d’utilisation Manual del Usuario TP04607 06/11...
- Page 2 WARNING THIS IS NOT A TOY. MISUSE MAY CAUSE SERIOUS INJURY OR DEATH. EYE, FACE AND EAR PROTECTION DESIGNED FOR PAINTBALL MUST BE WORN BY THE USER AND ANY PERSON WITHIN RANGE. WE RECOMMEND AT LEAST 18 YEARS OLD TO PURCHASE. PERSONS UNDER 18 MUST HAVE ADULT SUPERVISION WHEN USING THIS PRODUCT.
- Page 3 WARNING SAFETY IS YOUR RESPONSIBILITY READ AND FAMILIARIZE YOURSELF AND ANY OTHER USER OF THIS MARKER WITH THE SAFETY INSTRUCTIONS IN THIS MANUAL. FOLLOW THESE INSTRUCTIONS WHEN USING, WORKING ON, TRANSPORTING, OR STORING THIS MARKER. ALWAYS KEEP THE SAFETY IN SAFE MODE UNLESS FIRING AS DETAILED IN INSTRUCTIONS ON PAGE 6.
-
Page 4: Barrel Sleeve Installation Instructions
WARNING THIS IS NOT A TOY. MISUSE MAY CAUSE SERIOUS INJURY OR DEATH. EYE, FACE AND EAR PROTECTION DESIGNED FOR PAINTBALL MUST BE WORN BY THE USER AND ANY PERSON WITHIN RANGE. WE RECOMMEND AT LEAST 18 YEARS OLD TO PURCHASE. PERSONS UNDER 18 MUST HAVE ADULT SUPERVISION WHEN USING THIS PRODUCT. -
Page 5: Table Of Contents
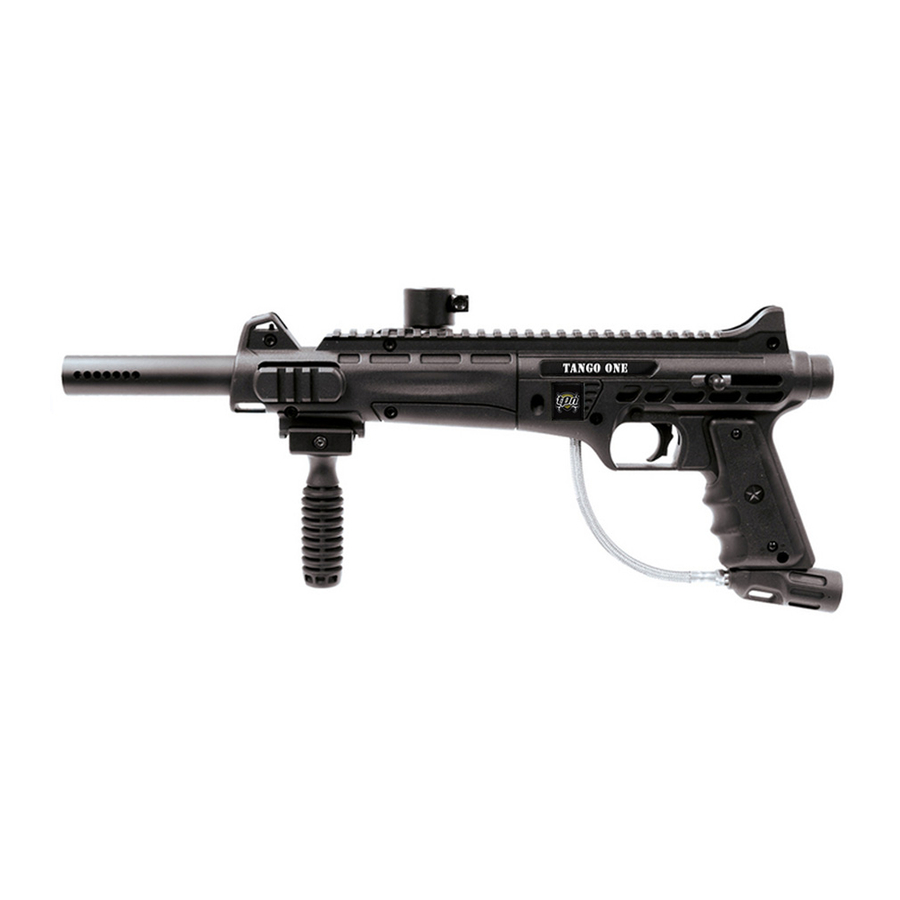
P) 260-749-6022 • F) 260-749-6619 • www.tippmann.com CONGRATULATIONS on your purchase of a TPN™ Tango One™ paintball marker. We believe our Tango One markers to be the most accurate and durable paintball markers available, and are proudly manufactured by Tippmann . -
Page 6: Warning/Liability Statement
If you as a user do not accept liability, Tippmann Sports, LLC requests you do not use a Tippmann Sports, LLC marker. By using this paintball marker you release Tippmann Sports, LLC of any and all liability associated with its use. - Page 7 • Handle this and any marker as if it were loaded at all times. • Keep your finger off the trigger until ready to shoot. • Do not look down the barrel of a paintball marker. Accidental discharge into the eyes may cause permanent injury or death.
-
Page 8: Getting Started
Always keep marker in the cocked position when attaching air/CO2 cylinder to the marker. This helps prevent an accidental discharge. c. Lubricate the air/CO2 cylinder valve O-ring with a little Tippmann oil. ®... -
Page 9: Loading The Hopper
the marker is now capable of firing after you put the Trigger Safety in the Fire position. (If you do not hear the air/CO2 cylinder engage, the pin valve could be too short or the pin valve seal is damaged, follow the Air/CO2 Cylinder Removal instructions on page 11 and take your air/CO2 cylinder to a “C5”... -
Page 10: Air/Co2 Cylinder Warnings
Unloading Your Marker 1. Eye protection designed for paintball use must be worn by the user and any person within range. 2. Install the Barrel Sleeve and put the Safety in Safe Mode. 3. Empty all paintballs from the Hopper. Loosen the Feed Elbow bolt. Lift the Hopper from the Feed Elbow. -
Page 11: Air/Co2 Cylinder Safety Tips
NOTE: The cylinder valve should unscrew from the paintball marker in about 3 or 4 full turns. If you finish the 4 full turn and the cylinder valve is not unscrewed from the paintball marker, STOP! Take the entire unit to a “C5” certified airsmith for safe removal and/or repair. -
Page 12: Repairing Air/Co2 Cylinder Leaks
: If a new air/CO2 valve O-ring does not resolve an air/CO2 leak, do not NOTE attempt to repair the air/CO2 cylinder. Contact Tippmann Sports, LLC, your local paintball dealer, or a “C5” Certified Airsmith. : Locate a “C5” certified airsmith at NOTE www.paintball-pti.com/search.asp... -
Page 13: Storage
13. The best valve O-rings are made of urethane. Urethane O-rings are not affected by high gas pressures. These may be purchased from Tippmann or your local paintball dealer. Use Tippmann oil to lightly lubricate the ® O-rings, springs, and other areas indicated in the Marker Disassembly and Assembly instructions. -
Page 14: The Valve
Marker Instructions Remember to always wear eye protection when performing any marker disassembly or re-assembly. 1. Pull the Bolt Handle back (see Figure 2 on page 8) and keep holding onto it. Then pull the Trigger and allow the Bolt Handle to move slowly forward. This uncocks the marker. - Page 15 3. Disconnect the (36) from the (35) and (49). Linkage Arm Rear Bolt Front Bolt 4. Slide the Front Bolt off the (48) and check the O-ring. Clean and Power Tube oil the O-ring, or if damaged, replace with a new one. Do the same with the Rear Bolt O-ring.
-
Page 16: The Trigger
The Trigger Disassembly instructions: 1. Remove the (59) assembly from Trigger the receiver. Be sure to retain the trigger return (61, located in front of the Spring Trigger, and not shown in Figure 9, but is shown in the Schematic Diagram). 2. -
Page 17: Specifications
Specifications Model ................TIPPMANN® Tango One™ Caliber ........................68 Action .............. Semi-Automatic (open bolt blow-back) Power ......................Pneumatic Gas Supply ..........Compressed Air, Nitrogen, or CO2 cylinder Hopper Capacity ..................188 Paintballs Ball Feed ..................Gravity Feed System Firing Rate ................8 paintballs per second Trigger ....................... -
Page 18: Basic Parts Diagram
Tango ONE Basic Parts Diagram and Parts Llist (on following pages) Basic Parts Diagram Tippmann Service Department ® 1-800-533-4831 www.tippmann.com... - Page 19 WARNING DO NOT DISASSEMBLE THIS MARKER WHILE IT IS PRESSURIZED. DO NOT PRESSURIZE A PARTIALLY ASSEMBLED MARKER. Revised 06/13/11...
-
Page 20: Parts List
Tango One Parts List ITEM QTY. PT. NO. DESCRIPTION TA06053 Right Receiver Half TA06052 Left Receiver Half 98-33 Receiver Dowel Pin CA-36 Sear Dowel Pin (Black) 02-35 Sear TA02036 Sear Spring TA02021 ACT Linkage Arm Guide Pin FA-18 Ball Latch... - Page 21 Tango One Parts List ITEM QTY. PT. NO. DESCRIPTION CA-15 Guide Pin SL2-4 O-ring, Front Bolt TA02011 Rear Bolt TA01016 Linkage Arm 98-57 O-ring, End Cap 98-40 O-ring, Barrel CA-27 Front Valve Seat PA-28 Valve Stem Cup Seal CA-29 Valve Stem Cup...
-
Page 22: Warranty And Repair Information
Tippmann Accessories for a period of ninety (90) days from the date of original retail sale. All Tippmann asks is that you properly maintain and care for the Marker and Accessories (collectively, the “Product”) and that you have warranty... - Page 23 Tippmann makes every effort to complete its repair work within twenty-four (24) hours of receipt. Tippmann will return the Product to you via regular ground UPS. If you wish to have it returned using a faster service, you can request NEXT DAY AIR UPS OR SECOND DAY AIR UPS, but you will be charged for this service and must include your credit card number with the expiration date.
-
Page 24: Utilisation De La Protection De Canon
AVERISSEMENT CECI N’EST PAS UN JOUET. TOUT USAGE INAPPROPRIE PEUT PROVOQUER DES BLESSURES GRAVES OU MORTELLES. LE PORT DE LA PROTECTION POUR LES YEUX, LE VISAGE ET LES OREILLES CONCUE POUR LE PAINTBALL EST OBLIGATOIRE POUR L’UTILISATEUR AINSI QUE POUR TOUTE PERSONNE A PORTEE DE TIR. - Page 25 Tippmann Tango One, avant de tenter de charger ou de tirer avec ce lanceur. S’il y a une pièce manquante ou défectueuse, ou avez besoin d’aide, veuillez contactez le service de relation clientèle Tippmann, au 1-800-533-4831, pour un dépannage rapide.
-
Page 26: Avertissement/Déclaration De Responsabilité
être tenu d’incorporer de telles améliorations aux produits anciennement vendus. Si vous, en tant qu’utilisateur, n’acceptez pas la responsabilité, Tippmann Sports, LLC vous demande de ne pas utiliser un lanceur Tippmann Sports, LLC. En utilisant ce lanceur de paintball, vous déchargez Tippmann LLC de toute responsabilité... - Page 27 • Gardez votre doigt éloigné de la détente jusqu’à ce que vous soyez prêt à tirer. • Ne regardez pas dans le canon d’un lanceur de paintball. Une décharge accidentelle dans vos yeux peut provoquer des blessures permanentes ou mortelles. •...
-
Page 28: Pour Commencer
UNE PROTECTION DES YEUX CONSTRUITE POUR LE PAINTBALL DOIT ÊTRE PORTÉE PAR L’UTILISATEUR ET TOUTE PERSONNE SITUÉE DANS LE CHAMP DE TIR. Ç 1. Installez le Canon. a. Appliquez de l’huile Tippmann sur le joint de canon. b. Insérez le canon dans le corps. c. Vissez le canon avec précaution, à la main, dans les sens horaire jusqu’à ce qu’il soit serré. Figure 1: le joint de canon 2. -
Page 29: Installation Du Loader
s’arrête. Soyez prudent car le lanceur est maintenant capable de tirer si vous passez la sûreté de détente en mode Tir. (Si votre bouteille est pleine est que vous n’entendez pas l’air s’engager, il se peut que la pin de valve soit trop courte ou endommagée. Suivez les consignes «... -
Page 30: Avertissements Relatif Aux Bouteilles D'air/Co2
3. Videz toutes les billes du réservoir. Dévissez la vis du coude d’alimentation (11) et retirez le réservoir. 4. Rendez-vous dans la zone de tir désignée, retirez la protection du canon et mettez la sûreté de la détente en position de tir. 5. -
Page 31: Conseils De Sûreté Relatifs Aux Bouteilles D'air/Co2
de votre lanceur de paintball en 3 ou 4 tours complets. Si vous avez effectué 4 tours complets et que votre système est toujours attaché au lanceur de paintball, STOP ! Amenez le tout à un technicien spécialisé dans le paintball, pour un retrait sûr, et/ ou réparations. -
Page 32: Retrait De La Bouteille D'alimentation D'air Ou De Co2
Tippmann ou dans votre magasin de paintball local. : Si un nouveau joint de valve d’alimentation d’air ne résout pas la fuite d’air, NOTE n’essayez pas de réparer la bouteille d’air/CO2. Contactez Tippmann Sports LLC, votre revendeur de paintball local ou un armurier agréé « C5 ». -
Page 33: Nettoyage Et Entretien
Les joints en uréthane ne sont pas affectés par les hautes pressions de l’alimentation d’air. Ceux-ci peuvent être achetés chez Tippmann ou dans votre magasin de paintball local. Utilisez de l’huile Tippmann pour lubrifier légèrement les joints, ressorts et autres zones indiquées dans les instructions de Démontage/Montage du lanceur... -
Page 34: Préparation D'une Zone De Travail
Installez un établi avec beaucoup d’espace pour vous assurer de ne pas perdre des petites pièces. Suivez ces consignes de sécurité chaque fois que vous démontez ou remontez votre lanceur Tango One. 1. Suivez d’abord les instructions du Décharger votre lanceur en page 29 et celles du Retrait la bouteille d’air comprimé... -
Page 35: La Valve
6. Si l’ (8) doit être remplacé, retirez anti double feed l’ancien du corps, placez le nouveau dans la partie droite du corps, orienté comme montré en figure 7 (objet entouré) 7. Retirez les Vis (23) de l’ (29). Retirez Adaptateur ASA l’ASA de l’ergot de la flasque droite. -
Page 36: La Détente
8. Inspectez et lubrifiez le (38) et le joint de valve de bouteille air/ Joint de Canon Co² avec quelques gouttes d’huile. Réassemblage : 1. Réinstallez la Valve dans le Powertube. Insérez la Valve nettoyée et lubrifiée dans le Powertube et alignez les trous de la Valve et du Powertube. Appliquez de la bande ou de la pate au téflon sur les filetages de la Ligne de Gaz et vissez dans la Valve avec Précaution. -
Page 37: Dépannage
• Problème — Les billes tombent du canon. Cause — Anti Double Feed (8) usé ou endommagé. Solution — Remplacez l’Anti Double Feed. Caractéristiques du la ligne de lanceurs Tango One Modèle ................TIPPMANN® Tango One™ Ç Calibre ........................68 Action .......... -
Page 38: Liste Des Pièces Basiques
Tango ONE Liste des pièces basiques et liste de pièces (aux pages suivantes) Liste des pièces basiques Service après vente de Tippmann ® 1-800-533-4831 www.tippmann.com Ç... - Page 39 AVERTISSEMENT NE PAS DÊSASSEMBLER CE LANCEUR PENDANT QUE C’EST PRESSURISÉ AVEC L’AIR. NE PAS PRESSURISER UN LANCEUR MOITIÉ ASSEMBLÉ. Ç Revised 06/13/11...
-
Page 40: Liste Des Pièces De Rechange
TA06064 Marquage TPN TA06015 Vis, 10-32 x 0.840” LHSHCS TA09919 Vis, 10-32 x 0.500” LHSHCS TA06054 Foregrip TA06055 Plaque de presseur de Foregrip TA06049 Adaptateur de Bouteille (ASA) CA-08B Ecrou, 10-32 TA06063 Plaque nominative TANGO ONE CA-14 Ressort de Marteau... - Page 41 Liste des pièces de rechange ITEM QTY. DESCRIPTION CA-15 Tige Guide SL2-4 Joint de Culasse TA02011 Marteau TA01016 Tige de Connexion 98-57 Joint de Bouchon arrière 98-40 Joint de Canon CA-27 Avant de valve PA-28 Cup Seal CA-29 Siège de Cup Seal SL2-25 Joint de Siège de Cup Seal 98-25N...
-
Page 42: Information Sur La Garantie Et Le Dépannage
à un service après-vente de qualité. Dans le cas peu probable d’un problème avec ce lanceur de paintball Tippmann (« Lnceur »), et/ou un d’autre accéssoires Tippmann (« Accessoires »), le personnel du service clientèle sont à votre disposition pour vous aider. - Page 43 à l’autre. Réparations sous/hors Garantie Ç Lorsque vous expédiez le produit à Tippmann pour une reparation sous garantie ou hors garantie : 1. Si vous avez des pièces ou modifications interne ne provenant pas de Tippmann, veuillez tester le lanceur avec les pièces originales avant de retourner le lanceur pour l’entretien, ou les réparations.
-
Page 44: Instalacion E Instrucciones Para La Funda De Seguridad
ADVERTENCIA ESTO NO ES UN JUGUETE. UN USO INAPROPIADO PUEDE CAUSAR SERIAS HERIDAS O LA MUERTE. OJOS, CARA Y OIDOS DEBEN SER PROTEGIDOS TODO EL TIEMPO, CON LA PROTECCIÓN DISEÑADA PARA PAINTBALL TANTO POR JUGADORES COMO POR CUALQUIER PERSONA QUE ESTE EN EL RADIO DE ALCANCE. RECOMENDAMOS AL MENOS 18 AÑOS PARA LA COMPRA Y USO. - Page 45 . Pensamos que nuestro ® marcador Tango One™ es el mas preciso y durable disponible en el mercado, y ha sido producido con mucho orgullo por Tippmann. Todos los marcador Tango One de Tippmann darán muchos años de servicio y uso si se ha dado un uso adecuado.
-
Page 46: Advertencia Y Declaración De Responsabilidad
Si usted como usario no acepta la responsabilidad que Tippmann Sports, LLC requiere, no utilice este marcador. SI lo usa de esta forma usted libera a Tippmann Sports, LLC de cualquiera y de todas las responsabilidades que esten asociadas con su manejo. - Page 47 • Nunca mire dentro del barril del marcador. Una descarga accidental en un ojo, le puede causar una lesión permanente o la muerte. • Mantenga seguro del gatillo en posición de Seguro (Safe Mode), hasta cuando este listo para disparar. •...
-
Page 48: Inicio
Figura 2: Jale la Manija del cilindro de aire/CO2 de su marcador. Tornillo hacia atrás hasta que quede asegurado en su lugar. c. Lubrique el empaque de la válvula de el cilindro con un poco de aceite para marcadores Tippmann. -
Page 49: Llenando La Tolva De Munición
d. Inserte la válvula del cilindro e aire/CO2 dentro de el Adaptador de Suministro de Aire (ASA) (29), en la parte posterior del mango del marcador. e. De vuelta al cilindro de aire/CO2 en sentido a las agujas del reloj dentro del ASA hasta que este se detenga. -
Page 50: Descargando El Marcador
Descargando el Marcador 1. Protectores para ojos para paintball deben ser usados por el usuario y cualquier persona el radio de alcance. 2. Instale la Funda de Seguridad del Barril (ver página 44) y coloque el Gatillo en posición de seguro (ver página 46). 3. -
Page 51: Consejos De Seguridad Con El Suministro De Aire
comienzan a separarse como se ve en la figura #5, el cilindro se estará desatornillando de la válvula del cilindro y usted debe PARAR y llevar toda la unidad a un experto “C5” quien esta certificado en airsmith para que el remueva en forma segura el cilindro y lo repare. -
Page 52: Remoción Del Cilindro De Suministro De Aire/Co2
grados Fahrenheit (121 grados centígrados) o mas deben ser destruidos por personas entrenadas. • Use el gas apropiado para su cilindro. Use solo CO2 para un cilindro para CO2 y use solo aire comprimido en cilindro para aire comprimido. • Mantenga todos los cilindros alejados del alcance de los niños. •... -
Page 53: Reparación De Fugas De Aire En El Cylindro
: Si un empaque nuevo en la válvula de aire/CO2 no resuelve el problema NOTA del escape, no intente reparar el cilindro de suministro de aire. Contacte Tippmann Sports, LLC, a su distribuidor local o a un Airsmith certificado “C5”. -
Page 54: Almacenaje
Uretano, estos no se alteran con las altas presiones. Estos se pueden adquirir en Tippmann o con su distribuidor local. Use siempre aceite de Tippmann para enaceiter los empaques, y otras áreas que se indican el las instrucciones de . -
Page 55: La Válvula
del Codo de Alimentación. El codo de alimentación se descuelga hacia abajo y las aletas del fondo sobresalen en las ranuras del la mitad Derecha del Recibidor (1) El Tornillo (11), Arandela Plana (17) y Tureca (12) son utilizadas para sostener la Tolva de munición en el Codo de Alimentación. -
Page 56: El Gatillo
Asegurese de organizar las partes sobre una mesa de trabajo. Inspeccione y limpie el exterior de todos los ensambles. NOTA : Revise los dos empaques externos de la Válvula (58) y si están en mal estado, reemplácelos con unos nuevos. Si los empaques están dañados, el marcador no funcionara correctamente. -
Page 57: Solución A Problemas
• Problema — La bolas de pintura caen dentro del barril. Causa — Desgaste o daño en el Acople de Enganche (8). Solución — Reemplace el Acople de Enganche. Especificaciones Modelo ................TIPPMANN Tango One™ ® Calibre ........................68 Acción ....................Semi- Automática Fuente de Poder ..................Neumática Suministro de Aire .......... -
Page 58: Diagrama De Partes
Tango ONE Partes de Básicas y Lista de Piezas (en las páginas siguientes) Diagrama de Partes El Departamento de Servicio al Cliente de Tippmann ® 1-800-533-4831 www.tippmann.com Ñ... - Page 59 ADVERTENCIA NO DESENSAMBLE ESTE MARCADOR MIENTRAS ESTE PRESURIZADO. NUNCA PRESURISE UN MARCADOR PARCIALMENTE ENSAMBLADO. Ñ Revised 06/13/11...
-
Page 60: Tango One Lista De Partes
Tango One Lista de Partes ITEM QTY. PT. NO. DESCRIPTIÓN TA06053 Mitad Recibidor Derecho TA06052 Mitad Recibidor Izquierdo 98-33 Pasador Doble del Recibidor CA-36 Pasador Doble del Cierre ( Negro) 02-35 Cierre TA02036 Resorte Cierre TA02021 ACT Pasador Guía del Brazo Conector... - Page 61 Tango One Lista de Partes ITEM QTY. PT. NO. DESCRIPTIÓN CA-15 Pasador Guia SL2-4 Empaque, Tornillo Frontal TA02011 Tornillo Trasero TA01016 Brazo Conector 98-57 Empaque Tapón Posterior 98-40 Empaque, Barril CA-27 Tapón de válvula PA-28 Tronco Válvula cubierta de selle CA-29 Cubierta válvula...
-
Page 62: Informacion De Garantia Y Reparacion
Para Accesorios Tippmann por un periodo de (90) dias desde el dia de la compra. Todo lo que Tippmann le pide es que haga el mantenimiento apropiado y cuide su Marcador y sus Accesorios ( collectivo, el “Producto”) y que usted tiene garantia de reparacion realizada por Tippmann o por... - Page 63 Tippmann hara todos lo necesario para hacer la reparacion en (24) venticuatro horas desde que se recibe el producto. Tippmann le reenviara el Producto usando el servicio de UPS tierra. Si usted desea que se envie el producto usando un...
- Page 64 NOTES...
Need help?
Do you have a question about the TANGO ONE and is the answer not in the manual?
Questions and answers