Table of Contents
Advertisement
Advertisement
Table of Contents

Related Manuals for Teac Esoteric K-05


Summary of Contents for Teac Esoteric K-05
- Page 1 K - 05 Super Audio CD/CD Player OWNER’S MANUAL D01163220A...
- Page 3 Cet appareil numérique de la classe B est conforme à la norme NMB- IF YOU ARE EXPERIENCING PROBLEMS WITH THIS PRODUCT, 003 du Canada. CONTACT TEAC FOR A SERVICE REFERRAL. DO NOT USE THE PRODUCT UNTIL IT HAS BEEN REPAIRED. USE OF CONTROLS OR ADJUSTMENTS OR PERFORMANCE OF PROCEDURES OTHER THAN THOSE SPECIFIED HEREIN MAY RESULT IN HAZARDOUS RADIATION EXPOSURE.
-
Page 4: Precautions Concerning Batteries
IMPORTANT SAFETY PRECAUTIONS (2) IMPORTANT SAFETY INSTRUCTIONS This product has been designed and manufactured according to FDA 1) Read these instructions. 2) Keep these instructions. regulations “title 21, CFR, chapter 1, subchapter J, based on the 3) Heed all warnings. Radiation Control for Health and Safety Act of 1968”, and is classified as 4) Follow all instructions. - Page 5 For European Customers Disposal of electrical and electronic equipment (a) All electrical and electronic equipment should be disposed of separately from the municipal waste stream via collection facilities designated by the government or local authorities. (b) By disposing of electrical and electronic equipment correctly, you will help save valuable resources and prevent any potential negative effects on human health and the environment.
-
Page 6: Table Of Contents
Contents What’s in the box Thank you for choosing Esoteric. Read this manual carefully Check to be sure the box includes all the supplied accessories to get the best performance from this unit. shown below. Please contact the store where you purchased this unit if any of these accessories are missing or have been damaged during What’s in the box . -
Page 7: Before Use
Before use Discs (1) Read this before attempting any operations. Discs that can be played on this unit CAUTION CDs that bear the “COMPACT disc DIGITAL AUDIO” logo. Do not move the unit during playback. During playback, the disc rotates at high speed. Do not lift or 12cm (4.7") or 8cm (3.15") discs move the unit during playback. - Page 8 Discs (2) CAUTION Maintenance Do not play any disc that is warped, deformed or damaged. If a disc becomes dirty, wipe its surface radially from the center Playing such discs could cause irreparable harm to the playing hole outward towards the outer edge with a soft, dry cloth. mechanisms.
-
Page 9: Remote Control Unit
Remote control unit The included remote control allows this unit to be operated from a Battery Installation distance. Point the remote control unit at the main unit’s remote sensor within 23 feet/7 meters of the main unit. Remote sensor 23 feet/7 m Use a Phillips screwdriver to remove the cover from the bottom of the remote control, and pull out the battery case. -
Page 10: Making Connections
Making connections Q Precautions when making connections Make all connection before plugging in the power cord. Carefully read the operation manuals of the other equipment and follow their instructions when connecting them. Amplifier or digital Amplifier or digital recording device recording device (CD recorder, MD (CD recorder, MD... - Page 11 Digital audio output connectors Clock sync input connector The DIGITAL OUTPUT connectors will send a digital audio signal Used to input an external clock signal. from CDs played on this unit. Connect the clock sync input connector to the output connector Connect a digital audio output connector (COAXIAL or OPTICAL) of a master clock generator.
-
Page 12: Names And Functions Of Parts (Main Unit)
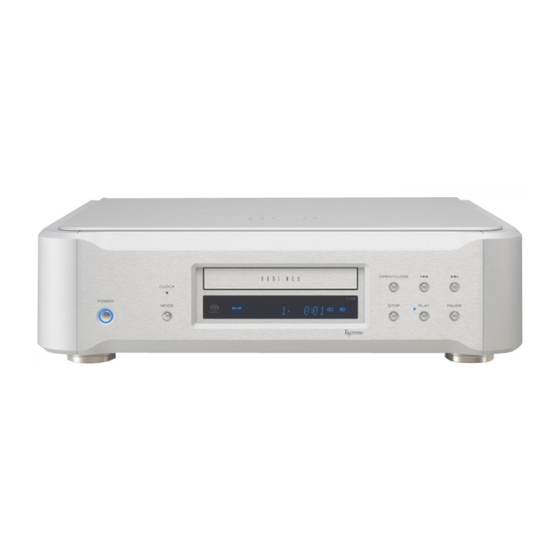
Names and functions of parts (main unit) G Tray OPEN/CLOSE button A POWER button Press to open and close the disc tray. Press to turn the power on and off. When the power is on, the ring around the button lights blue. When the power is off, the ring is unlit. -
Page 13: Names And Functions Of Parts (Display)
Names and functions of parts (display) Disc indicator Message display area This shows the type of disc that is loaded. This shows the playback time and a variety of messages. Super Audio CD: SA-CD Standard audio CD: CD DOWN MIX indicator If a DVD-Video (DVD-V), DVD-Audio (DVD-A) or video CD (VCD) When playing back the multichannel audio of a Super Audio CD, is loaded, the indicator will light, but the disc cannot be played... -
Page 14: Names And Functions Of Parts (Remote Control)
Names and functions of parts (remote control) When the main unit and the remote control both have buttons with the same functions, this manual explains how to use the button on the main unit. The corresponding remote control button can be used in the same manner. -
Page 15: Dimmer Button
ON button DIMMER button This button is not used with this unit. Use to adjust the brightness of the main unit's display (see p.28). STANDBY button SETUP button This button is not used with this unit. If the attenuator function has been set to ON, pressing this button enters setting mode. -
Page 16: Playback
Playback Press the OPEN/CLOSE button. The disc tray will close. Be careful not to let a finger or any item Turn the power on. get caught in it. Disc-loading may take some time depending on the amount of information on the disc being loaded. When the disc is loaded, the type of disc, the number of tracks it contains and the total time of those tracks will appear on the display (see p.13). -
Page 17: Pausing Playback
Pausing playback Opening and closing the disc tray During playback, press the PAUSE button to pause playback. When Press the OPEN/CLOSE button once to open the tray, and press it paused, the PLAY indicator on the main unit flashes. again to close the tray. Press the PLAY button or press the PAUSE button again to restart If you press the OPEN/CLOSE button during disc playback, several playback. -
Page 18: Selecting Tracks
Selecting tracks Searching forward/backward (scanning) Skipping During playback, press a remote control SCAN button ( m / , ) During playback, press a skip button ( . / / ) on the main unit to search forward/backward. When you find the point that you or the remote control to skip to the previous or next track and start want to listen to, press the PLAY button ( y ). -
Page 19: Using Repeat Playback
Using repeat playback Using program playback (1) You can program up to 30 tracks in the order that you want to listen to them. Press the AUDIO button when stopped or during playback. If a track is playing, it will become the first track in the program. During playback, press the REPEAT button to cycle through the following repeat modes. - Page 20 Using program playback (2) When you have finished adding tracks to Adding a track to the end of the program the program, press the PLAY button ( y ). When stopped or during playback, use the number buttons to Program playback starts. select the number of the track that you want to add.
-
Page 21: Changing The Display
Changing the display D/A converter mode When a disc is playing or paused, press the DISPLAY button to change This unit can be uses as D/A converter. what is shown on the display in the order shown below. When stopped, press the MODE button to show the current source Example: name. -
Page 22: Connecting A Computer And Playing Back Audio Files
Connecting a computer and playing back audio files By connecting this unit's USB input connector using a USB cable with You can select 1 of 3 modes to use when connecting this unit to a a computer, you can play back audio files stored on a computer using computer by USB. - Page 23 Start playback of an audio file on the Connect this unit to a computer using a USB computer. cable. Better sound quality can be achieved by setting the volume on Use a cable with a connector that matches that of this unit. the computer to the maximum level and using the amplifier connected to this unit to adjust the volume.
-
Page 24: Setting Mode
Setting mode (1) COAX in or OPT in source UPCONV> DF> CLK> USB source UPCONV> DF> USB> CLK> Changing settings Depending on the operation status, some items might not When stopped or during playback, press appear. and hold the MODE button for 2 or more seconds. - Page 25 Upconversion setting D/A converter digital filter setting Display: UPCONV>*** Display: DF>***** This setting can be made for each input. This setting can be made for each input. During Super Audio CD playback, the DSD signal is sent directly to During Super Audio CD playback or during conversion to DSD the D/A converter.
-
Page 26: Clock Setting
Setting mode (2) Clock setting When the input is COAX or OPT Display: CLK>*** PLL1 The built-in PLL circuit follows the input digital audio signal and This setting can be made for each input. generates master clock. Operation in response to a wide range of input clock frequencies is possible. - Page 27 USB input setting XLR output gain setting Display: USB>*** Display: XLR>**** When set to use a HIGH SPEED mode, dedicated driver software +6dB must be installed on the computer. Download the driver software Set the XLR output level to double the RCA output level (+6 dB). from our website.
-
Page 28: Using The Dimmer
Setting mode (3) Using the dimmer Automatic display (FL) off setting Display (FLaOFF>***) In CD/SACD mode, if playback is stopped and no operation is conducted for 15 minutes, the display automatically turns off. In D/A converter mode, after input has been locked for at least 15 minutes, the display automatically turns off. -
Page 29: Adjusting The Volume
Adjusting the volume Troubleshooting (1) If you experience a problem with the unit, please take a moment to review the following information before requesting service. Moreover, the problem might be caused by something other than this unit. Confirm that connected devices are also being used correctly. General The power does not turn on. - Page 30 Troubleshooting (2) USB connections with a computer Clock sync Computer does not recognize this unit. e This unit can be connected with computers running the following “NO WORD!” appears on the display. operating systems. e No clock signal is being input. Check the connection with the Windows XP 32-bit external master clock generator and its power and output status.
-
Page 31: Specifications
Specifications Compatible disc types (playback) General Super Audio CD, CD (including CD-R and CD-RW ) Power supply Europe/Hong Kong model ....... . . AC 230 V, 50 Hz U.S.A./Canada model . -
Page 32: Rear Panel
Rear panel... - Page 36 1-47 Ochiai, Tama-shi, Tokyo 206-8530, Japan Phone: (042) 356-9156 e-mail: eso-os@tec.teac.co.jp TEAC AMERICA, INC. 7733 Telegraph Road, Montebello, California 90640 U.S.A. Phone: (323) 726-0303 e-mail: esoteric_info@teac.com TEAC CANADA LTD. 5939 Wallace Street, Mississauga, Ontario L4Z 1Z8, Canada Phone: (905) 890-8008 TEAC MEXICO, S.A.
Need help?
Do you have a question about the Esoteric K-05 and is the answer not in the manual?
Questions and answers