Teac PD-501HR - CD Player Manual
- Owner's manual (88 pages) ,
- Owner's manual (39 pages)
Advertisement
- 1 Included items
- 2 Before use
- 3 Maintenance
- 4 Remote control unit
- 5 WAV/DSD files
- 6 Discs
- 7 Names and functions of parts
- 8 Connecting equipment
- 9 Basic operation
- 10 Playback from a specific track
- 11 Selecting folders and files
- 12 Repeat playback
- 13 Shuffle playback
- 14 Program playback
- 15 Dimmer
- 16 Information shown
- 17 Pure mode playback
- 18 Troubleshooting
- 19 Specifications
- 20 IMPORTANT SAFETY PRECAUTIONS
- 21 Documents / Resources
Included items
Check to be sure the box contains all the included items shown below.
Please contact the store where you purchased this unit if any of these items are missing or have been damaged during transportation.
RCA audio cable × 1
Power cord × 1
Remote control unit (RC-1306) × 1
Batteries for remote control unit (AAA) × 2
Owner's manual (this document) × 1
- Keep this manual in a safe place for future reference.
Warranty card × 1
Before use
Placement precautions
- Do not put anything on top of the unit.
- Avoid placing the unit in direct sunlight or close to any source of heat, such as a radiator, heater, open fireplace or amplifier. Also avoid locations that are subject to vibrations or exposed to excessive dust, cold or moisture.
- This unit can be stacked with other 501 series models, including the AI-501DA.
- Place the unit in a stable location near the audio system that you will use with it.
- Do not move the unit during use.
- The voltage supplied to the unit should match the voltage printed on the rear panel. If you are in any doubt regarding this matter, consult an electrician.
- As the unit could become warm during operation, always leave sufficient space around it for ventilation. When placing this unit, position it so that it is at least 3 cm (1.2") from walls in order to allow good heat dissipation. When installing it in a rack, leave at least 10 cm (4") open behind the unit.
- Do not open the body of the unit as this might result in damage to the circuitry or cause electric shock. If a foreign object should get into the unit, contact your dealer or TEAC customer support.
- When removing the power plug from the wall outlet, always pull directly on the plug; never yank on the cord.
- Depending on the electromagnetic waves of television broadcasts, interference might appear on television screens when this unit's power is on. This does not mean that this unit or the TV is malfunctioning. If this occurs, turn this unit's power off.
 Use precaution
Listening to anything at a high volume for a long time could be harmful to your hearing. In order to protect your ears, be careful not to set the volume too high when listening with headphones for a long time.
Maintenance
If the surface of the unit becomes dirty, wipe it with a soft dry cloth. If the unit becomes very dirty, dampen a soft cloth slightly with a diluted neutral cleanser and thoroughly wring out any excess fluid before using the cloth to wipe the unit.
For your safety, disconnect the power cord from the socket before cleaning.
- Never spray liquid directly on the unit.
- Do not use thinner or alcohol as they could damage the surface of the unit.
- Avoid allowing rubber or plastic materials to touch this product for long periods of time, because they could damage the cabinet.
Remote control unit
Precautions for use
Misuse of batteries could cause them to rupture or leak leading to fire, injury or the staining of items nearby. Please carefully read and observe the precautions.
- Point the remote control unit at the main unit's remote sensor from within 5 meters (16 feet) of it. Make sure that there are no obstacles between the remote control and the main unit.
- If direct sunlight or strong artificial illumination shines on the remote sensor, the remote control might not function. If that is the case, move this unit to another location.
- If the remote control unit is operated near other devices that generate infrared rays, or if other remote control devices using infrared rays are used near the unit, it might operate incorrectly. The other devices might also operate incorrectly.
Battery Installation
Remove the cover from the back of the remote control and insert two AAA batteries with their  /
/ oriented as shown in the case. Replace the cover.

Battery Replacement
If the operating range required between the remote control unit and main unit decreases, the batteries are exhausted. In this case, replace the batteries with new ones.
For more information about collection of batteries, please contact your local government, your waste disposal service or the point of sale where you purchased the collection.
WAV/DSD files
This unit can play back WAV files on CD-ROM/R/RW discs and WAV and DSD (Direct Stream Digital) DVD-ROM/±R/ RW discs. When using a computer to prepare WAV/DSD files, carefully read the instructions for the software you are using.
- The display of this unit can only show single-byte letters and numbers. If the file information uses Japanese, Chinese or other double-byte characters, playback is possible but the name will not be shown correctly.
- Always include the extension in the file name. This unit recognizes WAV files by their ".wav" file extensions or DSD files by their ".dsf" file extensions.
- Files without extensions cannot be played. Files that are not in the WAV or DSD format cannot be played even if they have ".wav" or ".dsf" file extensions.
- Discs that contain more than 999 folders and files in total might not play back properly on this unit.
- Depending on disc conditions, this unit might not be able to play a disc or skipping might occur.
Playable WAV file formats
Files on CD-ROM/R/RW discs
- Audio: mono or stereo
- Sampling frequency: 44.1 kHz or 48 kHz (88.2 kHz and higher cannot be played back)
- Encoding bit rate: 16-bit or 24-bit
Files on DVD-ROM/±R/RW discs
- Audio: mono or stereo
- Sampling frequency: 44.1 kHz, 88.2 kHz, 176.4 kHz, 48 kHz, 96 kHz or 192 kHz
- Encoding bit rate: 16-bit or 24-bit
Playable DSD file formats
Files on CD-ROM/R/RW discs
- Playback of DSD files is not possible.
Files on DVD-ROM/±R/RW discs
- Two-channel stereo
- 2.8 MHz and 5.6 MHz (double-rate) DSD formats
Discs
Audio CDs
CDs that bear the "COMPACT disc DIGITAL AUDIO" logo (12 cm/4.7")

- This unit cannot play back 8 cm CDs.
- Depending on disc quality and recording conditions, playback of some discs might not be possible.
![warning]() Playback of any other disc type could result in an unpleasant loud noise, damage to the speakers as well as potential harm to your hearing. Never play back any other type of disc.
Playback of any other disc type could result in an unpleasant loud noise, damage to the speakers as well as potential harm to your hearing. Never play back any other type of disc. - The logo should be on the disc label or the CD jacket.
- Video CDs cannot be played on this unit.
- Copy-protected discs, dual-layer discs and other discs that do not conform to the CD standard might not play correctly in this player. If you use such discs in this unit, TEAC corporation and its subsidiaries will not be responsible for any consequences or guarantee the quality of reproduction. If you experience problems with such non-standard discs, you should contact their issuers.
CD-ROM/CD-R/CD-RW discs
This unit can play back CD-ROM/R/RW discs that are in audio CD or ISO 9660 LEVEL 1/2/JOLIET formats.
- Discs created by a CD recorder must be finalized with the CD recorder that was used to create the discs before being used with this unit.
- Discs that have not been finalized cannot be played back. Finalize discs with the device used to record WAV files on them.
- If you are uncertain about the handling of a CD-R or CD-RW disc, please contact the seller of the disc directly.
DVD-ROM/±R/RW discs
This unit can play back DVD-ROM/±R/RW discs that contain WAV or DSD files that are in UDF or DVD-ROM compatible formats.
- This unit cannot play back Super Audio CDs.
- DVD video, DVD audio and related formats cannot be played back.
Inserting discs
- Hold the edges of disc with the label side up and insert it into the slot part way as shown in the illustration.
- Continue pushing the disc in until it is almost completely hidden in the slot and it will be pulled in the rest of the way automatically.
![]()

If the disc does not load properly
If the disc gets caught or is otherwise difficult to push, do not try to force it into the slot. Press the EJECT ( ) button and remove the disc once and then try to reinsert it. (If you try to force the disc, the disc or this unit could be damaged.)

- Do not play any disc that is warped, deformed or damaged. Playing such discs could cause irreparable harm to the playing mechanisms.
- While printable CD-R and CD-RW discs utilizing modern printing technologies are generally acceptable, older systems that use adhesives to attach paper type labels to the disc surface are not recommended.
- Do not stick papers or protective sheets on the discs and do not use any protective coating sprays.
- Never use a stabilizer. Using commercially available CD stabilizers with this unit will damage the mechanisms and cause them to malfunction.
- Do not use irregularly-shaped discs (octagonal, heartshaped, business-card-size, etc.). CDs with these shapes could damage the unit.
![]()

Storage precautions
- Discs should be returned to their cases after use to avoid dust and scratches that could cause the laser pickup to "skip."
- Do not expose discs to direct sunlight or high temperature and humidity for extended periods. Long exposure to high temperatures will warp discs.
- CD-R and CD-RW discs are more sensitive to the effects of heat and ultraviolet rays than ordinary CDs. It is important that they are not stored in locations where they will be exposed to direct sunlight. They should also be kept away from sources of heat, such as radiators and heat-generating electrical devices.
Maintenance
- If the side of the disc on which data is recorded has fingerprints or dust on it, use a soft cloth to gently wipe it radially from the center hole toward the outside edge.
![]()
- Never clean discs using chemicals such as record sprays, antistatic sprays and fluids, and thinner. Such chemicals will do irreparable damage to the disc's plastic surface.

If you are in any doubt as to the care and handling of a disc, read the precautions supplied with the disc or contact the disc manufacturer.
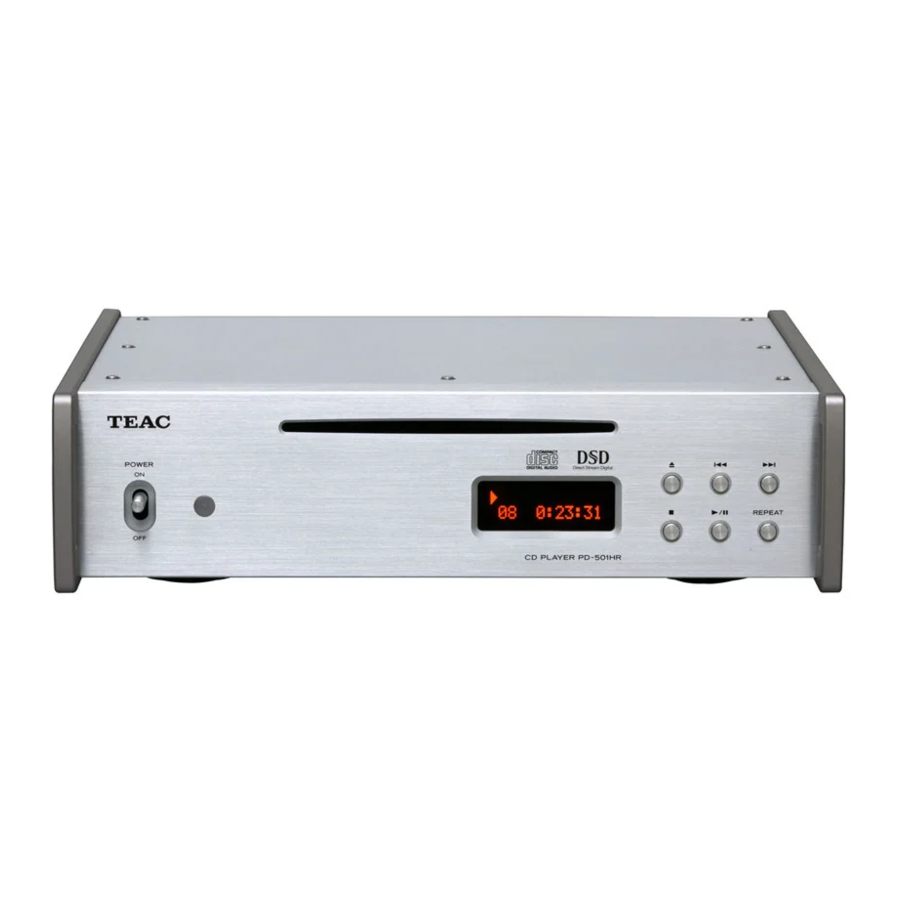
Names and functions of parts
Main unit

- POWER switch
Use to turn the power ON and OFF. - Remote control signal receiver
Signals from the remote control are received here. When using the remote control, point it toward this area. - Disc slot
Insert a disc here. After the disc has been partially inserted, it will be automatically pulled into the slot. - Display
This shows various information. - Eject button (
![]() )
)
Press when the unit is stopped to partially eject the disc. Hold the disc by its edges and pull it out. - Stop button (
![]() )
)
Press during playback to stop the disc. - Skip (
![]() ) button
) button
Press to skip to the previous track.
Press and hold during playback to search backward. - Play/pause button (
![]() /
/![]() )
)
Press when stopped to start playback.
Press during disc playback to pause.
Press again to restart playback. - Skip (
![]() ) button
) button
Press to skip to the next track. Press and hold during playback to search forward. - REPEAT button
Press to change the repeat playback mode.
 )
) )
)


When both the main unit and the remote control have buttons with the same functions, this manual explains how to use either of them. The corresponding buttons can be used in the same manner.
Remote control

- PURE mode button
Press when playback is stopped to turn pure mode playback ON and OFF. - SELECT button
Confirm items selected using the FOLDER (![]() /
/![]() ) and skip (
) and skip (![]() /
/![]() ) buttons.
) buttons.
When a WAV/DSD disc is loaded and playback is stopped, press the SELECT button to switch between disc and folder modes. - PROGRAM button
Use for program playback. - Shuffle [
![]() ] button
] button
Use for shuffle playback. - Repeat [
![]() ] button
] button
Use for repeat playback. - Stop [
![]() ] button
] button
Press during playback to stop playback. - DIMMER button
Use to adjust the brightness of the main unit's display. - DISPLAY button
Press to change what is shown on the display. - FOLDER [
![]() /
/![]() ] buttons
] buttons
When playing back a WAV/DSD disc, press to skip to the previous or next folder. - Number buttons
Use for track selection and preparing a program. - CLEAR button
Press to clear a track added to the program. - Search [
![]() /
/![]() ] buttons
] buttons
During playback, press and hold one of these buttons to search forward or backward. - Skip [
![]() /
/![]() ] buttons
] buttons
Use to skip to the previous or next track. - Play/pause [
![]() /
/![]() ] button
] button
Press when stopped to start playback. Press during playback to pause. Press again when paused to resume playback.
 /
/ ) and skip (
 ] button
 ] button
 ] button
 /
/ ] buttons
 /
/ ] buttons
 /
/ ] button
Connecting equipment

- AUTO POWER SAVE switch
Use to turn the automatic power saving function ON and OFF.
When ON, the unit will automatically enter standby mode if there is no audio output for 30 minutes or more.- When in standby mode, press a button on this unit or the remote control to turn the power ON.
- Analog audio output connectors
(LINE OUT)
These RCA jacks output two channels of analog audio signals. Connect these to an amplifier or other device with audio inputs.- Use commercially available audio cables to make the connections.
![]()
- Use commercially available audio cables to make the connections.
- DIGITAL OUT audio output connectors
These output digital audio. Connect these to the digital audio inputs of devices that accept digital audio signals.
COAXIAL: RCA coaxial digital cable
OPTICAL: Optical digital cable (TOS)- Use commercially available cables to make the connections.
- The sampling frequency and bit rate used by the digital outputs (COAXIAL and OPTICAL) are the same as for the playback source. During DSD playback or CD/PCM playback in pure mode, however, nothing is output from the digital outputs.
- Power inlet (~IN)
Insert the included power cord here. After completing all other connections, insert the power plug into a power outlet.
Unplug the cord from the outlet when not using the unit for a long time.
![shock hazard]() Use only the included power cord. Use of a different cord could cause fire or electric shock.
Use only the included power cord. Use of a different cord could cause fire or electric shock.

Do not turn the power on until after making all connections.
- Carefully read the manuals of the devices that you are connecting and follow their instructions when making connections.
- Do not bundle connecting cables with power cords. Doing so could cause noise.
- Connect all plugs completely.
Basic operation

- Set the POWER switch to ON.
- Hold the edges of the disc with the label side up and partially insert it into the slot.
![]()
- Continue pushing the disc in until it is almost completely hidden in the slot. It will be pulled in the rest of the way automatically.
![]()
If the disc gets caught or is otherwise difficult to push, do not try to force it into the slot. Press the EJECT (![]() ) button and remove the disc once and then try to reinsert it. (If you try to force the disc, the disc or this unit could be damaged.)
) button and remove the disc once and then try to reinsert it. (If you try to force the disc, the disc or this unit could be damaged.) - When a WAV/DSD disc is loaded and playback is stopped, press the SELECT button to switch between disc and folder modes.


Example of display when audio CD loaded

Examples of display when WAV/DSD disc loaded
Disc mode (playback of entire disk)

Folder mode (playback of selected folder)

- The indicator in the top left corner shows the playback status.
![]() Stopped
Stopped
![]() Playing back
Playing back
![]() Paused
Paused
![]() Searching backward
Searching backward
![]() Searching forward
Searching forward
 Stopped
 Playing back
 Paused
 Searching backward
 Searching forward
- Press the play/pause (
![]() /
/![]() ) button to start playback.
) button to start playback.
Example of display when audio CD loaded
![]()
Example of display when WAV disc loaded
![]()
Example of display when DSD disc loaded
![]()
- A little time is required to load a disc. While a disc is loading, buttons will not function when pressed. Wait until the total number of tracks and total playback time (when an audio CD is loaded) appear before pressing any buttons.
- The unit stops when playback of the last track finishes.
- "No Disc" appears on the display when no disc has been loaded in the disc slot.
- WAV/DSD files that are not in folders are automatically placed in the "ROOT" folder. Playback starts with the first track in the ROOT folder.
- Folders that do not contain any WAV/DSD files are skipped during playback.


Stopping playback
Press the stop ( ) button.

Ejecting a disc
When stopped, press the eject ( ) button.

The disc will be partially ejected. Hold the edges of the disc and pull it out.

Pausing playback
Press the play/pause ( /
/ ) button.

- Press the play/pause (
![]() /
/![]() ) button again to resume playback.
) button again to resume playback.
Searching for part of a track
During playback, press and hold a skip ( /
/ ) button to search backward or forward.

Release the button when you find the part you want.
- If you search forward to the end of the last track, the unit will stop.
- You can also use the search (
![]() /
/![]() ) buttons on the remote control for this.
) buttons on the remote control for this.
Skipping to the desired track
During playback, press a skip (/) button to skip to the previous or next track and start playing it back. Press the button repeatedly until you reach the desired track number.

- When stopped or paused, the unit will stop or pause at the beginning of the selected track. Press the play/ pause (
![]() /
/![]() ) button to start playback.
) button to start playback. - During playback, press
![]() once to return to the beginning of the currently playing track. Press
once to return to the beginning of the currently playing track. Press ![]() repeatedly if you want to play an earlier track.
repeatedly if you want to play an earlier track. - During program playback, these operations will skip to earlier and later tracks in program order.
Playback from a specific track
During playback or when stopped, use the number buttons to enter a track number and start playback from that track.

Examples:
Track number 3:

Track number 15:

Track number 107:

Selecting folders and files
During playback and when stopped, you can search for WAV/DSD folders and tracks that you want to find.
Selecting a folder
Use the FOLDER ( /
/ ) buttons to select the desired folder, and press the SELECT button.

Playback starts from the first track in the selected folder.
- Depending on the folder structure, the order of folders and tracks might not be as expected.
Selecting a track
Use the skip (/) buttons to select the desired track, and press the play/pause (/) button.

Playback starts from the select track.
- When you want to select a track that is inside a folder, you must select the folder first.
- The display of this unit can only show single-byte letters of the alphabet and numbers. If the name of a file uses Japanese, Chinese or other double-byte characters, the file will be playable but the name will not be shown correctly.
- The information displayed depends on the display setting.
If you want to see the file names, press the DISPLAY button to change the information displayed.
Repeat playback
Press the REPEAT button to cycle through the following repeat modes.

Audio CD and disc mode

Folder mode

- Press the stop (
![]() ) button to end repeat mode.
) button to end repeat mode.
 ) button to end repeat mode.
Single track repeat (RP 1)
The currently playing track will play back repeatedly. If you select another track, that track will play back repeatedly.
Example:

- If you select single track repeat when stopped, and then select a track number and start playback, that track will play back repeatedly.
Folder repeat (RP F)
(WAV/DSD discs only)
All the tracks in the currently playing folder will play back repeatedly. If you use the skip (/) buttons to select a different folder, all the tracks in the selected folder will play back repeatedly.
Example:

- If you select folder repeat when stopped, and then select a folder and start playback, all the tracks in that folder will play back repeatedly.
All track repeat (RP A)
All tracks on the disc play back repeatedly.
Example:

- During program playback, the programmed tracks are played back repeatedly.
Shuffle playback
Press the SHUFFLE button to play back the tracks on the disc in random order.

Example:

- During shuffle playback, press the SHUFFLE button to exit shuffle playback (including repeat playback) mode and continue ordinary playback of the playing track.
- When you press the stop (
![]() ) button to stop shuffle playback, shuffle playback (including repeat playback) mode ends.
) button to stop shuffle playback, shuffle playback (including repeat playback) mode ends. - During shuffle playback, press the skip (
![]() ) button to start playback of the next random track. Press the skip (
) button to start playback of the next random track. Press the skip (![]() ) button to return to the beginning of the current track. You cannot return to a track that has previously finished playing during shuffle playback.
) button to return to the beginning of the current track. You cannot return to a track that has previously finished playing during shuffle playback. - When in shuffle playback mode, the number and FOLDER (
![]() /
/![]() ) buttons are disabled.
) buttons are disabled.
 ) button to start playback of the next random track. Press the skip (
 ) button to return to the beginning of the current track. You cannot return to a track that has previously finished playing during shuffle playback.
 /
/ ) buttons are disabled.
Repeat playback
During shuffle playback, press the REPEAT button to cycle through the following shuffle modes.
Audio CD and disc mode

Folder mode

Shuffle repeat playback
The currently playing track will be played back repeatedly.
Example:

Shuffle all repeat playback
Shuffle playback will continue until you press the stop ( ) button.
Example: Audio CD and disc mode

Example: Folder mode

Program playback
You can create a playback program from up to 99 tracks from the same disc.

- Insert a disc before programming.
- When stopped, press the PROGRAM button.
![]()
- When using a WAV/DSD disc, track numbers are shown with three digits.
- You cannot change the program during playback.
- Use the number buttons to select a track.
Example: To program track number 15
![]()
Repeat step 2 until you have programmed all the desired tracks.- If you try to program more than 99 tracks, "P-FULL" appears on the display.
- If you program the wrong track by mistake, press the CLEAR button to remove the last programmed track.
- You cannot program a track number that does not exist on the disc.
- Press the stop (
![]() ) button to clear the entire program.
) button to clear the entire program.
- Press the play/pause (
![]() /
/![]() ) button to start program playback.
) button to start program playback.
![]()
Example:
![]()
- When playback of all programmed tracks completes, playback will stop automatically.


 /
/ ) button to start program playback.

Stopping program playback
Press the stop () button.

- The contents of the program are stored in memory. Press the play/pause (
![]() /
/![]() ) button to start playback of the program again.
) button to start playback of the program again.
Checking the contents of the program
When stopped, press the PROGRAM button repeatedly to cycle through the program numbers and their programmed track numbers.

"P-END" appears on the display when you reached the end of the program.
- To restore the ordinary contents of the display, start and stop program playback.
Repeat playback
During program playback, press the REPEAT button to cycle through the following program playback modes.

Program repeat playback
The currently playing track will be played back repeatedly.
Example:

Program all repeat playback
Program playback will continue until you press the stop () button.
Example:

Clearing part of a program
When stopped, press the PROGRAM button repeatedly until the number of the track that you want to remove appears.

Then, press the CLEAR button to remove that track from the program. The following tracks in the program will be moved forward in program order.
- Repeat the same procedure to remove multiple tracks.
- Press and hold the CLEAR button for three or more seconds to remove all the tracks from the program.
Adding tracks to a program
When stopped, press the PROGRAM button repeatedly until the program number of the track that you want to add a track before appears. Then, use the number buttons to select the track number.

- If you want to add a track at the end of the program, press the PROGRAM button repeatedly until "P-END" appears on the display. Use the number buttons to select the track.
Clearing the entire program
When stopped, press the PROGRAM button and then press the stop () button.

- Using either of the following controls will also clear the entire program.
Eject button (![]() )
)
POWER switch
 )
)Dimmer
You can adjust the brightness of the display.

Press the DIMMER button once to show "DIMMER" on the display. Press it repeatedly to cycle through the following display brightness settings.

- A few seconds after last pressing the DIMMER button, the display will resume showing its usual contents.
Information shown
Changing the information shown on the display
You can change what is shown on the display in the order shown below.

Press the DISPLAY button repeatedly to cycle through the following information.
Audio CD
Example:

WAV/DSD disc
Example:

- The display of this unit can only show single-byte letters and numbers. If the file information uses Japanese, Chinese or other double-byte characters, playback is possible but the name will not be shown correctly.
Pure mode playback
Press the PURE button when playback is stopped or paused to turn pure mode playback ON and OFF.

After pressing the PURE button during playback, the current ON/OFF status will appear for a few seconds before the display resumes showing its usual contents.

During CD/PCM playback
This turns the digital outputs off and allows you to enjoy music with the least possible digital noise generated within the unit.
- In this mode, no audio signals are output from the digital output connectors.
During DSD playback
In this mode, DSD data is sent directly to the digital analog converter without passing through the volume control or ΔΣ converter.
Use this to enjoy the unaltered original DSD audio.
- In pure mode, DSD playback will have an audio output level that is about 3 dB below ordinary playback.
In this mode, the original DSD audio is output as is without passing through the 50 kHz digital filter. Please use care to prevent damage to your speakers.
Troubleshooting
If you experience a problem with this unit, please check the following items before requesting service. If it still does not operate correctly, contact the retailer where you purchased the unit or TEAC customer support (see the back cover for contact information).
The power will not turn on
- Check that the power cord is completely plugged into the power outlet. If the outlet is switched, confirm that the switch is in the ON position.
- Connect a different electrical device to the outlet to confirm that it is supplying power.
No sound is output
- Confirm connections with the amplifier, receiver, and speakers.
- Confirm the operation of the amplifier and receiver.
- In pure mode, no audio signals are output from the digital output connectors.
Remote control does not work
- If the batteries are exhausted, replace both of them with new ones.
- The remote control will not work if there is an obstruction between it and the main unit. Point the remote control toward the main unit and use it within 5 m of the front panel.
A television set or another device operates in error
- Some televisions that are able to receive signals from wireless remote controls might be operated in error by this unit's remote control. If this should occur, turn the other device's power off when using this unit's remote control.
Playback is not possible
- If the disc is upside down, reload it with the labeled side up.
- If the disc is dirty, wipe it clean.
- Discs that do not have any recordings on them or that have not been finalized cannot be played back. Make sure that CD-ROM/R/RW and DVDROM/± R/RW discs that you want to play back have recordings on them and have been finalized.
- Depending on the quality and recording conditions of the disc, some CD-ROM/R/RW and DVDROM/± R/RW discs cannot be played back.
The sound skips
- Vibrations can cause the sound to skip. Install this unit in a stable location.
- If the disc is dirty, wipe it clean.
- Do not play any disc that is warped, deformed or damaged.
Program playback is not possible
- Turning the power off or ejecting the disc will cause the program to be cleared. If you have accidentally cleared the program, you will need to reenter it.
Automatic power saving caused the unit to enter standby
- When in standby mode, press a button on this unit or the remote control to turn the power ON.
Since this unit uses a microcontroller, external noise and other interference can cause the unit to malfunction. If this should occur, unplug the unit's power from the outlet and wait a little while before plugging the power in again and retrying the operation.
Beware of condensation
If the unit is moved from a cold place to a warm place, used immediately after a cold room has been heated or otherwise exposed to a sudden temperature change, condensation could occur. Should this happen, leave the unit off for one or two hours before turning the unit on.
Specifications
CD player
Playable disc types
CD-DA, CD-ROM/R/RW
(ISO9660 Level 1/2/JOLIET formats)
DVD-ROM, DVD±R/RW
(UDF, DVD-ROM-compatible)
- Only 12cm discs can be used
Playable formats
CD-DA: Audio CD (44.1 kHz, 16-bit)
PCM (WAV): 44.1 kHz, 88.2 kHz, 176.4 kHz, 48 kHz, 96 kHz, 192 kHz (16/24-bit)
DSD: 2.8 MHz, 5.6 MHz
CD-DA
Frequency range: 20 Hz–20 kHz (JEITA)
S/N ratio: 116 dB (JEITA)
Distortion: 0.0013% (JEITA)
Dynamic range: 103 dB (JEITA)
PCM (192 kHz/24-bit)
Frequency range: 20 Hz–80 kHz (JEITA)
S/N ratio: 116 dB (JEITA, audible range)
Distortion: 0.0004% (JEITA, audible range)
Dynamic range: 118 dB (JEITA, audible range)
DSD
Frequency range: 20 Hz–80 kHz (JEITA)
S/N ratio: 116 dB (JEITA, audible range)
Distortion: 0.0004% (JEITA, audible range)
Dynamic range: 118 dB (JEITA, audible range)
Output
Analog output jacks (RCA)
- Output impedance: 100 Ω
- Nominal output voltage level: 0.32 Vrms
Digital output connector (COAXIAL)
- Output impedance: 75 Ω
- Output level: 0.5 Vp-p
Digital output connector (OPTICAL)
- The sampling frequency and bit rate used by the digital outputs (COAXIAL and OPTICAL) are the same as for the playback source. During DSD playback or CD/PCM playback in pure mode, however, nothing is output from the digital outputs.
General
Power supply
- Model for Europe: AC 220 - 240 V, 50 Hz
- Model for USA/Canada: AC 120 V, 60 Hz
Power consumption: 11 W
External dimensions: 290 mm × 81.2 mm × 244 mm (11 3/8" x 3 1/4" x 9 5/8)
(W × H × D including protrusions)
Weight: 4.2 kg (9 3/8 lb)
Operating temperature range: +5°C to +35°C
Operating humidity range: 5 - 85% (no condensation)
Storage temperature range: −20°C to +55°C
Included accessories
RCA audio cable × 1
Power cord × 1
Remote control unit (RC-1306) × 1
Batteries for remote control unit (AAA) × 2
Owner's manual (this document) × 1
Warranty card × 1
- Specifications and appearance are subject to change without notice.
- Weight and dimensions are approximate.
- Illustrations in this owner's manual might differ slightly from production models.
IMPORTANT SAFETY PRECAUTIONS

RISK OF ELECTRIC SHOCK
DO NOT OPEN
TO REDUCE THE RISK OF ELECTRIC SHOCK, DO NOT REMOVE COVER (OR BACK). NO USER-SERVICEABLE PARTS INSIDE. REFER SERVICING TO QUALIFIED SERVICE PERSONNEL.
 The lightning flash with arrowhead symbol, within an equilateral triangle, is intended to alert the user to the presence of uninsulated "dangerous voltage" within the product's enclosure that may be of sufficient magnitude to constitute a risk of electric shock to persons.
The exclamation point within an equilateral triangle is intended to alert the user to the presence of important operating and maintenance (servicing) instructions in the literature accompanying the appliance.

TO PREVENT FIRE OR SHOCK HAZARD, DO NOT EXPOSE THIS APPLIANCE TO RAIN OR MOISTURE.
- DO NOT REMOVE THE EXTERNAL CASES OR CABINETS TO EXPOSE THE ELECTRONICS. NO USER SERVICEABLE PARTS ARE INSIDE.
- IF YOU ARE EXPERIENCING PROBLEMS WITH THIS PRODUCT, CONTACT TEAC FOR A SERVICE REFERRAL. DO NOT USE THE PRODUCT UNTIL IT HAS BEEN REPAIRED.
- USE OF CONTROLS OR ADJUSTMENTS OR PERFORMANCE OF PROCEDURES OTHER THAN THOSE SPECIFIED HEREIN MAY RESULT IN HAZARDOUS RADIATION EXPOSURE.
IN USA/CANADA, USE ONLY ON 120 V SUPPLY.
Precautions concerning batteries
Misuse of batteries could cause them to rupture or leak leading to fire, injury or the staining of nearby things. Please read and observe the following precautions carefully.
- Be sure to insert the batteries with correct positive (
![]() ) and negative (
) and negative (![]() ) orientations.
) orientations. - Use batteries of the same type. Never use different types of batteries together.
- If the remote control is not used for a long time (more than a month), remove the batteries to prevent them from leaking.
- If the batteries leak, wipe away the leakage inside the battery compartment and replace the batteries with new ones.
- Do not use batteries of types other than those specified. Do not mix new batteries with old ones or use different types of batteries together.
- Do not heat or disassemble batteries. Never throw batteries into fire or water.
- Do not carry or store batteries with other metallic objects. The batteries could short circuit, leak or explode.
- Never recharge a battery unless it is confirmed to be a rechargeable type.
 ) and negative (
 ) orientations.
IMPORTANT SAFETY INSTRUCTIONS
- Read these instructions.
- Keep these instructions.
- Heed all warnings.
- Follow all instructions.
- Do not use this apparatus near water.
- Clean only with dry cloth.
- Do not block any ventilation openings. Install in accordance with the manufacturer's instructions.
- Do not install near any heat sources such as radiators, heat registers, stoves, or other apparatus (including amplifiers) that produce heat.
- Do not defeat the safety purpose of the polarized or grounding type plug. A polarized plug has two blades with one wider than the other. A grounding type plug has two blades and a third grounding prong. The wide blade or the third prong are provided for your safety. If the provided plug does not fit into your outlet, consult an electrician for replacement of the obsolete outlet.
- Protect the power cord from being walked on or pinched particularly at plugs, convenience receptacles, and the point where they exit from the apparatus.
- Only use attachments/accessories specified by the manufacturer.
- Use only with the cart, stand, tripod, bracket, or table specified by the manufacturer, or sold with the apparatus. When a cart is used, use caution when moving the cart/apparatus combination to avoid injury from tip-over.
- Unplug this apparatus during lightning storms or when unused for long periods of time.
- Refer all servicing to qualified service personnel. Servicing is required when the apparatus has been damaged in any way, such as power-supply cord or plug is damaged, liquid has been spilled or objects have fallen into the apparatus, the apparatus has been exposed to rain or moisture, does not operate normally, or has been dropped.
- The apparatus draws nominal non-operating power from the AC outlet with its POWER or STANDBY/ON switch not in the ON position.
- The mains plug is used as the disconnect device, the disconnect device shall remain readily operable.
- Caution should be taken when using earphones or headphones with the product because excessive sound pressure (volume) from earphones or headphones can cause hearing loss.
- Do not expose this apparatus to drips or splashes.
- Do not place any objects filled with liquids, such as vases, on the apparatus.
- Do not install this apparatus in a confined space such as a book case or similar unit.
- The apparatus should be located close enough to the AC outlet so that you can easily reach the power cord plug at any time.
- If the product uses batteries (including a battery pack or installed batteries), they should not be exposed to sunshine, fire or excessive heat.
![caution]() CAUTION for products that use replaceable lithium batteries: there is danger of explosion if a battery is replaced with an incorrect type of battery. Replace only with the same or equivalent type.
CAUTION for products that use replaceable lithium batteries: there is danger of explosion if a battery is replaced with an incorrect type of battery. Replace only with the same or equivalent type.
 CAUTION for products that use replaceable lithium batteries: there is danger of explosion if a battery is replaced with an incorrect type of battery. Replace only with the same or equivalent type.
Products with Class construction are equipped with a power supply cord that has a grounding plug. The cord of such a product must be plugged into an AC outlet that has a protective grounding connection.
Documents / ResourcesDownload manual
Here you can download full pdf version of manual, it may contain additional safety instructions, warranty information, FCC rules, etc.
Advertisement


Need help?
Do you have a question about the PD-501HR and is the answer not in the manual?
Questions and answers