Table of Contents
Advertisement
NOTES
PC boards shown are viewed from parts side.
●
The parts with no reference number or no parts number in the
●
exploded views are not supplied.
As regards the resistors and capacitors, refer to the circuit diagrams
●
contained in this manual.
£
Parts marked with this sign are safety critical components. They
●
must be replaced with identical components - refer to the appropriate
parts list and ensure exact replacement.
Parts of [ ] mark can be used only with the version designated.
●
[J]:JAPAN [US]:U.S.A. [C]:CANADA [E]:EUROPE [UK]:U.K.
[K]:KOREA
Effective : June, 2003
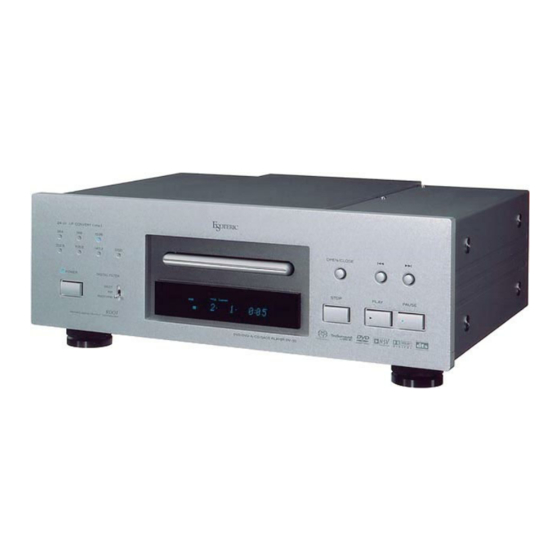
SERVICE MANUAL
D D V V - - 5 5 0 0
DVD/DVD-A/SACD/CD PLAYER
プリント基板図は部品面を示しています。
●
分解図に部番のない部品および品番のない部品は供給できま
●
せん。
標準の抵抗、コンデンサーは省略してあります。
●
回路図を参照してください。
£印は安全重要部品です。
●
交換する時は必ず指定の部品を使用してください。
仕向先
●
[J]:JAPAN [US]:U.S.A. [C]:CANADA [E]:EUROPE [UK]:U.K.
[K]:KOREA
注 意
S-0096A
Advertisement
Table of Contents

Subscribe to Our Youtube Channel
Related Manuals for Teac esoteric DV-50


Summary of Contents for Teac esoteric DV-50
- Page 1 SERVICE MANUAL D D V V - - 5 5 0 0 DVD/DVD-A/SACD/CD PLAYER NOTES 注 意 PC boards shown are viewed from parts side. プリント基板図は部品面を示しています。 ● ● The parts with no reference number or no parts number in the 分解図に部番のない部品および品番のない部品は供給できま ●...
-
Page 2: Table Of Contents
CONTENTS 目 次 1 SPECIFICATIONS 1 仕 様 ・ ・ ・ ・ ・ ・ ・ ・ ・ ・ ・ ・ ・ ・ ・ ・ ・ ・ ・ ・ ・ ・ ・ ・ ・ ・ ・ ・ ・ ・ ・ ・ ・ ・ ・... -
Page 3: Specifications
1 SPECIFICATIONS 仕 様 General AV connector output (Europe/U.K. Model) ....SCART x 2 This connector provides the video and audio signals for connection System ........DVD-Video, DVD-Audio, DVD-R/RW, to a compatible color TV or monitor. Video-CD, SACD, CD and MP3 files Power supply ....AC 120 V, 60 Hz (U.S.A./Canada model) Audio output (Analog Audio) AC 230 V, 50 Hz (Europe/U.K. - Page 4 2ch高品位アナログ音声出力端子 形式 (2チャンネル、RCA1系統+XLR1系統) DVDビデオ、DVDオーディオ、スーパーオーディオCD、CD、 最大出力レベル ビデオCD、DVD-RW、MP3ファイル RCA : 2.2Vrms/47kΩ(フルスケール) XLR : 2.2Vrms/600Ω(フルスケール) 一般 規定出力レベル 電源 ..............100V AC 50-60Hz RCA : 220mVrms/47kΩ(フルスケール−20dB) 消費電力 ..................28W XLR : 220mVrms/600Ω(フルスケール−20dB) 外形寸法(W x H x D) ....442mmx157mmx354mm 質量 ..................21.2kg 2ch高品位アナログ音声出力端子・出力特性(FIRモード時) 許容動作温度 ............+5℃∼+35℃ 周波数特性...
-
Page 5: Block Diagram
2 BLOCK DIAGRAM ブロックダイアグラム −5−... -
Page 6: Adjustment And Setting
3 ADJUSTMENT AND SETTING 調整と設定 3-1 Tray Adjustments 3-1 トレイ調整 1. Pull halfway out the tray by rotating the pulley situated under 1. LOADING MECHANISM ASSY下部のプーリーを回して、 the Loading Mechanism Assy. トレイを半分程引き出す。 2. Turn the two adjust screws (one at left and one at right) for a 2. -
Page 7: Service Mode
3-2 Service Mode 3-2 サービスモード The remote control unit RC-627 (Part Number: E00301900A) リモコンRC-627(品番:E00301900A)の → キーを runs in service mode when pressing 1 2 in order. This mode → 順に押すと、サービスモードとして機能します。このモードは、 is used in this chapter and in "4 TEST MODE". As for key names 本章および... -
Page 8: Id Number And Id Data Setting
• If "No ID DATA" is displayed, the ID data must be entered. • "No ID DATA" と表示される時は、 IDデータの入力が必要です。 Creating ID Data Disc IDデータディスクの作成 Download an image file of ID data disc off the TEAC Service Web TEACサービスWebサイトからIDデータディスクのイメージファ Site and write it to a CD-R using a commercially available writing イルをダウンロードし、市販のライティングソフトを使って、 tool. - Page 9 How to Input the ID Number and ID Data IDナンバーおよびIDデータの入力方法 Be sure to enter the ID number in Stop mode. ● IDナンバー入力は停止中に行ってください。 ● Use the remote control unit RC-627 for operations. Only ● 操作は全てリモコンRC-627で行います。但し、トレイの開 ● opening/closing of the tray are performed from the player. 閉は本体のOPEN/CLOSEボタンで行います。...
- Page 10 5. While the data are being read, the message shown in the 5. データ読み込み中は下記のようなメッセージが画面上に表示 following figure is displayed on the screen. される。 (FL管には "RD ID DATA" と表示される。 ) (The FL display indicates "RD ID DATA") [Player’s ID Data Setting] Loading The ID Data Disc ! 6.
- Page 11 How to Confirm the ID Number IDナンバーの確認方法 1. Press ESC + STEREO with an ID number set, and the unit 1. IDナンバーが設定されている状態でESC + STEREOキーを enters the ID number confirmation mode. 押すとIDナンバー確認モードに入る。 2. The set ID number is displayed on the screen (and on the FL 2.
-
Page 12: Region Setting (Only For Eur And Kor)
3-4. Region Setting (only for EUR and KOR) 3-4 リージョン設定(EUR, KORのみ) 1. Hold down the STOP button on the main unit and press the 1. 本体のSTOPボタンを押しながらPOWERボタンを押す。 POWER button. 2. リモコンRC-627の → キーを順に押して、サービスモ 2. Press 1 2 in order on the remote control unit RC-627 to ードにする。... -
Page 13: Test Mode
4 TEST MODE テストモード 4-1 Test Mode Screen Display 4-1 テストモード表示仕様 When the test mode is entered, press the ESC key and the TEST 本機をテストモードに入れるには、リモコンRC-627(7ページ key in order of the remote control unit RC-627 (refer to page 7). 参照)のESC → TESTキーを順に押してください。 Screen Composition Character in bold : Item name Remote control code... - Page 14 (3) Key code indication for the main unit [K−**] ( 3 ) 本体キーコード表示 [K−**] * The code for the key pressed on the main unit, which is シスコンが受けている本体スイッチのキーコードを、押し received by the system controller, is displayed while the key ている期間表示する。 is pressed. 右の数字はFLコンからのキーナンバー...
- Page 15 (14) 1 Disk sensing (14) ①ディスク判別 [DSCー***] [DSCー***] The type of discs loaded is displayed. セットしたディスクの種別を表示する [DVD],[CD ],[CDV],[VCD],[ [DVD] [CD ] [VCD] 2 CD 1/3 beam switch ②CD1/3ビーム切替え [BMー**] [BMー**] (15) 1 Equalizer value (15) ①イコライザ値 [Eー**] [Eー**] 2 Jitter value ②ジッター値 [Jー**] [Jー**] Make the jitter four times, and renew it in every 0.5 ジッター値を4倍し、0.5秒毎に更新...
-
Page 16: Self-Diagnostic Function Of Pickup Defective
4-2 Self-Diagnostic Function of Pickup Defective 4-2 ピックアップ不良自己診断機能 This unit can confirm the laser diode current value (DVD: 650nm, 本機はテストモード画面でピックアップのレーザーダイオード電 CD: 780nm) of pickup on the Test Mode screen. 流値 (DVD:650nm, CD:780nm) をそれぞれ確認すること (Press the ESC TEST keys in order on the remote control unit ができます。... -
Page 17: Debugging Screen Specification For The Mechanism Controller
4-3 Debugging Screen Specification for the 4-3 メカコン用デバッグ画面仕様 Mechanism Controller この仕様は予告なく変更されることがあります。 ● This specifications is subject to change without notice. ● Indication Method of the Mechanism Controller Debugging メカコンデバッグ画面の表示方法 Screen メカコンのデバッグ画面を表示するには、リモコンRC-627 ● A debugging screen of the mechanism controller is indicated のESC →... - Page 18 6. Processing step of inside mode of 5 5の内部モードの処理ステップ It can grasp the mode reaching an error and transition of step 5と6を見ることにより、エラーに至るまでのモードとステ by watching 5 and 6 and it can specify the occurrence place ップの遷移を把握することができ、ほとんどの場合、エラ of most errors. ーの発生場所を特定することができる。 7. Disk information in the mechanism controller メカコン内のディスク情報...
- Page 19 17. Focus balance setting value of L0 17. L0のフォーカスバランス設定値 18. Focus balance setting value of L1 18. L1のフォーカスバランス設定値 19. Current mechanism controller inside mode 19. 現在のメカコン内部モード(本機では対応していません) (it does not support in this unit) 最大10モードまで表示できる。モードのネストの分だけ表 It can indicate to a maximum 10 modes. Indicate only a nest 示する。...
- Page 20 28. It indicates the frequency that entered the tracking overrun 28. トラッキング暴走バックアップに入った回数 backup 16進表示。カウンタは電源を入れてから電源を切るまでリ Hexadecimal number indication. Counter does not reset till セットしない。1バイトカウンタなので、FFの次は00にな turns the power off after turning it on. Due to a 1 byte る。 counter, next of FF becomes 00. 29.
-
Page 21: Error Code
4-4 Error Code Error codes that are displayed on the FL display without using the remote control unit FL Display Possible causes Operation of the unit The sound may not out AV1 VER AV-1 chip is not a match with the program of system controller with the specific audio. - Page 22 Description Operation Causes if with a DVD Causes if with a CD of Error of the Unit Adjusts focus at the innermost circumference and tries to return to its position where the error 33 No FOK pulse during was generated (for 3 When the focus was deviated continuously 20 times.
- Page 23 Description Operation Causes if with a DVD Causes if with a CD of Error of the Unit Auto sequence ABUSY did not return within 200 mS after the timeout of Stop ADJMIR (modulation factor measurement) modulation factor command was sent. measurement Auto sequence ABUSY did not return within 2 seconds after the...
- Page 24 Description Causes if with a DVD Causes if with a CD Operation of the Unit of Error The tray switch that had been Open mode was forcibly changed to a mode other than F5 Tray being pushed Closes Open by an external force. Reverses the loading Loading, unloading or clamping could not be completed within a specified time (about F8 Loading timeout...
- Page 25 4-4 エラー表示 リ モ コ ン 操 作 を し な く て も に 表 示 さ れ る も の 表 示 考 え ら れ る 原 因 処 理 特 定 オ ー デ ィ オ で...
- Page 26 エ ラ ー 概 要 で の 発 生 条 件 で の 発 生 条 件 処 理 収 束 タ イ ム ア ウ ピ ー ク 検 出 中 に が 収 束 し な か っ た...
- Page 27 エ ラ ー 概 要 で の 発 生 条 件 で の 発 生 条 件 処 理 ト レ ー ス 中 に D I が 秒 以 上 が 読 め な い ス ト ッ プ 読...
-
Page 28: Disassembling And Reassembling
5 DISASSEMBLING AND REASSEMBLING 分解と組立 Disassembly of the Traverse Mechanism Assy トラバースメカの外し方 1. Remove the LOADING MECHANISM ASSY. 1. LOADING MECHANISM ASSYを外す。 2. Remove the MECHA HOUSING. 2. MECHA HOUSINGを外す。 3. Pull out the Tray and remove it while unhooking a Hook. 3. - Page 29 5. Remove the DVDM PCB ASSY. 5. DVDM PCB ASSYを外す。 6. Remove the MECHA HOLDER. 6. MECHA HOLDERを外す。 7. Remove a screw. 7. ネジを外す。 Screw is locked with Silicone adhesive. ネジはボンドロックされています。 Please lock it with Silicone adhesive when installs it. 取付ける時もボンドロックしてください。...
- Page 30 Styling the Pickup Flexible Cable ピックアップフレキのスタイリング 1. Fold a edge of lining part of the Pickup Flexible Cable. ピックアップフレキの裏打ち部分の端を折る 2. Insert the Pickup Flexible Cable in connector, and lock it surely. ピックアップフレキをコネクターに挿入して確実にロックする Pickup Assy Bottom View 導電面 Conducting plane FFC Holder Caution: Move the Pickup to the innermost of the disc.
-
Page 31: Exploded Views And Parts List
6 EXPLODED VIEWS AND PARTS LIST 分解図とパーツリスト EXPLODED VIEW-1 −31−... - Page 32 COVER,R SIDE C BLK [US,C,E,UK] 1- 7 M01539100A HOLDER,HOUSING(B) 1- 8 M01538900A PLATE,HOUSING 1- 9 M01538800B HOUSING,MECHA 1-10 M00140510A NAMEPLATE,ESOTERIC B [J,US,C,K] 5801413200 NAMEPLATE,TEAC [E,UK] 1-11 B00132000A SCREW,ADJUST 1-12 V00112000A MECHANISM ASSY,LOADING 1-13 M01487200A PANEL ASSY,TRAY 1-14 V00116001A TRAY,PAINT 1-15...
- Page 33 EXPLODED VIEW-1 REF.NO. PARTS NO. DESCRIPTION REMARKS 1-51 5801532510 SCREW,HEXAGON 3X8SILVER [J,K] 5801539500 SCREW,HEXAGON 3X8BLACK [US,C,E,UK] 1-52 B00132600A SCREW,VPB 3X8FZC 1-53 5780003004 SCREW,BPA 3X4FZC 1-54 5781703008 SCREW,HEXAGON M3X8(NI) 1-55 5783682010 SCREW,PPP 2X10NI 1-56 M01559000A PLAIN WSHR,2.2X5X0.3FNI 1-57 5781703006 SCREW,HEXAGON M3X6(NI) 1-58 5780003018 SCREW,BPA 3X18FZC...
- Page 34 EXPLODED VIEW-2 −34−...
- Page 35 EXPLODED VIEW-2 REF.NO. PARTS NO. DESCRIPTION REMARKS 2- 1 M01480000A REAR PANEL [J] M01480020A REAR PANEL [US,C] M01480050A REAR PANEL [E,UK] M01480004A REAR PANEL [K] 2- 2 E95150000A PCB ASSY,INLET 2- 3 E00768700A TERMINAL,GND D12 2- 4 M01480700A HEATSINK 2- 5 M01539400A SHIELD COVER 2- 6...
- Page 36 EXPLODED VIEW-3 Note : Refer to "■ Application of Lubricant". Note : "■ 潤滑材塗布位置" 参照 Refer to "■ Application of Lubricant". "■ 潤滑材塗布位置" 参照 FLOIL GYA1001 Parts No. V0011990 SANKOL CFD-5010Z 1Kg Parts No. A0004790 SANKOL CFD-5010Z To DVDM CN101 FLOIL GYA1001 FLOIL...
- Page 37 Application of Lubricant 潤滑材塗布位置 FLOIL GYA1001 Around the shaft 軸全周 No. 11 Loading Base FLOIL GYA1001 FLOIL GYA1001 No. 13 FLOIL Drive Cam GYA1001 No. 13 Top View Drive Cam Rear View Inner side of a ditch Inner side of a ditch 溝内側面...
-
Page 38: Pc Boards And Parts List
7 PC BOARDS AND PARTS LIST 基板図とパーツリスト DVDM PCB (SIDE A) −38−... - Page 39 DVDM PCB (SIDE B) −39−...
-
Page 40: Main Pcb
MAIN PCB (SIDE A) This PCB is a four-layered board. −40−... - Page 41 MAIN PCB (SIDE B) This PCB is a four-layered board. −41−...
-
Page 42: Dac Pcb
DAC PCB This PCB is a four-layered board. SCART PCB −42−... -
Page 43: Front Pcb
FRONT PCB LED PCB V UP PCB TOGGLE PCB −43−... -
Page 44: Power Pcb
POWER PCB REG PCB INLET PCB OUTPUT PCB PSW PCB −44−... -
Page 45: Main Pcb Assy
MAIN PCB ASSY [J,US,C,K] MAIN PCB ASSY [J,US,C,K] REF.NO. PARTS NO. DESCRIPTION REF.NO. PARTS NO. DESCRIPTION E95150200B PCB ASSY,MAIN [J,US,C,K] P2204 5336249600 CONN PLUG,B06B-PH-K-S W E90150200B PCB,MAIN P2205 5336249800 CONN PLUG,B08B-PH-K-S W £ C421,C440 5260467210 CE,4700UF 16V M AU Q421 13427500 TR,2SC2412KS C442... - Page 46 MAIN PCB ASSY [J,US,C,K] MAIN PCB ASSY [E,UK] REF.NO. PARTS NO. DESCRIPTION REF.NO. PARTS NO. DESCRIPTION £ U422 13447943 IC,NJM78M05FA D721-D728 S0022094 DIODE,1SS355 U441 S0048684 IC,CS4392-KSR F706-F708 E0079440 FILTER,TH287LSKS-15952 U442 5220450400 IC,NJM5532M-T2 F721-F723 E0075210 FILTER,TH287LSJS-15981 U501,U551 S0048684 IC,CS4392-KSR J701 E0074620 JACK,YKC21-4432 U502,U552 5220450400...
-
Page 47: Dac Pcb Assy
MAIN PCB ASSY [E,UK] MAIN PCB ASSY [E,UK] REF.NO. PARTS NO. DESCRIPTION REF.NO. PARTS NO. DESCRIPTION R669 R0112274 RN,1/16W 560 OHM D U1505 S0048744 IC,SN74AHC2G157HDCTR R672,R676 R0112274 RN,1/16W 560 OHM D U2403 S0048863 IC,CXD2753 R674,R678 R0112294 RN,1/16W 680 OHM D U2404 S0048783 IC,IC42S16100-7T... - Page 48 DAC PCB ASSY [J] DAC PCB ASSY [US,C,E,UK,K] REF.NO. PARTS NO. DESCRIPTION REF.NO. PARTS NO. DESCRIPTION Q3001 S0022044 TR,DTC114EUA-T106 5780202606 SCREW,FLAT M2.6X6 Q3002 S0047644 TR,DTB113EK-T146 C3002 5260531420 CE, 100UF 20V M SA Q3101,Q3102 5232255620 TR,DTC114ESA C3005,C3007 C0040520 CE,1000UF 6.3V M MV-AX Q3201,Q3202 5232255620 TR,DTC114ESA...
-
Page 49: Front Pcb Assy
DAC PCB ASSY [US,C,E,UK,K] FRONT PCB ASSY Part of GATHER A PCB ASSY REF.NO. PARTS NO. DESCRIPTION REF.NO. PARTS NO. DESCRIPTION U3002,U3003 £ S0038210 IC,NJM317F E95149400A PCB ASSY,FRONT [J] U3004 S0048824 IC,SN74HC153ANSR E95149420A PCB ASSY,FRONT [US,C] U3005 S0048814 IC,SN74LV163ANSR E95149450A PCB ASSY,FRONT [E,UK] U3006 5220123500... -
Page 50: Power Pcb Assy
POWER PCB ASSY REG PCB ASSY Part of GATHER B PCB ASSY Part of GATHER B PCB ASSY REF.NO. PARTS NO. DESCRIPTION REF.NO. PARTS NO. DESCRIPTION E95150100A PCB ASSY,POWER E95149900A PCB ASSY,REG E90150100B PCB,POWER E90149900A PCB,REG £ M00350800A HEATSINK,OSH-2435-SPL 5224016420 DIODE,S5688G B00132901A SCREW,VPC 3X8FZC... -
Page 51: Included Accessories
8 INCLUDED ACCESSORIES 付属品 INCLUDED ACCESSORIES REF.NO. PARTS NO. DESCRIPTION REMARKS D00692300B OWNER'S MANUAL,J [J] D00742000A OWNER'S MANUAL,E/F/S [US,C,K] D00727800A OWNER'S MANUAL,E/F/S [E,UK] D00727900A OWNER'S MANUAL,G/I/N [E] E00781800A REMOTE CONTROL UNIT,RC-884 [J,K] E00813800A REMOTE CONTROL UNIT,RC-908 [US,C] E00781801A REMOTE CONTROL UNIT,RC-887 [E,UK] 5347006900 BATTERY,UM-3 [J] 5347007000...
Need help?
Do you have a question about the esoteric DV-50 and is the answer not in the manual?
Questions and answers