Advertisement
Quick Start Guide for Tempo RAID133
You Should Have
The following items should be included in your product package:
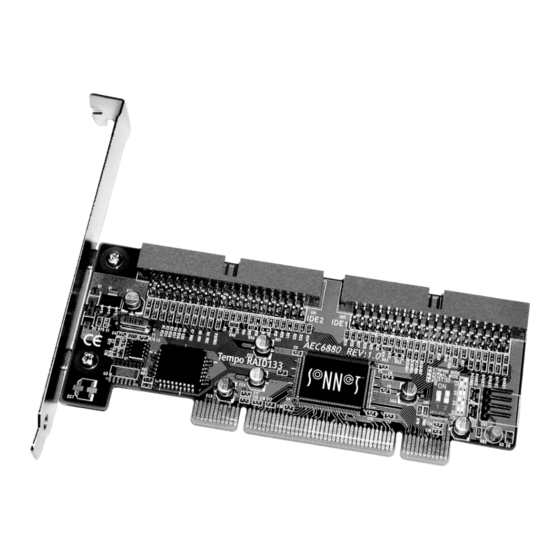
• One Tempo RAID133 PCI Macintosh ATA Hardware RAID Controller
• Two Ultra ATA cables
• Eight screws (for mounting hard drives)
• One power cable Y-adapter
The following items may be required for installation:
• Medium Phillips screwdriver
• Small fl at blade screwdriver
• Needle nose pliers
• Drive mounting brackets/carriers or drive mounting sleds (sold
separately)
• Additional power cable Y-adapters
System Requirements
The Tempo RAID133 requires the following in order to operate
in your system:
• One available PCI slot
• Two or four hard drives (depending on confi guration)
• Two or four available hard drive bays (depending on
confi guration)
• Mac OS 8.5 or higher (through Mac OS X Version 10.3.x)
For up-to-date information on Mac OS compatibility, please check our web site.
.
Support Notes:
We recommend you make a backup of important
information on your system's current hard drive(s) prior to installing new
hardware or software.
When handling computer products, you must take care to prevent components
from being damaged by static electricity. Before opening your computer or
removing parts from their packages, always ground yourself first by touching a
metal part of the computer, such as a port access cover, and work in an area free
of static electricity; avoid carpeted areas. Handle the Tempo RAID133 only by its
edges, and avoid touching connector traces and component pins on PCI cards,
hard drives, and other electronic devices.
Remember to register your product online at http://registration.sonnettech.com to be informed of future upgrades and product releases.
Software updates and links are available from the Sonnet web site at www.sonnettech.com. • Online support form available at http://supportform.sonnettech.com.
Sonnet Technologies Customer Service hours are Mon.-Fri., 7 a.m.–5 p.m. Pacific Time • Customer Service Phone: 1-949-472-2772 • E-mail: support@sonnettech.com
Sonnet Technologies, Inc., California 92618-2808 USA • Tel: 1-949-587-3500 Fax: 1-949-457-6350
©2002 Sonnet Technologies, Inc. Revised 2003. All rights reserved. Sonnet, the Sonnet logotype, Simply Fast, the Simply Fast logotype, and Tempo are trademarks of Sonnet Technologies, Inc. Macintosh and Mac are trademarks
of Apple Computer, Inc., registered in the United States and other countries. Other product names are trademarks of their respective owners. Product specifications subject to change without notice. Printed in the USA.
QSG-TAT133R-E-B-123103
Advertisement
Table of Contents

Related Manuals for Sonnet TEMPO RAID133


Summary of Contents for Sonnet TEMPO RAID133
-
Page 1: System Requirements
Sonnet Technologies, Inc., California 92618-2808 USA • Tel: 1-949-587-3500 Fax: 1-949-457-6350 ©2002 Sonnet Technologies, Inc. Revised 2003. All rights reserved. Sonnet, the Sonnet logotype, Simply Fast, the Simply Fast logotype, and Tempo are trademarks of Sonnet Technologies, Inc. Macintosh and Mac are trademarks of Apple Computer, Inc., registered in the United States and other countries. - Page 2 Quick Start Guide for Tempo RAID133 Installation Preparation 40-pin/80-wire Ultra ATA cable Prior to installing the Tempo RAID133 and hard drives into your sys- connects to tem, you should familiarize yourself with the parts you will install. Tempo RAID133 1. Identify the connectors on one of the included Ultra ATA cables as shown in Figure 1;...
- Page 3 Otherwise, connect additional Y-adapters (sold separately) as necessary to power all four hard drives. Verify the connectors are plugged in securely. 7. Remove the Tempo RAID133 card from its packaging. 8. Locate an available PCI slot close to the drive bays inside your normal...
- Page 4 3. Shut down the computer. Figure 8 4. Move DIP switch 2 on the Tempo RAID133 to ON to select the striping mode (Figure 8). 5. If you removed the card to move the DIP switches, verify the card is seated fi rmly in the slot.
- Page 5 Drive Formatting: Mac OS X This section describes the process of formatting (initializing) hard drives connected to the Tempo RAID133 using Disk Utility under Mac OS X Version 10.3; the process under Version 10.2 (and 10.1) is very similar. The drive formatting utility is located in the Utilities folder (within the Applications folder) on your Mac OS X volume.
- Page 6 Quick Start Guide for Tempo RAID133 3. If you have not already done so, open Disk Utility (Figure 12). Note that all attached drives appear in the Information window, regardless of being formatted or not. Support Note: IDE hard drives attached to the Tempo RAID133 will register as a SCSI devices to the computer.
- Page 7 Quick Start Guide for Tempo RAID133 8. Move DIP switch 2 on the Tempo RAID133 to ON to select the striping mode (Figure 15). Tempo RAID133 Macintosh ATA Hardware RAID Controller 9. If you removed the card to move the DIP switches, verify the card is seated fi...
- Page 8 Quick Start Guide for Tempo RAID133 17. When the Warning window appears, click the Partition button (Figure 18). If necessary, repeat steps 14–16 to partition another volume connected to the Tempo RAID133. Close Disk Utility; your drives are ready to use. Figure 18...
Need help?
Do you have a question about the TEMPO RAID133 and is the answer not in the manual?
Questions and answers