Advertisement
Table of Contents
(540) 427-3900
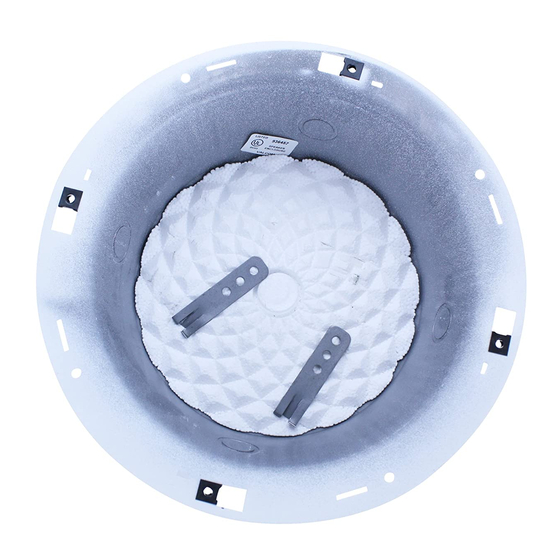
V-9914/V-9915/V-9918 ASSEMBLY & INSTALLATION
Mount plaster ring to studs 16" center then cut 10" hole through paste board.
V-9918 plaster ring is compatible only with V-1021C Ceiling Speaker.
(4 white screws provided)
1
Issue 8
Tinerman
Nuts (4)
V-9918
Plaster Ring
V-9915 Backbox
(4 #10 sheet metal
screws provided)
Ceiling Grille
and Speaker
948005
Advertisement
Table of Contents

Related Manuals for Valcom V-9914


Summary of Contents for Valcom V-9914
- Page 1 Issue 8 (540) 427-3900 V-9914/V-9915/V-9918 ASSEMBLY & INSTALLATION Tinerman Nuts (4) V-9918 Plaster Ring V-9915 Backbox (4 #10 sheet metal screws provided) Ceiling Grille and Speaker (4 white screws provided) Mount plaster ring to studs 16" center then cut 10" hole through paste board.
- Page 2 948005...
-
Page 3: Technical Assistance
(Major repairs will be subject to additional charges for parts and labor). This warranty is in lieu of and excludes all other warranties, expressed or implied, and in no event shall Valcom, Inc. be liable for any anticipated profits, consequential damages, loss of time or other losses incurred by the buyer in connection with the purchase, operation or use of the product.
Need help?
Do you have a question about the V-9914 and is the answer not in the manual?
Questions and answers