Table of Contents
Advertisement
Advertisement
Table of Contents

Related Manuals for Triumph Adler LP 4022


Summary of Contents for Triumph Adler LP 4022
- Page 1 Instruction Handbook LP 4022 Laser Printer b/w...
-
Page 3: Table Of Contents
Contents Machine Parts ..........1 Indicators . - Page 4 OPERATION GUIDE...
-
Page 5: Legal And Safety Information
Legal and Safety Information CAUTION: No liability is assumed for any damage caused by improper installation. Notice on Software Software used with this printer must support the printer's emulation mode. The printer is factory-set to emulate the PCL. Notice The information in this guide is subject to change without notification. Additional pages may be inserted in future editions. - Page 6 This product was developed using the Tornado™ Real Time Operating System and Tools from Wind River Systems. ® This product contains UFST™ and MicroType from Monotype Imaging Inc. License Agreements IBM Program License Agreement THE DEVICE YOU HAVE PURCHASED CONTAINS ONE OR MORE SOFTWARE PROGRAMS (“PROGRAMS”) WHICH BELONG TO INTERNATIONAL BUSINESS MACHINES CORPORATION (“IBM”).
- Page 7 THERE ARE NO OTHER WARRANTIES COVERING THE PROGRAMS (OR CONDITIONS), EXPRESS OR IMPLIED, INCLUDING, BUT NOT LIMITED TO, THE IMPLIED WARRANTIES OF MERCHANTABILITY AND FITNESS FOR A PARTICULAR PURPOSE. Some jurisdictions do not allow the exclusion of implied warranties, so the above exclusion may not apply to you.
- Page 8 Monotype Imaging License Agreement “Software” shall mean the digitally encoded, machine readable, scalable outline data as encoded in a special format as well as the UFST Software. You agree to accept a non-exclusive license to use the Software to reproduce and display weights, styles and versions of letters, numerals, characters and symbols (“Typefaces”) solely for your own customary business or personal purposes at the address stated on the registration card you return to Monotype Imaging KK.
-
Page 9: Interface Connectors
replacement of defective parts, upon their return to Monotype Imaging KK. IN NO EVENT WILL MONOTYPE IMAGING KK BE LIABLE FOR LOST PROFITS, LOST DATA, OR ANY OTHER INCIDENTAL OR CONSEQUENTIAL DAMAGES, OR ANY DAMAGES CAUSED BY ABUSE OR MISAPPLICATION OF THE SOFTWARE AND TYPEFACES. -
Page 10: Safety Information
Safety information Laser safety This printer is certified as a Class 1 laser product under the U.S. Department of Health and Human Services (DHHS) Radiation Performance Standard according to Radiation Control for Health and Safety Act of 1968. This means that the printer does not produce hazardous laser radiation. -
Page 11: Caution Labels
DANGER: INVISIBLE LASER RADIATION WHEN OPEN. AVOID DIRECT EXPOSURE TO BEAM. CAUTION: Use of controls or adjustments or performance of procedures other than those specified herein may result in hazardous radiation exposure. Caution Labels The printer bears any of the following labels. Label inside the machine (Laser radiation warning) Label inside the rear... -
Page 12: Energy Star Program
Energy Star Program As an E Partner, we have determined that this product meets NERGY the E guidelines for energy efficiency. NERGY The basic objective of the E Program is to reduce environmental NERGY pollution by encouraging the manufacture and sale of equipment that uses energy more efficiently. - Page 13 Please read this Operation Guide before using the machine. Keep it close to the machine for easy reference. The sections of this guide and parts of the machine marked with symbols are safety warnings meant to protect the user, other individuals and surrounding objects, and ensure correct and safe usage of the machine.
-
Page 14: Installation Precautions
The following symbols indicate that the related section includes information on prohibited actions. Specifics of the prohibited action are indicated inside the symbol..[Warning of prohibited action] ..[Disassembly prohibited] The following symbols indicate that the related section includes information on actions which must be performed. -
Page 15: Other Precautions
Avoid locations near radiators, heaters, or other heat sources, or locations near flammable items, to avoid the danger of fire. To keep the machine cool and facilitate changing of parts and maintenance, allow access space as shown below. Leave adequate space, especially around the vents, to allow air to be properly ventilated out of the machine. - Page 16 Power Supply/Grounding the Machine WARNING: Do not use a power supply with a voltage other than that specified. Avoid multiple connections in the same outlet. These types of situations present a danger of fire or electrical shock. Plug the power cord securely into the outlet. If metallic objects come in contact with the prongs on the plug, it may cause a fire or electric shock.
-
Page 17: Precautions For Use
Precautions for Use Cautions when Using the Machine WARNING: Do not place metallic objects or containers with water (flower vases, flower pots, cups, etc.) on or near the machine. This situation presents a danger of fire or electrical shock should they fall inside. - Page 18 CAUTION Do not pull the power cord when removing it from the outlet. If the power cord is pulled, the wires may become broken and there is a danger of fire or electrical shock. (Always grasp the power plug when removing the power cord from the outlet.) Always remove the power plug from the outlet when moving the machine.
- Page 19 CAUTION Use of controls or adjustments or performance of procedures other than those specified herein may result in hazardous radiation exposure. Cautions when Handling Consumables CAUTION Do not attempt to incinerate the Toner Container. Dangerous sparks may cause burns. Keep the Toner Container out of the reach of children. If toner happens to spill from the Toner Container, avoid inhalation and ingestion, as well as contact with your eyes and skin.
- Page 20 About the Operation Guide This Operation Guide has the following chapters: Chapter 1 - Machine Parts This chapter explains the names of parts. Chapter 2 - Loading Paper This chapter explains on loading paper. Chapter 3 - Connecting and Printing This chapter explains on setting the printer up ready for use, and how to print from your workstation.
- Page 21 Conventions This manual uses the following conventions Convention Description Example Italic Typeface References to additional Refer to page 12 for information. information. Bold Typeface Used to emphasize a key word Push firmly on the top of the container at phrase. the positions marked PUSH HERE, until you hear a click.
- Page 22 xxii OPERATION GUIDE...
-
Page 23: Machine Parts
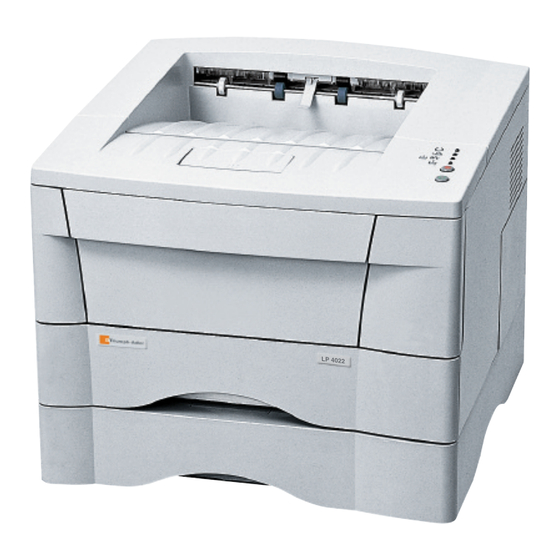
1 Machine Parts Paper Stopper Output Tray Option Interface Power Top Cover Rear Cover Slot Cover Switch MP Tray Power Cord Side Cover USB Interface Connector Connector Cassette Front Cover Parallel Interface Connector Operation Panel Ready Indicator Data Indicator Attention Indicator Toner Indicator Cancel Key GO Key... -
Page 24: Indicators
Machine Parts Indicators There are four indicators located on the top right of the printer. The indicators are used to identify the status of the printer at any time. To identify the printer status, check the indicators on the printer and then refer to the table below. -
Page 25: Keys
Machine Parts Keys Refer to the following table for the name and description of the basic functions of each key. Status Operation Function Cancel Press for 1 second or more Cancels the data from the PC At Ready Press momentarily Switches On-line / Off-line Press for 3 to 10 seconds Prints the status page... - Page 26 Machine Parts OPERATION GUIDE...
-
Page 27: Loading Paper
2 Loading Paper MP Tray 50 sheets (80 g/m 60 to 163 g/m A4, B5 (JIS), A5, Folio, Legal, Letter, Oficio II, Statement, Executive, A6, B6, B5 (ISO), Envelope C5, Envelope #10, Envelope #9, Envelope #6, Envelope Monarch, Envelope DL, 16K, Other 70 ×... -
Page 28: Preparing The Paper
Loading Paper Preparing the Paper After removing paper from the packaging, fan through the sheets to separate them prior to loading. If using paper that has been folded or is curled, straighten it prior to loading. Failure to do so may result in a paper jam. - Page 29 If using Folio or Oficio II paper, remove the green stopper (1) from the paper length guide and fix into position on the paper length guide (2). Pull the paper length guide towards the rear until it stops. Load the paper in the cassette. IMPORTANT: Always adjust the paper length and width guides before loading paper to avoid...
-
Page 30: Mp Tray
Loading Paper MP Tray Paper placed on the MP tray is automatically fed and overrides the cassette. Open the MP tray towards you until it stops. Pull out the subtray and unfold the flap. Adjust the paper width guides and slide the paper into the tray as far as it will go. - Page 31 Loading Paper After use, close the flap on the subtray, then push in the subtray and close the MP tray. NOTE: Be careful not to push the tray back into the printer with the subtray folded out horizontally as shown in the figure.
- Page 32 Loading Paper OPERATION GUIDE...
-
Page 33: Connecting And Printing
3 Connecting and Printing Power Switch USB Interface Connector Power Cord Parallel Interface Connector Connector Connections Connecting the USB Cable Connect the USB cable (not included) to the USB Interface Connector. NOTE: Use a USB cable with a rectangular Type A plug and a square Type B plug. -
Page 34: Connecting The Parallel Cable
Connecting and Printing Connecting the Parallel Cable Connect the printer cable (not included) to the Parallel Interface Connector. NOTE: Use a parallel printer cable that complies with IEEE 1284 standards. For optimum performance, install the printer close to the computer. The connection cable should be shielded and no longer than 3 meters long. -
Page 35: Loading Software
Press the Power Switch to On ( | ). The printer begins to warm up. IMPORTANT: If you install the toner container and switch on the power, after a moment the indicators light in sequence from top to bottom. When the printer is first switched on after toner installation, there will be a delay of approximately 15 minutes before the printer gets ready to print. -
Page 36: Printing
From the application File menu, select Print. The Print dialog box displays. Select the drop down list of printer names. All the printers installed are listed. Select the LP 4022. Select the options required, enter the number of copies required and if printing more than one set, select Collate. -
Page 37: Maintenance
4 Maintenance Cleaning Tasks The printer should be cleaned on a regular basis to ensure optimum performance. Use a clean, lint free cloth to clean dust and dirt from the printer. Process Unit The process unit should be removed to allow for printer cleaning tasks. -
Page 38: Toner Container
Maintenance Toner Container To replace the toner container use the instructions below. CAUTION: Do not attempt to incinerate the toner container. Dangerous sparks may cause burns. Do not attempt to force open or destroy the toner container. Open the top cover. Turn lock lever A to the unlock position, push lock lever B to the right and pull out the toner... - Page 39 Install the new toner container in the printer. Push firmly on the top of the container at the positions marked PUSH HERE, until you hear a click. Turn lock lever A to the lock position and close the top cover. OPERATION GUIDE...
-
Page 40: Cleaning The Printer
Maintenance Cleaning the Printer To avoid print quality problems, the interior of the printer must be cleaned with every toner container replacement. Open the top cover and front cover. Lift the process unit together with the toner container out of the printer. - Page 41 Maintenance Use a clean, lint free cloth to clean dust and dirt away from the metal registration roller (1). IMPORTANT: Take care not to touch the transfer roller (2) during cleaning. Slide the charger cleaner (green) back and forth 2 or 3 times to clean the charger wire, then return it to its original position (CLEANER HOME POSITION...
-
Page 42: Prolonged Non-Use And Moving The Printer
Maintenance Prolonged Non-Use and Moving the Printer Prolonged Non-use If you ever leave the printer unused for a long period of time, remove the power cord from the wall outlet. We recommend you consult with your dealer about the additional actions you should take to avoid possible damage that may occur when the printer is used next time. -
Page 43: Troubleshooting
5 Troubleshooting General Guidelines The table below provides basic solutions for problems you may encounter with the printer. We suggest you consult this table to troubleshoot the problems before calling for service. Symptom Check Items Corrective Action The printer will not print Check the indicator. -
Page 44: Print Quality Problems
Troubleshooting Print Quality Problems The table below describes potential print quality problems and the corrective action for each problem. Printed Results Corrective Action All black pages Contact your service technician. Dropouts, horizontal streaks or Clean the charger wire, refer to page stray dots 18 for information. -
Page 45: Output Tray And Rear Cover
Output Tray and Rear Cover If paper is not completely ejected into the output tray, open the rear cover and remove the jammed paper by pulling it out. Open and close the top cover to clear the error. The printer warms up and resumes printing. Cassette Pull out the cassette. - Page 46 Troubleshooting Open the top cover and front cover. Lift the process unit together with the toner container out of the printer. NOTE: The drum in process unit is sensitive to light. Never expose the process unit to light for more than five minutes. If the jammed paper appears to be pinched by rollers, pull it along the normal running direction of the...
- Page 47 Troubleshooting Insert the process unit together with the toner container, back into the machine. Close the front cover and top cover. Reload the MP tray. The printer warms up and resumes printing. Duplexer When a paper jam occurs in the duplex section, clear it using the following procedure.
- Page 48 Troubleshooting Open the duplexer’s rear cover and remove any jammed paper. Open the duplexer’s front cover and remove any jammed paper. Insert the cassette into the slot in the printer. Open and close the printer’s top cover to clear the error. The printer then automatically warms up and resumes printing.
- Page 49 Troubleshooting Lift the process unit together with the toner container out of the printer. NOTE: The drum in process unit is sensitive to light. Never expose the process unit to light for more than five minutes. If the jammed paper appears to be pinched by rollers, pull it along the normal running direction of the paper.
- Page 50 Troubleshooting OPERATION GUIDE...
-
Page 51: Options
6 Options The LP 4022 printer has the following options available to satisfy your printing requirements. For instructions on installing individual options, refer to the documentation included with the option. Some options are explained in the following sections. Network Interface Card (IB-21E) -
Page 52: Expansion Memory
Options Expansion Memory To expand the printer memory for more complex print jobs and faster print speed, you can plug in optional memory modules (DIMM) in the memory slot provided on the printer main controller board. You can select additional memory modules from 64, 128, or 256MB. -
Page 53: Setting The Printer Driver
Click the Windows Start button, and then click Printers and Faxes. Right click the LP 4022 KX icon, and click Properties. The Properties dialog box will open. Click the Device Settings tab. Enter the total memory size installed to the printer (up to 288MB) in the Memory box. -
Page 54: Compactflash (Cf) Card
Options CompactFlash (CF) Card The printer is equipped with a slot for a CompactFlash card with the maximum size of 256MB. A CompactFlash card is useful for storing fonts, macros, and overlays. You can use the IC Link for Windows utility to download fonts, etc., to a CompactFlash card. -
Page 55: Network Interface Card
Options Network Interface Card (IB-21E) The Network Interface Card supports TCP/IP, IPX/SPX, NetBEUI and Appletalk protocols, so that the printer can be used on network environments including Windows, Macintosh, UNIX, NetWare, etc. NOTE: If the Serial Interface Board is installed, remove it to use the Network Interface Card. - Page 56 Options OPERATION GUIDE...
-
Page 57: Specifications
7 Specifications NOTE: Specifications are subject to change without notice. Item Description Printing Method Electrophotography using laser scan Printing speed 1-sided printing 22 pages/minute (A4 size/Plain) 23 pages/minute (Letter size/Plain) 2-sided printing 11 pages/minute (A4/Letter size/Plain) When printing multiple copies of the same page Paper Sizes Cassette A4, B5 (JIS), A5, Folio, Legal, Letter, Oficio II, Executive, B5... - Page 58 Specifications Item Description Memory Standard 32MB Maximum 288MB Interfaces 1 (IEEE 1284) Parallel 1 (Full-Speed USB) Option Serial interface board Operating Environment Temperature 10 to 32.5°C Relative Humidity 20 to 80% RH Altitude 2,500m maximum Illumination 1,500 lux maximum Dimensions 378 ×...
- Page 59 Index Attention indicator Cancel Network Tool for Clients Cancel key Cassette paper length guide paper size Maintenance stopper cleaning triangle mark cleaning tasks width guides process unit Caution labels toner container CD-ROM Maximum memory size Cleaning MP tray 5, charger cleaner envelope lint free cloth flap...
- Page 60 serial interface board kit Toner container lock lever A lock lever B Paper PUSH HERE cassette replacement loading Toner indicator MP tray Troubleshooting specifications general guide thickness paper jam weight print quality Paper jam cassette duplexer 23, MT tray USB cable output tray USB interface connector rear cover...
- Page 61 UTAX GmbH, Ohechaussee 235, 22848 Norderstedt, Germany...
Need help?
Do you have a question about the LP 4022 and is the answer not in the manual?
Questions and answers