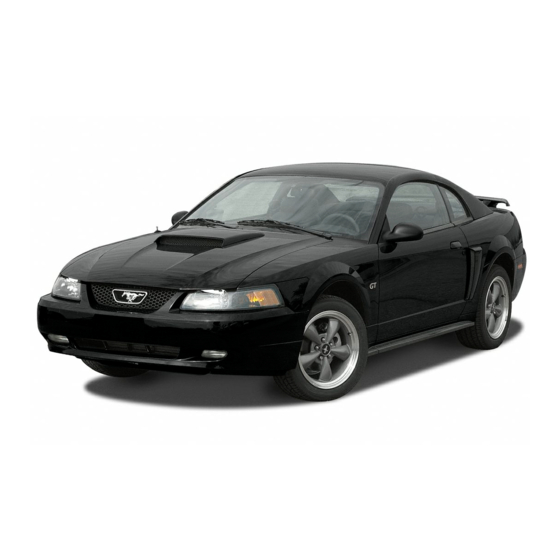
Ford 2003 Mustang Owner's Manual
Ford motor company 1999 ford taurus owner's guide
Hide thumbs
Also See for 2003 Mustang:
- Owner's manual (218 pages) ,
- Workshop manual (6 pages) ,
- Workshop manual (4378 pages)
Table of Contents
Advertisement
Before driving
Starting and driving
Servicing
All rights reserved. Reproduction by any means, electronic
or mechanical including photocopying, recording or by any
information storage and retrieval system or translation in
whole or part is not permitted without written
authorization from Ford Motor Company.
Copyright
1998 Ford Motor Company
Contents
2
4
16
74
102
107
124
141
190
200
215
216
1
Advertisement
Table of Contents

Related Manuals for Ford 2003 Mustang


Summary of Contents for Ford 2003 Mustang
-
Page 1: Table Of Contents
All rights reserved. Reproduction by any means, electronic or mechanical including photocopying, recording or by any information storage and retrieval system or translation in whole or part is not permitted without written authorization from Ford Motor Company. Copyright Contents 1998 Ford Motor Company... -
Page 2: Introduction
Introduction ICONS Indicates a safety alert. Read the following section on Warnings. Indicates vehicle information related to recycling and other environmental concerns will follow. Correct vehicle usage and the authorized disposal of waste cleaning and lubrication materials are significant steps towards protecting the environment. -
Page 3: Special Notices
Introduction INFORMATION ABOUT THIS GUIDE The information found in this guide was in effect at the time of printing. Ford may change the contents without notice and without incurring obligation. SPECIAL NOTICES Notice to owners of natural flexible fuel vehicles Before you drive your vehicle, be sure to read the “Flexible Fuel Vehicle Owner’s Guide Supplement”. -
Page 4: Instrumentation
Instrumentation Headlamp control (pg. 16) Trunk release — sedan only Parking brake (pg. 57) release (pg. 109) Rear window wiper and washer — wagon only (pg. 50) Instrument cluster (pg. 6) 0 1 2 2 FUEL DOOR> 0 0 0 1 3 SERVICE ENGINE km/h... - Page 5 Electronic sound system (pg. 29) FM 12 BASS TREB SEEK EJECT PUSH-ON SCAN TUNE TAPE SIDE TAPE R-DEF VENT Instrumentation Passenger side air bag (pg. 89) FADE Climate control systems (pg. 18) Gearshift (pg. 111)
-
Page 6: Warning Lights And Chimes
Instrumentation WARNING LIGHTS AND CHIMES Standard instrument cluster FUEL DOOR> SERVICE ENGINE SOON THEFT COOLANT Optional instrument cluster FUEL DOOR> SERVICE ENGINE SOON THEFT COOLANT Turn signal Illuminates when the left or right turn signal or the hazard lights are turned on. - Page 7 Instrumentation Safety belt Momentarily illuminates when the ignition is turned to the ON position to remind you to fasten your safety belts. For more information, refer to the Seating and safety restraints chapter. Door ajar Illuminates when the ignition is in the ON or START position and any door is open.
- Page 8 Instrumentation Temporary malfunctions may cause your Service Engine Soon light to illuminate. Examples are: 1. The vehicle has run out of fuel. (The engine may misfire or run poorly.) 2. Poor fuel quality or water in the fuel. 3. The fuel cap may not have been properly installed and securely tightened.
-
Page 9: Low Coolant
Instrumentation of a tank indicated on the fuel gauge (refer to Fuel gauge in this chapter for more information). The ignition must be in the ON position for this lamp to illuminate. The lamp will also illuminate for several seconds after the ignition is turned to the ON position regardless of the fuel level. - Page 10 Instrumentation Speed control (if equipped) This light comes on CRUISE when either the SET/ACCEL or RESUME controls are pressed. It turns off when the speed control OFF control is pressed, the brake is applied or the ignition is turned to the OFF position.
- Page 11 Instrumentation Air bag readiness Momentarily illuminates when the ignition is turned ON. If the light fails to illuminate, continues to flash or remains on, have the system serviced immediately. Safety belt warning chime Chimes to remind you to fasten your safety belts. For information on the safety belt warning chime, refer to the Seating and safety restraints chapter.
- Page 12 Instrumentation GAUGES Standard instrument cluster gauges FUEL DOOR> SERVICE ENGINE SOON THEFT COOLANT Optional instrument cluster gauges FUEL DOOR> SERVICE ENGINE SOON THEFT COOLANT Speedometer Indicates the current vehicle speed. Standard instrument cluster – 0 1 2 2 RPMx1000 0 0 0 1 3 UNLEADED FUEL ONLY km/h –...
- Page 13 Optional instrument cluster Tachometer Indicates the engine speed in revolutions per minute. Standard instrument cluster Optional instrument cluster Driving with your tachometer pointer in the red zone may damage the engine. Engine coolant temperature gauge Indicates the temperature of the engine coolant.
- Page 14 Instrumentation overheating. Stop the vehicle as soon as safely possible, switch off the engine immediately and let the engine cool. Refer to Engine coolant in the Maintenance and care chapter. Never remove the coolant reservoir cap while the engine is running or hot. This gauge indicates the temperature of the engine coolant, not the coolant level.
- Page 15 Instrumentation Fuel gauge Displays approximately how much fuel is in the fuel tank (when the key is in the ON position). The fuel gauge may vary slightly when the vehicle is in motion. The ignition should be in the OFF position while the vehicle is being refueled.
-
Page 16: Controls And Features
Controls and features HEADLAMP CONTROL Rotate the headlamp control to the first position to turn on the parking lamps. Rotate to the second position to also turn on the headlamps. Daytime running lamps (DRL) (if equipped) Turns the headlamps on with a reduced output. To activate: the ignition must be in the ON position and the headlamp control is in the OFF or Parking... -
Page 17: Panel Dimmer Control
Flash to pass Pull toward you to activate and release to deactivate. PANEL DIMMER CONTROL Use to adjust the brightness of the instrument panel during headlamp and parklamp operation. Rotate up to brighten. Rotate down to dim. Rotate to full up position (past detent) to turn on interior lamps. -
Page 18: Rear Window Defroster
Controls and features To turn autolamps on, rotate the control up. The preselected time lapse is adjustable up to approximately three minutes by continuing to rotate the control upward. To turn autolamps off, rotate the control down until it clicks. REAR WINDOW DEFROSTER Clears the rear window of thin ice and fog. - Page 19 Temperature control knob Controls the temperature of the airflow inside the vehicle. Mode selector control Controls the direction of the airflow to the inside of the vehicle. The air conditioning compressor will operate in all modes except VENT . However, the air conditioning will only function if the outside temperature is about 10°C (50°F) or higher.
- Page 20 Controls and features OFF-Outside air is shut out and the fan will not operate. For short periods of time only, use this mode to prevent undesirable odors from entering the vehicle. (Panel and floor)-Distributes outside air through the instrument panel registers and the floor ducts.
- Page 21 Controls and features Operating tips In humid weather, select before driving. This will prevent your windshield from fogging. After a few minutes, select any desired position. To prevent humidity buildup inside the vehicle, don’t drive with the climate control system in the OFF position.
-
Page 22: Electronic Automatic Temperature Control
Controls and features Do not place objects on top of the instrument panel, as these objects may become projectiles in a collision or sudden stop. Electronic Automatic Temperature Control (EATC) system (if equipped) — TEMP — F-DEF R-DEF The EATC system will maintain a selected temperature and automatically control airflow. - Page 23 Controls and features Turning the EATC off Press OFF. The AUTO Outside Temperature function will continue to operate until the SIDE TEMP ignition is turned off. VENT Automatic operation Press AUTO and select the desired temperature. The selected temperature and the word AUTO will appear in the display window.
- Page 24 Controls and features To control the — temperature, select any TEMP temperature between — 18°C (65°F) and 29°C F-DEF R-DEF (85°F) by pressing the temperature control. For continuous maximum cooling, push the temperature control until 16°C (60°F) is shown in the display window.
- Page 25 Fan speed ( When AUTO is pressed, fan speed is adjusted automatically for existing conditions. You can override fan speed at any time. To control fan speed manually, press the fan control to cancel automatic fan speed operation. Press the control up for higher fan speed or down for lower fan speed.
- Page 26 Controls and features Since the air conditioner removes considerable moisture from the air during operation, it is normal if clear water drips on the ground under the air conditioner drain while the system is working and even after you have stopped the vehicle. Under normal conditions, your vehicle’s climate control system should be left in any position other than MAX A/C or OFF when the vehicle is parked.
- Page 27 -Distributes outside air through the instrument panel registers and the floor ducts. Heating and air conditioning capabilities are provided in this mode. The air will be heated or cooled based on the temperature selection. For added customer comfort, the air distributed through the floor ducts will be slightly warmer than the air sent to the instrument panel registers.
- Page 28 Controls and features Operating tips In humid weather, select F This will reduce your windshield from fogging. After a few minutes, select any desired position. To prevent humidity buildup inside the vehicle, don’t drive with the climate control system in the OFF position.
-
Page 29: Using Your Audio System
Do not place objects on top of the instrument panel, as these objects may become projectiles in a collision or sudden stop. USING YOUR AUDIO SYSTEM AM/FM Stereo FM 12 SEEK PUSH-ON SCAN TUNE Volume/power control Press the control to turn the audio system on or off. - Page 30 Controls and features If the volume is set above a certain level and the ignition is turned off, the volume will come back on at a “nominal” listening level when the ignition switch is turned back on. If you wish to maintain your preset volume level, turn the audio system off with the power control before switching off the ignition.
- Page 31 Seek function in radio mode Press to find the next listenable station down the frequency band. Press to find the next listenable station up the frequency band. Scan function The scan function works in radio mode. Scan function in radio mode Press the SCAN control to hear a brief sampling of all listenable stations on the frequency band.
- Page 32 Controls and features 3. Press and hold a memory preset control until the sound returns, indicating the station is held in memory on the control you selected. Bass/treble adjust The bass adjust control allows you to increase or decrease the audio system’s bass output.
-
Page 33: Setting The Clock
To set the minute, press and hold the minute (m) control. When the desired minute appears, release the control. AM/FM Stereo/Cassette/Ford MACH Audio System with CD DJ Compatibility FM 12 SEEK PUSH-ON SCAN TUNE DISC 1-6... - Page 34 Controls and features Volume/power control Press the control to turn the audio system on or off. PUSH-ON Turn control to raise or lower volume. PUSH-ON If the volume is set above a certain level and the ignition is turned off, the volume will come back on at a “nominal”...
- Page 35 AM/FM select in CD mode Press this control to stop CD play and begin radio play. You can switch from CD play to tape play by simply inserting a tape into the cassette deck. Tune adjust The tune control works in radio or CD mode.
- Page 36 Controls and features Press to find the next listenable station up the frequency band. Seek function in tape mode Press to listen to the previous selection on the tape. Press to listen to the next selection on the tape. Seek function in CD mode Press to seek to the previous track of the current disc.
- Page 37 direction, wrapping back to the first track at the end of the CD.) To stop on a particular selection, press the control again. Radio station memory preset The radio is equipped with six station memory preset controls. These controls can be used to select up to six preset AM stations and twelve FM stations (six in FM1 and six in FM2).
- Page 38 Controls and features The treble adjust control allows you to increase or decrease the audio system’s treble output. Speaker balance/fade adjust Speaker sound distribution can be adjusted between the right and left speakers. Speaker sound can be adjusted between the front and rear speakers.
- Page 39 radio or CD mode, press the TAPE control. Press the button during rewind or fast forward to stop the rewind or fast forward function. To begin CD play (if CDs are loaded in the CD changer), press the CD button. The first track of the first disc will begin playing.
- Page 40 Controls and features Dolby noise reduction Dolby noise reduction operates only in tape mode. Dolby reduces the amount of hiss and static during tape playback. Press the button to activate (and deactivate) Dolby noise reduction. The noise reduction system is manufactured under license from Dolby Laboratories Licensing Corporation.
- Page 41 Controls and features Setting the clock To set the hour, press and hold the hour (h) control. When the desired hour appears, release the control. To set the minute, press and hold the minute (m) control. When the desired minute appears, release the control.
- Page 42 Controls and features Make sure only one disc is inserted in each slot. Each disc must be inserted with the label surface upward. Depending on your system, you may insert up to six or ten CDs. The magazine does not need to be full for the changer to operate.
- Page 43 The disc is dusty or defective. The player’s internal temperature is above 60°C (140°F). Allow the player to cool down before operating. A disc with format and dimensions not within industry standards is inserted. Cleaning compact discs Inspect all discs for contamination before playing. If necessary, clean discs only with an approved CD cleaner and wipe from the center out to the edge.
- Page 44 Controls and features Do not leave tapes in the cassette player for a long time when not being played. Radio frequency information The Federal Communications Commission (FCC) and the Canadian Radio and Telecommunications Commission(CRTC) establish the frequencies AM and FM stations may use for their broadcasts. Allowable frequencies are: AM 530, 540–1600, 1610 kHz FM 87.9, 88.1–107.1, 107.9 MHz...
-
Page 45: Positions Of The Ignition
Controls and features Audio system warranties and service Refer to the “Warranty Guide” for audio system warranty information. If service is necessary, see your dealer or a qualified technician. POSITIONS OF THE IGNITION 1. ACCESSORY, allows the electrical accessories such as the radio to operate while the engine is not running. - Page 46 Controls and features Do not use the speed control in heavy traffic or on roads that are winding, slippery, or unpaved. Do not shift the gearshift lever into N (Neutral) with the speed control on. To turn speed control off Press OFF or Turn off the vehicle ignition.
- Page 47 If your vehicle slows down more than 16 km/h (10 mph) below your set speed on an uphill, your speed control will disengage. This is normal. Pressing RES/RSM/RESUME will re-engage it. Do not use the speed control in heavy traffic or on roads that are winding, slippery, or unpaved.
- Page 48 Controls and features Depress the brake pedal. When the desired vehicle speed is reached, press SET/SET ACC/ SET ACCEL. To disengage speed control Depress the brake pedal. Disengaging the speed control will not erase the previously programmed set speed. Pressing OFF will erase the previously programmed set speed.
-
Page 49: Turn Signal Control
Indicator light This light comes on when either the SET ACC/SET ACCEL or RES/RSM/RESUME controls are pressed. It turns off when the speed control OFF control is pressed, the brake is applied or the ignition is turned to the OFF position. TURN SIGNAL CONTROL Push down to activate the left turn... -
Page 50: Hazard Flasher
Controls and features Mist Function To operate the Mist function of the windshield wipers, O F F push and release the windshield washer control quickly. The wipers will cycle one or two times. Rear window wiper and washer (wagon only) The rear wiper control is located under the headlamp controls... -
Page 51: Dome Lamps And Map Lamps
TILT STEERING Pull the tilt steering control toward you to move the steering wheel up or down. Hold the control while adjusting the wheel to the desired position, then release the control. Never adjust the steering wheel when the vehicle is moving. DOME LAMPS AND MAP LAMPS The front dome lamp is located overhead between the driver and passenger seats. -
Page 52: Illuminated Visor Mirror (If Equipped)
Controls and features The map lamps and controls are located on the dome lamp. Press the controls on either side of each map lamp to activate the lamps. If equipped with a moon roof, the map lamps are located on the moon roof control panel. -
Page 53: Power Windows
POWER WINDOWS Press and hold the rocker switches to open and close windows. Press the top portion of the rocker switch to close. Press the bottom portion of the rocker switch to open. One touch down Press AUTO completely down and release quickly. -
Page 54: Power Door Locks - If Equipped
Controls and features Accessory delay (if equipped) With accessory delay, the window switches may be used for up to ten minutes after the ignition switch is turned to the OFF position or until any door is opened. POWER DOOR LOCKS (IF EQUIPPED) Press U to unlock all doors and L to lock all doors. - Page 55 Controls and features Heated outside mirrors (if equipped) Both mirrors are heated automatically to remove ice, mist and fog when the rear window defrost is activated. Do not remove ice from the mirrors with a scraper or attempt to readjust the mirror glass if it is frozen in place.
-
Page 56: Center Console
Controls and features CENTER CONSOLE Your vehicle may be equipped with a variety of console features. These include: utility compartment cupholders coin holder slots cellular phone (if equipped) Use only soft cups in the cupholder. Hard objects can injure you in a collision. If your vehicle is equipped with the column shift and a bench seat, it has a center console in the center front seating position. - Page 57 Controls and features TRUNK REMOTE CONTROL Press the remote trunk release control on the instrument panel to the left of the steering wheel. LIFTGATE (WAGON ONLY) You can open the entire liftgate or just the liftgate window. To open the entire liftgate, pull the release handle hidden under the exterior trim panel just...
- Page 58 Controls and features CARGO AREA FEATURES Storage compartment Your vehicle comes equipped with a storage compartment in the floor of the cargo area. An additional compartment is in the rear trim panel on the right. Always put the load you are carrying as far forward as possible. Cargo net (if equipped) The cargo net secures lightweight objects in the cargo area.
- Page 59 Cargo cover (if equipped) Your vehicle may be equipped with a cargo area shade that covers the luggage compartment of your vehicle. To install the shade: 1. Fasten the cover into the mounting brackets (make sure the cover is right side up).
-
Page 60: Remote Entry System (If Equipped)
Controls and features 2. Wrap the vinyl around the roller tube twice. Tuck the edges of the vinyl inside the end cap with each wrap. 3. Fold the edges of the vinyl towards the center, making sure that the edges clear the end cap slots. - Page 61 Controls and features (remote entry transmitters) are brought to the dealership, to aid in troubleshooting. Unlocking the doors Press this control to unlock the driver’s door. The interior lamps will illuminate. Press the control a second time within five seconds to unlock all doors.
- Page 62 Controls and features Sounding a panic alarm Press this control to activate the alarm. To deactivate the alarm, press the control again or turn the ignition to ACC or This device complies with part 15 of the FCC rules and with RS-210 of Industry Canada.
- Page 63 Replacing lost transmitters Take all your vehicle’s transmitters to your dealer if service is required. If you purchase additional transmitters (up to four may be programmed), perform the following procedure: To reprogram the transmitters yourself, place the key in the ignition and turn from OFF to ON eight times in rapid succession (within 10 seconds) ending in ON.
-
Page 64: Perimeter Alarm System (If Equipped)
Controls and features To replace the battery: 1. Twist a thin coin between the two halves of the transmitter near the key ring. DO NOT TAKE THE FRONT PART OF THE TRANSMITTER APART. 2. Place the positive (+) side of new battery in the same orientation. - Page 65 Press the remote entry lock control (doors opened or closed). Press 7/8 and 9/0 controls on the keyless entry pad at the same time to lock the doors (doors opened or closed). Open a door and press the power door lock control to lock the doors.
-
Page 66: Keyless Entry System
Controls and features Disarming the system You can disarm the system by any of the following actions: Unlock the doors by using your remote entry transmitter. Unlock the doors by using your keyless entry pad. Unlock the doors or liftgate with a key. Turn the key full travel (toward the front of the vehicle) to make sure the alarm disarms. - Page 67 Your vehicle has a factory-set 5–digit code that operates the keyless entry system. You can also program your own 5–digit personal entry code. The factory-set code is located: on the owner’s wallet card in the glove compartment taped to the computer module When pressing the controls on the keyless entry keypad, press the middle of the controls to ensure a good activation.
- Page 68 Controls and features If you wish to erase your personal code, use the following instructions: Erasing personal code 1. Enter the factory-set code. 2. Press 1/2 within five seconds of step 1. 3. Press the 7/8 and 9/0 controls at the same time within five seconds of step two.
- Page 69 Locking the doors and liftgate (wagon), press the 7/8 and 9/0 controls at the same time. This can be done at any time. Autolock Autolock is a feature that will automatically lock all doors when: all vehicle doors, liftgate and liftgate window are fully closed the ignition key is in the ON position you shift into or through R (Reverse)
- Page 70 Controls and features 1. Turn the ignition key from OFF to RUN/ACC. 2. Press the power door UNLOCK control three times. 3. Turn the ignition key from RUN/ACC to OFF. 4. Press the power door UNLOCK control three times. 5. Turn the ignition key from OFF to RUN/ACC. A horn chirp indicates the enable/disable feature is entered.
- Page 71 The SecuriLock passive anti-theft system is not compatible with aftermarket remote start systems. Use of these systems may result in vehicle starting problems and a loss of security protection. Large metallic objects or devices such as the Mobil Speedpass on the same key ring as your SecuriLock key may cause vehicle starting problems.
- Page 72 Controls and features Programming spare SecuriLock Spare SecuriLock your dealership and programmed to your SecuriLock passive anti-theft system (up to a total of 8 keys). Your dealership can program your new SecuriLock key(s) to your vehicle or you can do it yourself using the following simple procedure.
- Page 73 4. Turn the ignition to OFF and remove the second SecuriLock key from the ignition. 5. Within 10 seconds of turning the ignition to OFF, insert the unprogrammed SecuriLock key/valet key) into the ignition and turn the ignition from OFF to RUN (maintain ignition in RUN for at least one second).
-
Page 74: Seating And Safety Restraints
Seating and safety restraints SEATING Head restraints Your vehicle’s seats may be equipped with head restraints which are vertically adjustable. The purpose of these head restraints is to help limit head motion in the event of a rear collision. To properly adjust your head restraints, lift the head restraint so that it is located directly behind your head or as close to that position as possible. - Page 75 Seating and safety restraints Lift handle to move seat forward or backward. Pull lever up to adjust seatback. Adjusting the front power seat (if equipped) Never adjust the driver’s seat or seatback when the vehicle is moving. Do not pile cargo higher than the seatbacks to avoid injuring people in a collision or sudden stop.
- Page 76 Seating and safety restraints Press to raise or lower the rear portion of the seat cushion. Press the control to move the seat forward, backward, up or down. Using the power lumbar support (if equipped) The power lumbar control is located on the outboard side of the seat.
- Page 77 Seating and safety restraints 3rd seat (wagon only) The third seat faces the rear of the vehicle. For height and weight limits, see the label on the seat cushion. When the seat is down, the back of your wagon has a flat surface for carrying cargo. To open up the seat: 1.
- Page 78 Seating and safety restraints SAFETY RESTRAINTS Safety restraints precautions Always drive and ride with your seatback upright and the lap belt snug and low across the hips. To reduce the risk of injury, make sure children sit where they can be properly restrained.
- Page 79 Seating and safety restraints Each seating position in your vehicle has a specific safety belt assembly which is made up of one buckle and one tongue that are designed to be used as a pair. 1) Use the shoulder belt on the outside shoulder only.
- Page 80 Seating and safety restraints Energy Management Feature This vehicle has a seat belt system with an energy management feature at the front outboard seating positions to help further reduce the risk of injury in the event of a head-on collision. This seat belt system has a retractor assembly that is designed to pay out webbing in a controlled manner.
- Page 81 Seating and safety restraints receives an impact of 8 km/h (5 mph) or more, the combination safety belts will lock to help reduce forward movement of the driver and passengers. Automatic locking mode In this mode, the shoulder belt is automatically pre-locked.
- Page 82 Seating and safety restraints Allow the belt to retract. As the belt retracts, you will hear a clicking sound. This indicates the safety belt is now in the automatic locking mode. How to disengage the automatic locking mode Disconnect the combination lap/shoulder belt and allow it to retract completely to disengage the automatic locking mode and activate the vehicle sensitive (emergency) locking mode.
- Page 83 Seating and safety restraints Front safety belt height adjustment Your vehicle has safety belt height adjustments for the driver and front passenger. Adjust the height of the shoulder belt so the belt rests across the middle of your shoulder. To lower the shoulder belt height, push the button and slide the height control down.
- Page 84 Seating and safety restraints To attach the shoulder belt to the lap belt, pull the shoulder belt out from the retractor in the seatback and insert into the lap belt connecting pin into the wide end of the key slot on the shoulder belt.
- Page 85 Seating and safety restraints Shorten and fasten the belt when not in use. Safety belts for rear-facing occupants (wagon only) Never use child safety seats in the third seat of a wagon. Your vehicle is equipped with safety belts containing an adjust tongue at the rear-facing seating positions.
- Page 86 Seating and safety restraints The lap belts should fit snugly and as low as possible around the hips, not around the waist. Front and rear seat occupants, including pregnant women, should wear safety belts for optimum protection in an accident. Each seating position in your vehicle has a specific safety belt assembly which is made up of one buckle and one tongue that are designed...
- Page 87 Seating and safety restraints extension assembly (part number 611C22). Safety belt extension assemblies can be obtained from your dealer at no cost. Use only extensions manufactured by the same supplier as the safety belt. Manufacturer identification is located at the end of the webbing on the label.
-
Page 88: Air Bag Supplemental Restraint System
(if equipped), child safety seat tether bracket assemblies (if equipped), and attaching hardware, should be inspected after a collision. Ford recommends that all safety belt assemblies used in vehicles involved in a collision be replaced. However, if the collision was minor and a... - Page 89 Seating and safety restraints Important supplemental restraint system (SRS) precautions The supplemental restraint system is designed to work with the safety belt to help protect the driver and right front passenger from certain upper body injuries. Air bags DO NOT inflate slowly or gently and the risk of injury from a deploying air bag is greatest close to the trim...
- Page 90 Do not attempt to service, repair, or modify the Air Bag Supplemental Restraint System or its fuses. See your Ford or Lincoln-Mercury dealer. Children and air bags For additional...
- Page 91 Seating and safety restraints Air bags can kill or injure a child in a child seat. NEVER place a rear-facing child seat in front of an active air bag. If you must use a forward-facing child seat in the front seat, move the seat all the way back.
- Page 92 Seating and safety restraints amounts of sodium hydroxide may be present which may irritate the skin and eyes, but none of the residue is toxic. While the system is designed to help reduce serious injuries, contact with a deploying air bag may also cause abrasions, swelling or temporary hearing loss.
-
Page 93: Safety Restraints For Children
Seating and safety restraints Determining if the system is operational The SRS uses a readiness light in the instrument cluster or a tone to indicate the condition of the system. Refer to the Air bag readiness section in the Instrumentation chapter. Routine maintenance of the air bag is not required. - Page 94 Seating and safety restraints Important child restraint precautions You are required by law to use safety restraints for children in the U.S. and Canada. If small children ride in your vehicle (generally children who are four years old or younger and who weigh 18 kg [40 lbs] or less), you must put them in safety seats made especially for children.
-
Page 95: Safety Seats For Children
Do not leave children, unreliable adults, or pets unattended in your vehicle. To improve the fit of lap and shoulder belts on children who have outgrown child safety seats, Ford recommends use of a belt-positioning booster seat that is labelled as conforming to all Federal motor vehicle safety standards. - Page 96 Put the safety belt in the automatic locking mode. Refer to Automatic locking mode. Ford recommends the use of a child safety seat having a top tether strap. Install the child safety seat in a seating position which is capable of providing a tether anchorage.
- Page 97 Seating and safety restraints Carefully follow all of the manufacturer’s instructions included with the safety seat you put in your vehicle. If you do not install and use the safety seat properly, the child may be injured in a sudden stop or collision. Installing child safety seats in combination lap and shoulder belt seating positions 1.
- Page 98 Seating and safety restraints 3. While holding the shoulder and lap belt portions together, route the tongue through the child seat according to the child seat manufacturer’s instructions. Be sure the belt webbing is not twisted. 4. Insert the belt tongue into the proper buckle (the buckle closest to the direction...
- Page 99 Seating and safety restraints 8. Allow the safety belt to retract to remove any slack in the belt. 9. Before placing the child in the seat, forcibly tilt the seat forward and back to make sure the seat is securely held in place. 10.
- Page 100 (part number 613D74) including instructions, may be obtained at no charge from any Ford or Lincoln-Mercury dealer. All vehicles built for sale in Canada include a tether anchor hardware kit. Be sure to follow the child safety seat manufacturer’s instructions.
- Page 101 Seating and safety restraints 2. Use a screwdriver or coin to snap the covers off the anchor in a rearward and upward direction. Remove the covers completely. 3. Snap the tether strap hook onto the U-shaped tether anchor.
-
Page 102: Starting
Starting PREPARING TO START YOUR VEHICLE Engine starting is controlled by the ignition system. This system meets all Canadian Interference-Causing Equipment standard requirements regulating the impulse electrical field strength of radio noise. When starting a fuel-injected engine, avoid pressing the accelerator before or during starting. Only use the accelerator when you have difficulty starting the engine. - Page 103 Starting Important safety precautions A computer system controls the engine’s idle revolutions per minute (RPM). When the engine starts, the idle RPM runs faster to warm the engine. If the engine idle speed does not slow down automatically, have the vehicle checked. Do not allow the vehicle to idle for more than ten minutes at the higher engine RPM.
-
Page 104: Starting The Engine
Starting FUEL DOOR> SERVICE ENGINE SOON THEFT COOLANT Make sure the corresponding lights illuminate briefly. If a light fails to illuminate, have the vehicle serviced. If the driver’s safety belt is fastened, the may not illuminate. STARTING THE ENGINE 1. Turn the key to 5 (START) without pressing the accelerator pedal and... - Page 105 Using the engine block heater (if equipped) An engine block heater warms the engine coolant, which improves starting, warms up the engine faster and allows the heater-defroster system to respond quickly. Use of an engine block heater is strongly recommended if you live in a region where temperatures reach -23°C (-10°F) or below.
- Page 106 Starting Engine exhaust, some of its constituents, and certain vehicle components contain or emit chemicals known to the State of California to cause cancer, and birth defects or other reproductive harm. Important ventilating information If the engine is idling while the vehicle is stopped in an open area for long periods of time, open the windows at least 2.5 cm (one inch).
-
Page 107: Driving
Driving BRAKES Your service brakes are self-adjusting. Refer to the scheduled maintenance guide for scheduled maintenance. Occasional brake noise is normal and often does not indicate a performance concern with the vehicle’s brake system. In normal operation, automotive brake systems may emit occasional or intermittent squeal or groan noises when the brakes are applied. - Page 108 Driving The ABS operates by detecting the onset of wheel lockup during brake applications and compensating for this tendency. The wheels are prevented from locking even when the brakes are firmly applied. The accompanying illustration depicts the advantage of an ABS equipped vehicle (on bottom) to a non-ABS equipped vehicle (on top) during hard braking with loss of front braking traction.
- Page 109 stopping distance. Always leave enough room between your vehicle and the vehicle in front of you to stop. We recommend that you familiarize yourself with this braking technique. However, avoid taking any unnecessary risks. Parking brake Apply the parking brake whenever the vehicle is parked.
- Page 110 Driving Pull the release lever to release the brake. Driving with the parking brake on will cause the brakes to wear out quickly and reduce fuel economy. STEERING Your vehicle is equipped with power steering. Power steering uses energy from the engine to help steer the vehicle.
-
Page 111: Automatic Transaxle Operation
AUTOMATIC TRANSAXLE OPERATION Brake-shift interlock This vehicle is equipped with a brake-shift interlock feature that prevents the gearshift from being moved from P (Park) unless the brake pedal is depressed. If you cannot move the gearshift out of P (Park) with the brake pedal depressed: 1. - Page 112 Driving If the parking brake is fully released, but the brake warning lamp remains illuminated, the brakes may not be working properly. See your dealer or a qualified service technician. Driving with an automatic overdrive transaxle Your automatic transaxle electronically controls the shift feel by using an adaptive learning strategy.
- Page 113 To put your vehicle in gear, start the engine, depress the brake pedal, then move gearshift out of P (Park). Hold the brake pedal down while you move the gearshift lever from P (Park) to another position. If you do not hold the brake pedal down, your vehicle may move unexpectedly and injure someone.
- Page 114 Driving R (Reverse) With the gearshift in R P R N (Reverse), the vehicle will move backward. You should always come to a complete stop before shifting into and out of R (Reverse). N (Neutral) With the gearshift in P R N the N (Neutral) position, the vehicle can be started and is...
- Page 115 Driving fourth gear will increase your fuel economy when you travel at cruising speeds. Overdrive may not be appropriate for certain terrains. If the transaxle shifts back and forth between third and fourth gears while you are driving hilly roads or if your vehicle requires additional power for climbing hills, shift into D (Drive).
-
Page 116: Vehicle Loading
Driving When parking, do not use the gearshift in place of the parking brake. Always set the parking brake fully and make sure that the gearshift is securely latched in Park (P). Turn off the ignition whenever you leave your vehicle. Never leave your vehicle unattended while it is running. - Page 117 GCWR (Gross Combined Weight Rating): Maximum combined weight of towing vehicle (including passengers and cargo) and the trailer. The GCWR indicates the maximum loaded weight that the vehicle is designed to tow. Maximum Trailer Weight Rating: Maximum weight of a trailer the vehicle is permitted to tow. The maximum trailer weight rating is determined by subtracting the vehicle curb weight for each engine/transmission combination, any required...
-
Page 118: Driving Through Water
Driving weight added should not exceed the Front Axle Reserve Capacity (FARC). Additional frontal weight may be added to the front axle reserve capacity provided you limit your payload in other ways (i.e. restrict the number of passengers or amount of cargo carried). -
Page 119: Trailer Towing
Your vehicle does not come from the factory fully equipped to tow. No towing packages are available through Ford or Mercury/Lincoln dealers. Do not tow a trailer until your vehicle has been driven at least 800 km (500 miles). If towing with a station wagon, inflate the rear tires to 35 psi. - Page 120 Driving 3.0L 4-Valve Duratec Engine and SHO engine Model Passenger Load-#/kg (lbs.) Sedan 5/340 (750) 0 2/135 (300) 70 (150) 2/135 (300) 0 Wagon 5/340 (750) 70 (150) 2/135 (300) 70 (150) 2/135 (300) 0 The above chart is based on the specified vehicle at a maximum GCW (Vehicle weight + Trailer weight) equal to 2 470 kg (5 450 lbs.).
- Page 121 Safety chains Always connect the trailer’s safety chains to the vehicle. To connect the trailer’s safety chains, cross the chains under the trailer tongue and allow slack for turning corners. If you use a rental trailer, follow the instructions that the rental agency gives to you.
- Page 122 Driving When towing a trailer: Use D (Drive) or a lower gear when towing up or down steep hills. This will eliminate excessive downshifting and upshifting for optimum fuel economy and transaxle cooling. Anticipate stops and brake gradually. Servicing after towing If you tow a trailer for long distances, your vehicle will require more frequent service intervals.
-
Page 123: Luggage Rack (If Equipped)
Before you have your vehicle towed: Release the parking brake. Turn the key in the ignition to OFF. Move the gearshift to N (Neutral). Unlock the steering wheel. Do not tow your vehicle at a speed faster than 56 km/h (35 mph) or for a distance greater than 80 km (50 miles), unless the drive wheels are placed on dollies. -
Page 124: Roadside Emergencies
Roadside emergencies HAZARD FLASHER Use only in an emergency to warn traffic of vehicle breakdown, approaching danger, etc. The hazard flashers can be operated when the ignition is off. The hazard lights control is located on top of the steering column. - Page 125 Roadside emergencies If your vehicle is a wagon, the fuel pump shut-off switch is located behind the service panel on the right side of the cargo area. Use the following procedure to reset the fuel pump shut-off switch. 1. Turn the ignition to the OFF position. 2.
- Page 126 Roadside emergencies Standard fuse amperage rating and color Fuse Stan- Mini Rat- dard Fuses Fuses Grey Grey Violet Violet Pink Pink 7.5A Brown Brown Blue Blue Yellow Yellow Natural Natural Green Green — — — — — Passenger compartment fuse panel The fuse panel is located below and to the left of the steering wheel by the brake pedal.
- Page 127 Roadside emergencies The fuses are coded as follows. Fuse/Relay Fuse Amp Location Rating — Description Not Used Instrument Illumination Left Low Beam Headlamp Right Low Beam Headlamp Instrument Cluster, Shift Lock Actuator, Rear Defrost TR Sensor, Reverse Lamps, DRL, A/C Controls TR Sensor, Starter Relay...
- Page 128 Roadside emergencies Fuse/Relay Fuse Amp Location Rating — Description Instrument Cluster, Autolamps, Transmission Control Switch, ICP, GEM Electronic Crash Unit (ECU), Blower Motor, EATC Semi-Active Ride Control Module Multifunction Switch (Turn Signal) Not Used Front Wiper/Washer Headlamp Switch Rear Wiper/Washer ICP, RAP, Phone, GEM Cigar Lighter Power Mirrors, Power...
- Page 129 Roadside emergencies Fuse/Relay Fuse Amp Location Rating — — — — — — — Power distribution box The power distribution box is located in the engine compartment. The power distribution box contains high-current fuses that protect your vehicle’s main electrical systems from overloads.
- Page 130 Roadside emergencies If the battery has been disconnected and reconnected, refer to the Battery section of the Maintenance and Care chapter. The high-current fuses are coded as follows. Fuse/Relay Fuse Amp Location Rating 40A** 30A** 40A** 30A C.B. 40A** — 40A** 30A** 40A**...
- Page 131 Roadside emergencies Fuse/Relay Fuse Amp Location Rating 40A** — 15A* 10A* 20A* 30A* 15A* 15A* — 30A* — — — 30A* 10A* 15A* — — — — — — * Mini Fuses ** Maxi Fuses Description Anti-Lock Brake Module Not Used Daytime Running Lamps (DRL) Module Electronic Control Unit...
-
Page 132: Changing The Tires
Roadside emergencies Relays Relays are located in the power distribution box and should be replaced by qualified technicians. CHANGING THE TIRES If you get a flat tire while driving, do not apply the brake heavily. Instead, gradually decrease your speed. Hold the steering wheel firmly and slowly move to a safe place on the side of the road. - Page 133 Roadside emergencies When one of the front wheels is off the ground, the transaxle alone will not prevent the vehicle from moving or slipping off the jack, even if the vehicle is in P (Park). To prevent the vehicle from moving when you change a tire, be sure the parking brake is set, then block (in both directions) the wheel that is diagonally opposite (other side and end of...
- Page 134 Roadside emergencies 3. Remove the center ornament or wheel cover from the wheel with the tapered end of the wheel nut wrench that came with your vehicle. Insert and twist the handle, then pry against the wheel. 4. Loosen each wheel lug nut one-half turn counterclockwise but do not remove them...
-
Page 135: Jump Starting Your Vehicle
Roadside emergencies 10. Return the flat tire, jack and lug wrench to their proper storage locations. Make sure the jack is fastened so it does not rattle when you drive. 11. Unblock the wheels. JUMP STARTING YOUR VEHICLE The gases around the battery can explode if exposed to flames, sparks, or lit cigarettes. - Page 136 Roadside emergencies not touch. Set the parking brake on both vehicles and stay clear of the engine cooling fan and other moving parts. 4. Check all battery terminals and remove any excessive corrosion before you attach the battery cables. Ensure that vent caps are tight and level. 5.
- Page 137 Roadside emergencies 3. Connect the negative (-) cable to the negative (-) terminal of the assisting battery. 4. Make the final connection of the negative (-) cable. For the 3.0L Vulcan and 3.4L SHO, make the connection to an exposed metal part of the stalled vehicle’s engine, away from the battery and the carburetor/fuel injection system.
- Page 138 Roadside emergencies 5. Be sure that the cables are clear of fan blades, belts and other moving parts of both engines. Jump starting 1. Start the engine of the booster vehicle and run the engine at moderately increased speed. 2. Start the engine of the disabled vehicle. 3.
- Page 139 Roadside emergencies 3. Remove the jumper cable from the positive (+) terminal of the booster vehicle’s battery. 4. Remove the jumper cable from the positive (+) terminal of the disabled vehicle’s battery. After the disabled vehicle has been started and the jumper cables removed, allow it to idle for several minutes so the engine computer can relearn its idle conditions.
-
Page 140: Wrecker Towing
It is recommended that your vehicle be towed with a wheel lift or flatbed equipment. Do not tow with a slingbelt. Ford Motor Company has not approved a slingbelt towing procedure. If your vehicle is to be towed from the rear using... -
Page 141: Maintenance And Care
SERVICE RECOMMENDATIONS To help you service your vehicle: We highlight do-it-yourself items in the engine compartment for easy location. We provide a Scheduled Maintenance Guide which makes tracking routine service easy. If your vehicle requires professional service, your dealership can provide necessary parts and service. Check your “Warranty Guide”... -
Page 142: Opening The Hood
Maintenance and care 3. Block the wheels to prevent the vehicle from moving unexpectedly. Working with the engine on 1. Set the parking brake and ensure the gearshift is securely latched in P (Park). 2. Block the wheels to prevent the vehicle from moving unexpectedly. -
Page 143: Identifying Components In The Engine Compartment
Maintenance and care IDENTIFYING COMPONENTS IN THE ENGINE COMPARTMENT 3.0L V6 Vulcan engine 1. Automatic transmission fluid dipstick 2. Brake fluid reservoir 3. Air filter assembly 4. Battery 5. Engine oil filler cap 6. Engine oil dipstick 7. Power steering fluid reservoir 8. - Page 144 Maintenance and care 3.0L DOHC V6 Duratec engine 1. Automatic transmission fluid dipstick 2. Brake fluid reservoir 3. Air filter assembly 4. Battery 5. Engine oil filler cap 6. Engine oil dipstick 7. Engine coolant reservoir 8. Windshield washer fluid reservoir 9.
-
Page 145: Engine Oil
Maintenance and care 3.4L-32V V8 SHO engine VALVE 1. Automatic transmission fluid dipstick 2. Brake fluid reservoir 3. Air filter assembly 4. Battery 5. Engine oil dipstick 6. Engine oil filler cap 7. Engine coolant reservoir 8. Windshield washer fluid reservoir 9. - Page 146 Maintenance and care 3. Set the parking brake and ensure the gearshift is securely latched in P. 4. Open the hood. Protect yourself from engine heat. 5. Locate and carefully remove the engine oil indicator (dipstick). 6. Wipe the indicator clean. Insert the indicator fully, then remove it again.
- Page 147 American Petroleum Institute (API). Motor oil displaying the API Certification Trademark will meet all requirements for your vehicle’s engine. Ford oil specification is WSS-M2C153-G. Do not use supplemental engine oil additives, oil treatments or engine treatments. They are...
- Page 148 Ford material and design specifications, startup engine noises or knock may be experienced. It is recommended you use the appropriate Motorcraft oil filter (or another brand meeting Ford specifications) for your engine application. BRAKE FLUID Checking and adding brake fluid...
- Page 149 If you use a brake fluid that is not DOT 3, you will cause permanent damage to your brakes. Do not let the reservoir for the master cylinder run dry. This may cause the brakes to fail. WINDSHIELD WASHER FLUID Checking and adding washer fluid Check the washer fluid whenever you stop for...
- Page 150 Maintenance and care Checking and adding washer fluid for the liftgate (if equipped) The opening for the reservoir is located on the passenger side under the tail lamp. Refill this reservoir with the same fluid you use for your windshield. ENGINE COOLANT Check the level of the engine coolant in the...
- Page 151 E2FZ-19549–AA (in Oregon, F5FZ-19549–CC, in Canada, Motorcraft CXC-10) or a premium engine coolant that meets Ford specification ESE-M97B44–A. DO NOT USE Ford Extended Life Engine Coolant F6AZ-19544–AA (orange in color). DO NOT USE a DEX-COOL engine coolant or an equivalent engine coolant that meets Ford specification WSS-M97B44–D.
- Page 152 Change your engine coolant according to the appropriate schedule listed in the Scheduled Maintenance Guide. Recycled engine coolant Ford Motor Company recommends that Ford and Lincoln-Mercury dealers use recycled engine coolant produced by Ford-approved processes. Not all coolant recycling processes produce coolant which meets Ford specification ESE-M97B44–A, and...
-
Page 153: Checking And Adding Power Steering Fluid
Maintenance and care Coolant refill capacity To find out how much fluid your vehicle’s cooling system can hold, refer to Refill capacities in the Capacities and specifications chapter. Have your dealer check the engine cooling system for leaks if you have to add more than 1.0 liter (1.0 quart) of engine coolant per month. - Page 154 Maintenance and care temperature gauge indicator will be near the center of the normal area between H and C). 2. While the engine idles, turn the steering wheel left and right several times. 3. Turn the engine off. Perform steps 4 and 5 following the procedure for your engine.
-
Page 155: Transmission Fluid
Maintenance and care TRANSMISSION FLUID Checking automatic transmission fluid Refer to your Scheduled Maintenance Guide for scheduled intervals for fluid checks and changes. Your transaxle does not consume fluid. However, the fluid level should be checked if the transaxle is not working properly, i.e., if the transaxle slips or shifts slowly or if you notice some sign of fluid leakage. - Page 156 Maintenance and care Low fluid level Do not drive the vehicle if the fluid level is at the bottom of the dipstick and the outside temperatures are above 10°C (50°F). Correct fluid level The transmission fluid should be checked at normal operating temperatures 66°C-77°C (150°F-170°F) on a level surface.
- Page 157 Maintenance and care If an overfill occurs, excess fluid should be DON’T ADD IF IN CROSSHATCH AREA--CHECH WHEN HOT-IDLING removed by a qualified technician. An overfill condition of transmission fluid may cause shift and/or engagement concerns and/or possible damage. BATTERY Your vehicle is equipped with a Motorcraft...
- Page 158 Maintenance and care If you see any corrosion on the battery or terminals, remove the cables from the terminals and clean with a wire brush. You can neutralize the acid with a solution of baking soda and water. Batteries normally produce explosive gases which can cause personal injury.
-
Page 159: Windshield Wiper Blades
2. Put the gearshift in P (Park), turn off all accessories and start the engine. 3. Let the engine idle for at least one minute. 4. The relearning process will automatically complete as you drive the vehicle. The vehicle may need to be driven 16 km (10 miles) or more to relearn the idle and fuel trim strategy. - Page 160 Maintenance and care blades, do not use fuel, kerosene, paint thinner or other solvents. Changing the wiper blades To replace the wiper blades: 1. Pull the wiper arm away from the windshield and lock into the service position. 2. Turn the blade at an angle from the wiper arm.
- Page 161 U.S. Department of Transportation-Tire quality grades: The U.S. Department of Transportation requires Ford to give you the following information about tire grades exactly as the government has written it. Treadwear The treadwear grade is a comparative rating based on the wear rate of the tire when tested under controlled conditions on a specified government test course.
- Page 162 Maintenance and care temperature can lead to sudden tire failure. The grade C corresponds to a level of performance which all passenger car tires must meet under the Federal Motor Vehicle Safety Standard No. 109. Grades B and A represent higher levels of performance on the laboratory test wheel than the minimum required by law.
- Page 163 If you do not follow these precautions, your vehicle may not drive properly and safely. Make sure that all replacement tires are of the same size, type, load-carrying capacity and tread design (e.g., “All Terrain”, etc.), as originally offered by Ford. Maintenance and care...
-
Page 164: Snow Tires And Chains
Maintenance and care Failure to follow these precautions may adversely affect the handling of the vehicle and make it easier for the driver to lose control and roll over. Tires that are larger or smaller than your vehicle’s original tires may also affect the accuracy of your speedometer. -
Page 165: What You Should Know About Automotive Fuels
The suspension insulation and bumpers will help prevent vehicle damage. Do not remove these components from your vehicle when using snow tires and chains. WHAT YOU SHOULD KNOW ABOUT AUTOMOTIVE FUELS Important safety precautions Do not overfill the fuel tank. The pressure in an overfilled tank may cause leakage and lead to fuel spray and fire. - Page 166 Maintenance and care Observe the following guidelines when handling automotive fuel: Extinguish all smoking materials and any open flames before fueling your vehicle. Always turn off the vehicle before fueling. Automotive fuels can be harmful or fatal if swallowed. Fuel such as gasoline is highly toxic and if swallowed can cause death or permanent injury.
- Page 167 on the skin, promptly wash skin thoroughly with soap and water. Consult a physician immediately if you experience an adverse reaction. When refueling always shut the engine off and never allow sparks or open flames near the filler neck. Never smoke while refueling. Fuel vapor is extremely hazardous under certain conditions.
- Page 168 The customer warranty may be void for any damage to the fuel tank or fuel system if the correct genuine Ford or Motorcraft fuel filler cap is not used. The fuel system may be under pressure. If...
- Page 169 Octane recommendations 3.0L V6 Vulcan and 3.0L DOHC V6 Duratec engines Your vehicle is designed to use “Regular” unleaded gasoline with an (R+M)/2 octane rating of 87. We do not recommend the use of gasolines labeled as “Regular” that are sold with octane ratings of 86 or lower in high altitude areas.
- Page 170 Cleaner air Ford approves the use of gasolines to improve air quality, including reformulated gasolines that contain oxygenates up to 10% ethanol or 15% MTBE. Running out of fuel Avoid running out fuel because this situation may have an adverse affect on powertrain components.
-
Page 171: Essentials Of Good Fuel Economy
ESSENTIALS OF GOOD FUEL ECONOMY Measuring techniques Your best source of information about actual fuel economy is you, the driver. You must gather information as accurately and consistently as possible. Fuel expense, frequency of fillups or fuel gauge readings are NOT accurate as a measure of fuel economy. - Page 172 Maintenance and care Use a known quality gasoline, preferably a national brand. Use the same side of the same pump and have the vehicle facing the same direction each time you fill up. Have the vehicle loading and distribution the same every time.
- Page 173 Driving style — good driving and fuel economy habits Give consideration to the lists that follow and you may be able to change a number of variables and improve your fuel economy. Habits Smooth, moderate operation can yield up to 10% savings in fuel.
- Page 174 Maintenance and care Combine errands and minimize stop-and-go driving. Maintenance Keep tires properly inflated and use only recommended size. Operating a vehicle with the wheels out of alignment will reduce fuel economy. Use recommended engine oil. Refer to Lubricant Specifications. Perform all regularly scheduled maintenance items.
-
Page 175: Emission Control System
If other than Ford, Motorcraft or Ford-authorized parts are used for maintenance replacements or for service of components affecting emission control, such non-Ford parts should be equivalent to genuine Ford Motor Company parts in performance and durability. Maintenance and care... - Page 176 Maintenance and care Do not park, idle, or drive your vehicle in dry grass or other dry ground cover. The emission system heats up the engine compartment and exhaust system, which can start a fire. Illumination of the charging system warning light, “Service Engine Soon”...
- Page 177 If the vehicle’s powertrain system or its battery has just been serviced, the on-board diagnostics system is reset to a “not ready for I/M test” condition. To ready the on-board diagnostics system for I/M testing, a minimum of 30 minutes of city and highway driving is necessary as described below: First, at least 10 minutes of driving on an expressway or highway.
- Page 178 Maintenance and care Replacing headlamp bulbs Handle a halogen headlamp bulb carefully and keep out of children’s reach. Grasp the bulb only by its plastic base and do not touch the glass. The oil from your hand could cause the bulb to break the next time the headlamps are operated.
- Page 179 Maintenance and care To install the new bulb: 1. Install the electrical connector into the rear of the plastic base until it snaps, locking it into position. 2. With the flat side of the bulb’s plastic base facing upward, insert the glass end of the bulb into the lamp assembly.
- Page 180 Maintenance and care 5. To complete installation, follow the removal procedure in reverse order. License plate lamp bulbs To change the license plate bulbs: Sedan 1. Remove two screws and the license plate lamp assembly from the rear bumper. 2. Remove bulb socket by turning counterclockwise.
- Page 181 Replacing tail lamp/backup bulbs For bulb replacement, see a dealer or qualified technician. Replacing the interior bulbs Check the operation of the following interior bulbs frequently: interior overhead lamp map lamp Using the right bulbs Function Front side marker lamp Front park/turn lamp Headlamp Tail lamp/brake lamp...
-
Page 182: Aiming The Headlamps
Maintenance and care AIMING THE HEADLAMPS Your vehicle is equipped with a Vehicle Headlamp Aim Device (VHAD) on each headlamp body. Each headlamp may be properly aimed in the horizontal direction (left/right) and the vertical position (up/down) using your VHAD system. The headlamps on your vehicle are properly aimed at the assembly plant. -
Page 183: Cleaning And Caring For Your Vehicle
“0” reference mark on the vertical indicator when viewed directly from above. Repeat the above procedures to the other headlamp, if necessary. CLEANING AND CARING FOR YOUR VEHICLE Refer to the Customer Assistance chapter for a list of Ford-approved cleaners, polishes and waxes. - Page 184 Maintenance and care Washing your vehicle Wash your vehicle regularly with cold or lukewarm water. Never use strong detergents or soap. If your vehicle is particularly dirty, use a quality car wash detergent. Always use a clean sponge, washing glove or similar device and plenty of water for best results.
- Page 185 Ultra Touch Prep and Finishing Kit (#F7AZ-19K507–BA), touch-up paint (#ALBZ-19500–XXXXA), or aerosol paint spray (#ALAZ-19500–XXXXA) from the Ford Car Care Chemicals line. Please note that the part numbers (shown as XXXX above) will vary with your vehicle’s specific coloring.
- Page 186 Maintenance and care Cover the highlighted areas to prevent water damage when cleaning the engine. 3.0L Vulcan engine 3.0L Duratec engine...
- Page 187 3.4L SHO engine Never wash or rinse the engine while it is running; water in the running engine may cause internal damage. Cleaning plastic exterior parts Use vinyl cleaner for routine cleaning. Clean with a tar remover if necessary. Do not clean plastic parts with thinners, solvents or petroleum-based cleaners.
- Page 188 Dry with a soft cloth. For tougher soiling concerns, Ford recommends using the Deluxe Leather Care Kit F8AZ-19G253–AA, which is available from your Ford Dealer. This mild cleaner and special pad, cleans the leather and maintains its natural beauty. Follow the instructions on the cleaner label.
- Page 189 Maintenance and care Cleaning and maintaining the safety belts Clean the safety belts with a mild soap solution recommended for cleaning upholstery or carpets. Do not bleach or dye the belts, because these actions may weaken the belt webbing. Check the safety belt system periodically to make sure there are no nicks, wear or cuts.
-
Page 190: Capacities And Specifications
Capacities and specifications MOTORCRAFT PART NUMBERS Com- 3.0L V6 ponent Vulcan engine Air filter FA-1630 element Fuel filter FG-800-A Battery BXT-58R (standard) Battery BXT-36R (optional) Oil filter FL-400-S EV-228 valve Spark AWSF- plugs* 32PP** * Refer to Vehicle Emissions Control Information (VECI) decal for spark plug gap information. -
Page 191: Refill Capacities
Capacities and specifications REFILL CAPACITIES Fluid Ford Part Name Brake High Per- fluid formance DOT 3 Motor Vehicle Brake Fluid Engine Premium coolant Engine Coolant Engine oil Motorcraft (includes 5W-30 filter Super change) Premium Motor Oil Fuel tank capacity Application Capacity... - Page 192 Washer Rear Con- centrate Use Ford Premium Engine Coolant (green in color). DO NOT USE Ford Extended Life Engine Coolant (orange in color). Refer to Adding engine coolant, in the Maintenance and Care chapter. Application Capacity 3.0L V6 Keep in...
-
Page 193: Lubricant Specifications
Capacities and specifications LUBRICANT SPECIFICATIONS Ford Part Items Name or equivalent Brake fluid High Per- formance DOT 3 Motor Vehicle Brake Fluid Door latch, Multi- hood latch, Purpose auxiliary Grease hood latch, seat tracks, trunk and liftgate latches Lock Penetrating... -
Page 194: Engine Data
Capacities and specifications Ford Part Items Name or equivalent Engine Ford coolant Premium Engine Coolant Power Motorcraft steering MERCON fluid Windshield Ultra-Clear washer Windshield fluid Washer Concentrate ENGINE DATA Engine 3.0L V6 Vulcan engine Cubic inches Horsepower 145 @ 5250 rpm Torque 170 lb.-ft. -
Page 195: Vehicle Dimensions
Capacities and specifications Engine 3.0L V6 Vulcan engine Spark plug 1.07-1.17 mm (0.042- 0.046 inch) Ignition EDIS system Compres- 9.3:1 sion ratio VEHICLE DIMENSIONS Vehicle Sedan mm (in) Wagon mm (in) dimensions (1) Overall 5 016.5 (197.5) length (2) Overall 1 854.2 (73.0) width (3) Overall... - Page 196 Capacities and specifications...
- Page 197 Capacities and specifications...
-
Page 198: Certification Label
Certification Label may be located. The Certification Label is located on the front door latch pillar on the driver’s side. MFD. BY FORD MOTOR CO. IN U.S.A. DATE: XXXXX GVWR:XXXXX LB/ XXXXX KG FGAWR: XXXXXX/XXXXXXX RGAWR: XXXXXXX/XXXXXXX THIS VEHICLE CONFORMS TO ALL APPLICABLE FEDERAL MOTOR VEHICLE SAFETY STANDARDS IN EFFECT ON THE DATE OF MANUFACTURE SHOWN ABOVE. - Page 199 Capacities and specifications Vehicle identification number The vehicle identification number XXXXXXXXXXXXXXXXX is attached to a metal tag and is located on the driver side instrument panel. Engine number The engine number (the last eight numbers of the vehicle identification number) is stamped on the engine block, transmission, frame and transfer case (if equipped).
-
Page 200: Customer Assistance
80,000 km (50,000 miles) on Lincoln vehicles In the United States, you may purchase additional roadside assistance coverage beyond this period through the Ford Auto Club by contacting your Ford or Lincoln-Mercury dealer. Roadside assistance will cover: changing a flat tire... - Page 201 There are several plans available in various time, distance and deductible combinations which can be tailored to fit your own driving needs. Ford ESP also offers reimbursement benefits for towing and rental coverage. (In Hawaii, rules vary. See your dealer for details.)
- Page 202 Ford. At Ford Motor Company and Ford of Canada, we are dedicated to providing Ford, Lincoln and Mercury vehicle owners with programs that will enhance your ownership experience and protect you from unexpected repair bills.
- Page 203 In most cases, your concern will be resolved at this level. Ford Motor Company and Ford of Canada dealerships also carry genuine Ford parts and accessories, providing you with original equipment reliability. Away from home...
-
Page 204: The Dispute Settlement Board
Ford Motor Company vehicles The Dispute Settlement Board may not be available in all states. Ford Motor Company reserves the right to change eligibility limitations, modify procedures and/or to discontinue this service without notice and without incurring obligations per applicable state law. - Page 205 West Virginia, Georgia and Wisconsin purchasers/lessees. Board membership The Board consists of: three consumer representatives a Ford or Lincoln/Mercury dealership representative Consumer candidates for Board membership are recruited and trained by an independent consulting firm. The dealership Board member is chosen from Ford and Lincoln-Mercury dealership management, recognized for their business leadership qualities.
- Page 206 DSB’s independent administrator Your dealership and a Ford Motor Company representative are asked to submit statements at this time. To properly review your case, the Board needs the...
- Page 207 Board’s decision. The decisions of the Board are binding on Ford (and, in some cases, on the dealer) but not on consumers who are free to pursue other remedies available to them under state or federal law.
-
Page 208: Getting Assistance Outside The U.s. And Canada
Ford Motor Company/Ford of Canada is not responsible for any damage caused by use of improper fuel. In the United States, using leaded fuel may also result in difficulty importing your vehicle back into the U.S. - Page 209 Ford Motor Company Worldwide Direct Market Operations. FORD ACCESSORIES FOR YOUR VEHICLE Ford has many quality products available from your dealer to clean your vehicle and protect its finishes. For best results, use the following or products of equivalent quality:...
- Page 210 Ford’s rigid engineering and safety specifications. Ford accessories are warranted for up to 12 months or 20,000 km (12,000 miles) on all cars and light trucks and 12 months with unlimited distance on...
- Page 211 Customer assistance Travel equipment Console Console armrest Daytime running lights Factory luggage rack Factory luggage rack adaptors Fog lights Framed luggage covers Heavy-duty battery Neutral towing transfer case kit (Explorer 4.0L only) Off road lights Pickup box rails Removable luggage rack Removable luggage rack adapters Retractable bed hooks and loops Running boards...
- Page 212 Customer assistance Carpet floor mats Cleaners, waxes and polishes Flat splash guards Front end covers (full and mini) Hood deflectors Locking gas cap Lubricants and oils Molded splash guards Molded vinyl floor mats Rallye bars Rear air deflectors Rear decklid spoilers Side window air deflectors Spare tire lock Step bumpers...
- Page 213 (Citizens band [CB] transceivers, garage door openers and other transmitters with outputs of five watts or less will not ordinarily affect your vehicle’s operation.) Ford cannot assume responsibility for any adverse effects or damage that may result from the use of such equipment.
-
Page 214: Ordering Additional Owner's Literature
Monday-Friday 8:00 a.m. - 6:00 p.m. EST, for credit card holders only To order the publications in this portfolio in Canada: Make cheques payable to: Ford Motor Company of Canada, Ltd. Service Publications P.O. Box 1580, Station B Mississauga, Ontario, Canada L4Y 4G3 or order toll free: 1-800-387-4966 Monday-Friday 8:00 a.m. -
Page 215: Reporting Safety Defects
National Highway Traffic Safety Administration (NHTSA) in addition to notifying Ford Motor Company. If NHTSA receives similar complaints, it may open an investigation, and if it finds that a safety defect exists in a group of vehicles, it may order a recall and remedy campaign. -
Page 216: Index
Index Accessory delay ... 54 Air bag supplemental restraint system ... 88,89 and child safety seats ... 90 description ... 89 disposal ... 93 driver air bag ... 91 indicator light ... 11,93 operation ... 91 passenger air bag ... 91 Air cleaner filter ... - Page 217 ... 151 refill capacities ... 153,191 specifications .. 193,194 Customer Assistance ... 200 Ford accessories for your vehicle ... 209 Ford Extended Service Plan ... 201 Getting assistance outside the U.S. and Canada ... 208 Getting roadside assistance ...
- Page 218 Index capacity ... 191 choosing the right fuel ... 168 comparisons with EPA fuel economy estimates ... 175 detergent in fuel ... 170 filling your vehicle with fuel .. 165,167,171 filter, specifications .. 170,190 fuel pump shut-off switch ... 124 gauge ...
- Page 219 Jump-starting your vehicle ... 135 Keyless entry system ... 66 autolock ... 69 keypad ... 66 locking and unlocking doors ... 68 programming entry code ... 67 Keys key in ignition chime ... 11 positions of the ignition ... 45 Lamps autolamp system ...
- Page 220 Index fluid, refill capacity ... 191 fluid, specifications .. 193,194 Radio ... 29 Relays ... 125,132 Remote entry system ... 60,62 illuminated entry ... 62 locking/unlocking doors ... 61 opening the trunk ... 61 panic alarm ... 62 replacement/additional transmitters ... 63 replacing the batteries ...
- Page 221 lubricant specifications ... 194 Transmission fluid, checking and adding (automatic) ... 155 Trip odometer ... 14 Trunk ... 61 remote release ... 57 Turn signal ... 6,49 Vehicle dimensions . 195 Vehicle Identification Number (VIN) ... 199 Vehicle loading ... 116 Ventilating your vehicle ...
-
Page 223: Filling Station Information
87 octane Unleaded fuel only - 91 octane 60.6L (16 gallons) 4.25L (4.5 quarts). Use Motorcraft 5W30 Super Premium Motor Oil, Ford specification WSS-M2C153-G. 5.2L (5.5 quarts). Use Motorcraft 5W30 Super Premium Motor Oil, Ford specification WSS-M2C153-G. 6.1L (6.5 quarts). Use... - Page 224 (AX4S)-3.0L V6 Vulcan engine Use Ford Premium Engine Coolant (green in color). DO NOT USE Ford Extended Life Engine Coolant (orange in color). Refer to Adding engine coolant, in the Maintenance and Care chapter. Ensure the correct automatic transmission fluid is used.
Need help?
Do you have a question about the 2003 Mustang and is the answer not in the manual?
Questions and answers