Table of Contents
Advertisement
Quick Links
Advertisement
Table of Contents

Related Manuals for Miele KWF 7510 SNE ed 3


Summary of Contents for Miele KWF 7510 SNE ed 3
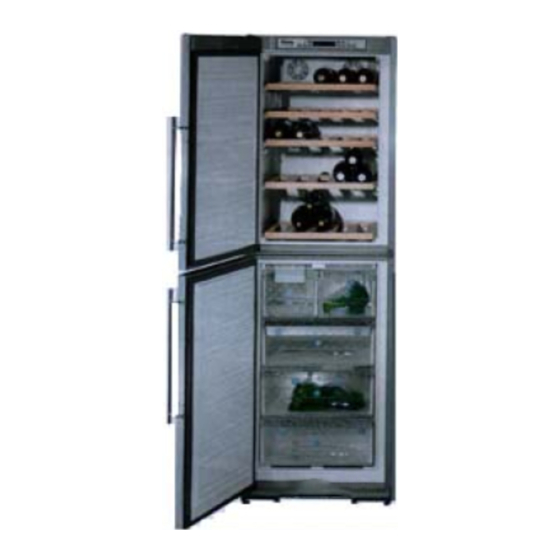
- Page 1 Operating and installation instructions Wine cellar freezer combination with ice cube maker KWF 7510 SNE ed-3 To avoid the risk of accidents or damage to the appliance, it is to read these operating instructions before it is installed or used for the first time.
-
Page 2: Table Of Contents
......... 4 . - Page 3 Freezer tray ............22 Cool pack.
-
Page 4: Freezer Section
a Wine cellar alarm button f Freezer section temperature display b Wine cellar On/Off button g Temperature selector buttons for the feezer section c Temperature selector buttons Upper button: warmer for the wine cellar Lower button: colder Upper button: warmer h Freezer section On/Off button Lower button: colder d Wine cellar... - Page 5 k Wooden shelf front with descriptive labels l Active charcoal filter m Condensate channel and drain hole n Ice cube drawer with automatic ice cube maker o Freezer drawers with freezer calendar p Marker system for frozen food...
- Page 6 Please ensure that your old appliance is disposed of at an authorised disposal The transport and protective packing centre only. Contact your local authority has been selected from materials which for advice if required. are environmentally friendly for disposal and can normally be recycled. Make sure that the pipework is not damaged whilst moving an old Rather than just throwing these...
- Page 7 This appliance complies with all This appliance contains the coolant relevant legal safety requirements. Isobutane (R600a), a natural gas Improper use of the appliance can, which is very environmentally friendly. however, present a risk of both Although it is flammable, it does not personal injury and material damage the ozone layer and does not damage.
- Page 8 Before connecting the appliance to persons could be dangerous and the the mains supply make sure that manufacturer will not be held liable. the rating on the data plate The manufacturer cannot be held corresponds to the voltage and liable for damage due to a faulty frequency of the household supply.
- Page 9 When cooling drinks quickly in the freezer make sure bottles are not Never handle frozen food with wet left in for more than one hour, otherwise hands. Your hands may freeze to they could burst. Danger of injury and the frozen food. Danger of injury. damage to the appliance.
- Page 10 Do not block the ventilation grilles in the appliance as this would Before disposing of an old impair the efficiency of the appliance, appliance first make the door latch increase the electricity consumption or lock unusable. and could cause damage to the This way you will prevent children from appliance.
-
Page 11: Temperature Range
The stainless steel surface has a protective foil to prevent scratching during transportation. ^ Do not remove this foil until the appliance has been installed or built in. Start at one of the upper corners. ^ Press the On/Off button for the ^ Clean the inside of the appliance and freezer section. - Page 12 ^ Press the approriate On/Off button. If the appliance is not going to be used The temperature display goes out and for a longer period of time, e.g. whilst the cooling process is switched off. (If on holiday, this does not happen, then the safety lock is still engaged).
-
Page 13: Freezing Fresh Food
Wine can be stored at a temperature For freezing fresh food and storing between 5°C and 18°C. The optimum frozen food for a long time a temperature is around 10 - 12 °C. Most temperature of at least white wines can be consumed at this needed. - Page 14 – Each subsequent press of the button adjusts the temperature shown in During normal operation the 1 °C steps. temperature displays show the – Keeping the button pressed in temperature in the wine cellar and the adjusts the temperature continually. temperature in the warmest part of the freezer section.
- Page 15 – the ambient temperature surrounding the appliance is too high. The appliance is designed for use in specific ambient temperatures (climate ranges). Do not use in ambient temperatures for which it is not designed. However, if the temperature in the freezer section remains above -18 °C for a long time, check that the frozen food has not started to defrost.
- Page 16 Your appliance has been fitted with a warning system which ensures that the If a door has been left open for approx. temperature cannot rise unnoticed and 60 seconds an alarm (continuous tone) to avoid energy being wasted if the will sound.
-
Page 17: Super Freeze
Fresh food should be frozen as quickly Switch the super freeze function on as possible. This way the nutritional before putting fresh food into the value of the food, its vitamin content, freezer. appearance and taste are not impaired. When freezing small quantities of food in the freezer, the super freeze function Food which takes a long time to freeze should be switched on... -
Page 18: Humidity Level
Filtering the incoming air through the active charcoal filter ensures that all the Wine keeps on maturing depending on air entering the appliance is fresh and the surrounding conditions. The length free from dust and smells. In addition, of time for which wine can be kept in the constant temperature which is good condition will therefore depend evenly distributed throughout the unit,... -
Page 19: Maximum Freezing Capacity
To ensure that fresh food placed in the Only freeze fresh food which is in a freezer freezes through to the core as good condition. quickly as possible, the maximum freezing capacity must not be exceeded. The maximum freezing – The following types of food capacity for freezing within a 24 hour for freezing: period is given on the data plate... - Page 20 ^ Make a note of the contents and the – Do not season fresh foods or blanched vegetables before date of freezing on the packaging. freezing. Only season cooked food lightly before freezing but care should be taken as the taste of some ^ When freezing more than 2 kg of spices alters when frozen.
- Page 21 When freezing e.g. a turkey or a large joint of meat, the separator Markers serve as a reminder of how plate in between two of the freezer long food has been stored. drawers can be removed to give more Each freezer drawer has two slide room.
- Page 22 ^ Hang the tray in one of the upper It is particularly important to observe food hygiene rules when freezer drawers. defrosting poultry. Do not use the liquid Leave food for 10 - 12 hours to freeze from defrosted poultry. Pour it away and thoroughly on the tray.
- Page 23 For the automatic ice cube maker to To ensure that the water pipes are operate it must be connected to the thoroughly flushed through before mains water supply. use, ice cubes from the first three ice cube making processes must not be consumed.
-
Page 24: Storing Frozen Food
The ice cube maker can be switched off independently of the freezer section if you do not want the appliance to make any ice cubes. ^ Press the On/Off button on the ice cube maker until the indicator light goes out. If the ice cube maker is switched off, the ice cube drawer can be used as an extra drawer for freezing fresh food and... -
Page 25: Defrosting
Condensate and frost can build up on This freezer is equipped with a "Frost the back wall of the wine cellar whilst it free" system. The freezer section is in use. These are automatically defrosts automatically. removed and defrosted by the The moisture generated by defrosting appliance. -
Page 26: Ventilation Grilles
^ A microfibre "E-Cloth" is available The data plate located inside the from the Miele UK Spare Parts appliance must not be removed. It Department, Part Number 980 13530, contains information which is... -
Page 27: Door Seals
^ Then take the ice cube drawer out of the appliance and clean it. The ice cubes are formed in a tray ^ Now clean the ice cube tray with hot before they are dropped down into the drawer. water and a little washing up liquid or sterilising fluid. -
Page 28: Metal Grille At The Back Of The Appliance
Active charcoal has reached the required filters are available from your dealer or temperature place the food back in the Miele Spare Parts Dept. the freezer drawers and place them back in the freezer. ^ Switch off the super freeze function by pressing the super freeze button. - Page 29 ^ Check that the fuse is not defective and that the mains fuse has not blown. If it has, contact the Miele Ser- vice department. ^ Check to see whether any pieces of furniture next to the appliance are vibrating whilst the appliance is in operation.
- Page 30 ^ Check whether the ventilation grilles Check the temperature displays about have been covered over or become 6 hours after switching on the too dusty. appliance. The display will not show a temperature until the temperature in the ^ Check whether, the metal grille (heat appliance has reached a certain level.
- Page 31 If you still cannot remedy the fault having followed these suggestions, ^ Was the water inlet pipe purged of air please contact the Miele Service Department. by a qualified and competent person before the appliance was used for...
- Page 32 In the event of a fault which you cannot correct yourself, or if the appliance is under guarantee please contact: – Your Miele Dealer – The Miele Service Department (see back cover for address). When contacting the Service Department, please quote the model...
- Page 33 – The stainless steel hose is 1.5 m Before making plumbing long. This may only be lengthened connections, ensure the appliance is by means of a Miele 1.5 m WPS disconnected from the mains extension hose. electricity supply. The extension hose is available from the Miele Spare Parts Department.
- Page 34 ^ Turn on the stopcock slowly and check the whole water system for leaks. Before using the appliance for the first time the water inlet pipe should be purged of air by a qualified and competent person. ^ The appliance can then be connected to the electricity supply.
- Page 35 The appliance is supplied with a mains The wires in the mains lead are cable and moulded plug ready for coloured in accordance with the connection to an a.c. single phase following code: 220 – 240 V 50 Hz supply. Green/yellow = earth The fuse rating is 13 amps.
- Page 36 (as applicable to the design of the plug fitted). Replacement fuses should be ASTA approved to BS 1362 and have the correct rating. Replacement fuses and fuse covers may be purchased from your local electrical supplier or Miele Service agent.
-
Page 37: Climate Range
Operating in a room which is too cold (e.g. a garage in winter) will cause the Appliances without side wall heating cooling system to switch off for too long must not be installed "side-by-side" causing the internal temperature in the next to another refrigerator or appliance to rise with the risk of frozen freezer. - Page 38 ^ Remove any cable clips from the back of the appliance. ^ Check that all parts at the back of the appliance are unhindered. Remove any hindrance. ^ Carefully push the appliance into position. ^ To align the appliance adjust the feet using the spanner supplied.
- Page 39 The appliance is supplied right hand Re-fit all parts on the opposite side hinged. If left hand door hinging is required follow the instructions below. ^ Open the lower appliance door. ^ Remove the cover plate a. ^ Unscrew bearing block b and place ^ Use a screwdriver to lever the plinth it on the other side (see illustration).
- Page 40 ^ Pull bearing bush d downwards out of hinge bracket e and refit it from above into the hinge bracket. ^ Use a screwdriver to remove spacer g and refit it on the opposite side. ^ Remove covers m at the front and slide off to the side.
- Page 41 The air inlet and outlet must not be covered or blocked in any way. They should be dusted on a regular basis. When built into a kitchen run (max. depth 580 mm) the appliance can be installed directly next to a kitchen furniture housing unit.
- Page 44 Alteration rights reserved / 2803 M.-Nr. 05 946 200 / 01 KWF 7510 SNE ed-3 This paper consists of cellulose which has been bleached without the use of chlorine.
Need help?
Do you have a question about the KWF 7510 SNE ed 3 and is the answer not in the manual?
Questions and answers