Table of Contents
Advertisement
Advertisement
Table of Contents

Related Manuals for Triumph Adler LP 4235


Summary of Contents for Triumph Adler LP 4235
- Page 1 Instruction Handbook Colour Scanner USB for LP 4235/4240/4245...
- Page 2 ELCOME We congratulate you on your choice. This multi-function terminal can process both black&white and colour documents when scanning/faxing, and is capable of printing/copying in black&white; it can also be used for communication on the Internet. Your terminal will meet all your professional requirements. We highly recommend that you take the time to read this manual so that you can get the most out of the many features of your terminal.
- Page 3 CANNER CONTROL PANEL key: duplex (double-sided) scan/copy key: access to special characters key: 'crystal' function for photo printing key: selection of colour mode key: scan resolution key: photo printing key: contrast setting key: black and white copy Graphical colour screen. Scan resolution indicator.
-
Page 4: Table Of Contents
Contents ONTENTS NSTALLATION Installing your terminal Installation requirements Unpacking the scanner and the mechanical interface Description of the multifunction terminal Installation of the terminal Connections Adjusting the original document output tray 1-11 Wall connections 1-12 Telephone and lan connections 1-12 Power line connection and switch on 1-12 ETTING STARTED... - Page 5 Sommaire IRECTORY Creating subscribers record Adding a record Creating subscribers lists Adding a list Adding or deleting a number from the list Consulting a record or a list Modifying a record or a list Deleting a record or a list Printing the directory Importing a directory The file structure...
- Page 6 Contents Printing the functions list 5-28 Printing the machine settings 5-28 Counters 5-29 Deposit and polling 5-29 Lock 5-30 Scan to PC (depends on model) 5-33 Mail box (MBX FAX) 5-34 MBX management 5-34 AINTENANCE Maintenance General Cleaning Scanner calibration Incidents Communication errors Scanner incidents...
- Page 7 Sommaire This unit has been designed in accordance with European harmonised standards, it is designed for connection to the Public Switched Telephone Network (PSTN). In case of any problems, first contact your Supplier. The mark attests that the products comply with the essential requirements of Directive R&TTE 1999/05/EC.
-
Page 8: Installing Your Terminal Installation Requirements
NSTALLATION NSTALLING YOUR TERMINAL NSTALLATION REQUIREMENTS A proper location helps to ensure that your printer provides you with the long service life for which it is designed. Double-check to make sure that the location you select has the following characteristics: •... -
Page 9: Operational Precautions
Installation • Make sure there is no chance of ammonia or other organic gasses being generated in the area. • The grounded power outlet (refer to the safety instructions in the Safety section) you plan to connect to for power should be nearby and not obstructed. •... - Page 10 Installation • Make sure that the power to the printer is switched off before connecting or disconnecting an interface lead to the printer (use a shielded interface lead). • Never try to remove any secured panel or cover. The terminal contains high-voltage circuit which creates the danger of electrical shock when exposed.
- Page 11 Installation NPACKING THE SCANNER Open the shipping box and take out the parts: - the scanner, - the document feeder, - the equipped mechanical interface, - the leads and cables: telephone lead, mains lead, mains extension lead, USB cable, - the cable sleeve, - guide clips, - the mounting screws, the installation guide and the CD-ROMs.
-
Page 12: Description Of The Multifunction Terminal
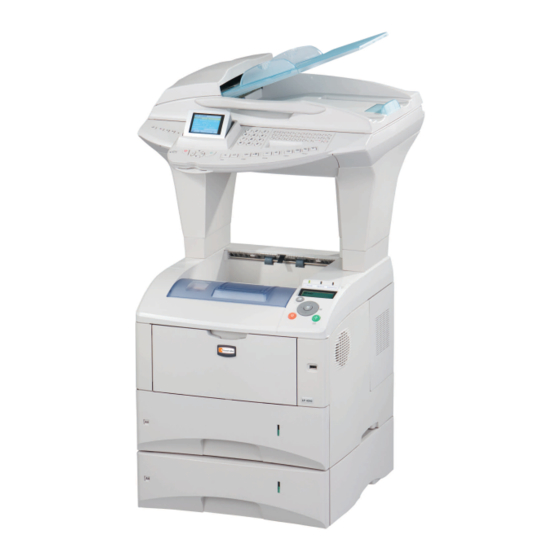
Installation DESCRIPTION OF THE MULTIFUNCTION TERMINAL Document feed tray for scanning Adjustable paper guide Original document Scroll scanner output stacker (ADF) Scanner control Access handle panel flatbed scanner Memory key connector Memory card reader Chip card reader... - Page 13 Installation Put the document feeder in place by pushing its two locking pins into the corresponding openings on the scanner. Terminal connections Looking at the back of the terminal, you will find the available connections as shown below. Phone line Host USB ports Mains socket Mains socket...
-
Page 14: Connections
Installation Mains socket for extension USB port LAN connector lead ONNECTIONS The leads and cables are connected separately to the scanner and the printer. We advise you start with connecting the leads and cables that arrive on the scanner unit. Connecting the leads and cables to the scanner Make sure that the mains on/off switches of scanner and printer are set to "O". - Page 15 Installation 5 - Connect the 220/240V mains extension lead for the printer to the mains outlet of the scanner. Group together all the leads and cables connected so far on the back of the righthand column. Take the cable sleeve, open it and fit the leads and cables in the sleeve. Position the assembled cable sleeve in the 3 guide clips and lock the clips.
- Page 16 Installation RIGINAL DOCUMENT OUTPUT TRAY format of the document to be scanned - A4 or LGAL (LEGAL) adjust...
-
Page 17: Wall Connections
Installation ALL CONNECTIONS Caution - Make sure that the mains On/Off switch of the scanner is set to "O" (Off). ELEPHONE AND LAN CONNECTIONS Connect the end of the telephone lead to the telephone wall socket (please see the paragraph Terminal connections, on page 1-8), for the connections to the scanner. -
Page 18: Getting Started
Getting started ETTING STARTED AVIGATION METHODS RESENTATION The navigator gives you access to the menus visible on screen. The navigator This navigator has 4 keys and allows you to move within the menus available on your machine. - Page 19 Getting started Moving within the menus Use key Symbol used Enter the main menu or select the next line in a menu. Enter the main menu or select the previous line in a menu. Confirm entry and go to the following menu.
-
Page 20: Access To Functions
Getting started Use key Symbol used Confirm your entry. Delete a character by moving the cursor to the left. Confirm your entry and return to the initial screen. The display screen The screen comprises 3 or 6 lines of 20 characters. The currently selected line is highlighted in yellow. - Page 21 Getting started Press the key, the functions menu appear F---- FUNCTION 1 DIRECTORY 2 SETUP 3 FAX Select the desired function by means of the navigator arrows. F---- FUNCTION 3 FAX 4 SM S 4 SMS SERVICE 5 PRINT Validate your choice by pressing OK. Select the desired sub-function by means of the navigator arrows.
-
Page 22: Guide To Function List
Getting started UIDE TO FUNCTION LIST MAIN MENU 1: D IRECTORY Functions Function description Page 11 OK Enter a new contact in the directory p. 4-2 ONTACT 12 OK Enter a relay broadcast list p. 4-4 13 OK Modify a record or a list p. - Page 23 Getting started MAIN MENU 2: S ETUP Functions Function description Page 2532 OK IP A Fax IP address p. 3-12 DRESSE 2533 OK Subnet mask p. 3-12 UBNET MASK 2534 OK Gateway #1 address p. 3-12 ATEWAY 2535 OK IEEE A Fax IEEE address p.
- Page 24 Getting started MAIN MENU 4: SMS S ERVICE Functions Function description Page 41 OK Send SMS p. 3-25 42 OK Read SMS received p. 3-27 43 OK Delete SMS received p. 3-27 ELETE 431 OK Select SMS to delete p. 3-27 ELECTION 432 OK SMS R...
- Page 25 Getting started MAIN MENU 8: A DVANCED FCT Functions Function description Page 80 OK Scanner calibration p. 6-17 ALIBRATION 81 OK Activate an access limitation lock p. 5-30 811 OK Locking code p. 5-31 OCKING 812 OK Activate keyboard lock p.
- Page 26 Getting started MAIN MENU 9: I NTERNET Functions Function description Page 9233 OK DNS 1 Primary DNS p. 3-18 9234 OK DNS 2 Primary DNS p. 3-18 924 OK SMTP A SMTP authentification access parameters p. 3-18 UTHENT 9241 OK SMTP authentification activation CTIVATION Immediat access to ISP...
- Page 27 Getting started 2-10...
-
Page 28: Main Settings
ETTING YOUR MACHINE AIN SETTINGS At machine powerup, the screen displays: MONDAY 12 NOV 18:16 You have to set the date and time, telephone network, language parameter and verify the other parameters listed below. -
Page 29: Before Transmission
Setting your machine EFORE TRANSMISSION Date/Time You can, at any moment, modify the current date and time of your fax. You can also activate the automatic management of summer and winter time. The changeover is performed the last Sunday of March for the changeover to summer time and the last Sunday of October for the changeover to winter time. - Page 30 Setting your machine To select the type of network: 251 OK - SETUP / NETWORKS / TEL. NETWORK then confirm your choice with OK. Select option PABX PSTN Geographical settings These settings will enable you to use your machine in different preset countries using different languages.
-
Page 31: Transmission Report
Setting your machine • the outside numbers requiring a prefix, must be long numbers greater or equal to the minimal size (to be defined, for example France has 10 digits). Programming your fax with the local prefix consists of two steps: •... -
Page 32: Before Reception
Setting your machine Document feed type You may choose the way you want to feed your documents: • from memory, transmission will take place only after memory storage of the document and dialling. It allows you to get your originals back quickly to free up the machine. •... -
Page 33: Number Of Copies
Setting your machine Saving an access code 383 OK - FAX / FAX ANSW. / ANSWER CODE Enter the code (4 digits) and confirm with OK. Activating or deactivating the answering machine 382 OK - FAX / FAX ANSW. / ACTIVATION If you saved an access code for your fax answering machine, enter it and validate with OK. -
Page 34: Relay Broadcast
Setting your machine Relay broadcast Your fax machine (initiator) can relay a document, in other words, transmit a document to your subscribers via a remote fax and with a precise relay list. To do this the initiator fax and the remote fax must both have the relay function. To relay you need to supply the remote fax with the document and the relay list number. - Page 35 Setting your machine Duplex printing (depending on model) This function allows to produce printouts • SINGLE SIDED • DOUBLE SIDED All faxes received are printed according to the mode selected from the menu, no matter how the duplex key is set. To select the fax print mode: 244 OK - SETUP / RECEPTION / DUPLEX Select the required option SINGLE SIDED or DOUBLE SIDED and validate your choice with...
-
Page 36: Technical Parameters
Setting your machine ECHNICAL PARAMETERS As delivered your fax is preset by default. However, you may adjust it to meet your requirements by resetting the technical parameters. To set the technical parameters: 29 OK - SETUP / TECHNICALS Select the desired parameter and confirm with OK. With the keys, modify the parameter settings by following the table below and press OK. - Page 37 Setting your machine Parameter Setting Signification 10 - RX HEADER 1 - WITH If this parameter is on, all documents received by your fax 2 - WITHOUT will include the subscriber’s header with his name, number (if available) fax print date and the page number. 11 - RX SPEED Transmission speed for incoming documents.
- Page 38 Setting your machine Parameter Setting Signification 74 - ERASE 1 - WITH When the fax machine receives an e-mail with an attachment and cannot open it, it erases the message from the ISP MBX, MAILBOX prints and transmits with a notice of uncomprehension to the message sender.
-
Page 39: Local Network Settings
Setting your machine OCAL NETWORK SETTINGS Automatic configuration We recommend that you carry out a manual configuration of your terminal. The automatic configuration of the local network settings may be considered, if your local network features a DHCP or BOOTP server that can dynamically assign addresses to the peripheral devices present on the LAN. To automatically configure the local network settings: 2531 OK - SETUP / NETWORKS / LOCAL NETWORK / CONFIGURATION Choose... - Page 40 Setting your machine IEEE address (or Ethernet address) or MAC address 2535 OK - SETUP / NETWORKS / LOCAL NETWORK / IEEE ADDRESS The Ethernet card of your terminal already has an unmodifiable, yet consultable, IEEE address. NetBIOS The NetBIOS name, which can be used with the network options, are used to identify your terminal machine from a PC connected to a local network (for instance with the name "IMP-NETWORK-1").
- Page 41 Setting your machine Domain name 2543 OK - SETUP / NETWORKS / DOM LOGIN / DOM. NAME Enter the domain name of the local network, then validate with OK. SNTP server configuration The terminal can automatically update its date and time when connecting to an SNTP server. Server address 2551 OK - SETUP / NETWORKS / SNTP SERVER / ADDRESS Enter the name of the SNTP server, then validate with OK.
-
Page 42: Remote Configuration
Setting your machine Press the key. MENU Switch your terminal off and then back on again. You have now finished configuring the IP address. Manually configuring IP settings You can make these settings when the TCP/IP protocol is on. To configure your terminal manually, you will need the usual information for setting up a peripheral (IP address, subnet mask and gateway address). -
Page 43: Message Service And The Internet
Setting your machine Accessing the Web Server Open a Web browser from a PC registered on the network. Enter the IP address of the terminal you want to configure in the ADDRESS field. Confirm by pressing ENTER The welcome window is displayed, choose the interface language. Change the settings of your choice on the screen then confirm. - Page 44 Setting your machine • servers, allows you to identify the name of the IP address of Internet SMTP providers (send) and POP3 (MBX reception) and the address of DNS 1 and DNS 2 servers. The server address is made up of 4 groups of 3 digits maximum, separated by dots. •...
- Page 45 Setting your machine In the PARAMETERS menu, select ID.MESS.SERV to keep the same identification parameters as in the messaging service or AUTHENT. SPEC. to define other identification parameters, then validate with Access to SMTP authentification parameters by pressing OK key. When you select AUTHENT.
-
Page 46: Settings
Setting your machine SERVERS 9231 SMTP mail.gofornet.com 9232 POP3 mail.gofornet.com 9233 DNS 1 103.195.014 001 9234 DNS 2 103.195.014 002 SMTP AUTHENT. 9241 ACTIVATION With or Without Your terminal is now configured. ETTINGS The settings are divided into several categories: •... - Page 47 Setting your machine Selecting the connection type 941 OK - INTERNET / SETTINGS / CONNEC. TYPE Select one of the connection options among SET TIMES PERIODIC ON DEMAND press OK to confirm. Selecting the transmission type - INTERNET / SETTINGS / SEND TYPE Select one of the send options then press OK to validate.
- Page 48 Setting your machine Mail sorting This function lets you choose the mode for all Internet documents stored in your mail box. You have three choices: , lets you poll and print E-Mails in your machine. F@X ONLY • , lets you keep your E-Mails in you mailbox for later use with a computer (no E-Mail PC ONLY poll), •...
- Page 49 Setting your machine Select your option from the table below and validate with OK. Menu Description The E-mails opened and read by the fax (w/o attachment) are erased DELETE MAILS after the fax has printed. SAVE MAILS The E-mails opened and read by the fax are not erased. At each connection, the number of E-mails still present in your mailbox are displayed on the screen.
-
Page 50: The Sms Service
Setting your machine SERVICE Thanks to the button you can send an SMS to subscribers all over the world. An SMS (Short Message Service) is a service which permits short written messages to be sent to mobile phones or other SMS-compatible devices. -
Page 51: Sending An Sms
Setting your machine Terminal address - SMS SERVICE / PARAMETERS / TERM. ADDR. Enter the terminal number, then validate with OK key. ENDING AN To send an SMS to any SMS-compatible devices: Press the key. Write your SMS by means of the Qwerty keypad. To do so, you have a true editor at your disposal: È... -
Page 52: Erase An Sms
Setting your machine RASE AN Proceed as follows to erase an SMS: - SMS SERVICE / DELETE SMS Select the messages to erase. - SMS SERVICE / DELETE SMS / SELECTION Select SELECTION using keys and validate with OK key. and validate with OK key. -
Page 53: Sms Server
Setting your machine Print an SMS Access by menus: 44 OK - SMS SERVICE / PRINT SMS • Direct access Press key Select PRINT SMS using keys and validate with OK key. Select SELECTION (to choose messages to print), NEW (to print all unread messages) or ALL (to print all messages in memory) using keys and validate with OK key. - Page 54 Setting your machine 3-27...
-
Page 55: Directory
IRECTORY Your fax lets you create a directory by memorising subscriber records and subscriber lists. • Your machine can store up to 500 subscriber records with names and phone numbers. • You may also group several names to build a subscriber list with up to 32 subscriber lists. A subscriber list is made from the subscriber records already stored. -
Page 56: Creating Subscribers Record
Directory REATING SUBSCRIBERS RECORD For each contact record, complete the fields listed below. Only fields with the Name and Telephone number have to be completed: • Contact NAME, • TEL and fax number of contact, • E-mail address, example: dupont@messagerie.com, •... - Page 57 Directory Your subscriber’s ID number will automatically appear on the screen, if you wish to modify this number you may do so by choosing another free number and validate with OK. Select the option assigned key if you want to assign a letter (shortcut key) to your WITH subscriber.
-
Page 58: Creating Subscribers Lists
Directory If required, select the appropriate transmission rate for faxes to your contact, and validate your selection with the OK key. REATING SUBSCRIBERS LISTS A subscriber list is made from the subscriber records already stored. For each list fill in the following lines: •... -
Page 59: Adding Or Deleting A Number
Directory For every subscriber included in the list repeat the above step then validate with OK. Note: you can stop record creation at any time by pressing The list ID number will automatically appear on the screen. If you wish to modify this number you may do so by choosing another free number and validate with OK. -
Page 60: Modifying A Record Or A List
Directory ODIFYING A RECORD OR A LIST 13 OK - DIRECTORY / MODIFY The directory appears in alphabetical order. keys to select the subscriber list (L) you wish to modify and press OK to Use the confirm. Modify the line or lines in the subscriber record or subscriber list and confirm each modification with OK. -
Page 61: The File Structure
Directory HE FILE STRUCTURE The electronic file containing the data in the directory must be structured into lines or records each comprising five fields separated from one another by a unique character (a tab stop, a comma or a semi-colon). The lines themselves are separated by a line break (carriage return). Fields Contents A unique identifier in your directory, up to 20 characters long. -
Page 62: Procedure
Directory The rate is coded on a number, see the following board: Rate Code number 1200 2400 4800 7200 9600 12000 14400 33600 Caution - You must always enter the field separator character, even if one or more of the fields are left blank. -
Page 63: Exporting A Directory
Directory XPORTING A DIRECTORY You may also export a directory from a fax machine as a text file, and send it to any mail client (be it PC or fax based), in the form of an e-mail attachment entitled directoryxxx.csv. To export the directory: 18 OK - DIRECTORY / EXPORTATION Key in the e-mail address of the PC or other fax machine to which you want to export the... -
Page 64: Accessing Server Contacts
Directory CCESSING SERVER CONTACTS When the LDAP function on your terminal is switched on, you can send documents or e-mails to contacts in the server's directory. This is what happens when you search for a contact: when you enter the first letter of the recipient's name, all the entries in the server's directory which begin with this letter will be alphabetically added to the local ones. -
Page 65: Operation
PERATION ENDING Faxes sent over the telephone network are sent from the feeder or the memory. Documents sent over the Internet are first memorised and sent at the time of Internet connection. Over the telephone network, your faxes are transmitted in black and white or in colour. Over the Internet: you can send black and white documents (TIFF format or PDF) or colour documents (JPEG format or PDF). -
Page 66: Selecting Colour/Resolution/Contrast
Operation From the flat scanner Using the handle, lift up the document feeder tray. Put your document, with the printed face down on the scanner window. The scanner origin is located at your end, to Scanner origin the left, as shown opposite. Once the operation is complete, lift the document feeder tray and recover your document. -
Page 67: Dialling
Operation Contrast You can set the contrast if your document is too light or too dark. If the document is light, you must raise the contrast and if it is dark, you must reduce it. To set the contrast: Press as many times as necessary to choose the desired contrast, as shown by the position of a cursor. - Page 68 Operation Using the last number dialled key You can redial one number among the ten last numbers you just dialled before. For a fax number (Tel in the Directory) key. Press the The screen displays the last number used. Use the keys of the browser.
-
Page 69: Transmission Over The Public Switched Telephone Network (Pstn)
Operation RANSMISSION OVER THE (PSTN) UBLIC WITCHED ELEPHONE ETWORK Immediate transmission Position the document (please see the paragraph Document depositing, on page 5-1). Enter the fax number or choose your dialling mode (please see the paragraph Dialling, on page 5-3) then press The "Line"... - Page 70 Operation Transmission with auto redial This function allows you to monitor the dialling operation during a fax transmission. In this case, the maximum transmission rate will be 14400 bps. This function allows for example: • To hear if the subscriber’s fax is engaged and if so, choose the moment when the line is clear to start the document transmission.
-
Page 71: Transmission Over The Internet
Operation subscriber manually or store the name and related number in the directory (please see the paragraph Creating subscribers record, on page 4-2). Note: You may forward a fax to the e-mail address of the subscriber stored in your directory if the fax is not available The Fax will then be sent as an attachment in the pre-defined file format (p 3-11 for the configu- ration of the attachment files format) / REROUTING / COPY... - Page 72 Operation If your contact has a PC, he will receive an E-mail to which your fax is attached in colour PDF or TIFF format, depending on the format choice you made. If your subscriber has an Internet fax, he will receive a paper fax. Sending a typed message to an E-Mail address You can send a typed message to an E-mail mailbox.
-
Page 73: Scan To Ftp
Operation If you have started to scan with the flat scanner, the unit will scan the other pages. Put your second page to scan, select NEXT and validate with OK. Press key. Set contrast and resolution if necessary (please see the paragraph Selecting Colour/ Resolution/Contrast, on page 5-2). - Page 74 Operation If necessary, change the attachment format: PDF or IMAGE et validate with OK key. If you have started to scan with the flat scanner, the unit will scan the other pages. Put your second page to scan, select NEXT and validate with OK. Multi-contact sending Multi-contact sending is not possible with the key dedicated to this function.
-
Page 75: Transmission Waiting Queue
Operation Multi-contact transmission Multi-contact transmission (transmission to several destinaries at the same time) is not possible by means of the key dedicated to this function. To perform this kind of transmission, you first need to create a group that contains only the shared addresses. - Page 76 Operation Immediately perform transmission from the waiting queue 61 OK - COMMANDS / PERFORM Select the document in the waiting queue and confirm your choice with OK or immediately perform the selected transmission. Consult or modify the waiting queue 62 OK - COMMANDS / MODIFY In the waiting queue select the required document and confirm your choice with OK.
-
Page 77: Cancelling A Transmission In Progress
Operation ANCELLING A TRANSMISSION IN PROGRESS Cancelling a transmission in progress is possible whatever the type of transmission but varies depending on whether the transmission is a single call number or a multi-call number. • For a single call number from the memory, the document is erased from the memory. •... -
Page 78: Copying
Operation OPYING Your fax offers to print out one more copies of one or more pages. You can also make copies in tiled or poster mode. The tiling function allows you to print a number of pages imported from the ADF scanner onto a page, at a reduced scale (there are 2 modes available: 2 scanned pages onto a sheet or 4 scanned pages onto a sheet). - Page 79 Operation "Sophisticated" copy Position the document (please see the paragraph Document depositing, on page 5-1). Press the key to make a black and white copy. A screen that shows the default copy settings is displayed. Modify the settings that you want to change, using the keys to select the field then press the OK key.
-
Page 80: Specific Copy Settings
Operation • The FORMAT field allows you to select one of the options for printing in mosaic format (ADF scanner): 1 on 1, 2 on 1 or 4 on 1 or one of the poster print options: 1 to 1, 1 to 4 or 1 to 9 (flatbed scanner). -
Page 81: Scanner Settings
Operation Scanner settings 841 OK - ADVANCED FCT / COPY / B&W RESOLUTION setting to adjust the resolution for photocopying. Select the B&W RESOLUTION resolution: by means of the ULTRA FAST , FAST QUALITY PHOTO , keys, validate your choice by pressing the OK key. 842 OK - ADVANCED FCT / COPY / COLOUR RESOL. - Page 82 Operation You can also directly adjust the desired contrast using the key, press this key several times until the required adjustment is obtained without using 846. 847 OK - ADVANCED FCT / COPY / LUMINOSITY The LUMINOSITY parameter is used to make your original document lighter or darker. Adjust the brightness required using keys , then validate the choice with the OK key.
- Page 83 Operation Select WITH or WITHOUT using keys. Validate by pressing the OK key. 854 OK - ADVANCED FCT/ SCAN. & PRINT/ S.F MARGINS If you want to offset the side margins of your document to the left or to the right when scanning with your scroll scanner.
- Page 84 Operation Displaying the content of the memory supports Note: If the memory support contains more than 999 files, only the 999 most recent ones are taken into account You have several display modes available to view the photos and documents stored on the memory support.
-
Page 85: Printing A Photo From A Memory Device
Operation Compatible USB keys The memory keys must be FAT16 or FAT32 formatted for the terminal to be able to read them. NTFS formatted memory keys are not compatible with the terminal. Informations on the use of the photo memory device •... - Page 86 Operation Putting a memory device in place If your digital camera uses a memory device to record the image files, you can use it in your multifunction terminal to print image files or other documents. It is also possible to digitise a photo or a document with the scanner and to record it in the memory device (please see the paragraph Recording a document in a memory device, on page 5-25).
- Page 87 Operation The screen you allows you to view the photos starting with the most recent one. Each photo is accompanied by the following informations: "Red-eye" Crystal image correction function function activated Total number of Order of the photo photos to be printed relative to the total number of photos on the memory card...
-
Page 88: Printing A Document From A Memory Device
Operation To print the current photo, select by means of the keys, then CURRENT PHOTO validate with the OK key or by typing 4 on the numerical keyboard. Note: 24 photos can be printed in miniature on a index page The photos are accompanied by their file name and their number on the memory card They are printed in chronological order Select the paper size for the photo between by means of the... -
Page 89: Recording A Document In A Memory Device
Operation Select to start printing the list of all documents on the memory card or start printing all documents on the memory card. Select to select several documents with consecutive names. The screen then SERIES displays the alphabetical list of the documents on the memory card. At the FIRST FILE prompt select the first document of the series with the key, then at the... -
Page 90: Analysis Of The Memory Device
Operation Setting up the memory device file deletion to record new scans keys and the OK key or use the In the media menu, select by means of the DELETE 7key of the numerical keyboard, 07 OK - MEDIA / DELETE Select AUTOMATIC Select... - Page 91 Operation Select to select the files to be deleted one by one. Use the keys to SELECTION move through the list of files, and use the OK key to select them. The selected documents are marked with a star at the left of their name. Press the Start key to delete the files.
-
Page 92: Other Functions
Operation THER FUNCTIONS The incoming and outgoing logs list the last 30 transmissions (incoming and outgoing) made by your machine. An automatic print out will take place after every 30 transmissions. However, you may request a print out at any time. Each log (incoming or outgoing) contains a table with the following information: •... -
Page 93: Counters
Operation OUNTERS At any time, you may consult the activity counters of your machine. To get access to the counters of the machine: 82 OK - ADVANCED FCT/ COUNTERS These counters indicate the number of: • transmitted pages 821 OK - ADVANCED FCT/ COUNTERS / SENT PAGES •... -
Page 94: Lock
Operation Choose the type, according to the table below: Menu Procedure Select FEEDER MEMORY If necessary, adjust the contrast and confirm with OK SIMPLE Enter the number of pages that you wish to deposit If necessary, adjust the contrast and confirm with OK MULTIPLE Enter the number of pages that you wish to deposit Confirm deposit by pressing the OK key. - Page 95 Operation Entering the locking code The operator access parameters are confidential; they are protected by a four-digit interlock code that the authorised operators must know. To access the locking code: 811 OK - ADVANCED FCT/ LOCK/ LOCKING CODE Enter your four-digit interlock code on the keypad. Confirm by pressing OK.
- Page 96 Operation Locking the Internet settings This function prevents access to all the Internet settings of menu 9. As a matter of fact, any untoward change to these settings might result in repeated connection failures. You can still send documents to an E-mail address (menu 95) and get connected (menu 93). To access the Internet settings locking menu: 814 OK - ADVANCED FCT/ LOCK/ LOCK PARAMETERS Enter the four-digit locking code with the numerical keypad.
-
Page 97: Scan To Pc (Depends On Model)
Operation PC ( CAN TO DEPENDS ON MODEL Note: your machine is provided with a Scan to PC key This key activates, first of all, the SCAN -TO - PC, func- tion, which associated with the Companion Suite Pro kit makes it possible to send an opening notice of a scan function of a PC connected to your machine For more information, refer to the User Manual provi- ded with your PC Kit (Companion Suite Pro LH) 5-33... -
Page 98: Mail Box (Mbx Fax)
Operation (MBX FAX) AIL BOX There are 32 mailboxes (MBX), enabling you to transmit documents in complete confidence using an access code (named code MBX), to all subscribers equipped with a fax compatible to yours. MBX 00 is public. It is handled directly by the terminal to record the messages of the fax TAD as soon as this is put into service. - Page 99 Operation Modifying the features of a MBX 71 OK - MAILBOXES/ CREATE MBX Select a free MBX out of the 31 MBX, or enter the number of a free MBX directly (1-31) then confirm your choice with OK. Enter the code of this MBX, if there is one, and confirm with OK. Select the menu , then confirm your choice with OK.
- Page 100 Operation MBX deposit in a remote fax Insert the document in the fax machine’s feeder. Select 35 OK - FAX MBX SENDING and confirm with OK. Enter your subscriber’s number for MBX deposit or choose your dialling mode (please see the paragraph Dialling, on page 5-3) and validate with OK.
-
Page 101: Maintenance
AINTENANCE AINTENANCE ENERAL To ensure the best operating conditions for your fax, it is recommended that you regularly clean the inside. For normal usage, please respect the following rules: • Never leave the cover open unless required. • Do not attempt to oil the machine. •... -
Page 102: Cleaning
Maintenance LEANING Cleaning the scanner’s reading devices When one or more vertical lines appear on transmitted copies or faxes, follow these steps: Open the scanner cover by pushing it backwards until held vertically in position Clean transparent scanning windows with a soft, lint-free cloth, dampened with alcohol. -
Page 103: Scanner Calibration
Maintenance CANNER CALIBRATION You can perform this operation when the quality of photocopied documents is no longer satisfactory. 80 OK - ADVANCED FCT / CALIBRATION Confirm your choice by pressing the OK key. NCIDENTS OMMUNICATION ERRORS If the communication fails, the fax advises you of an automatic retry later. Example of what is displayed: Current time- - - - - - - - - - - - - - - - - - - - - - - - - - - - - - - - - - FRI 11 SEP 20:13... -
Page 104: Communication Error Codes
Maintenance • restarting the transmission immediately by pressing • abandoning transmission by pressing . To eject the document, press again. Transmission from memory You have the choice between: • waiting until the transmission takes place at the given time • restarting the transmission using the transmission queue (please see the paragraph Imme- diately perform transmission from the waiting queue, on page 5-12). - Page 105 Maintenance Code 08 - Quality The document you sent was not well received. Contact your subscriber to see if you need to send again. Code 0A - No document to be polled You tried to poll a document from a subscriber who had not prepared his document (no deposit) or the password entered was incorrect.
- Page 106 Maintenance Code 1B - Transmission failed During transmission: start again. During reception: ask your subscriber to resend the document. Internet codes Codes 40 and 41 - No reply from supplier The modem cannot connect to the Internet service provider. If this error always occurs, check the supplier’s dial-up number.
-
Page 107: Scanner Incidents
Maintenance CANNER INCIDENTS Scanner paper jam When a paper jam occurs, the following message appears on the control panel screen REMOVE DOCUMENT If jams often occur in a specific part of the unit, the latter needs to be checked, cleaned or repaired. Open the scanner cover. - Page 108 Maintenance The fax does not detect the presence of your inserted document. The message does READY not appear on the screen. At the start and during scanning, appears on the screen. REMOVE DOCUMENT Remove the document or press Check the thickness of the document (50 sheets of paper of 80 g/m Iron out the sheets if needed.
-
Page 109: Packing And Transporting The Unit
Maintenance ACKING AND TRANSPORTING THE UNIT If you wish to transport the unit, always use the original packaging. If you do not pack the unit correctly, you could void the warranty. Scanner unit Set the mains switch of the machine to OFF. Disconnect the mains lead from the wall socket, then disconnect all the cables connected to the machine. -
Page 110: Specifications
Maintenance PECIFICATIONS Type of device: fast professional terminal, for use with all group 3 devices according to the UIT-T recommendations. Scanner / communication Original document format: A4 format Legal 60 to 90 g/m² paper Document feeder: Max. capacity: normal capacity of 50 pages (80g/m²) Format on receipt (A4 format) and Legal: Width: 210 / 216 mm... - Page 111 Maintenance The effective transmission time for an A4 page varies from a few seconds to around a minute (depending on the line quality, the modem speed, the amount of information in the original and the resolution) (*). (*) Without including the exchange initialisation procedure Internet: general specifications TCP/IP/PPP protocols SMTP/POP3/MIME protocols for electronic mail...
- Page 112 Maintenance Registered trademarks PRESCRIBE is a registered trademark of the Kyocera Corporation. KPDL and KIR (Kyocera Image Refinement) are commercial trademarks of the Kyocera Corporation. Diablo 630 is a product from Xerox Corporation. IBM Proprinter X24E is an International Business Machines Corporation product.
-
Page 113: Limited Warranty
Maintenance IBM PROGRAM LICENSE AGREEMENT The device you have purchased contains one or more software programs ("Programs") which belong to international business machines corporation ("IBM"). This document defines the terms and conditions under which the software is being licensed to you by IBM. If you do not agree with the terms and conditions of this license, then within 14 days after your acquisition of the device you may return the device for a full refund. - Page 114 Maintenance Limitation of Remedies IBM’s entire liability under this license is the following; 1) For any claim (including fundamental breach), in any form, related in any way to this license, IBM’s liability will be for actual damages only and will be limited to the greater of: a) the equivalent of U.S.$25,000 in your local currency;...
- Page 115 Maintenance 3.To protect proprietary rights of Agfa Japan, you agree to maintain the Software and other proprietary information concerning the Typefaces in strict confidence and to establish reasonable procedures regulating access to and use of the Software and Typefaces. 4.You agree not to duplicate or copy the Software or Typefaces, except that you may make one backup copy.
- Page 116 Maintenance 6-16...
-
Page 117: Safety
AFETY AFETY SAFETY WARNING Before powering on your unit, make sure the mains outlet it is connected to meets the requirements printed on the warning label on your unit, or on the separate power supply (depending on the model). This unit must not be installed on the floor. If your unit works with a battery, replace it only with the same type of battery or an equivalent type rec- ommended by the manufacturer. -
Page 118: Environment
Safety NVIRONMENT Preservation of the environment is an essential concern for the manufacturer. The desire of the manufacturer is to operate installations that respect the environment and hence it has decided to integrate environmental performance in the complete life cycle of its products, from the manufacturing phase to the commissioning, use and elimination. - Page 119 The declaration of compliance can be requested at the following address: UTAX GmbH Ohechaussee 235, 22848 Norderstedt - Germany...
- Page 120 Data subject to change wi hout motice *253068043A* UTAX GmbH Ohechaussee 235, 22848 Norderstedt - Germany www.utax.com...
Need help?
Do you have a question about the LP 4235 and is the answer not in the manual?
Questions and answers