Table of Contents
Advertisement
Quick Links
Advertisement
Table of Contents

Related Manuals for Triumph Adler CX 8020


Summary of Contents for Triumph Adler CX 8020
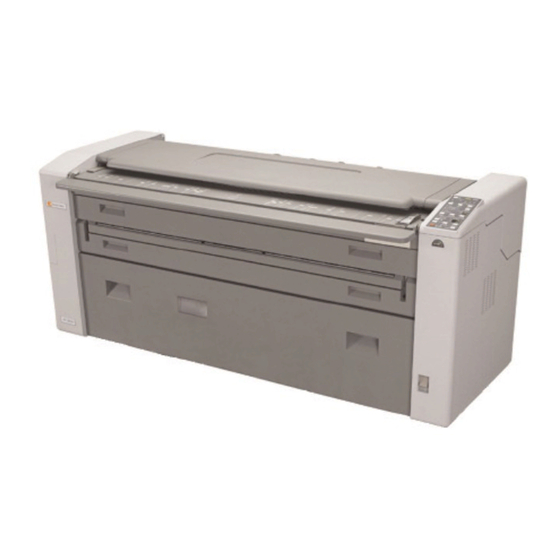
- Page 1 Instruction Handbook CX 8020 Large Format System...
- Page 2 Thank you for purchasing the Copier CX 8020. This USER'S MANUAL contains functional and operational explanations for the CX 8020. Please read this USER'S MANUAL carefully before using the Copier. Please keep this USER'S MANUAL for future reference. 1. When this product is installed in North America.
-
Page 3: Safety Warnings
Safety Warnings The following warnings are very important in order to safely use this product. These notes are important in preventing danger to the operator or operation of the machine. The following symbols are found throughout the USER’S Manual and have the following meaning: WARNING This WARNING mark means that there is a possibility of death or serious injury if you ignore or do not follow the said instruction. - Page 4 WARNING Ground the product with a correct ground source or you may be electrically shocked. 1. The Power source should be as follows: 220-240V plus 6% or minus 10%, 50/60Hz, 10A 2. Use a circuit with a dedicated breaker. 3. Install the product as close to the wall outlet as possible. 4.
- Page 5 CAUTION Do not install the machine in a humidified room or a dusty room. Also, do not install the machine on an unstable floor as injuries may occur. 1. Unplug the machine before you move it. The power cord may be damaged and it may result in a fire or electric shock.
-
Page 6: Table Of Contents
1-12 1. 8. 3 Operation Panel 1-13 Chapter 2 Basic Operation Page 2. 1 Turning on the CX 8020 2- 2 2. 2 Turning off the CX 8020 2- 4 2. 3 Replacing the Roll Media 2- 5 2. 4... - Page 7 3. 6 Power Saving Mode and Power OFF Mode 3-11 3. 6. 1 Power Saving Mode 3-11 3. 6. 1. 1 Power Saving Mode (Manual) 3-11 3. 6. 1. 2 Power Saving Mode (Automatic) 3-12 3. 6. 2 Power OFF Mode 3-13 3.
-
Page 8: Chapter 1 Before Use
Chapter 1 Before Use Page 1. 1 Installation Requirements 1- 2 1. 2 Originals Prohibited from Duplication 1- 3 1. 3 Features 1- 4 1. 4 Specifications 1- 5 1. 5 Specifications of Original 1- 6 1. 6 Specifications of Copying Paper 1- 8 1. -
Page 9: Installation Requirements
(Refer to the following figure.) The equipment must be levelled and the floor strength must be ample to sustain the weight of the equipment. 60cm or wider (Rear side) CX 8020 60cm or 120cm or wider wider (Front side) 90cm or wider... -
Page 10: Originals Prohibited From Duplication
1. 2 Originals Prohibited from Duplication It may not be allowed to copy every type of original. You may be punished by the law if you possess the copy of some types of originals. We recommend you to consider the following before you copy originals. [Originals prohibited from copying by the law] 1. -
Page 11: Features
1. 3 Features 1. 2 methods to feed media CX 8020 can feed media by automatic roll paper feeding (1 roll) and manual cut sheet feed. 2. Cut Modes selection 2 Cut Modes are selectable; Standard Cut and Synchro Cut. -
Page 12: Specifications
1. 4 Specifications Subject Specification Model CX 8020 Configuration Desk Top Type Original Sheet through type Photoconductor Organic Photoconductive Drum Copy method Indirect Electrostatic System Copy speed 60mm per second (1.5 copies (A0) / minute) Light Source Fluorescent lamp Kind of Original... -
Page 13: Specifications Of Original
1. 5 Specifications of Original The used original must satisfy the following specifications. Minimum Maximum Remarks Thickness 0.05mm 0.2mm In case of Single Copy 0.07mm 0.2mm In case of Multiple Copy Width 210mm 841mm Length 297mm 3,000mm Also, do not use the following kinds of original, because you may damage the original or machine! Sticked with paste Torn Folded... - Page 14 Clipped or stapled Rough surface (Carbon paper for example) Clipped Stapled Rough surface K I P K I P 100Punched Chapter 1 Before Use...
-
Page 15: Specifications Of Copying Paper
1. 6 Specifications of Copying Paper The following sizes of paper are available for copying. The maximum width is 914mm (36 inches) and the minimum is 216mm. The maximum length is 3000mm, and the minimum is 279mm. Type Weight Available Copying Sizes Plain Paper 64 to 80g/m A0, A1, A2, A3 and A4 size... -
Page 16: Storage Of Copying Media
“Void of image” may occur when you make a copy with a plain paper or vellum. Treatment 1. Turn on the Dehumidify Heater of CX 8020 to dehumidify the air in the machine. 2. Remove the plain paper or vellum from the machine whenever you finish copying, and keep it in a polyethylene bag. -
Page 17: Appearance
1. 8 Appearance 1. 8. 1 Front View Name Function Original Table Open the Original Table and put the original onto it. Exit Cover Open the Exit Cover when you remove a mis-fed paper in the Fuser Unit. Copy Exit Copies are ejected from the Copy Exit. - Page 18 Name Function Power Switch You can turn on/off the CX 8020. Dehumidify Heater Switch You can turn on/off the Dehumidify Heater which dehumidifies the roll paper in the machine. Length Counter Total copy length is indicated. (1 count /1 meter) Upper Unit Open the Upper Unit when you remove a mis-fed paper.
-
Page 19: Rear View
1. 8. 2 Rear View Name Function Toner Hatch Open Levers Pull both the Toner Hatch Open Levers inward to unlock and open the Toner Hatch. Developer Covers Remove these covers when you set a new Toner Cartridge to supply the toner to the Developer Unit. Original Exit Original is ejected from here. -
Page 20: Operation Panel
1. 8. 3 Operation Panel STAND BY LIGHTER DARKER FILM VELLUM/TRACING PLAIN PAPER MEDIA ROLL CUT SHEET CLEAR DECREASE INCREASE CUT MODE LEAD EDGE TRAIL EDGE DECREASE INCREASE STOP CLEAR ALL CLEAR 1-13 Chapter 1 Before Use... - Page 21 Name Function WAIT Indicator The WAIT Indicator lights when the CX 8020 is warming up. (It is impossible to make a copy when it is lighting.) Also the WAIT Indicator flashes when the Original Guide is not at the far right position. (It is impossible to make a multiple copy in this case.)
- Page 22 Name Function STOP/ALL CLEAR Key 1) Press the STOP/ALL CLEAR KEY to stop copying in the middle. 2) Also press the STOP/ALL CLEAR KEY when the machine is not copying to clear (initialize) all the settings. Mis-feed Indicator The Mis-feed Indicator lights when the copying paper or original is mis-fed anywhere in the machine.
-
Page 23: Chapter 2 Basic Operation
Chapter 2 Basic Operation Page 2. 1 Turning on the CX 8020 2- 2 2. 2 Turning off the CX 8020 2- 4 2. 3 Replacing the Roll Media 2- 5 2. 4 Adding Toner 2- 9 2. 5 Copying with Roll Media 2-13 2. -
Page 24: Turning On The Cx 8020
(4) outlet must satisfy 220-240V +6%/-10%, 50/60Hz and 10A. 2. There is a Power Switch (1) on the right front side of CX 8020. Press its “ I ” side to turn on the CX 8020. Chapter 2 Basic Operation... - Page 25 CLEAR DECREASE INCREASE LEAD EDGE CUT MODE TRAIL EDGE DECREASE INCREASE STOP CLEAR ALL CLEAR 4. The Ready Indicator (4) lights when the CX 8020 is ready. STAND BY LIGHTER DARKER FILM VELLUM/TRACING PLAIN PAPER MEDIA ROLL CUT SHEET CLEAR...
-
Page 26: Turning Off The Cx 8020
2. 2 Turning off the CX 8020 1. There is a Power Switch (1) on the right front side of CX 8020. Press its “O” side to turn off the CX 8020. Chapter 2 Basic Operation... -
Page 27: Replacing The Roll Media
2. 3 Replacing the Roll Media 1. Open the Front Door (1), and then pull out both the Spool Guides (2). 2. Lift up the core of roll paper with the Spool holding its both sides. 3. Press down the Lock Lever (3) to unlock the core of roll paper, and then pull out the Spool (4) from the core. - Page 28 4. Insert the Spool into the new roll paper with pressing down the Lock Lever (3). And then align the side face of roll paper with the concerning size mark (5) printed on the Spool. When aligned, release your hand from the Lock Lever (3) to lock the roll paper firmly.
- Page 29 6. Lift up the Feeding Roller Cover (6) until it is locked. 7. Hold on the sides of the media about 30mm from the top leading edge, pulling the paper outwards ( to keep the lead edge taught ) Feed the media straight up in between the rollers noted .
- Page 30 9. Close the Front Door. NOTE If the Feeding Roller Cover is not closed properly, the Front Door can not be closed. 10. Cut the leading part of roll paper by the Initial Cut. (As for the detail of the Initial Cut, refer to [3.1 Initial Cut] on the page 3-2.) Chapter 2 Basic Operation...
-
Page 31: Adding The Toner
2. 4 Adding Toner WARNING There is combustible powder in the toner cartridge. Do not burn up the used toner cartridge. NOTE If your hand or your clothing is soiled by toner, dust the toner. If it is unable to dust it, wash the clothing with the cold water. (Do not use the hot water at this time because the toner will soak into fibres.) 1. - Page 32 3. Prepare 2 Toner Cartridges (5), and shake them left and right several times while facing up its film side. 4. One side of each Toner Cartridge has a tape (6) which fixes the film. Insert this side of each Toner Cartridge under the holder (7).
- Page 33 6. Strip off the tape (6) which fixes the film (8), and then put the Holder (9) on the right end of the Toner Cartridge as the following picture. NOTE Do not discard the tape (6) at this point of time because it will be used later. 7.
- Page 34 9. Pull each green Hook (3) toward the arrow mark and remove each Toner Cartridge (5). Discard the Toner Cartridge in a proper way. 11. Put back the Developer Covers (4). 12. Close the Toner Hatch (2). 2-12 Chapter 2 Basic Operation...
-
Page 35: Copying With The Roll Media
2. 5 Copying with Roll Media 1. Confirm that the Ready Indicator on the Operation Panel is lit. Ready Indicator STAND BY LIGHTER DARKER FILM VELLUM/TRACING PLAIN PAPER MEDIA ROLL CUT SHEET CLEAR DECREASE INCREASE LEAD EDGE CUT MODE TRAIL EDGE DECREASE INCREASE STOP... - Page 36 3. Ensure that the Original Table (1) is open. Move the Original Guide (2) according to the width of original as needed. NOTE In case you will make a multiple copy, slide the Original Guide fully to the right after you insert the original.
- Page 37 5. The Original is ejected from the Original Exit after the scan. 6. Copy is ejected from the Copy Exit. 2-15 Chapter 2 Basic Operation...
-
Page 38: Copying With The Cut Sheet Media
2. 6 Copying with Cut Sheet Media NOTE It is impossible to make a multiple copy by Cut Sheet Paper Feeding Mode. 1. Confirm that the Ready Indicator on the Operation Panel is lighting. Ready Indicator STAND BY LIGHTER DARKER FILM VELLUM/TRACING PLAIN PAPER... - Page 39 4. There are several Size Marks (3) on the Bypass Feeder Table. Align the edge of cut sheet paper with the Size Marks (3), and insert the cut sheet into the Bypass until it touches the feeding roller. Cut sheet paper is transported in a little, and then awaits the original to be inserted.
- Page 40 5. Move the Original Guide (4) according to the width of original. 6. Put the original with face down on the Original Table, and then insert it under the Original Feed Unit along the Original Guide (4) until the leading edge touches the feeding roller.
- Page 41 7. The Original is ejected from the Original Exit after the scan. 8. Copy is ejected from the Copy Exit. NOTE 1. The paper feeding mode automatically changes from Cut Sheet Paper Feeding Mode to Roll Paper Feeding Mode after the copy. 2.
-
Page 42: Replacing The Waste Toner Bottle
2. 7 Replacing the Waste Toner Bottle WARNING There is combustible powder in the wasted toner bottle. Do not burn up the used wasted toner bottle. NOTE Do not reuse the wasted toner. 1. Press down the Upper Unit Open Levers (1) at both sides, and lift up the Upper Unit (2). 2. - Page 43 3. Remove the Wast Toner Bottle (4) gently. 4. Install the new Waste Toner Bottle. Then hold it with the Bracket and tighten the Screw Knob (5). 5. Close the Upper Unit. NOTE 1. If toner spill out from the bottle, clean with a wet cloth. 2.
-
Page 44: Chapter 3 Useful Functions
Chapter 3 Useful Functions Page 3. 1 Initial Cut 3- 2 3. 2 Adjusting the Copy Density 3- 3 3. 3 Selecting the Cut Mode 3- 5 3. 4 Adjusting the Leading/Trailing Margin 3- 6 3. 5 Multiple Copy 3- 7 3. -
Page 45: Initial Cut
3. 1 Initial Cut In many cases the leading edge of a new roll paper is not straight but is rough (folded or torn). The Initial Cut is a useful function to straighten it by cutting off the leading part by 280mm long. NOTE The leading part of a roll media will be humidified if it is kept in the machine for a long term without printing, which results in a defective image. -
Page 46: Adjusting The Copy Density
3. 2 Adjusting the Copy Density The CX 8020 has 14 levels of Copy Density. It is possible to select your preferable one optionally from these 14 levels. (7 levels in Normal Mode and also 7 levels in SL Mode) ( SL removes background ) The Copy Density is shown by both the Copy Density Indicator and SL Indicator. - Page 47 1. Press the DARKER KEY (1) if you will make the copy density darker. On the contrary press the LIGHTER Key (2) if you will make it lighter. STAND BY 2. Press the SL Key (3) if you will validate the SL Mode. The SL Indicator (4) lights when validated.
-
Page 48: Selecting The Cut Mode
3. 3 Selecting the Cut Mode You can specify the Cut Mode of roll media. Synchronous Cut and Standard Cut are selectable. Reference The roll paper is cut as long as the copy image if you select the Synchronous Cut. Please select the Synchronous Cut when the size of copy image is not standard (as D size or E size) because of original size, magnification and so on The roll paper is cut by the standard size (length) as A0 or A2 if you select the Standard Cut. -
Page 49: Adjusting The Leading/Trailing Margin
3. 4 Adjusting the Leading/Trailing Margin You can provide the copy with a Leading/Trailing Margin. NOTE It is impossible to provide a Trailing Margin when you copy with a cut sheet paper. 1. Whenever you press the LEAD/TRAIL Select Key (1), the LEAD EDGE Indicator (2) and the TRAIL EDGE STAND BY Indicator (3) light alternately. -
Page 50: Multiple Copy
3. 5 Multiple Copy It is possible to make a multiple copy. The maximum Copy Number is 19. NOTE 1. It is impossible to make a multiple copy by the Cut Sheet Paper Feeding Mode. 2. Note that it is unable to make a multiple copy if the original is 1.25m or longer. 1. - Page 51 3. Specify Copy Number pressing both the INCREASE Key and the DECREASE Key (1). STAND BY The Copy Number Indicator (2) indicates the Copy Number you specified. If you wish to cancel the multiple copy after specifying the Copy Number, press the STOP/ALL CLEAR Key (3). LIGHTER DARKER FILM...
- Page 52 If the Original Guide (5) is not at the far right position, the WAIT Indicator lights and it is impossible to start the multiple copy. 6. The CX 8020 scans the original as many times as the Copy Number by transporting forward and backward.
- Page 53 7. The Original is ejected from the Copy Exit after scanning. 8. Copies are ejected from the Copy Exit. 3-10 Chapter 3 Useful Function...
-
Page 54: Power Saving Mode
Power Saving Mode and Power OFF Mode You can enable the Power Saving Mode or the Power OFF Mode to save the power consumption when the CX 8020 is not used for a long time. 3. 6. 1 Power Saving Mode The Power Saving Mode is the function to reduce the power consume when you do not make any operation for some period although you leave the CX 8020 ON. -
Page 55: Power Saving Mode (Automatic)
3. 6. 1. 2 Power Saving Mode (Automatic) The Power Saving Mode automatically works if you do not make any copy for you specified in advance. 1. Press the STAND BY Key (1) for 3 seconds. The Indication Part (2) indicates “LP” (at first). 2. -
Page 56: Power Off Mode
3. 6. 2 Power OFF Mode The Power OFF Mode is the function to turn off the CX 8020 automatically if you do not make any copies in the time you specified in advance. Reference The purpose of Power OFF Mode is not to consume any power by turning off the machine automatically. - Page 57 6. When you have finished all the settings, press the STAND BY Key (1). If you leave the machine without any operation for the time you specified, the CX 8020 is turned off automatically by the Power OFF Mode. NOTE If both the Power Saving Mode (Automatic) and the Power OFF Mode are ON, the Power OFF Mode has the priority.
-
Page 58: Dehumidifying The Roll Media
3. 7 Dehumidifying the Roll Media If the roll media has too much moisture, the toner may not be fixed correctly to the media. And also, void of image, double feeding, creasing might occur. If the room has humidity, turn on the Dehumidify Heater to dehumidify the interior of the machine. -
Page 59: Sample Copy
STOP CLEAR ALL CLEAR 2. Set the Original to the CX 8020. The original is transported about 280mm long for the Sample Copy, and then it is returned to the front. The Sample Copy about 280mm long is ejected from the Copy Exit. -
Page 60: Chapter 4 Error Treatment
Chapter 4 Error Treatment Page 4. 1 Call Operator Errors 4- 2 4. 1. 1 Mis-feed Errors 4- 2 4. 1. 1. 1 Code “J0” : Original Mis-feed 4- 4 4. 1. 1. 2 Code “J1” : Paper Mis-feed at Paper Entrance Area 4- 5 4. -
Page 61: Call Operator Errors
DECREASE INCREASE STOP CLEAR ALL CLEAR The following figure is the section of the CX 8020 which shows the location of each mis-feed. (More detailed explanation for each code is described on the later pages.) Rear Front Chapter 4 Error Treatment... - Page 62 NOTE (1) Carefully remove the mis-fed paper as its edge may be very sharp, or you may harm your hand. (2) Remove a necklace, a bracelet and a wristwatch from yourself before removing the mis-fed paper. Otherwise you may be burnt or get an electric shock when such metal accessory touches the inside of the printer.
-
Page 63: Code "J0" : Original Mis-Feed
4. 1. 1. 1 Code “J0” : Original Mis-feed Mis-feed Code “J0” is indicated when the original is mis-fed under the Original Feed Unit. STAND BY LIGHTER DARKER FILM VELLUM/TRACING PLAIN PAPER MEDIA ROLL CUT SHEET CLEAR DECREASE INCREASE CUT MODE LEAD EDGE TRAIL EDGE Rear... -
Page 64: Code "J1" : Paper Mis-Feed At Paper Entrance Area
4. 1. 1. 2 Code “J1” : Paper Mis-feed at Paper Entrance Area Mis-feed Code “J1” is indicated when the paper is mis-fed at the Paper Entrance Area. STAND BY LIGHTER DARKER FILM VELLUM/TRACING PLAIN PAPER MEDIA ROLL CUT SHEET CLEAR DECREASE INCREASE... - Page 65 3. Rewind the roll paper completely. Then, set the roll paper again. NOTE If it is difficult to set the paper again as its leading edge is folded or torn, cut it off by the cutter or scissors. 4. Bring down the Feeding Roller Cover (2), and close the Front Door (1).
-
Page 66: Code "J2" : Paper Mis-Feed At Paper Turning Area
4. 1. 1. 3 Code “J2” : Paper Mis-feed at Paper Turning Area Mis-feed Code “J2” is indicated when the paper is mis-fed at the Paper Turning Area. STAND BY LIGHTER DARKER FILM VELLUM/TRACING PLAIN PAPER MEDIA ROLL CUT SHEET CLEAR DECREASE INCREASE... - Page 67 3. Rewind the roll paper completely. Then, set the roll paper again. NOTE If it is difficult to set the paper again as its leading edge is folded or torn, cut it off by the cutter or scissors. 4. Bring down the Feeding Roller Cover (2), and close the Front Door (1).
-
Page 68: Code "J3" : Paper Mis-Feed At Print Area Or Copy Exit Area
4. 1. 1. 4 Code “J3” : Paper Mis-feed at Print Area or Copy Exit Area Mis-feed Code “J3” is indicated in either of the following cases. STAND BY (1) The paper is mis-fed at the Print Area. (Print Area is between Drum and Fuser in the following drawing.) LIGHTER DARKER... - Page 69 2. Hold the mis-fed paper by both hands and pull it out carefully without breaking. NOTE (1) Be careful not to touch on the Fuser Roller and the surrounding parts as they are very hot. You will be burnt if you touch such parts. (2) Be careful not to touch the Stripper Fingers as they are very sharp.
- Page 70 5. There are Levers (3) at both sides of the Corner Transport Unit (4). Pull both Levers (3) inward to open the Corner Transport Unit (4) backward. 6. Remove the mis-fed paper gently. NOTE There is a Photoconductive Drum (large cylinder) on the bottom of the Upper Unit. Do not touch the drum when you remove the mis-fed paper or when you open/close the Corner Transport Unit! Do not leave the Upper Unit open for a long period as the Photoconductive Drum is very...
- Page 71 7. Close the Corner Transport Unit (4) and lock it moving the Levers (3) outward. 8. Close the Upper Unit finally. NOTE Confirm that the Mis-feed Indicator is put out and the Paper Mis-feed Code disappears after removing the mis-fed paper. If the Mis-feed Indicator lights again, some more paper may be mis-fed anywhere in the machine, so please check other areas as well.
-
Page 72: Code "J4" : Incorrect Insertion Of Cut Sheet Paper
4. 1. 1. 5 Code “J4” : Incorrect insertion of Cut Sheet Paper Mis-feed Code “J4” is indicated when you insert the cut sheet paper to the Bypass Feeder mistakenly when the CX 8020 is STAND BY copying with the roll paper. -
Page 73: Code "J5" : Mis-Feed Of Cut Sheet Paper At Paper Turning Area
4. 1. 1. 6 Code “J5” : Mis-feed of cut sheet paper at Paper Turning Area Mis-feed Code “J5” is indicated when the cut sheet paper is mis-fed at the Paper Turning Area. STAND BY LIGHTER DARKER FILM VELLUM/TRACING PLAIN PAPER MEDIA ROLL CUT SHEET... - Page 74 2. There are Levers (2) at both sides of the Corner Transport Unit (3). Pull both Levers (2) inward to open the Corner Transport Unit (3) backward. 3. Remove the mis-fed paper gently. NOTE There is a Photoconductive Drum (large cylinder) on the bottom of the Upper Unit. Do not touch the drum when you remove the mis-fed paper or when you open/close the Corner Transport Unit! Do not leave the Upper Unit open for a long period as the Photoconductive Drum is very...
- Page 75 4. Close the Corner Transport Unit (3) and lock it moving the Levers (2) outward. 5. Close the Upper Unit finally. NOTE Confirm that the Mis-feed Indicator is put out and the Paper Mis-feed Code disappears after removing the mis-fed paper. If the Mis-feed Indicator lights again, some more paper may be mis-fed anywhere in the machine, so please check other areas as well.
-
Page 76: Code "J6" : Mis-Feed Of Cut Sheet Paper (Incorrect Size)
4. 1. 1. 7 Code “J6” : Mis-feed of cut sheet paper (Incorrect size) Mis-feed Code “J6” is indicated when you set a cut sheet paper of incorrect size. STAND BY (Incorrect size means shorter than 279mm or longer than 3 meters.) LIGHTER DARKER... - Page 77 2. There are Levers (2) at both sides of the Corner Transport Unit (3). Pull both Levers (2) inward to open the Corner Transport Unit (3) backward. 3. Remove the mis-fed paper gently. NOTE There is a Photoconductive Drum (large cylinder) on the bottom of the Upper Unit. Do not touch the drum when you remove the mis-fed paper or when you open/close the Corner Transport Unit! Do not leave the Upper Unit open for a long period as the Photoconductive Drum is very...
- Page 78 4. Close the Corner Transport Unit (3) and lock it moving the Levers (2) outward. 5. Close the Upper Unit finally. NOTE Confirm that the Mis-feed Indicator is put out and the Paper Mis-feed Code disappears after removing the mis-fed paper. If the Mis-feed Indicator lights again, some more paper may be mis-fed anywhere in the machine, so please check other areas as well.
-
Page 79: Other Errors
4. 1. 2 Other Errors 4. 1. 2. 1 Roll Empty The Roll Empty Indicator (1) lights if the roll paper is emptied in the middle of copying. Please replace the roll paper making reference to STAND BY [2.3 Replacing the Roll Paper] on the page 2-5. LIGHTER DARKER FILM... -
Page 80: Waste Toner Full
4. 1. 2. 3 Waste Toner Full The Waste Toner Full Indicator (1) lights when the Waste Toner Bottle is filled with the toner. STAND BY Replace the Waste Toner Bottle with the new one making reference to [2.7 Replacing the Waste Toner Bottle] on the page 2-20. -
Page 81: Call Service Errors
4. 2 Call Service Errors If the machine has a fatal error, the Service Call Indicator (1) lights to inform you of the error. Also the Indication Part (2) indicates any of the following Error Code. STAND BY Error Code Name of the error Fuser Error (High Temperature) LIGHTER... -
Page 82: Chapter 5 Cleaning And Checking
Chapter 5 Cleaning and Checking Page 5. 1 Cleaning of Each Part 5- 2 5. 1. 1 Original Feeding Part 5- 2 5. 1. 2 Original Guide 5- 2 Chapter 5 Cleaning and Checking... -
Page 83: Cleaning Of Each Part
5. 1 Cleaning of Each Part The following parts tend to get dirt, so clean them once in a week. (If they are dirty the copy quality will not be good.) 5. 1. 1 Original Feeding Part 1. Open the Original Feed Unit (1). 2. - Page 84 UTAX GmbH, Ohechaussee 235, 22848 Norderstedt, Germany...
Need help?
Do you have a question about the CX 8020 and is the answer not in the manual?
Questions and answers