Table of Contents
Advertisement
Advertisement
Table of Contents

Related Manuals for Triumph Adler DC 2218


Summary of Contents for Triumph Adler DC 2218
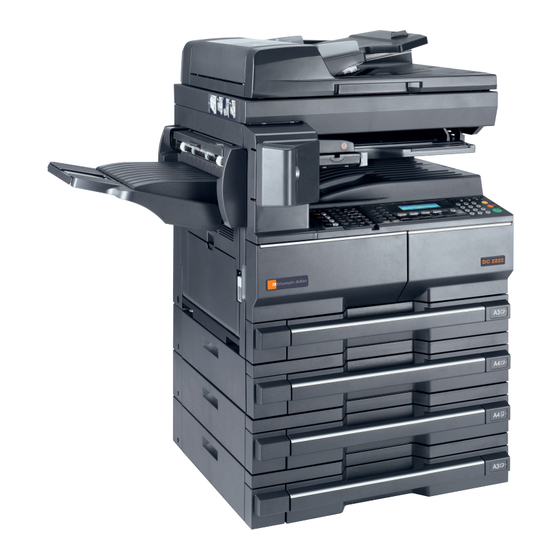
- Page 1 Instruction Handbook Advanced DC 2218 | 2222 Digital Multifunctional System...
- Page 2 This Advanced Operation Guide is for DC 2218 and DC 2222. This Operation Guide mentions that DC 2218 is a 18 ppm (prints per minute) model and DC 2222 is a 22-ppm model.
- Page 3 Guide to This Operation Guide This operation guide has the following chapters. The content of each chapter is summarized below for reference. 1 Copier Functions This chapter explains various settings that can be made in relation to the copier functions of this machine.
-
Page 5: Table Of Contents
CONTENTS Copier Functions ................... 1-1 Paper Source Selection ......................1-2 Original Size Selection ......................1-3 Image Quality Mode .........................1-5 Copy Density Adjustment ......................1-6 Number of Copies ........................1-7 Original Orientation ........................1-8 Offset Copying ..........................1-9 Staple Copying ........................1-10 Margin Mode ..........................1-12 Border Erase Mode ........................1-13 Continuous Copying .......................1-14 Auto Rotation .........................1-15 EcoPrint Mode ........................1-16... - Page 6 Memory Card Operation ......................2-35 Reading Font Data ......................2-35 Reading Macro Data ......................2-36 Reading Data ........................2-36 Reading Program ......................2-36 Writing Data ........................2-37 Deleting Data ........................2-37 Deleting Font Data ......................2-37 Deleting Program Data ....................2-38 Deleting Macro Data ......................
- Page 7 Default Settings ........................4-13 Copier Job Accounting .....................4-13 Printer Job Accounting .....................4-14 Scanner Job Accounting ....................4-14 Fax Job Accounting ......................4-15 Operation against Excess over Limit ................4-16 Using Job Accounting ......................4-17 Appendix ......................Appendix-1 Paper ...........................Appendix-2 Basic Specifications of Paper ................Appendix-2 Proper Paper Selection ..................Appendix-2 Special Paper ......................Appendix-5 Glossary ........................Appendix-8 Index ........................Index-1...
-
Page 9: Copier Functions
Copier Functions This chapter explains the following topics. • Paper Source Selection • Original Size Selection • Image Quality Mode • Copy Density Adjustment • Number of Copies • Original Orientation • Offset Copying • Staple Copying • Margin Mode •... - Page 10 Copier Functions Paper Source Selection Perform the following procedure to select a paper source (cassette or multi purpose tray) with the desired paper size. Set the original. Ready to copy . If Auto is displayed on the message display, copy Auto Auto paper of the same size as the original is automatically...
-
Page 11: Original Size Selection
Copier Functions Original Size Selection With manual original size selection, this machine can scan only the part of a specified size of the original for copying. Also you can use an irregular size original by inputting the original size. Selecting an Original Size from Regular Size Set the original. - Page 12 Copier Functions Press the Enter key. Press the Start key. Copying starts. Inputting the Original Size Set the original. Press the Original Size key. Press the key or the key to select Input size. Original Size : Auto Input Size Press the Enter key.
-
Page 13: Image Quality Mode
Copier Functions Image Quality Mode You can select the image quality mode according to the type of originals. Image quality mode Description Text + Photo Select to copy originals that contain a mixture of both text and photographs. Text Select to copy originals that contain large amounts of text, such as documents. -
Page 14: Copy Density Adjustment
Copier Functions Copy Density Adjustment This section explains how to adjust the copy density. The following modes are available for copy density adjustment. Mode Description Auto density mode The machine detects the density of the original and sets the optimum density. -
Page 15: Number Of Copies
Copier Functions Number of Copies Set the number of copies to be made as follows. You can set the number of copies to 999 at the maximum. Set the original. Use the numeric keys to set the desired number of Ready to copy . -
Page 16: Original Orientation
Copier Functions Original Orientation You must specify the orientation of the original when using the following functions: duplex copying, split copying (from 2-sided originals), margin mode, border erase mode, combine copying, auto selection mode (optional), and staple copying (optional). When the originals are set on the platen: Original Rear Left top... -
Page 17: Offset Copying
Copier Functions Offset Copying For copying of multiple sets, the orientation of the copies can be changed at the end of each set for easy classification. Notes • If the optional document processor or finisher is not installed, use this function with sort copying. -
Page 18: Staple Copying
Copier Functions Staple Copying Copies can be stapled at the upper left or upper right corner. Note The optional finisher must be installed. The following options are available for stapling copies. Cassette Paper Load Cassette Paper Load Direction Direction Original Orientation: Top Edge (Back Edge) Original Orientation: Top Edge (Back Edge) - Page 19 Copier Functions Set the original. Press the Staple key. Press the key or the key to select the desired Staple : stapling position. Left Top Right Top Press the Enter key. Press the Start key. Scanning of the original starts. If the originals have been set in the optional document processor, copying starts automatically.
-
Page 20: Margin Mode
Copier Functions Margin Mode The image of the original can be shifted to make a margin (blank) space at the left or top side on the copy. You can set the width of each margin to 1/8" to 3/4" in 1/8" increments [1 mm to 18 mm in 1 mm increments]. -
Page 21: Border Erase Mode
Copier Functions Border Erase Mode Shadows that may appear around the edges of copies can be erased. The following modes are available for border erase function. Mode Description Use this mode to erase shadows that may appear around the edges of Sheet Erase copies made from sheet originals. -
Page 22: Continuous Copying
Copier Functions Continuous Copying The continuous copying function allows multiple originals to be separated into some blocks, to be scanned at more than one time, and to be copied in one batch. Since multiple originals of the same type are scanned in multiple steps to accumulate data in memory, many originals can be copied in one batch. -
Page 23: Auto Rotation
Copier Functions Auto Rotation With the auto rotation function, the image of the original is automatically rotated counterclockwise by 90 degrees if the orientation of the original is different from that of the paper loaded in the cassette. Notes • The paper sizes that can be used for auto rotation are A4/11 ×... -
Page 24: Ecoprint Mode
Copier Functions EcoPrint Mode The ecoprint mode can reduce toner consumption. Use this mode when high quality copies are not necessary, for example, for trial copying. Notes • The copy densityDensity will be a little lighter. • You can select whether or not to turn on the ecoprint mode at a default setting. (See EcoPrint Mode on page 3-4.) -
Page 25: Auto Selection Mode
Copier Functions Mixed Size Originals Mode With Mixed Size Originals, you need not use the Paper Selection key to specify the paper size when using the optional document processor. The original sizes are detected one by one and each original is automatically copied to a sheet of the same size. Notes •... -
Page 26: Program Function
Copier Functions Program Function Up to eight combinations of copy modes and functions displayed on the operation panel can be registered as a single program. Registering a Program Set the desired copy modes, etc., to be registered. Press the Program key. Press the key or the key to select Register... -
Page 27: Printer Settings
Printer Settings This chapter explains the settings required for using the printer functions. For setting operation required for using this machine as a network printer, use the operation panel. The principal settings that can be made are shown below. • Using This Machine as a Network Printer •... -
Page 28: Using This Machine As A Network Printer
Printer Settings Using This Machine as a Network Printer To use this machine as a network printer, use the procedure below for the setting. Preparation of network connection environment (Assignment of IP address, etc.) Connection of network cable (Refer to the Basic Operation Guide, Connecting the Network... -
Page 29: Menu Hierarchical Diagram
Printer Settings Menu Hierarchical Diagram Note > displayed on each setting screen indicates the current setting. Print Status No, Print Page e-MPS Quick Copy Select User Select JOB Copies: ### Name Delete Private/ Select User Select JOB Copies: ### Enter User ID Stored Name Delete... - Page 30 Printer Settings Emulation PCL 6 Pen (1 to 8) 01 to 99 dot(s) KC-GL KC-GL Pen Adjust KC-GL Page A2, A1, A0, B3, B2, B1, B0, SPSZ KPDL Print KPDL On, Off Errs KPDL (AUTO) Print KPDL On, Off Errs Alt.
- Page 31 Printer Settings HARD DISK Read Data Read Program Write Data Delete Data Delete Font Delete Program Delete Macro Delete the language Format No, OK List of No, Print Partitions RAM Disk On, Off Mode 1 to 1024 Mbyte Change # RAM Disk Size Read Data...
- Page 32 Printer Settings 0 to 495 sec. Others Form Feed Time Out Print HEX-DUMP Printer Reset Resource Off, Permanent, Perm/Temp Prot. Auto On, Off Continue 0 to 495 sec. Change # Finishing Proces. On, Off Error Duplex print Staple mode On, Off Service Print Status No, Print...
-
Page 33: Status Page Printing
Printer Settings Status Page Printing The printer default settings, the memory capacity, and so on are printed in a list. Press the Printer key. Press the key or the key to select MENU. Ready CANCEL MENU Press the Enter key. Press the key or the key to select Print... -
Page 34: E-Mps Function
Printer Settings e-MPS Function The following items can be set in e-MPS function setting. • Printing Quick Copy/Proof-and-Hold • Deleting Quick Copy/Proof-and-Hold • Printing Private Print/Stored Job • Deleting Private Print/Stored Job • Printing Virtual Mailbox Data • Printing Virtual Mailbox List •... -
Page 35: Deleting Quick Copy/Proof-And-Hold
Printer Settings Press the key or the key to select the user name. Select User Name The user name is the name that has been set with the printer driver. Press the Enter key. Press the key or the key to select the desired job Select JOB name. -
Page 36: Deleting Private Print/Stored Job
Printer Settings Press the key or the key to select the user name. Select User Name The user name is the name that has been set with the printer driver. Press the Enter key. Press the key or the key to select the desired job Select JOB name. -
Page 37: Printing Virtual Mailbox List
Printer Settings Press the Enter key. Press the key or the key to select the mailbox to Print VMB Data print. 001: File B Press the Enter key. Use the numeric keys to input the five-digit access :File B code. Enter User ID Press the Enter key. -
Page 38: Printing Code Job List
Printer Settings Printing Code Job List Permanent code jobs in the hard disk can be printed. Display the e-MPS screen. Press the key or the key to select List of e-MPS code JOB. Print VMB Data List of VMB List of Code JOB Press the Enter key. - Page 39 Printer Settings Press the key or the key to select Quick Copy. e-MPS Configuration Back Quick Copy Temp Code Job Size Press the Enter key. Press the < key or the > key to input the maximum Quick Copy number of jobs that can be stored. You can set the number to 0 to 50.
- Page 40 Printer Settings Press the key or the key to select Perm Code e-MPS Configuration Job Size [Perm. code Job size]. Quick Copy Temp Code Job Size Perm Code Job Size Press the Enter key. Press the < key or the > key to input the total capacity Permanent Code Job Size for storage of permanent code jobs.
-
Page 41: Interface
Printer Settings Interface This machine is equipped with a parallel interface, USB interface, and network interface as standard components. How to Display the Interface Screen Press the Printer key. Press the key or the key to select MENU. Ready CANCEL MENU Press the Enter key. - Page 42 Printer Settings Press the key or the key to select Change #. NetWare Change # Press the Enter key. Press the key or the key to select the frame NetWare Frame mode. Back Auto 802.3 Press the Enter key. Press the Reset key. The message display returns to the printer basic screen. EtherTalk When using this machine by connecting to an Apple Macintosh computer, turn EtherTalk On.
- Page 43 Printer Settings TCP/IP When connecting to a Windows network through TCP/IP, turn TCP/IP On. Display the Interface screen. Press the key or the key to select Network. Interface Back Network Press the Enter key. Press the key or the key to select TCP/IP. Network Setting Back NetWare...
-
Page 44: Subnet Mask
Printer Settings IP Address Register the IP address of this machine. Notes • To obtain the IP address to enter, check with your network administrator before performing this setting. • Before entering the IP address by following the instructions below, be sure to turn the DHCP setting Off and the TCP/IP setting On. -
Page 45: Default Gateway
Printer Settings Press the Enter key. Next, set the default gateway. Default Gateway To register the default gateway, continue the procedure from step 4 above. Press the key or the key to select Gateway. TCP/IP Setting IP Address Subnet Mask Gateway Press the Enter key. -
Page 46: Emulation
Printer Settings Emulation Note You can set the emulation for each interface. Emulation Mode Selection Emulation modes that can be used with this machine: PCL6, KC-GL, KPDL, KPDL (AUTO), Line Printer, IBM Proprinter, Diablo 630, EPSON LQ-850 If you set KC-GL, you can set the thickness of the pen and the page size. If you set KPDL (AUTO), switching between KPDL and an alternative emulation mode will be automatically performed according to the print data. - Page 47 Printer Settings KC-GL Pen Thickness If you have selected the KC-GL emulation, you can set the thicknesses of the eight pens and the page size. Continue the procedure from step 9 of Emulation Mode Selection to set these items as shown below.
- Page 48 Printer Settings KPDL Error Printing The details of any error that occurs during printing in the KPDL emulation mode can be printed. Continue the procedure from step 9 of Emulation Mode Selection to set this item as shown below. Press the key or the key to select Print KPDL KPDL...
-
Page 49: Font
Printer Settings Font You can select the default font for the current interface. The default font can be one of the internal fonts or a font stored in the optional memory card. You can set the following items for fonts. •... -
Page 50: Font Size
Printer Settings Press the key or the key to select the font ID. Select Font Back I000 Detail Press the Enter key. The font number is displayed. Font ID Characters displayed before font numbers indicate the I000 following items. Display Description Internal font Downloaded fonts... -
Page 51: Courier/Letter Gothic Font Character Pitch
Printer Settings Press the Reset key. The message display returns to the printer basic screen. Courier/Letter Gothic Font Character Pitch You can set the character pitch of the Courier or Letter Gothic font. Display the Font screen. (See How to Display the Font Screen on page 2-23.) Press the key or the... -
Page 52: Code Set Selection
Printer Settings Press the key or the key to select Regular or Courier Dark. Back Regular Dark Press the Enter key. Press the Reset key. The message display returns to the printer basic screen. Code Set Selection With the PCL6 emulation, you can select a code set. Display the Font screen. - Page 53 Printer Settings Press the Enter key. Printing of the font list starts. Internal Scalable and Bitmapped Fonts List PRESCRIBE Font Name Scalable/Bitmap Password Selection [FSET] Font ID Internal Scalable and Bitmapped Fonts List PRESCRIBE Font Name Scalable/Bitmap Password Selection [FSET] Font ID 2-27...
-
Page 54: Print Configuration
Printer Settings Print Configuration You can set the following items for print configuration. • Number of Copies • Reduction Printing • Print Orientation • Page Protect Mode • Line Feed (LF) Action • Carriage Return (CR) Action • Wide A4 Note You can set the print configuration for each interface. -
Page 55: Reduction Printing
Printer Settings Press the < key or the > key to input the number of Copies copies. You can set any number from 1 to 999. Press the Enter key. Press the Reset key. The message display returns to the printer basic screen. Reduction Printing If you specify the paper size (original size) and the output size, the machine reduces the image at a preset magnification ratio to print onto the specified output size paper. -
Page 56: Page Protect Mode
Printer Settings Press the Enter key. Press the Reset key. The message display returns to the printer basic screen. Page Protect Mode To maintain the printer memory efficiently, the default setting of this mode is Auto. Normally, this menu is not displayed. If a print overrun error occurs due to insufficient printer memory, Page Protect is forcibly set to On. -
Page 57: Carriage Return (Cr) Action
Printer Settings Carriage Return (CR) Action Set the action of the machine to be executed when it receives a carriage return code (0DH). Display the Page Set screen. (See How to Display the Page Set Screen on page 2-28.) Press the key or the key to select CR Action. -
Page 58: Print Quality
Printer Settings Print Quality You can set the following items for print quality. • KIR Mode • EcoPrint Setting • Resolution Setting • Print Density How to Display the Print Quality Screen Press the Printer key. Press the key or the key to select MENU. -
Page 59: Ecoprint Setting
Printer Settings EcoPrint Setting The ecoprint mode allows printing with less toner consumption. Use this mode when high quality printing is not necessary, for example, for trial printing. Display the Print Quality screen. (See How to Display the Print Quality Screen page 2-32.) Press the key or the... -
Page 60: Print Density
Printer Settings Print Density The print density can be adjusted among five levels from 1 (light) to 5 (dark). Display the Print Quality screen. (See How to Display the Print Quality Screen page 2-32.) Press the key or the key to select Print Print Quality Density. -
Page 61: Memory Card Operation
Printer Settings Memory Card Operation If the optional memory card is installed in this machine, the following operations are available. • Reading Font Data • Reading Macro Data • Reading Data • Reading Program • Writing Data • Deleting Data •... -
Page 62: Reading Macro Data
Printer Settings Reading Macro Data Display the Memory Card screen. (See How to Display the Memory Card Screen on page 2-35.) Press the key or the key to select Read Macro. Memory Card Back Read Fonts Read Macro Press the Enter key. Press the key or the key to select OK. -
Page 63: Writing Data
Printer Settings Writing Data Display the Memory Card screen. (See How to Display the Memory Card Screen on page 2-35.) Press the key or the key to select Write Data. Memory Card Read Data Read Program Write Data Press the Enter key. Press the key or the key to select OK. -
Page 64: Deleting Program Data
Printer Settings Press the Reset key. The message display returns to the printer basic screen. Deleting Program Data Display the Memory Card screen. (See How to Display the Memory Card Screen on page 2-35.) Press the key or the key to select Delete Memory Card Program. -
Page 65: Printing A Partition List
Printer Settings Display the Memory Card screen. (See How to Display the Memory Card Screen on page 2-35.) Press the key or the key to select Format. Memory Card Back Format Press the Enter key. Press the key or the key to select OK. - Page 66 Printer Settings Press the Enter key. The partition list is printed. PARTITION LIST 2-40...
-
Page 67: Hard Disk Operation
Printer Settings Hard Disk Operation If the optional hard disk is installed in this machine, the following operations are available. • Reading Data • Reading Program • Writing Data • Deleting Data • Deleting Font Data • Deleting Program Data •... -
Page 68: Ram Disk Operation
Printer Settings RAM Disk Operation RAM Disk Functions This machine is equipped with RAM disk functions. The RAM disk is a virtual disk unit that uses a part of the memory. If you assign a certain size of the memory to the RAM disk, you can use the RAM disk for electronic sorting (for reduction of total print time) and storage and reading of data. -
Page 69: Ram Disk Size
Printer Settings Press the Enter key. Press the key or the key to select RAM Disk Menu Mode. Page Set Print Quality RAM Disk Mode Press the Enter key. Press the key or the key to select Change #. RAM Disk Mode Change # Press the Enter key. - Page 70 Printer Settings Press the Enter key. Press the Reset key. Press the key or the key to select Yes. Do you want to restart ? Press the Enter key. This machine restarts. 2-44...
-
Page 71: Paper Handling
Printer Settings Paper Handling You can set the following items for paper. • Multi Purpose Tray Mode • Paper Source • Duplex Print Mode • Output Destination • Override A4/Letter How to Display the Paper Handling Screen Press the Printer key. Press the key or the key to select MENU. -
Page 72: Paper Source
Printer Settings Paper Source Set the paper source to be selected first. Display the Paper Handling screen. (See How to Display the Paper Handling Screen page 2-45.) Press the key or the key to select Feed Select. Paper Handling Back MP Tray Mode Feed Select Press the Enter key. -
Page 73: Output Destination
Printer Settings Press the Enter key. Press the key or the key to select Short edge Duplex Mode bind or Long edge bind. Back None Short Edge Bind Press the Enter key. Press the Reset key. The message display returns to the printer basic screen. Output Destination Set the paper output destination. - Page 74 Printer Settings Press the key or the key to select On or Off. Override A4/LT Back Press the Enter key. Press the Reset key. The message display returns to the printer basic screen. 2-48...
-
Page 75: Other Settings
Printer Settings Other Settings You can set the following items for other settings. • Form Feed Timeout • Received Data Dump • Printer Function Resetting • Resource Protect Mode • Auto Continue • Duplex Printing Error Detection • Stapling Error Detection •... -
Page 76: Received Data Dump
Printer Settings Press the Reset key. The message display returns to the printer basic screen. Received Data Dump You can print data received by this machine as hexadecimal codes for debugging programs and files. Display the Others screen. (See How to Display the Others Screen on page 2-49.) Press the key or the... -
Page 77: Resource Protect Mode
Printer Settings Resource Protect Mode The resource protect mode protects the resource data such as downloaded fonts and macros and memorizes the PCL resources even if the emulation mode is switched. If you select Permanent, temporary resources are not protected. If you select Perm/Temp, however, temporary resources are also protected. -
Page 78: Duplex Printing Error Detection
Printer Settings Press the Enter key. Press the key or the key to select On or Off. Auto Continue Back Press the Enter key. If you have selected On, Change # is displayed. To set the time that elapses before auto continue is Auto Continue activated, press the key or the... -
Page 79: Stapling Error Detection
Printer Settings Press the key or the key to select On or Off. Duplex Print Process Back Press the Enter key. Press the Reset key. The message display returns to the printer basic screen. Stapling Error Detection You can select whether or not to display Add Staples and Press GO when staples have run out while stapling is performed. -
Page 80: Service Status Page Printing
Printer Settings Service Status Page Printing The service status page contains more detailed printer setting information than the normal status page. This page is mainly used by the service personnel for maintenance. Use the following procedure to print this page as needed. Display the Others screen. -
Page 81: System Menu
System Menu This chapter explains the system settings concerning the general operation of this machine. The principal settings that can be made are shown below. • Default Setting Mode • Multi Purpose Tray Settings • Browsing and Printing the Total Counter •... -
Page 82: Default Setting Mode
System Menu Default Setting Mode For this machine, the state that the machine enters at the end of warm-up or when the Reset key is pressed is called initial mode. The settings of this machine that are made automatically in the initial mode are called default settings. -
Page 83: Original Image Quality
System Menu Note The four-digit management code can be changed. (See Administrator Management Code Change on page 3-23.) If the management code is accepted, the Copy Copy Default : Default screen is displayed. Density Mode Manual Next, perform the setting referring to the following Original Image Txt+Phto description of each setting item. -
Page 84: Background Color Adjustment
System Menu EcoPrint Mode Select whether or not to set the ecoprint mode at the default setting. Display the Copy Default screen. (See How to Display the Copy Default Screen on page 3-2.) Press the key or the key to select EcoPrint. Copy Default : Density Mode Manual... -
Page 85: Paper Type In Auto Paper Selection
System Menu Press the Enter key. Press the key or the key to select Auto or Paper Selection : Default cassette. Auto Default Cassette Press the Enter key. Press the Reset key. The message display returns to the copier basic screen. Paper Type in Auto Paper Selection Paper to be selected in the auto paper selection mode can be limited to a certain paper type. -
Page 86: Default Magnification
System Menu Display the Copy Default screen. (See How to Display the Copy Default Screen on page 3-2.) Press the key or the key to select Default Copy Default : Cassette. Paper Selection Auto Paper Type(Auto ) Plain Default Cassette Casset.1 Press the Enter key. - Page 87 System Menu Press the < key or the > key to adjust the density. Adjust auto density : Moving right darkens the density, and moving left lightens it. Press the Enter key. Press the Reset key. The message display returns to the copier basic screen. Auto OCR Density Adjustment Adjust the overall density of scanning for OCR when using the optional scanner functions.
-
Page 88: Collate Copying
System Menu Density Adjustment for Text Originals Adjust the density of the central value in the manual density mode for text originals. Display the Copy Default screen. (See How to Display the Copy Default Screen on page 3-2.) Press the key or the key to select Txt Ori Copy Default :... - Page 89 System Menu Press the key or the key to select Collate. Copy Default : Txt Ori Density Photo Ori Dnsity Collate Press the Enter key. Press the key or the key to select On or Off. Collate: Press the Enter key. Press the Reset key.
-
Page 90: Margin Width Default Value
System Menu Press the Enter key. Press the Reset key. The message display returns to the copier basic screen. Margin Width Default Value Set the default value of the margin width. Display the Copy Default screen. (See How to Display the Copy Default Screen on page 3-2.) Press the key or the... -
Page 91: Black Streaking Reduction Processing
System Menu Limit of Number of Copies Set the limit of the number of copies that can be set at a time. Display the Copy Default screen. (See How to Display the Copy Default Screen on page 3-2.) Press the key or the key to select Copy Limit. -
Page 92: Machine Default Settings
System Menu Machine Default Settings You can set the following items as machine default settings. • Auto Cassette Switching • Paper Size (cassettes 1 to 4) • Paper Type (cassettes 1 to 4) • Multi Purpose Tray Confirmation Display • Paper Weight for Paper Type •... -
Page 93: Auto Cassette Switching
System Menu If the management code is accepted, the Machine Machine Default : default screen is displayed. Auto Cassette SW Next, perform the setting referring to the following Paper Size(1st) Auto I description of each setting item. Note The * (asterisk) at an item on each setting screen indicates the current setting. Auto Cassette Switching This machine can continue copying by switching the cassette to another cassette that contains paper of the same size and the same orientation as the current paper when paper runs out in the... -
Page 94: Multi Purpose Tray Confirmation Display
System Menu Press the key or the key to select Auto Paper Size (1st cassette ): Detection Metric, Auto Detection Inch or a Auto Detection Metric paper size. Auto Detection Inch Press the Enter key. Press the Reset key. The message display returns to the copier basic screen. Paper Type (cassettes 1 to 4) Set the paper types of cassettes 1 to 4. -
Page 95: Paper Weight For Paper Type
System Menu Press the key or the key to select On or Off. Check MP Tray Sizing : Press the Enter key. Press the Reset key. The message display returns to the copier basic screen. Paper Weight for Paper Type Set the paper weight for each paper type. -
Page 96: Duplex Print For Paper Type
System Menu Duplex Print for Paper Type Select whether or not to use paper of custom 1 to 8 in duplex printing. Display the Machine default screen. (See How to Display the Machine Default Screen page 3-12.) Press the key or the key to select Machine Default : P.type(Duplex). -
Page 97: Custom Paper Type
System Menu Custom Paper Type Printing onto prepunched paper, preprinted paper or letterhead in the one-sided mode and the two-sided mode from the same paper source may cause displacement of hole positions or reverse orientations on both sides in two-sided printing. Set Match Print Direction to match the orientation in one-sided printing and two-sided printing. -
Page 98: Auto Sleep Time
System Menu Original Orientation Set the default original orientation. Display the Machine default screen. (See How to Display the Machine Default Screen page 3-12.) Press the key or the key to select Orig. Machine Default : direction. P. Type (2sided) Specific P . -
Page 99: Auto Low Power Time
System Menu Press the Reset key. The message display returns to the copier basic screen. Auto Low Power Time Set the time that elapses before the low power mode is automatically activated. Time that can be set: Inch Specification — 1 to 240 minutes (in 1 minute increments) Metric Specification —... -
Page 100: Default Operation Mode
System Menu Press the Enter key. Press the Reset key. The message display returns to the copier basic screen. Fax Output Destination Set the paper output destination with priority for received fax data and various reports. Setting item Output destination Output tray of main body Top tray Finisher Tray Output Optional finisher... -
Page 101: Date And Time
System Menu Press the Enter key. Press the Reset key. The message display returns to the copier basic screen. Key Sound Select whether or not to enable the beep sound that will be emitted each time a key on the operation panel is pressed. -
Page 102: Display Contrast Adjustment
System Menu Press the key or the key to select DST Date/Time: [Summertime]. Time 06:33 Press the < key or the > key to select On or Off. Press the key or the key to select Year. Date/Time: Time Zone GMT 00:00 Year 2009... -
Page 103: Auto Sleep
System Menu Press the Enter key. Press the Reset key. The message display returns to the copier basic screen. Administrator Management Code Change You can change the four-digit management code for the administrator of this machine. Important! • If you change the management code, be sure to note it. If you should forget the management code, contact your service representative. -
Page 104: Auto Clear
System Menu Press the Enter key. Press the Reset key. The message display returns to the copier basic screen. Auto Clear You can set the auto clear function (refer to Chapter 1 Basic Operation Guide, Auto Clear Function) that will be activated when the preset time elapses after copying is complete. Display the Machine default screen. -
Page 105: Silent Mode
System Menu Silent Mode This mode reduces operating noise of this machine. Use this mode if the operating noise of this machine is annoying. Display the Machine default screen. (See How to Display the Machine Default Screen page 3-12.) Press the key or the key to select Silent Mode. -
Page 106: Multi Purpose Tray Settings
System Menu Machine Management Code Change You can change the four-digit management code for security management. Note If you change the management code, be sure not to forget it. If you forget the management code, contact you service representative. The management code at the factory default setting is 1800 for the 18 ppm model and 2200 for the 22 ppm model. -
Page 107: Paper Type
System Menu Press the key or the key to select the paper size. MP Tray Paper Size : Input Size Press the Enter key. The MP Tray Paper type screen is displayed. Proceed to Paper Type described below. Selecting a Size from Other Regular Sizes Sizes that can be set: Inch Specification —... -
Page 108: Paper Type
System Menu Press the key or the key to select Input Size. MP Tray Paper Size : Universal Size Input Size Press the Enter key. Press the < key or the > key to set the vertical size. You Input Size : can set the vertical size to 3 "... -
Page 109: Browsing And Printing The Total Counter
System Menu Browsing and Printing the Total Counter You can browse the total count on the operation panel. Also you can output it as a counter report. Browsing the Total Counter Note You can browse the output counter and the scanning counter. Press the System Menu/Counter key. -
Page 110: Report Output
System Menu Report Output You can print the various reports from the machine. These reports provides statics that are useful to administrate the machine. Note • Ensure that A4/11 × 8 " paper is set in the cassette when printing a report. •... -
Page 111: User Interface Language
System Menu User Interface Language You can select the language that is used in the message display. The following languages are available: English, German (Deutsch), French (Français), Spanish (Español) and Italian (Italiano) Press the System Menu/Counter key. Press the key or the key to select Language. - Page 112 System Menu 3-32...
-
Page 113: Job Accounting
Job Accounting This chapter explains the job accounting functions of this machine. The principal functions that can be set are shown below. • Job Accounting Mode • Managing Accounts • Overall Account Management • Individual Account Management • Enabling Job Accounting •... -
Page 114: Job Accounting Mode
Job Accounting Job Accounting Mode Use the job accounting mode to control the total number of copies and prints by setting an ID-code for each account. The job accounting mode of this machine has the following features. • Controls the copier functions, printer functions, and optional scanner/fax functions using the same ID-codes. - Page 115 Job Accounting How to Display the Job Accounting Screen Use the following procedure to display the Job Accounting screen. Press the System Menu/Counter key. Press the key or the key to select Job System Menu / Counter : Accounting. Counter Check Print Report Job Accounting Press the Enter key.
-
Page 116: Managing Accounts
Job Accounting Managing Accounts Registering a New Account Register a one- to eight-digit ID-code and the limit of use for each account. Display the Job Accounting screen. (See How to Display the Job Accounting Screen page 4-3.) Press the key or the key to select Edit Job Job Accounting : Accounting. -
Page 117: Copy Restriction
Job Accounting Setting Limit of Use You can set the limit of use for each registered account. The items that can be set are shown below. Item Description of limit Reference page Copy restriction Select whether to permit or prohibit copying. Able to use —... -
Page 118: Print Restriction
Job Accounting Press the key or the key to select Able to use Copy : or Unable to use. Able to use Unable to use Press the Enter key. The message display returns to the Limit in use screen. Print Restriction You can select whether to permit or prohibit printing. -
Page 119: Scanner Transmission Limit
Job Accounting Use the numeric keys to input the counter limit. You Counter Limit Default Value : can set the limit to 999,999 at the maximum in 1 sheet increments. 999.999 Limitation Press the Enter key. The message display returns to the Limit in use screen. Scanner Transmission Limit You can set the limit of count of scanner transmission if the optional network scanner kit is installed. -
Page 120: Deleting An Account
Job Accounting Press the key or the key to select No limit, Fax Transmitting : Counter limit or Is not permitted. No Limit Counter Limit Is not permitted Press the Enter key. If you have selected Counter limit, the Counter limit Default Value screen is displayed. -
Page 121: Changing Limit Of Use
Job Accounting Changing Limit of Use Change the limit of use that has been set for each account. Important! To set the limit of use in managing accounts, you must set Copier Job Accounting Printer Job Accounting in the default settings from Off to On. If the optional network scanner kit or fax kit is installed, set Scanner Job Accounting Fax Job Accounting... -
Page 122: Overall Account Management
Job Accounting Overall Account Management You can browse the total output count, output the job accounting report, and clear the counter for all accounts. Display the Job Accounting screen. (See How to Display the Job Accounting Screen page 4-3.) Press the key or the key to select Job Job Accounting :... -
Page 123: Individual Account Management
Job Accounting Individual Account Management You can see the output count and clear the counter for individual accounts. Display the Job Accounting screen. (See How to Display the Job Accounting Screen page 4-3.) Press the key or the key to select Each Job Job Accounting : Accounting TL. -
Page 124: Enabling Job Accounting
Job Accounting Enabling Job Accounting Turn on or off the job accounting function. Display the Job Accounting screen. (See How to Display the Job Accounting Screen page 4-3.) Press the key or the key to select Job Job Accounting : Accounting On/Off. -
Page 125: Default Settings
Job Accounting Default Settings Adjust the default settings for job accounting. You can set the following items in default settings. • Copier Job Accounting (page 4-13) • Printer Job Accounting (page 4-14) • Scanner Job Accounting (page 4-14) • Fax Job Accounting (page 4-15) •... -
Page 126: Printer Job Accounting
Job Accounting Printer Job Accounting You can select whether or not to enable job accounting for the printer functions. Display the Job Accounting screen. (See How to Display the Job Accounting Screen page 4-3.) Press the key or the key to select Job Job Accounting : Accountg Def. -
Page 127: Fax Job Accounting
Job Accounting Press the key or the key to select Off or On. Scanner Job Accounting : Press the Enter key. Press the key or the key to select End. Job Accounting Default Setting Copy Job Account . : On Prnt Job Account . -
Page 128: Operation Against Excess Over Limit
Job Accounting Operation against Excess over Limit You can select whether to stop output by prohibiting immediately use of the machine, to stop the operation from the next job or to display a warning message only, when the limit of count that has been set with the function of the limit of use is exceeded. -
Page 129: Using Job Accounting
Job Accounting Using Job Accounting Copier Operation Under job accounting, you can perform copier operation only by inputting your ID-code using the numeric keys. Be sure to press the Logout key after Important! completing copying. The ID-code input screen is displayed. - Page 130 Job Accounting 4-18...
-
Page 131: Appendix
Appendix This appendix explains the following topics. • Paper • Glossary Appendix-1... -
Page 132: Basic Specifications Of Paper
Appendix Paper Basic Specifications of Paper This machine is designed for printing on paper for ordinary xerographic copiers and page printers (standard paper). This machine also supports other types of paper as long as they meet the standards explained in this chapter. Since use of unsuitable paper may cause paper jams or wrinkling of paper, be careful about selection of paper. - Page 133 Appendix Paper Sizes The following table lists the sizes of paper that can be used in the cassette or multi purpose tray. The dimensional tolerances are ±0.7 mm for both length and width of paper. The corner angles must be 90 ° ±0.2 °. Multi purpose tray Cassette or multi purpose tray B6R (128 ×...
- Page 134 Appendix Wavy or dry edges may cause misalignments in paper feeding. The recommended moisture content of paper is between 4 and 6 %. To maintain the correct moisture content level, pay attention to the following items. • Store paper in a dry, well-ventilated place. •...
-
Page 135: Special Paper
Appendix Special Paper This section describes printing onto special paper other than standard paper. You can use the following types of special paper in this machine. • Transparency • Preprinted paper • Label • Bond paper • Recycled paper • Thin paper (45 to 64 g/m²) •... - Page 136 Appendix Label Be sure to feed labels from the multi purpose tray. For selecting labels, use extreme care so that the adhesive may not come in direct contact with any part of the machine and that the labels are not easily peeled from the carrier sheet. Adhesives that stick to the drum or rollers and peeled labels remaining in the machine may cause a failure.
- Page 137 Appendix Envelope Be sure to feed envelopes from the multi purpose tray. Since the composition of an envelope is complex, consistent printing quality over the entire envelope surface may be difficult. Thin envelopes, particularly, may be wrinkled while they pass through this machine.
-
Page 138: Glossary
Appendix Glossary Additional memory An additional memory (optional) is used for increasing the memory capacity of this machine. In this machine, a memory can be added for the copier functions and the printer functions respectively. (For copier: 16 MB, 32 MB, 64 MB, and 128 MB/for printer: 32 MB, 64 MB, 128 MB, and 256 MB) For DIMM that can be used in this machine, contact your dealer. - Page 139 Appendix IP Address The Internet Protocol address is a unique number that is assigned to each computer in a network. The format of an IP Address is four numbers separated by dots, e.g. 192.168.110.171. Each number should be a decimal between 0 and 255. IPP (Internet Print Protocol) This enables output to the printer from a printer driver over the Internet or an intranet and via an IPP port.
- Page 140 Appendix PostScript This is a page description language developed by Adobe Systems, Inc. It provides flexible font functions and high-performance graphics, allowing higher quality printing. The initial version of PostScript which was introduced in 1985 is currently referred to as Level 1. Level 2, which was compatible with color printing and 2-byte languages such as Japanese, was introduced in 1990 while Level 3, which added compatibility to Internet, step-by-step implementation level, and PDF, was brought out in 1996.
-
Page 141: Index
Index Index Additional memory .......................Appendix-8 Administrator management code change ................3-23 AppleTalk ........................Appendix-8 Auto cassette switching ......................3-13 Auto clear ..........................3-24 Auto clear time ......................... 3-24 Auto continue ...........................2-51 Auto drum refresh setting ...................... 3-25 Auto exposure adjustment ....................... 3-6 Auto exposure mode ........................ - Page 142 Index Duplex print for paper type ....................3-16 Duplex print mode ........................2-46 Duplex printing error detection ....................2-52 Ecoprint ....................1-16, 2-33, 3-4, Appendix-8 e-MPS detail settings ......................2-12 e-MPS function ..........................2-8 Emulation ......................2-20, Appendix-8 Enabling job accounting ......................4-12 Envelope ........................Appendix-7 EtherTalk ..........................2-16 Exposure adjustment for photo originals ................3-8 Exposure adjustment for text + photo originals...
- Page 143 Index Logical Printer .......................Appendix-9 Low power mode ......................Appendix-9 Machine default settings ......................3-12 Machine Management Code Change .................. 3-26 Managing accounts ........................4-4 Manual exposure mode ......................1-6 Margin mode ..........................1-12 Margin width default value ..................... 3-10 Memory card ..........................2-35 Menu hierarchical diagram ......................2-3 Multi purpose tray...
- Page 144 Index Preprinted paper ......................Appendix-7 Print restriction ...........................4-6 Printer driver ........................Appendix-10 Printer job accounting ......................4-14 Priority cassette .........................3-5 Private print/stored job ....................2-9, 2-10 Program function ........................1-18 Proof-and-Hold ........................2-8, 2-9 Proper paper selection ....................Appendix-2 Quick copy ......................... 2-8, 2-9, 2-12 RAM disk ..........................2-42 RAM disk size ..........................2-43...
-
Page 145: Index
Index Using job accounting ......................4-17 Virtual mailbox ........................2-10, 2-11 Wide A4 ............................ 2-31 Index-5... - Page 146 Index Index-6...
- Page 147 For best print results and machine performance, we recommend that you use only TA Triumph-Adler original supplies for your TA Triumph-Adler products.
- Page 148 UTAX GmbH, Ohechaussee 235, 22848 Norderstedt, Germany...
Need help?
Do you have a question about the DC 2218 and is the answer not in the manual?
Questions and answers