Table of Contents
Advertisement
Quick Links
Advertisement
Table of Contents
Troubleshooting

Related Manuals for Triumph Adler DC 2062


Summary of Contents for Triumph Adler DC 2062
- Page 1 DC 2062 INSTRUCTION HANDBOOK...
- Page 2 As an ENERGY STAR Partner, UTAX GmbH, a company of TA Triumph - Adler AG, has determines that this product meets the ENERGY STAR guidelines for energy efficiency. The ENERGY STAR program is an energy reduction plan introduced by the United States Environmental Protection Agency in response to environmental issues and for the purpose of advancing the development and utilization of more energy efficient office equipment.
- Page 3 Please read the instruction handbook before using the copier. Keep it in the designated location for easy reference. The sections of this handbook and parts of the copier marked with symbols are safety warnings meant to protect the user, other individuals and surrounding objects, and ensure correct and safe usage of the copier. The symbols and their meanings are indicated below.
-
Page 5: Table Of Contents
CONTENTS Section 1 IMPORTANT! PLEASE READ FIRST ..... 1-1 (5) Adding covers for or insert sheets between copies [Sheet copy mode] ..............5-7 CAUTION LABELS ..............1-1 1 Submodes ................5-8 INSTALLATION PRECAUTIONS ..........1-2 G Cover mode ..............5-8 PRECAUTIONS FOR USE ............ - Page 6 Contents ! Zoom mode ............... 8-16 (4) Shared data box ................ 7-6 1 Registering shared data ............7-7 @ Copy limit ..............8-16 2 Printing out shared data ............7-7 # Custom border erase size ......... 8-16 3 Checking shared data ............7-8 $ Front &...
- Page 7 G MAKING FULL USE OF THE MACHINE'S ADVANCED FUNCTIONS Registering an image for form overlay Minimizing copy time <Repeat copying> Storing data that is received from your (page 7-1) (page 7-4) computer <Quick copying> (page 7-4) * The copier must be equipped with the optional Print/Scan System.
- Page 8 G MAKING FULL USE OF THE MACHINE'S ADVANCED FUNCTIONS Overlaying images <Form overlay Copying the images from either two or Making a booklet (sheet originals) mode> (page 5-18) four originals onto a single copy sheet <Booklet copy mode> (page 5-21) <Combined copy mode>...
- Page 9 G MAKING FULL USE OF THE MACHINE'S ADVANCED FUNCTIONS I Mailbox Unit (page 9-12) I Booklet Stitcher (page 9-10) A full range of optional equipment is avail- able… I Finisher (page 9-1) I Side Deck (page 9-11) I Key Counter (page 9-11) I Print/Scan System (page 9-12) I Tandem Board (page 9-12)
-
Page 10: Section 1 Important! Please Read First
Section 1 IMPORTANT! PLEASE READ FIRST. CAUTION LABELS Caution labels have been attached to the copier at the following locations for safety purposes. BE SUFFICIENTLY CAREFUL to avoid fire or electric shock when removing a paper jam or when replacing toner. Label 1 Label 2 High voltage inside. -
Page 11: Installation Precautions
INSTALLATION PRECAUTIONS I Power supply/Grounding the copier I Environment WARNING CAUTION • DO NOT use a power supply with a voltage other than • Avoid placing the copier on or in locations which are that specified. Avoid multiple connections in the same unstable or not level. -
Page 12: Precautions For Use
PRECAUTIONS FOR USE I Cautions when using the copier • DO NOT leave the document feeder open as there is a danger of personal injury..........WARNING • DO NOT place metallic objects or containers with water Other precautions (flower vases, flower pots, cups, etc.) on or near the •... -
Page 14: Section 2 Names Of Parts
Section 2 NAMES OF PARTS Section 2 NAMES OF PARTS... -
Page 15: Main Body
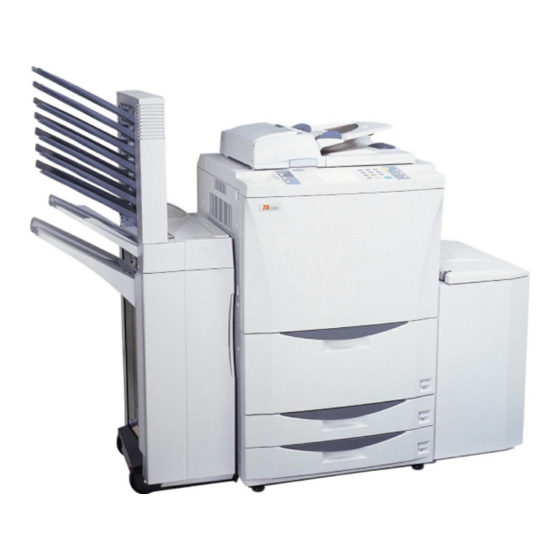
Section 2 NAMES OF PARTS (1) Main body DF (Document Feeder) 1 Front cover (Automatically feeds and scans each original, one by one, for copying.) 2 Operation panel · Original table 3 Original size indicator lines (Set the originals that you want to copy on this table.) ‚... - Page 16 Section 2 NAMES OF PARTS % Start key and indicator (2) Operation panel (Press this key when the indicator is lit green in order to start copying.) 1 Punch key / Punch mode indicators ^ Proof Copy key and indicator (In order to punch holes in your copies with the optional Finisher, press (Press this key to light the indicator when you want to make a test this key until the appropriate indicator [for either 2- or 3-hole punch] is...
-
Page 17: Basic Screen On The Touch Panel
Section 2 NAMES OF PARTS 7 Copy magnification ratio display (3) Basic screen on the touch panel (Displays the selected copy magnification ratio.) 8 Copy quality mode selection keys (Touch either the “MIXED” (text and photos), “TEXT” or “PHOTO” keys to select the mode that corresponds to the content of the origi- nals being used. -
Page 18: Optional Units
Section 2 NAMES OF PARTS (4) Optional units Finisher 1 Sort tray (When you are Sort copying or Group copying, finished copies will be ejected onto this tray. The Sort tray will automatically lower as the number of copies increases and will be raised when the number of copies is minimal.) 2 Non-sort tray (When you are copying in the Non-sort mode, finished copies will be ejected onto the Non-sort tray. -
Page 19: G Side Deck
Section 2 NAMES OF PARTS Side Deck & Upper cover * Right cover (Open this cover when you want to load paper into the Side Deck.) ( Paper plate up/down switch (for right cover) (Hold this switch down when you want to raise or lower the paper plate inside the Side Deck. -
Page 21: Section 3 Preparations
Section 3 PREPARATIONS Section 3 PREPARATIONS 1. Loading paper POINT OF INFORMATION After you remove a stack of paper from its original wrapping, fan it out a few times before loading it into the drawers, decks or the stack bypass tray. (1) How to load copy paper Paper can be loaded into 4 different locations: the Front Deck, the two drawers and the stack bypass tray. -
Page 22: Loading Paper Into The Front Deck
Section 3 PREPARATIONS 2 Loading paper into the Front Deck The Front Deck will hold up to 1,500 sheets of 11" x 8-1/2" [A4] size standard (75 g/m 80 g/m ) or colored paper in each of its two rows for a total capacity of 3,000 sheets. 1. -
Page 23: Loading Paper Into The Side Deck (Option)
Section 3 PREPARATIONS 3. Slide the paper along the guides and into the stack bypass tray, as far as they will go. IMPORTANT! When you set paper into the stack bypass tray, set the side that you want to copy onto face up. -
Page 24: Setting Originals
Section 3 PREPARATIONS 2. Setting originals 1 What is the DF for? The DF (Document Feeder) automatically feeds and scans each original, one by one, for copying. When you make copies from two-sided originals, it will automatically turn the originals over in order to copy the reverse side as well. 2 Originals that can be set in the DF…... -
Page 25: Auto Selection Mode
Section 3 PREPARATIONS 5 Auto selection mode The copier will automatically detect the size of each original and select paper of that same size to copy onto. POINT OF INFORMATION • A maximum of 50 originals can be set in DF at one time with this mode. •... - Page 26 Section 3 PREPARATIONS 1. Open the cover on the right side of the operation panel. 2. Turn the new toner bottle upside down and tap the bottom about 10 times or so. 3. Hold the bottle firmly and shake up the contents by turning it upside down and then right-side up 10 or more times in the manner shown in the illustration.
-
Page 28: Section 4 Basic Operation
Section 4 BASIC OPERATION (1) Basic copying procedure 1. Warm-up 2. Setting originals Turn the main switch ON ( | ). At the end of warm-up, “READY TO Set the originals that you want to copy in the DF or on the platen. COPY.”... - Page 29 Section 4 BASIC OPERATION I Various functions • Enlargement/reduction • Two-sided copying from various originals • Interrupt copying • Making a margin space for binding, etc. • Printing page numbers on the copies • Copying each side of two-page [open-face] originals onto separate sheets •...
-
Page 30: Enlargement/Reduction
Section 4 BASIC OPERATION (2) Enlargement/reduction 1 Auto magnification selection mode Enlargement/reduction is automatically performed in order to fit the size of the selected copy paper. 1. Set the originals. The copier will automatically detect the size of the originals and select copy paper of that same size. -
Page 31: Standard Zoom Mode
Section 4 BASIC OPERATION 3 Standard zoom mode The corresponding zoom ratio will be automatically displayed once the size of the originals to be copied and the desired size of copy paper are selected. * In order to use this mode, it is necessary in advance to select “STANDARD ZOOM” under “! Zoom mode”... -
Page 32: Xy Zoom Mode
Section 4 BASIC OPERATION 5 XY zoom mode It is possible to set the zoom ratio for the length and the width of the copy independently. Each zoom ratio can be set to any 1% increment between 25% and 400% (between 25% and 200% when using the DF). -
Page 33: G Two-Sided Copying From Two-Page [Open-Face] Originals
Section 4 BASIC OPERATION G Two-sided copying from two-page [open-face] originals Each page of two-page [open-face] originals, such as magazines and books, is copied on separate sides of the copy paper with a single press of the Start key. In this operation it is necessary to specify the binding orientation of the originals: 1 LEFT: The left page of the originals is copied first followed by the right page. -
Page 34: Interrupt Copying
Section 4 BASIC OPERATION 4. Specify the binding orientation of the originals. The touch panel will return to the basic screen. 5. Select the direction of copying that you want for the back side of the copies. The touch panel will return to the basic screen. (4) Interrupt copying The interrupt copying function is useful when you want to make copies from new originals and at different settings when another copying operation is already in progress. -
Page 35: Rotate Copy
Section 4 BASIC OPERATION 2. Wait until “INTERRUPT MODE.” is displayed and the Interrupt indicator lights continu- ously. 3. Remove the originals that were being copied and put them aside, then set the new origi- nals and perform the desired copy procedure. 4. -
Page 36: Recall Mode
Section 4 BASIC OPERATION 2. Select the desired copy modes and settings on the operation panel. 3. Set the originals that you want to copy and press the Start key. The test copy will be printed out. 4. Once the test copy has been made, a screen will be displayed that will let you select how you want the copies to be finished. -
Page 37: Energy-Saving (Auto Preheat) Function
Section 4 BASIC OPERATION 2. Change the number of copies by touching the “+” key or “-” key. * If the copier is equipped with the optional Finisher, it is also possible to change the Staple-Sort mode and the Hole Punch mode settings as well. If the copier is equipped with the optional Booklet Stitcher, it is the Staple-Sort mode settings that can also be changed. -
Page 39: Making A Margin Space In The Copies For Binding, Etc Margin Mode]
Section 5 OTHER CONVENIENT FUNCTIONS Section 5 OTHER CONVENIENT FUNCTIONS (1) Making a margin space in the copies for binding, etc. [Margin mode] Left margin The image of the original will be shifted to the right in order to make a margin for binding on the left side of the copy paper. -
Page 40: Section 5 Other Convenient Functions
Section 5 OTHER CONVENIENT FUNCTIONS 1. Set the originals. POINT OF INFORMATION When you set the originals be sure that their top (or left) side is set towards the rear of the DF or the platen. If you do not set the originals in the proper direction, the margin may be created in the wrong location. -
Page 41: Printing Page Numbers On The Copies [Print
Section 5 OTHER CONVENIENT FUNCTIONS 7. Select the margin width that you want for the front side by touching the “+” key or the “-” key under the “Margin” field until the desired width is displayed. The margin width can be set between 1 mm and 18 mm in 1 mm increments. * If you do not want to change the current margin width, go to the next step. - Page 42 Section 5 OTHER CONVENIENT FUNCTIONS 3. Touch the “PAGE #” key. (If that key is not displayed, touch the “ ” key or the “ ” key until it is displayed.) The print page number set-up screen will appear. 4. If you want to change which sheet the page numbering will start from, touch the “+” key or the “-”...
-
Page 43: G Page Separation From Two-Page [Open-Face] Originals
Section 5 OTHER CONVENIENT FUNCTIONS (3) Copying each side of two-page [open-face] originals onto separate sheets [Page separation mode] Page separation from two-page [open-face] originals Two-page originals, such as magazines and books or the like, are copied onto two separate sheets of paper. -
Page 44: G Erasing Blemishes From The Edges Of Copies (Sheet)
Section 5 OTHER CONVENIENT FUNCTIONS 4. Specify the type of the originals that are being used by touching either the “DUPLEX” or “BOOK” key. If you selected “BOOK”, go to the next step. If you selected “DUPLEX”, the touch panel will return to the basic screen. 5. -
Page 45: Adding Covers For Or Insert Sheets Between Copies [Sheet Copy Mode]
Section 5 OTHER CONVENIENT FUNCTIONS 1. Set the originals. * When using a book as the original, set it on the platen as shown in the illustration. 2. Touch the “FUNCTION” key. The function select screen will appear. 3. Touch the “BORDER” key. (If that key is not displayed, touch the “ ” key or the “ ” key until it is displayed.) The border erase set-up screen will appear. -
Page 46: Submodes
Section 5 OTHER CONVENIENT FUNCTIONS 1 Submodes Cover mode Special paper that is set in the stack bypass tray is fed as a front cover, or as both a front and back cover, to the copy sets. With this mode, you can select whether you want both sides or only one side of the front cover to be copied onto, or to have it left completely blank. -
Page 47: G Chapter Mode
Section 5 OTHER CONVENIENT FUNCTIONS • When copying onto both the front and back side of the insert sheets * The illustration shows an example of two-sided copying. • When copying only onto the front side of the insert sheets * The illustration shows an example of two-sided copying. -
Page 48: Combining Modes
Section 5 OTHER CONVENIENT FUNCTIONS 2 Combining modes The available mode combinations will differ depending upon the type of originals being used and type of copies that you want to make. See the following table. The circle (“ ”) indicates the possible combinations. “COVER+ “COVER+ “INSERT+... - Page 49 Section 5 OTHER CONVENIENT FUNCTIONS 4. Specify the type of the originals that are being used by touching either the “DUPLEX”, “BOOK” or “1-SIDED” key. * If you selected “DUPLEX”, go to step 8. If you selected “BOOK”, go to step 7. If you selected “1-SIDED”, go to the next step.
- Page 50 Section 5 OTHER CONVENIENT FUNCTIONS Cover mode settings 8. Touch the “COVER” key, if you want to use the cover mode. If not, go to step 12. * The “CHAPTER” key will only be displayed if you are making two-sided copies from one- sided originals.
-
Page 51: Making Handout Materials Together Withtransparencies [Presentation Mode]
Section 5 OTHER CONVENIENT FUNCTIONS 16. Use the numeric keys to enter the page number where you want the insert sheet or chapter page to be inserted. 17. Touch the “CFM. PG” key. * If you want to add more than one insert sheet or chapter page, repeat steps 16 and 17. The screen will show 15 locations at a time. -
Page 52: G Presentation Mode (Leaving The Backing Sheet Blank)
Section 5 OTHER CONVENIENT FUNCTIONS Presentation mode (leaving the backing sheet blank) After copying onto the transparency (with the backing sheets left blank, see page 5-16), the same original is copied onto a specified number of sheets of standard paper. Page separation copying from two-page [open-face] originals can be used in combination with this mode. - Page 53 Section 5 OTHER CONVENIENT FUNCTIONS 5. Touch the “COPIED” key if you want to copy onto the backing sheets, and touch the “BLANK” key if you want to leave the backing sheets blank. 6. Select the type of finished copies that you want to make by touching either the “DUPLEX”, “SPLIT”...
-
Page 54: Feeding Paper As A Backing Sheet For Transparencies [Transparency + Backing Sheet Modes]
Section 5 OTHER CONVENIENT FUNCTIONS 10. Specify the type of the originals that are being used by touching either the “DUPLEX” or “BOOK” key. * If you selected “DUPLEX”, the touch panel will return to the basic screen. In this case, go to step 12. - Page 55 Section 5 OTHER CONVENIENT FUNCTIONS 1. Set the transparencies in the stack bypass tray. POINT OF INFORMATION • Fan out the transparencies at least once before setting them. • Up to 25 transparencies can be loaded into the stack bypass tray at one time. •...
-
Page 56: Overlaying Images [Form Overlay]
Section 5 OTHER CONVENIENT FUNCTIONS 6. Specify the type of the originals that are being used by touching either the “DUPLEX” or “1-SIDED” key. The touch panel will return to the basic screen. (8) Overlaying images [Form overlay] This mode can be used to read the first original into memory and have its image overlaid onto copies made from subsequent originals. -
Page 57: Copying The Images From Either Two Or Four Originals Onto A Single Copy Sheet [Combine Copy]
Section 5 OTHER CONVENIENT FUNCTIONS 6. A list of registered images will appear. Select the image and touch the “ENTER” key. * If the image that you want to use is not displayed, touch the “ ” key or the “ ” key until it is displayed. -
Page 58: Borderline Indication
Section 5 OTHER CONVENIENT FUNCTIONS 2 Borderline indication A DOTTED The borderline of the originals will be indicated by a dotted line. B SOLID The borderline of the originals will be indicated by a solid line. C CROPMRK The borderline of the originals will be indicated by registration marks. 1. -
Page 59: Making A Booklet (Sheet Originals) [Booklet Copy]
Section 5 OTHER CONVENIENT FUNCTIONS 6. Select the type of finished copies that you want to make by touching either the “DUPLEX” or “1-SIDED” key. The touch panel will return to the basic screen. * When selecting “DUPLEX” copies, choose between the left “DUPLEX” key for normal copying (like in a bound book) and the right “DUPLEX”... -
Page 60: Making A Booklet (Two-Page [Open-Face] Originals) [Booklet + Cover Copy Mode]
Section 5 OTHER CONVENIENT FUNCTIONS 1. Touch the “FUNCTION” key. The function select screen will appear. 2. Touch the “BOOKLET” key. (If that key is not displayed, touch the “ ” key or the “ ” key until it is displayed.) The booklet mode set-up screen will appear. - Page 61 Section 5 OTHER CONVENIENT FUNCTIONS Copy onto the cover If the original that will be copied onto the front cover is scanned in first, the paper onto which it is copied will be in the front cover position after the copies are finished and folded in the center.
-
Page 62: Copying And Binding Into A Booklet (Sheet Originals) [Binding Mode]
Section 5 OTHER CONVENIENT FUNCTIONS 5. Set the original in a spread out position. * The originals can also be set in the DF. Be sure to set the original that will be copied onto the front cover first. 6. Press the Start key. The original will be scanned into memory. * If you set the first original on the platen, go to the next step. - Page 63 Section 5 OTHER CONVENIENT FUNCTIONS • When you do not want to copy onto the cover sheet… The first page of the originals is copied onto the front of the page that comes after the cover sheet and the second page onto the back of that page. Copies are then made so that the content can be read sequentially with the pages spread open.
-
Page 64: Inverting Black And White [Invert Copy Mode]
Section 5 OTHER CONVENIENT FUNCTIONS 5. Select the binding orientation that you want for the finished copies by touching either the “LEFT” or “RIGHT” key. The finishing set-up screen will appear. 6. Set the number of copies that you want to make by touching the “+” key or the “-” key. 7. -
Page 65: Automated Sorting [Sort Copy]
Section 5 OTHER CONVENIENT FUNCTIONS 2. Touch the “FUNCTION” key. The function select screen will appear. 3. Touch the “MIRROR” key. (If that key is not displayed, touch the “ ” key or the “ ” key until it is displayed.) The touch panel will return to the basic screen. -
Page 66: Copying With A Registered Program
Section 5 OTHER CONVENIENT FUNCTIONS 4. Touch the program number (“1” to “8”) that you want to register the settings under. * If you also want to register a name for that program, touch the “NAME REGISTRATION” key. (See page 8-29 for the procedure on entering the name.) 5. -
Page 68: Section 6 Advanced Copy Modes
Section 6 ADVANCED COPY MODES Section 6 ADVANCED COPY MODES (1) Scheduling one copy job during copying of another [Job reservation] Copy jobs can be scheduled even while another copy job is in progress. Up to 9 different jobs can be registered (up to 4 of those from your computer). It is also possible to change which jobs are scheduled and in which order they will be carried out. -
Page 69: Modifying The Settings For A Reserved Job
Section 6 ADVANCED COPY MODES 2 Modifying the settings for a reserved job The finishing settings for a reserved job (the number of copies and the Sortering, Staple and/ or Hole Punch modes) can be changed. 1. Press the Add Job key. A list of the currently reserved jobs will appear. -
Page 70: Changing The Order Of Reserved Jobs
Section 6 ADVANCED COPY MODES 4. Touch the “DELETE” key. 5. Touch the “DELETE” key once again. The touch panel will return to the screen for step 2. * To cancel the deletion operation, touch the “CANCEL” key. 6. Touch the “END” key. The touch panel will return to the basic screen. - Page 71 Section 6 ADVANCED COPY MODES 1. Touch the Job Build key. The job build select screen will appear. 2. Make sure that the “MEMORY COPY FROM DF AND PLATEN” key is highlighted. If it is not, touch that key until it is highlighted. 3.
- Page 72 Section 6 ADVANCED COPY MODES * If you want to change the magnification ratio, touch the “+” key or the “-” key at the right of the copy magnification ratio display to select the desired ratio. If you want to change the zoom mode, such as selecting the standard zoom or XY zoom mode, touch the “ZOOM”...
-
Page 73: Two-Sided Copies From A Mixture Of One-Sided And Two-Sided Originals
Section 6 ADVANCED COPY MODES 2 Two-sided copies from a mixture of one-sided and two-sided originals G Making copies like the originals [Print as originals] By specifying whether each set of originals is either one-sided or two-sided, each set will be scanned and all of the one-sided originals will be made into one-sided copies while the two- sided originals will be made into two-sided copies just like the corresponding originals. - Page 74 Section 6 ADVANCED COPY MODES 4. Specify the type of the originals that are being used by touching either the “2-SIDED ORIG.” or “1-SIDED ORIG.” key. 5. The start scanning screen will appear. * The auto magnification selection mode is the default setting in the initial mode. When copying onto custom paper sizes or with a custom zoom ratio, press the Manual key until “1:1”...
-
Page 75: Batch Copy From The Platen
Section 6 ADVANCED COPY MODES 8. If you want to scan in more originals, touch the “CONTINUE” key and repeating the proce- dure from step 4. * Once all of the originals have been completely scanned, go to step 9. * To delete the last set of the originals that you scanned, touch the “CLEAR LAST JOB”... - Page 76 Section 6 ADVANCED COPY MODES 4. Select how you want the copies to be finished by touching either the “2-SIDED COPY” or “1-SIDED COPY” key. * If you selected “SHEET & BOOK ORIGINALS” in step 3, go to the next step. If you selected “BOOK ORIGINALS”, go to step 6.
- Page 77 Section 6 ADVANCED COPY MODES * If you want to change the setting for the border erase mode, touch the “+” key or the “-” key at the right of the border width display to select the desired width. The border width can be set to 6 mm, 12 mm or 18 mm.
-
Page 79: Section 7 Document Management Functions
Section 7 DOCUMENT MANAGEMENT FUNCTIONS Section 7 DOCUMENT MANAGEMENT FUNCTIONS (1) Registering an image for form overlay It is possible to register and store in the copier’s memory, in advance, images that you want to use as an overlay in the form overlay mode (see page 5-18). This is especially convenient, for example, for registering images such as those that designate confidential documents, so that everyone can use them. -
Page 80: Checking Registered Images
Section 7 DOCUMENT MANAGEMENT FUNCTIONS 8. Once scanning of the original is finished, a message that asks you whether or not you want to continue registering other images will appear. Once you are finished registering images, touch the “END” key. The touch panel will return to the basic screen. -
Page 81: Modifying Information For An Image
Section 7 DOCUMENT MANAGEMENT FUNCTIONS 3. Select the image that you want to delete and touch the “DELETE” key. * If the image that you want to delete is not displayed, touch the “M” key or the “L” key until it is displayed. -
Page 82: Repeat Copying
Section 7 DOCUMENT MANAGEMENT FUNCTIONS (2) Repeat copying It is possible to make additional copies from the same originals, using the same copy settings but without the need to rescan the originals, as long as copying is started before the auto clear function engages. -
Page 83: Checking Data For A Print Job
Section 7 DOCUMENT MANAGEMENT FUNCTIONS 2. Touch the “QUICK PRINT” key. 3. Select the print job that you want to print out. * If the print job that you want to print out is not displayed, touch the “M” key or the “L” key until it is displayed. -
Page 84: Deleting Data For A Print Job
Section 7 DOCUMENT MANAGEMENT FUNCTIONS 5. Once you are finished checking the information, touch the “END” key. The touch panel will return to the screen for step 3. * If there is further information available for that print job, the “MORE” key will be displayed. If you touch this key in order to check that information, touch the “CHECK”... -
Page 85: Registering Shared Data
Section 7 DOCUMENT MANAGEMENT FUNCTIONS 1 Registering shared data Originals can be registered both from your computer as well as using the copier itself. Follow the procedure below when you want to use the copier to store the original. 1. Press the Doc. Mgmt. key. The document management screen will appear. -
Page 86: Checking Shared Data
Section 7 DOCUMENT MANAGEMENT FUNCTIONS 4. Select the data that you want to print out. * If the data that you want to print out is not displayed, touch the “M” key or the “L” key until it is displayed. 5. -
Page 87: Deleting Shared Data
Section 7 DOCUMENT MANAGEMENT FUNCTIONS 4. Select the shared data that you want to check. * If the data that you want to check is not displayed, touch the “M” key or the “L” key until it is displayed. 5. Touch the “RECALL” key. Information about that data will be displayed. -
Page 88: Modifying Information For Shared Data
Section 7 DOCUMENT MANAGEMENT FUNCTIONS 6. If you are certain that you want to delete that data, touch the “DELETE” key once again. The touch panel will return to the screen for step 4. * If you do not want to delete that data, touch the “CANCEL” key. 7. -
Page 89: Registering Originals In A Synergy Print Box
Section 7 DOCUMENT MANAGEMENT FUNCTIONS * It is also possible to print out a list of all of the registered information for each synergy print box. (See “4 Document list” on page 8-23.) IMPORTANT! You can additionally select the length of time that you want to elapse before each job file in a synergy print box is automatically deleted. -
Page 90: Print Box
Section 7 DOCUMENT MANAGEMENT FUNCTIONS 7. Set the originals. 8. Make sure that “SET ORIGINAL. PRESS START KEY.” is displayed. * Make sure that “AUTO” is displayed under “ORIGINAL”. * If you want to change the size of the copy paper, touch the “PAPER” key and select the size of paper that you want. -
Page 91: Checking Originals In A Synergy Print Box
Section 7 DOCUMENT MANAGEMENT FUNCTIONS 7. Select the originals that you want to print out. (You can select up to 10 sets of originals at one time.) * If you are going to select more than one set of originals, it is only possible to select originals of the same size at one time. -
Page 92: Deleting Originals From A Synergy Print Box
Section 7 DOCUMENT MANAGEMENT FUNCTIONS 2. Select the originals that you want to check. (You can select up to 10 sets of originals at one time.) * If any original that you want to check is not displayed, touch the “M” key or the “L” key until it is displayed. -
Page 93: Changing The Order Of Printing
Section 7 DOCUMENT MANAGEMENT FUNCTIONS 4. If you are certain that you want to delete those originals, touch the “DELETE” key once again. The touch panel will return to the screen for step 2. * If you do not want to delete those originals, touch the “CANCEL” key. 5. - Page 94 Section 7 DOCUMENT MANAGEMENT FUNCTIONS 3. If you want to change the password for that synergy print box, touch the “PASSWORD” key. If you do not want to change the password, go to step 6. 4. Use the numeric keys to enter the new password. (Max. 8 digits) 5.
-
Page 95: Virtual Mailboxes
Section 7 DOCUMENT MANAGEMENT FUNCTIONS (6) Virtual mailboxes If the copier is equipped with the optional Print/Scan System, you can create virtual mail- boxes in the copier's memory. Each mailbox can be assigned to an individual user and, if they store their originals in their own box, they can print out that data in a single operation at the copier. -
Page 96: Changing The Password
Section 7 DOCUMENT MANAGEMENT FUNCTIONS 6. If a password was registered for the selected box, the password input screen will appear. Enter the registered password (8 digits or less). If there was no password registered for that box, go directly to the next step. 7. -
Page 98: Section 8 Copier Management
Section 8 COPIER MANAGEMENT Section 8 COPIER MANAGEMENT (1) Copy management You can set 4-digit department code numbers for up to 1,000 departments in order to man- age the total number of copies made by each department. It is also possible to limit the number of copies that can be made by each department. -
Page 99: How To Register The Various Management Settings
Section 8 COPIER MANAGEMENT 2. Touch the “MANAGEMENT” key. 3. Use the numeric keys to enter the management pin code “6200”. If the pin code you entered matches the registered one, the screen will change to the copy management mode set-up screen. See “3 How to register the various management set- tings”... - Page 100 Section 8 COPIER MANAGEMENT 6. Use the numeric keys to enter the limit for the number of copies that can be made by that department. The limit can be set in units of 1,000 sheets, up to a maximum of 999,000. * Enter “0”...
- Page 101 Section 8 COPIER MANAGEMENT 6. Touch the “END” key. The touch panel will return to the copy management mode set-up screen. 7. Touch the “END” key. The touch panel will return to the basic screen. G Changing limits 1. Enter the copy management select mode. (See page 8-1.) 2.
- Page 102 Section 8 COPIER MANAGEMENT G Clearing copy counts 1. Enter the copy management select mode. (See page 8-1.) 2. Touch the “SET CODE” key. 3. Touch the “CLEAR” key. 4. Touch the “YES” key to clear all of the copy counts. The touch panel will return to the screen for step 3.
-
Page 103: Making Copies When Copy Management Is Turned On
Section 8 COPIER MANAGEMENT G Printing out the copy management report 1. Enter the copy management select mode. (See page 8-1.) 2. Make sure that A4 size paper is loaded in one of the drawers or decks. If not, load paper of that size. -
Page 104: Weekly Timer
Section 8 COPIER MANAGEMENT (2) Weekly timer Power to the copier can be turned ON and OFF automatically at specified times on each day of the week between Monday and Sunday. Set the copier to be turned ON early so that it is warmed up and ready for the start of work in the morning, and set it to be turned OFF automatically in the evening in case nobody remem- bers to switch it off manually. -
Page 105: How To Register The Various Timer Settings
Section 8 COPIER MANAGEMENT 3. Use the numeric keys to enter the management pin code “6200”. If the pin code you entered matches the registered one, the screen will change to the weekly timer set-up screen. See “3 How to register the various timer settings” in order to make the desired settings. - Page 106 Section 8 COPIER MANAGEMENT 4. Set the time (hour and minutes) that you want the copier to be turned ON by touching the corresponding “+” key or the “-” key. 5. Touch the “OFF” key. 6. Set the time (hour and minutes) that you want the copier to be turned OFF by touching the corresponding “+”...
-
Page 107: Making Copies After The Copier Has Been Turned Off By The Weekly Timer
Section 8 COPIER MANAGEMENT 4. Once you are finished setting the days on which the weekly timer will be canceled, touch the “ENTER” key. The touch panel will return to the weekly timer set-up screen. 5. Touch the “END” key. The touch panel will return to the basic screen. -
Page 108: Machine Defaults
Section 8 COPIER MANAGEMENT [1] Machine defaults G Types of machine defaults The 11 different default settings defined as “machine defaults” are described below. Change the settings for any or all of them as appropriate to your desired copying conditions. Default setting Explanation Page... -
Page 109: G Accessing The Machine Default Setting Mode
Section 8 COPIER MANAGEMENT G Accessing the machine default setting mode 1. Touch the “SPECIAL” key. The management mode select screen will appear. 2. Touch the “DEFAULT SETTING” key. 3. Use the numeric keys to enter the management pin code “6200”. If the pin code you entered matches the registered one, the screen will change to the default select screen. - Page 110 Section 8 COPIER MANAGEMENT 3. Set the width of the custom paper size by touching the upper “+” or “-” key. The paper width can be set between 162 mm and 242 mm in 1 mm increments. 4. Set the length of the custom paper size by touching the lower “+" or “-" key. The paper length can be set between 98 mm and 162 mm in 1 mm increments.
- Page 111 Section 8 COPIER MANAGEMENT 5 APS mode for special paper 1. Select whether special paper will be used for such functions as automatic drawer switch- ing or not by touching the “ON” key or the “OFF” key, as appropriate. * If you want to continue changing other default settings, follow the procedure that corre- sponds to that setting.
-
Page 112: Copy-Related Defaults
Section 8 COPIER MANAGEMENT 0 Auto shut-off ON/OFF 1. Select whether to use the auto shut-off function or not by touching the “ON” key or the “OFF” key, as appropriate. * If you want to continue changing other default settings, follow the procedure that corre- sponds to that setting. -
Page 113: Manual Exposure Adjustment
Section 8 COPIER MANAGEMENT Default setting Explanation Page 5 Manual exposure Adjust the overall exposure level for the manual exposure mode. The exposure level can be set separately for each copy quality mode: “TEXT”, “PHOTO” and “MIXED”. adjustment 8-19 6 Copy quality mode Specify the copy quality mode (see page 4-2) that you want be automatically selected each time the copier is turned ON. -
Page 114: G Accessing The Copy Default Setting Mode
Section 8 COPIER MANAGEMENT G Accessing the copy default setting mode 1. Touch the “SPECIAL” key. The management mode select screen will appear. 2. Touch the “DEFAULT SETTING” key. 3. Use the numeric keys to enter the management pin code “6200”. If the pin code you entered matches the registered one, the screen will change to the default select screen. -
Page 115: G Changing The Default Settings
Section 8 COPIER MANAGEMENT G Changing the default settings 1 Exposure mode 1. Select the default copy exposure mode by touching the “AUTO” key or the “MANUAL” key, as appropriate. * If you want to continue changing other default settings, follow the procedure that corre- sponds to that setting. - Page 116 Section 8 COPIER MANAGEMENT 5 Manual exposure adjustment 1. If you want to change the exposure level for any of the copy quality modes under the manual exposure mode, touch the “CHANGE” key. 2. Touch the “LIGHTER” key or the “DARKER” key under each copy quality mode to move the scroll box within the corresponding exposure scale.
- Page 117 Section 8 COPIER MANAGEMENT 9 Job programming 1. Select whether program number “1” will be automatically designated or not by touching the “OFF THE PLATEN” key or the “REGULAR” key, as appropriate. * If you want to continue changing other default settings, follow the procedure that corre- sponds to that setting.
- Page 118 Section 8 COPIER MANAGEMENT 2. Touch the upper “+” key or “-” key to set the width (horizontal direction). It is possible to set the width between 94 mm and 214 mm in 1 mm increments. 3. Touch the lower “+” key or “-” key to set the length (vertical direction). It is possible to set the length between 60 mm and 296 mm in 4 mm increments.
- Page 119 Section 8 COPIER MANAGEMENT 2. Select the drawer (or stack bypass tray) in which the cover sheets are or will be loaded. The touch panel will return to the copy default select screen. * If you want to continue changing other default settings, follow the procedure that corre- sponds to that setting.
-
Page 120: Box Management Procedures
Section 8 COPIER MANAGEMENT ) Customize function display screen (#1 - #5) 1. If you want to change the functions that appear in the first display of the function select screen, touch the “CHANGE” key. 2. Touch the keys that correspond to the functions that you want to appear in that first display. 3. -
Page 121: G Accessing The Box Management Procedures
Section 8 COPIER MANAGEMENT G Accessing the box management procedures 1. Touch the “SPECIAL” key. The management mode select screen will appear. 2. Touch the “DEFAULT SETTING” key. 3. Use the numeric keys to enter the management pin code “6200”. If the pin code you entered matches the registered one, the screen will change to the default select screen. - Page 122 Section 8 COPIER MANAGEMENT 2. Select the type of box for which you want to delete all of the data. 3. A message that checks to make sure that you want to delete the data will appear. If you are certain that you want to delete the data, touch the “DELETE” key. * You can continue to perform other box management procedures.
- Page 123 Section 8 COPIER MANAGEMENT 6. If you want to register a password for that box, touch the “BOX PASSWORD” key. 7. Use the numeric keys to enter the desired password. (Max. 8 digits) 8. Touch the “ENTER” key and the touch panel will return to the screen for step 4. 9.
-
Page 124: Deleting Stored Data
Section 8 COPIER MANAGEMENT 4 Document list 1. Touch the “DOCUMENT LIST” key. 2. Select the type of data for which you want to print out the document list. * Once printing is finished, the touch panel will return to the screen for step 2. You can continue to print out a document list for other types of data. -
Page 125: Toner Usage Information
Section 8 COPIER MANAGEMENT [5] Toner usage information It is possible to print out a report related to toner consumption. Checking the rate of toner use is useful in regard to regulating when toner must be added. For example, if it appears that toner use is excessive, it is suggested that you utilize the toner economy mode (by touching the “Eco”... -
Page 126: Entering Characters
Section 8 COPIER MANAGEMENT 3. Touch the key that corresponds to the language that you want to use. * The language will be changed and the touch panel will return to the basic screen. (5) Entering characters Follow the procedure below when you want to register names for programs, boxes and other data. Each name can be up to a maximum of 16 characters. - Page 127 Section 8 COPIER MANAGEMENT 2. Touch the “A” key. 3. Touch the “a” key to switch to the screen for inputting lowercase letters. 4. Touch the “b” and “c” keys, in that order. 5. Touch the “MODE” key to switch to the screen for inputting symbols. 6.
-
Page 129: Section 9 Optional Equipment
Section 9 OPTIONAL EQUIPMENT Section 9 OPTIONAL EQUIPMENT (1) Finisher The Finisher stores a large quantity of copies, and sorts multiple sets by shifting the position that each one is ejected. It is also possible to use the Finisher to staple the copy sets or punch holes in them for filing purposes. -
Page 130: Copying In The Sort Mode
Section 9 OPTIONAL EQUIPMENT 2 Copying in the Sort mode This mode automatically sorts copies made from multiple originals into sets identical to the originals. 1. Press the Sort-Group key to light the Sort indicator. The Sort mode is now selected. POINT OF INFORMATION Acceptable copy paper sizes: A3, B4, A4, A4R... -
Page 131: Copying In The Sort-Staple Mode
Section 9 OPTIONAL EQUIPMENT 4 Copying in the Sort-Staple mode This mode automatically sorts and then staples each copy set. 1. Press the Staple Sort key until the indicator that corresponds to the desired stapling style is lit. The Staple-Sort mode is now selected. POINT OF INFORMATION Acceptable copy paper sizes: A3, B4, A4, A4R... -
Page 132: Copying In The Hole Punch Mode
Section 9 OPTIONAL EQUIPMENT 5. Remove all of the finished copies from the Sort tray. 5 Copying in the Hole Punch mode Copies can be automatically hole punched. 1. Press the Punch key until the indicator that corresponds to the desired number of holes is lit [either 2- or 4-hole punch]. -
Page 133: Copying In The Non-Sort Mode
Section 9 OPTIONAL EQUIPMENT * If the Stacking mode (See below) engages, all of the finished copies will be ejected onto the Sort tray. * If the Stacking mode does not engage and the number of finished copies in the Non- sort tray reaches the acceptable limit, “PAPER CAPACITY EXCEEDED. -
Page 134: Stapling Unit
Section 9 OPTIONAL EQUIPMENT 9 Stapling Unit The Stapling Unit has two separate staplers for stapling documents in two different places. Accordingly, when staples run out in either stapler, they must be replenished separately. * If the staples run out, contact the service representative for your copier. 0 Refilling the Stapling Unit If a message appears on the copier indicating that staples have run out, the staple holder(s) need to be replenished with staples. - Page 135 Section 9 OPTIONAL EQUIPMENT 5. Pull out the staple holder. 6. Remove the empty staple cartridge from the staple holder. 7. Hold the staple holder in one hand and the new staple cartridge in the other and insert the new staple cartridge making sure the direction of insertion is correct. * The arrow on the staple cartridge indicates the correct direction of insertion.
-
Page 136: Clearing A Staple Jam
Section 9 OPTIONAL EQUIPMENT 11. Replace the internal tray in its original position all the way into the Finisher. 12. Close the front cover securely. ! Clearing a staple jam 1. Grasp the front cover handle and open the front cover towards you. 2. -
Page 137: Disposing Of Hole-Punch Scraps
Section 9 OPTIONAL EQUIPMENT 7. Remove the jammed staple from the tip of the staple cartridge (the end where staples are set). 8. Lower the protective faceplate back into its original position. 9. Replace the staple holder back in its original position in the Stapling Unit. Once it has been fully inserted, it will click into place. -
Page 138: Booklet Stitcher
Section 9 OPTIONAL EQUIPMENT 2. Pull on the both of the knobs, one on each side of the scrap hole-punch tank, to release the lock. 3. Grasp the scrap hole-punch tank handle and remove the tank from the Finisher. 4. Dispose of the hole-punch scraps appropriately. 5. -
Page 139: Key Counter
Section 9 OPTIONAL EQUIPMENT The mode that is selected when both the Sort and Group indicators are out will differ depending upon the setting made under “7 Sort mode ON/OFF” on page 8-16. • SORT:ON…The Sort mode will be selected and copies will be ejected into tray 1. •... -
Page 140: Mailbox Unit
Section 9 OPTIONAL EQUIPMENT (5) Mailbox Unit This unit is convenient when you want to use the copier as a printer. If multiple computer users utilize it as a network printer, print jobs will be ejected into the mailbox tray that is designated specifically for that user. - Page 141 10-1...
-
Page 142: Section 10 Troubleshooting
Section 10 TROUBLESHOOTING Section 10 TROUBLESHOOTING 1. Messages during copying If one of the following messages appears on the touch panel, perform the corresponding procedure to resolve the problem. Message Action Page “CLOSE FRONT COVER.” One or more of the covers on the main body of the copier (front, right upper cover, right lower cover, paper eject cover) is open. - Page 143 Section 10 TROUBLESHOOTING Message Action Page The first original was not fed correctly into the DF. Remove all originals and then “RESET ALL ORIGINALS IN FEEDER set them in the DF once again. AND PRESS START KEY.” The drawer currently in use is out of order and cannot be used at the moment. “PAPER DRAWER IS OUT OF ORDER.
-
Page 144: Replacing The Waste Toner Tank
Section 10 TROUBLESHOOTING 2. Replacing the waste toner tank If “CHANGE WASTE TONER TANK.” appears in the message display, replace the waste toner tank as soon as possible. * DO NOT replace the waste toner tank unless this message is displayed. 1. -
Page 145: If Paper Misfeeds
Section 10 TROUBLESHOOTING 3. If paper misfeeds If a paper misfeed occurs, copying will stop, a message informing you of the misfeed will be displayed on the touch panel, and the location of the misfeed will be displayed as well. Leave the main switch turned ON ( | ) and refer to “(3) Removal procedures” in order to remove the misfed paper. (1) Misfeed location indicators The procedure to remove misfed paper can 1 Misfeed in the paper feed section (page 10-5) -
Page 146: Removal Procedures
Section 10 TROUBLESHOOTING (3) Removal procedures 1 Misfeed in the paper feed section G Misfeed in a drawer If “MISFEED IN PAPER DRAWER. REMOVE PAPER.” and the misfeed location indica- tor shown in the illustration appear on the touch panel, paper has misfed in the indicated drawer. - Page 147 Section 10 TROUBLESHOOTING G Misfeed inside the right upper cover If “PAPER MISFEED. OPEN RIGHT UPPER COVER.” and the misfeed location indica- tor shown in the illustration appear on the touch panel, a misfeed has occurred inside the right upper cover. * If the copier is equipped with the optional Side Deck, first pull the Side Deck away from the copier before you perform the following procedure.
- Page 148 Section 10 TROUBLESHOOTING G Misfeed in the stack bypass tray If “PAPER MISFEED IN STACK BYPASS. REMOVE PAPER.” and the misfeed location indicator shown in the illustration appear on the touch panel, paper has misfed in the stack bypass tray. 1.
- Page 149 Section 10 TROUBLESHOOTING 4. Carefully pull out the paper conveyor section. 5. Remove the misfed paper without tearing it. * If the paper does happen to tear, remove any loose scraps from inside the copier. 6. Open the fixing unit cover and check for the misfed paper. If the misfed paper is visible, remove it without tearing it and then close the fixing unit cover.
- Page 150 Section 10 TROUBLESHOOTING 3. If the paper is not ejected, open the paper ejection cover. * If the copier is equipped with the optional Finisher, first detach it from the main body of the copier. If the copier is equipped with the optional Copy Tray, first remove the tray.
- Page 151 Section 10 TROUBLESHOOTING 7. Remove the misfed paper without tearing it. 8. Close the fixing unit cover. 9. Push the conveyor section all the way back into its original position in the copier and return the release lever to its original position as well. 10.
- Page 152 Section 10 TROUBLESHOOTING 4. If the misfed paper is in the re-feeding section, remove it. 5. If it is not in the re-feeding section, lift up on the duplex cover. 6. If the misfed paper is under that cover, remove it. Close the duplex cover and go to step 9.
- Page 153 Section 10 TROUBLESHOOTING 1. Remove all of the originals from the original table. If the original set indicator goes out, copying can be resumed. Reset the originals. * If the originals are difficult to remove, or if the original set indicator continues to blink red even after the originals are removed, go to the next step.
- Page 154 Section 10 TROUBLESHOOTING 1. Hold down the Finisher release button and pull the Finisher away from the copier. 2. Remove the misfed paper from the coupling section without tearing it. 3. If the misfed paper cannot be removed from the coupling section, open the upper cover.
- Page 155 Section 10 TROUBLESHOOTING 2. If the misfed paper is visible in the ejection slot, pull it out in the direction of ejection without tearing it. 3. Grasp the front cover handle and open the front cover towards you. 4. Turn the conveyor knob in a clockwise direction. The misfed paper will be returned to the internal tray and the internal tray can now be pulled out.
- Page 156 Section 10 TROUBLESHOOTING 7. Replace the internal tray in its original position all the way into the Finisher. 8. Close the front cover securely. G Misfeed in the paper conveyor section If “MISFEED IN FINISHER. REMOVE PAPER.” and the misfeed location indicator shown in the illustration appear on the touch panel, paper has misfed in the paper conveyor section to the internal tray.
- Page 157 Section 10 TROUBLESHOOTING 5. If the misfed paper is visible, remove it without tearing it. 6. Replace both conveyor guides in their original positions. 7. Grasp the internal tray handle and carefully pull the internal tray out towards you. 8. If there is any misfed paper visible in the internal tray, remove it without tearing it. 9.
- Page 158 Section 10 TROUBLESHOOTING 2. If the misfed paper is visible in the coupling section between the Side Deck and the copier, remove the paper without tearing it. * If you cannot remove the misfed paper easily, go to the next step. 3.
-
Page 159: Troubleshooting Tables
Section 10 TROUBLESHOOTING 4. Troubleshooting tables If trouble occurs, refer to the tables below to carry out corrective procedures. If the trouble persists, contact the service representative for your copier. Procedure Trouble Check point Page Nothing lights on the Is the power plug connected to an AC operation panel even though Connect the plug to an AC outlet. - Page 160 Section 10 TROUBLESHOOTING Trouble Check point Procedure Page To adjust the overall exposure level, perform 8-15 Is the copier in the auto exposure mode? the “Auto exposure adjustment” procedure. The finished copies are too Use the copy exposure adjustment keys to dark.
-
Page 161: Cleaning The Copier
Section 10 TROUBLESHOOTING 5. Cleaning the copier CAUTION For safety purposes, ALWAYS remove the power plug from the outlet when performing cleaning operations. G Cleaning the original protector and the DF scanning cover Lift open the DF and wipe the original protector a and the DF scanning cover b with a soft cloth dampened with alcohol or mild detergent. - Page 162 12-1...
-
Page 163: Section 11 Specifications
Section 11 SPECIFICATIONS Section 11 SPECIFICATIONS Type ..............Desk-top Original table ............Stationary-type Copying system ..........Indirect electrostatic Acceptable originals ........... Platen: Sheets, books, 3-dimensional (Max. size: A3) DF: Sheets (A3 - A5 [vertical-feed], Folio, one-sided originals: 35 g/m - 160 g/m , two-sided originals: 50 g/m - 120 g/m Copy size ............ -
Page 164: Laser Safety
Laser Safety Section 11 SPECIFICATIONS Laser radiation could be hazardous to the human body. For this reason, laser radiation emitted inside this machine is hermetically sealed within the protective housing and external cover. In the normal operation of the product by user, no radiation can leak from the machine. This machine is classified as Class 1 laser product under IEC 825. -
Page 165: Declaration Of Conformity
CAUTION! The power plug is the main isolation device! Other switches on the equipment are only functional switches and are not suitable for isolating the equipment from the power source. VORSICHT! Der Netzstecker ist die Hauptisoliervorrichtung! Die anderen Schalter auf dem Gerät sind nur Funktionsschalter und können nicht verwendet werden, um den Stromfluß...
Need help?
Do you have a question about the DC 2062 and is the answer not in the manual?
Questions and answers