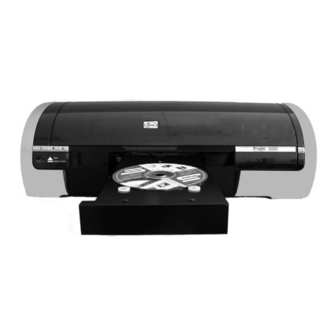
MF DIGITAL PicoJet 6000 User Manual
Cd / dvd printer
Hide thumbs
Also See for PicoJet 6000:
- Setup manual (12 pages) ,
- Quick connect manual (8 pages) ,
- Installation manual (5 pages)
Table of Contents
Advertisement
Quick Links
Download this manual
See also:
Setup Manual
Advertisement
Table of Contents

Related Manuals for MF DIGITAL PicoJet 6000


Summary of Contents for MF DIGITAL PicoJet 6000
- Page 1 PicoJet 6000 CD / DVD Printer User’s Guide...
-
Page 2: Table Of Contents
HAT YOU WILL ALSO NEED ..............................5 ACKING ATERIALS ........................5 LACE RINTER ..............................6 AFETY RECAUTIONS CONNECTING YOUR PICOJET TO YOUR MF DIGITAL COPIER ...............6 MF D PC (DP -9102 & 9104) ......................6 IGITAL CRIBE MF D SA (DP -3102 & 3104) ......................8 IGITAL CRIBE BUTTONS &... -
Page 3: Welcome To The Pj-6000 Picojet Cd / Dvd Printer
10 business days (not including transit). • Valid from the date the product is shipped from MF DIGITAL. • MF Digital will pay for Ground Inbound and Outbound freight for the initial 30 Days only. US Only. Customer pays freight charges after initial 30 days. -
Page 4: Piracy
The copying of discs, including artwork found on the disc itself, without the permission of the copyright holder is illegal. MF Digital accepts no responsibility for the copyright use or misuse of this equipment. It is the sole responsibility of the user to ensure that the legal rights of copyright in duplicating are respected. -
Page 5: About Mf Digital
Document Revision:013106.1 About MF Digital Thank you for purchasing MF Digital’s PicoJet 6000 CD / DVD Printer. MF Digital manufactures a wide variety of CD and DVD duplication equipment, including manual and fully automated CD and DVD duplicators and printers. We hope you will consider us for all of your duplication needs. -
Page 6: Getting Started
Carefully remove the printer from the shipping container. Inspect the contents, and verify them against the packing slip. Report any errors in shipping as soon as possible. What’s In The Box Your new printer includes: • PicoJet 6000 Printer • 1 Black Cartridge • 1 Color Cartridge • Power cord •... -
Page 7: Safety Precautions
Connecting your PicoJet to your MF Digital Copier If you will be connecting your PicoJet to your MF Digital copier, refer to the quick connect guide that accompanied your copier, or the appropriate section to follow. If you are unsure as to which unit you have, Scribe SA units have LCD display and numeric keypad while the Scribe PC Series does not. - Page 8 4. After mounting the Printer, be sure to push the printer all the way forward then use the Thumbscrew to secure the printer to the MF Digital PC Series Unit. To wire your printer to MF Digital PC Series please follow the wiring diagram to the right.
-
Page 9: Mf Digital Scribe Sa (Dpx-3102 & 3104)
3. The threaded screw located at the rear of the mounting plate will line up with the “U”shaped housing located on the rear of the MF Digital SA Series Unit. See picture above (blue circle). 4. After mounting the Printer, be sure to... -
Page 10: Buttons & Leds
CD-3706/P Operator’s Guide PicoJet PJ-6000 Operator’s Guide Document Revision: 030501.1 Document Revision:013106.1 Buttons & LEDs Cartridge Status LED This LED will flash to indicate when the cartridges are low. It will also flash to alert you to improper cartridge installation, or if the cover is open or ajar. -
Page 11: Picojet 6000 Cartridges
Monochrome Black None M56B *** To order Cartridges, contact your reseller or MF Digital at (001) 631-249-9393 x205 Ink Tip: Use the M56B and M57C and refrain from using the M58P Photo cartridge, as yields will be significantly lower in Photo mode. -
Page 12: Installing Cartridges
CD-3706/P Operator’s Guide PicoJet PJ-6000 Operator’s Guide Document Revision: 030501.1 Document Revision:013106.1 Installing Cartridges Note: If you run out of ink during a job, and you are replacing one or more cartridges, change the cartridge as describe below, and then wait for blinking LED to stop before resuming the job in progress. -
Page 13: Using Refilled Or Remanufactured Cartridges
CD-3706/P Operator’s Guide PicoJet PJ-6000 Operator’s Guide Document Revision: 030501.1 Document Revision:013106.1 • Hold the print cartridge so that the copper strip is on the bottom and facing toward the printer, then slide the print cartridge into the cradle as shown. Push down on the print cartridge latch until it snaps closed. -
Page 14: Installing Drivers & Software
You may also wish to install them on a PC that may make use of the network client software provided with all MF Digital copiers. This will allow you to create your printer image files as well (.PRN Files). The printer is not physically attached to these PCs but the driver is used to create print images compatble with the automated PicoJet. - Page 15 CD-3706/P Operator’s Guide PicoJet PJ-6000 Operator’s Guide Document Revision: 030501.1 Document Revision:013106.1 Note: If the installer fails to load automatically, Click on Start/Run and type D:setup (D=Disc Drive) then follow instructions above. • Click Next to begin Installation • Click “Continue Anyway” •...
- Page 16 CD-3706/P Operator’s Guide PicoJet PJ-6000 Operator’s Guide Document Revision: 030501.1 Document Revision:013106.1 • When the PicoJet is first connected to the PC. This screen appears Leave the option selected for “Install the Software Automatically”, and then click next to continue. You will see the following two windows: Page 15...
- Page 17 CD-3706/P Operator’s Guide PicoJet PJ-6000 Operator’s Guide Document Revision: 030501.1 Document Revision:013106.1 • Click on “Continue Anyway” and the necessary files will be copied to your system: • Once the files are copied, you will be prompted to click “Finish” to close the installation wizard: Page 16...
-
Page 18: Installing The Printer Driver (On Pc With No Picojet Attached)
PC. • Insert PicoJet 6000 CD into your computer. If you are working from downloaded drivers, simply unzip them double click on the SETUP file to start the installer. - Page 19 CD-3706/P Operator’s Guide PicoJet PJ-6000 Operator’s Guide Document Revision: 030501.1 Document Revision:013106.1 • Click Next to begin Installation • Click “Continue Anyway” • Click “Finish” to complete installation of the drivers. Since you will not actually be connecting the printer to this PC, you will now have to use the Windows “Add Printer”...
- Page 20 CD-3706/P Operator’s Guide PicoJet PJ-6000 Operator’s Guide Document Revision: 030501.1 Document Revision:013106.1 click on the “Add a printer” icon. If you are using Windows XP you will see something similar to: • Click “NEXT” Page 19...
- Page 21 CD-3706/P Operator’s Guide PicoJet PJ-6000 Operator’s Guide Document Revision: 030501.1 Document Revision:013106.1 • Select Local Printer attached to this computer, and uncheck “Automatically detect and install my Plug and Play printer”. Click on “NEXT” to continue • If the Virtual USB Printer Port has been installed, select it. Otherwise select LTP1 (if not being use by another printer).
- Page 22 CD-3706/P Operator’s Guide PicoJet PJ-6000 Operator’s Guide Document Revision: 030501.1 Document Revision:013106.1 • Click the “Browse” button, and browse to the folder where the PicoJet Drivers are installed. This will either be on the CD provided with the PicoJet, or to the folder to which you unzipped the downloaded drivers to.
- Page 23 CD-3706/P Operator’s Guide PicoJet PJ-6000 Operator’s Guide Document Revision: 030501.1 Document Revision:013106.1 • If you are prompted with this screen, select replace existing driver and. click the “Next” button. • Choose whether or not you wish this to be the default printer. Unless this is the primary use of this PC, you likely will want to select “NO”.
- Page 24 CD-3706/P Operator’s Guide PicoJet PJ-6000 Operator’s Guide Document Revision: 030501.1 Document Revision:013106.1 • When prompted to print a test page, select “No”, and then click the “Next” button • Click on the “Finish” button • You will now see the PicoJet listed amongst installed printers: •...
- Page 25 OK. Note: When using with automation, such as the MF Digital Scribe PC or Scribe SA, this setting must be set prior to making any .PRN print images. If you have already made one, delete it and recreate it with this setting properly selected.
-
Page 26: Reinstalling / Upgrading Driver
Uninstalling or removing the PicoJet driver • Insert PicoJet 6000 CD into your computer. If you are working from downloaded drivers, simply unzip them double click on the SETUP file to start the installer. In a few moments the installer program will launch automatically. You will see:... - Page 27 CD-3706/P Operator’s Guide PicoJet PJ-6000 Operator’s Guide Document Revision: 030501.1 Document Revision:013106.1 • Choose the Uninstall option to delete or remove the PicoJet drivers from your system, and then click on “next”. • Click “Continue” Page 26...
- Page 28 CD-3706/P Operator’s Guide PicoJet PJ-6000 Operator’s Guide Document Revision: 030501.1 Document Revision:013106.1 • The PicoJet drivers have been removed and you should now restart your PC • If you were upgrading or reinstalling drivers, once your PC reboots, complete the process by following the appropriate one of the two previously detailed “Driver Installation”...
-
Page 29: Installing Surething Cd / Dvd Layout Software
CD-3706/P Operator’s Guide PicoJet PJ-6000 Operator’s Guide Document Revision: 030501.1 Document Revision:013106.1 Installing SureThing CD / DVD layout software If you purchased PicoJet at the same time as your Scribe PC based copier or Director publisher, SureThing is preinstalled. To re-install, or install on another PC, follows these steps: •... - Page 30 CD-3706/P Operator’s Guide PicoJet PJ-6000 Operator’s Guide Document Revision: 030501.1 Document Revision:013106.1 • Select the desired location, and click “Next” to continue software installation. • Click “Next” to add shortcuts. Page 29...
- Page 31 CD-3706/P Operator’s Guide PicoJet PJ-6000 Operator’s Guide Document Revision: 030501.1 Document Revision:013106.1 • Click “Start” to begin copying files to your hard drive. • When installation is complete, click “Finish” to exit. If you would like design your CD layout now, double Click the SureThing icon on your desktop. Page 30...
-
Page 32: Using The Surething Cd Labeler
• Install the printer driver and SureThing software as detailed in the previous pages on the PC with which you wish to use for creating CD / DVD labels. • Click on START-SETTING-PRINTERS and locate the PicoJet printer on the list. Right click on the PicoJet 6000 and select Properties. Page 31... - Page 33 • Click on “OK”. Start the SureThing software and complete the initialization screens if prompted. If you have not familiarized yourself with the software yet, it would be a good time to go through the “start-up” tutorials. If prompted: Select the MF Digital PicoJet 600 and click “Finish”. Page 32...
- Page 34 Enter a filename to save your label to a SureThing “.STD” file, This file cannot be used as the print file for your MF Digital Copier but can be useful if later editing is needed. To create the compatible file, a PRN file, click on FILE-PRINT:...
- Page 35 CD-3706/P Operator’s Guide PicoJet PJ-6000 Operator’s Guide Document Revision: 030501.1 Document Revision:013106.1 • Be sure to leave “No. of Labels” set to 1. Under “Additional Options” at the bottom of this dialog box, click on “Advanced” and check off “Print to File”. •...
- Page 36 1.PRN, 2.PRN, 3.PRN, etc.). • You have usefully created a PRN file! This file can now be used with your MF Digital copier., For more information on printing using these files, please refer to your copiers manual. Thank you for buying MF Digital!
-
Page 37: Appendix A: Printing Gray Scale
• Go to the Windows control panel and select “printer & Faxes”. This will give you a list if installed printers. • Locate the PicoJet 6000 on the list then right click on it and select “Printing Preferences…”. The following window will be displayed: •... - Page 38 CD-3706/P Operator’s Guide PicoJet PJ-6000 Operator’s Guide Document Revision: 030501.1 Document Revision:013106.1 • Select High Quality by clicking on the circle or “radio button” next to this option. • Create, or recreate, your PRN to reflect the changes made. Your grayscale prints will now look great! Page 37...
Need help?
Do you have a question about the PicoJet 6000 and is the answer not in the manual?
Questions and answers