Table of Contents
Advertisement
Quick Links
Advertisement
Table of Contents

Related Manuals for Metronic zapbox twin


Summary of Contents for Metronic zapbox twin
-
Page 1: Parental Lock
2-in-1 Digital Receiver Ref : 441525 3500 channels Parental lock 2 scarts Wide screen ready DiSEqC 1.0 Sound volume equalizer SATELLITE + FREEVIEW ����� ��������� ��� ������� ��� ��� ����� ������ ��� ����� ��� MET531 ����� ������ �� �� ���� ��������... - Page 3 CAUTION Your receiver has ventilation slots. These slots must not be obstructed, even partially, in order to ensure proper ventilation. The lifetime of your device depends on these factors. The device may not be exposed to dripping or splashing and no object filled with liquid, such as vases, must be put on the device.
- Page 4 The first time you switch your AccessBOX on, your are prompted to enter the desired language for On Screen Dislplay. Just press 3 and EXIT to select English. This language selection window is also shown after resetting the unit (factory settings). Altering the settings of the receiver requires to go through the menus.
-
Page 5: Table Of Contents
TABLE OF CONTENT 1 Installation advice page 06 2 Installation of a fixed dish on a satellite page 10 3 Installation on several satellites page 11 4 Connection on an already installed dish page 13 5 Connection on a dual-head system Astra + Hotbird already aligned page 14 6 Terrestrial installation page 15... -
Page 6: Installation Advice
1 - Installation advice Foreword Your Zapbox twin terminal allows you to receive satellite digital channels, as well as Freeview (terrestrial) channels. In the case of satellite channels, these can be pre-programmed. Your Zapbox twin receiver therefore includes satellite channels which you can start viewing immediately, if a satellite dish has already been installed. - Page 7 B - Necessary elements: Satellite dish Screw and fixing 13 mm 11 mm Offset arm Universal LNB Mast or stand off arm Recommended diameter minimum: 40 mm (1,6’’) Satellite receiver TV set PAL for digital reception and PAL/ 12 mm 10 mm SECAM for analogue (to be able to watch it in colour) Scart lead male/male 21 pin...
- Page 8 C - Assembly and insulation of the «F» plug • The plug must be screwed on the strip iron aluminium. Take care that there is not a strand of the braid in contact with the central heart of the coaxial cable •...
-
Page 9: Important Notes
E - Pre-programmed channels and satellites Your receiver is delivered pre-programmed on the main satellites available in Europe. Some satellites require a one-meter satellite dish, you will not be able to receive them with a lower size satellite dish, even if this satellite appears in your pre-programmed channels list. You will use these channels to point your satellite dish towards the satellite you want. -
Page 10: Installation Of A Fixed Dish On A Satellite
2 - Installation of a fi xed dish on a satellite Read the installation advices, and particulary the paragraph E (page 9). A - Connections The receiver must be disconnected from the mains, connect directly the LNB to the LNB input of the receiver. -
Page 11: Installation On Several Satellites
C - Adjustment of the polarisation Rotate the LNB clockwise in its holder for a few degrees to further increase the quality of signal. If the signal decreases, rotate it in the opposite direction. Once you obtain the best signal, tighten definitively all the screws. Your installation is finished. Press on EXIT to hide the information banner. - Page 12 Alignment of the dish • Install the monobloc on the dish arm as depicted on the figure • Align the dish on HotBird as explained in the previous paragraph • Check that you receive channels from both Astra and HotBird •...
-
Page 13: Connection On An Already Installed Dish
Example for 2 dishes on Astra and Hotbird, Astra beeing connected to the input 2 (or B) of the switch, and Hotbird beeing connected to 1 (or A): Programmation • Go in MENU / Installation / LNB Setup. • On the Satellite line, select Hotbird with 34 arrows. •... -
Page 14: Connection On A Dual-Head System Astra + Hotbird Already Aligned
Caution: you should not alter the satellite dish adjustments or the switch, it is only necessary to program your digital receiver. DiSEqC 1.0 or Tone Burst switch ����� ��������� ��� ������� ��� ��� Rear Zapbox twin ����� ������ ��� ����� ��� ����� ������ �� ����... -
Page 15: Terrestrial Installation
Terrestrial installation Your terrestrial aerial currently points towards a transmitter broadcasting national channels in analogue mode. The installation process of your Zapbox twin receiver will vary, depending on whether the digital channels are also broadcasted by this transmitter or not. We’ll consider three possible scenarios. - Page 16 Purchase a UHF aerial with a high gain (at least 15 dB) and connect it to the ANT input socket of your Zapbox twin receiver. Orientate your new aerial in the same direction as the existing one and launch an automatic search (see Scenario 1). If it locates channels that were not found by the existing aerial, simply replace the old aerial with the new one.
-
Page 17: Remote Control Description
Euronews on Hot Bird), allows you to select the language of the program. Press twice to quickly access the volume adjustment setting. Unused key on the Zapbox twin receiver. MUTE. Press once to turn the sound off. Press again to return to normal mode. -
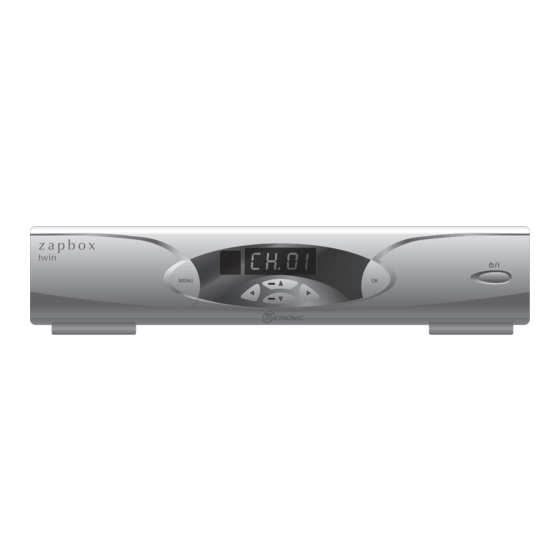
Page 18: Receiver Description
Receiver description ����� ��������� ��� ������� ��� ��� ����� ������ ��� ����� ��� ����� ������ �� ���� �� �������� Infrared receiver (detects signals from the remote control) CH+ / CH- - As on remote control VOL+ / VOL- - As on remote control MENU - As on remote control OK - As on remote control ON/OFF... -
Page 19: Day To Day Operation
Day to day operation In normal use, only the following keys will be required, as described above: • 34 to adjust the sound volume. • 65 to change channel. • to switch the sound on/off. • Digit keys for direct access to a channel. •... -
Page 20: Accessing A Channel
10 - Accessing a channel When the original (factory) settings are left unchanged, or after resetting the unit, the 56 keys allow you to select channels in the list of pre-programmed TV channels. You can also enter a channel number to access it directly. Press OK to display the TV channels list. 11 - Adding channels Before adding channels, you must first declare the satellites that you can receive. - Page 21 • Go in MENU / Installation / Program Satellite • On the Current Antenna line, select with 34 arrows the number that makes the cor- rect satellite appear on the Satellite Name line. • On the TP line, press OK to show the TP list window (Freq, Pol, SR) •...
- Page 22 D - Add / Delete / Modify a transponder To delete a transponder note : deleting out-of-date transponders speeds up the automatic search • Press the blue key, a small circle is displayed after each TP. • With the arrow keys, put the selection bar on the TP you want to delete and press OK.
- Page 23 • Go in MENU / Edit / Edit CH. • Press the yellow key, the Add channel pops up. • On the Satellite line, select the satellite with 34 arrows. • On the TP line, select with 34 arrows the TP that carries the channel to add. If the TP is not listed, you must add it in the Edit TP menu as explained above in this manual.
-
Page 24: Channels Management
12 - Channel management For the TV channel list, as for the radio channel list, you can move a channel, delete it, rename it or lock it . To be watched A locked channel needs a secret code to be entered. While viewing channels, press OK to display the channel list, press then on the key, the mode selection window will appear. -
Page 25: Favorites Channels Management
D - Lock a channel This menu also allows to lock channels. Please refer to section “Parental Lock” on page 29 to check how to proceed. 13 - Favorite channels management Among the huge amount of channels you are able to receive, you will probably only watch a few tens of them. -
Page 26: Locating A Channel In A List
14 - Locating a channel in a list While the channels list is displayed, you can use the coloured keys to sort and organise the channels, based on various criteria: TV / Radio Press the red key to select a TV or radio channels list. When you watch a TV channel or listen to a radio channel, this key automatically toggles to the other mode, without displaying the channels list. -
Page 27: B- Tv Output Settings
Furthermore, when in standby mode, it is impossible to guarantee the precision of the circuit updating the time. Therefore, Metronic cannot guarantee the exactness of the time displayed and an incorrect time will not be considered as a malfunction of the receiver. - Page 28 Basic timer To switch the receiver on/off at a specific time, the basic timer is all you need. For example, it allows you to switch the receiver on at the start of your favourite program, or to program a single recording at a later time. If a more complex programming is required, please refer to the next section.
-
Page 29: D- Parental Lock
D - Parental lock Several channels, although broadcasted free-to-air, show adults only programs, not suitable for a younger audience. We therefore recommend that these channels be locked with a confi den- tial parental code, to prevent viewers who do not know the code from watching these channels. The parental lock can be activated in two stages: 1 - Locking channels •... -
Page 30: Resetting The Receiver
16 - Resetting the receiver This procedure allows to recover the factory settings, as well as the factory channel list. To reset the unit, proceed as follows : • Put the receiver on the channel you want to record • Go to MENU / System Information / Factory Reset •... -
Page 31: Troubleshooting
19 - Troubleshooting • The screen displays “NO SIGNAL” Two possible causes: 1 The program (channel) that you are trying to watch is no longer available via the transponder. Buy a specialised magazine to check if the channel settings have changed or if the channel has disappeared. -
Page 32: Glossary
Glossary Analogue Method of terrestrial television broadcast signal delivery used since the middle of the 20th century. The switch-over to digital television means that analogue television is expected to disappear in the next few years. Channel number Number allocated to a frequency band. In the case of the UHF band, the channels are numbered from 21 to 69. -
Page 33: Assistance And Advice
• Hardware ref.: Zapbox Twin CERTIFICATE OF GUARANTEE The Zapbox Twin receiver is guaranteed one year parts and labour. In the event of a breakdown, the transport charges outward are the customer responsibility, the costs carriage back is our responsibility. -
Page 35: Channel Guide
CHANNELS GUIDE # # NAME # NAME SR- Freq - Pol SR- Freq - Pol Hotbird--------------------------------------------------------------- 1064 PEOPLE TV-RETE7 11200 V 27500 1065 ROMA SAT 11200 V 27500 1001 RAI1 11766 V 27500 1066 AL HAYAT 11200 V 27500 1002 RAI2 11766 V 27500 1067 Punto Sat 11262 H 27500... - Page 36 CHANNELS GUIDE # NAME # NAME SR- Freq - Pol SR- Freq - Pol 1129 TVE INTER. ASIA 11785 H 27500 1194 OASI.TV 12303 V 27500 1130 RaiNotizie24 11804 V 27500 1195 TV Puls 12322 H 27500 1131 Camera Deputati 11804 V 27500 1196 PilotTV 12360 H 27500...
- Page 37 CHANNELS GUIDE # # NAME # # NAME SR- Freq - Pol SR- Freq - Pol Astra 19------------------------------------------------------------ 1321 SAT.1-CH 12148 H 27500 1322 lastminute.tv 12148 H 27500 1258 Bibel TV 10832 H 22000 1323 RNFplus 12148 H 27500 1259 TV TRWAM 10832 H 22000 1324 TV TRAVEL SHOP 12148 H 27500...
- Page 38 CHANNELS GUIDE # # NAME # # NAME SR- Freq - Pol SR- Freq - Pol 1383 BBC NEWS 24 10773 H 22000 1449 HollywoodTV 11681 V 27500 1384 BBC TES 3 10773 H 22000 1450 GOD 2 11681 V 27500 1385 CBBC Channel 10773 H 22000 1451 price-drop.tv...
- Page 39 CHANNELS GUIDE # # NAME # # NAME SR- Freq - Pol SR- Freq - Pol Arabsat 2/3A------------------------------------------------------- 1561 TRT4 11492 V 30000 1562 TRT1 11492 V 30000 1505 Saudi 1 11747 V 27500 1563 TRT2 11492 V 30000 1506 Kuwait 11747 V 27500 1564 TRT3 11492 V 30000...
- Page 42 GUIDE DES CHAÎNES N° N° Nom N° Nom SR- Freq - Pol SR- Freq - Pol 1618 Cadena Milagro 11972 V 27500 1040 RTL 2 12207 V 27500 1619 Cadena Local 11972 V 27500 1041 SKYROCK 12207 V 27500 1620 Tv Amistad 11972 V 27500 1042 FUN RADIO 12207 V 27500...
- Page 44 Node Park Touraine BP 1 TAUXIGNY 37310 REIGNAC SUR INDRE CEDEX FRANCE www.metronic.com Product made in Asia...
Need help?
Do you have a question about the zapbox twin and is the answer not in the manual?
Questions and answers