Linn CLASSIK Owner's Manual
Independent cd/control/power amplifier
Hide thumbs
Also See for CLASSIK:
- Owner's manual (90 pages) ,
- Addendum to owner's manual (2 pages) ,
- Glossary (30 pages)

Subscribe to Our Youtube Channel
Related Manuals for Linn CLASSIK


Summary of Contents for Linn CLASSIK
- Page 1 LINN CLASSIK I N D E P E N D E N T C D / C O N T R O L / P O W E R A M P L I F I E R O W N E R S M A N U A L...
-
Page 2: Important Safety Information
This appliance is supplied with a non-rewireable mains plug for the intended country. Replacement mains leads can be obtained from your Linn retailer. Should you need to change the plug please dispose of it carefully. A plug with bared conductors is dangerous if engaged in a live socket. -
Page 3: General Safety Instructions
GENERAL SAFETY INSTRUCTIONS Read instructions. Read the safety and operating instructions before operating the appliance. Retain instructions. Retain the safety and operating instructions for future reference. Heed warnings. Observe all warnings on the appliance and in the operating instructions. Follow instructions. Follow all operating and use instructions. Water and moisture. - Page 4 Mains plug replacement Should your mains plug need replacing and you are competent to do this proceed as follows. If you are in doubt contact your Linn retailer or a competent electrician. a) Disconnect the plug from the mains supply.
- Page 5 CE Declaration of Conformity Linn Products Ltd declare that this product is in conformance with the Low Voltage Directive 73/23/EEC and Electromagnetic Compatibility 89/336/ EEC as amended by 92/31/EEC and 93/68/EEC. The conformity of the designated product with the provisions of Directive...
-
Page 6: Table Of Contents
Contents Introduction ........1 Your Linn CLASSIK ........2 Special features of the CLASSIK ........3 Setting up the CLASSIK ........5 Unpacking ........5 Positioning the CLASSIK ........6 Connecting the CLASSIK ........7 Using the CLASSIK ........10 Using the front panel ........ - Page 7 Using the CLASSIK with other sources ........27 Selecting a source ........27 Changing the volume and balance ........28 Changing the bass and treble ........29 Recording a source ........31 Using the clock, timer, and alarm ........32 Using the clock ........
- Page 8 Copyright and acknowledgements Copyright © Linn Products Limited. Linn Products Limited, Floors Road, Waterfoot, Glasgow, G76 0EP, Scotland, United Kingdom. All rights reserved. No part of this publication may be reproduced, stored in a retrieval system, or transmitted, in any form or by any means, electronic, mechanical, photocopying, recording, or otherwise, without the prior written consent of the publisher.
- Page 9 viii...
-
Page 10: Introduction
It will show you how to make good use of all the features we have built into the CLASSIK, and help you to enjoy it whenever you use it in your home. -
Page 11: Your Linn Classik
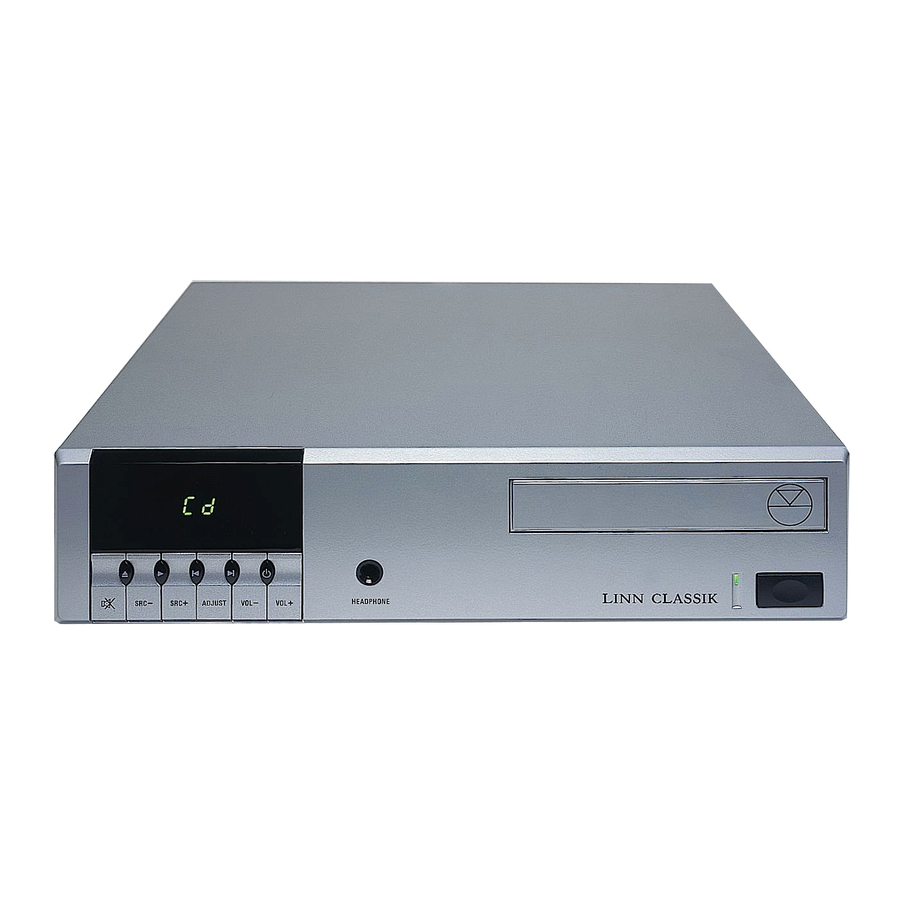
Your Linn CLASSIK Every hi-fi system has three sections: source, control, and playback. The Linn CLASSIK combines these in a single unit to give you a high-performance CD player, control amplifier, and power amplifier within the same case. Source The CLASSIK incorporates a high-quality CD... -
Page 12: Special Features Of The Classik
Clock, alarm, and timer The Linn CLASSIK includes a clock so that you can check the time whilst listening to music, or display the time when the unit is in standby. It also provides a timer, which will switch the unit to... - Page 13 Tape monitor facility You can make tape recordings from the Linn CLASSIK, and monitor the result using the special tape monitor inputs. A record lock feature ensures that you cannot accidentally disturb a recording when switching between the input signal and the tape monitor.
-
Page 14: Setting Up The Classik
CLASSIK at a later date. WARNING: Do not connect the mains supply until you have verified that the CLASSIK is set to the correct voltage for your area. Voltage selection The CLASSIK is factory set for your local mains supply voltage. -
Page 15: Positioning The Classik
If possible, allow a few centimetres of space around the amplifier for air to circulate. Note that no harm will come to the CLASSIK if it does not have adequate ventilation; if it gets too hot it will simply turn itself off until its temperature drops. -
Page 16: Connecting The Classik
Connecting the sources In addition to the internal CD source, the CLASSIK provides line- level RCA phono input connections for up to four other sources. For convenience these are labelled TUNER, AUX, TAPE1, and TAPE2/MONITOR on the back panel, but you can use them for any appropriate sources in your system. - Page 17 (red to positive, black to negative). The CLASSIK provides two pairs of speaker connections so you can connect up to two pairs of speakers. The CLASSIK will drive two pairs of 8 speakers or one pair of 4 speakers. However, its protection will prevent damage if you accidentally overload it.
- Page 18 Connecting the mains supply Connect the mains lead to the CLASSIK and plug it into a suitable power outlet.
-
Page 19: Using The Classik
Using the CLASSIK This chapter gives general information about using the front panel and switching the CLASSIK on and off. The next few chapters then give detailed information about using each of the CLASSIK’s functions. Using the front panel We designed the CLASSIK to be as simple as possible to operate. - Page 20 ADJUST Adjust the balance, bass, or treble. VOL- and VOL+ Adjust the volume. å Stop the CD playing or open the drawer. > Play the disc. [ and ] Skip back and forward between tracks. Switch the CLASSIK into standby.
-
Page 21: Using The Handset
Using the handset The CLASSIK is supplied with a remote control handset, and this provides access to all of the functions available from the front panel. In addition it provides several more advanced features, including selecting tracks by number, programming a selection of tracks, and using the timer and alarm. -
Page 22: Switching On And Off
You can safely leave the CLASSIK connected and in standby, ready to respond to commands from the handset or front panel. However, switch the CLASSIK off if you will not be using it for a long time. To switch on from standby Press any of the following keys on the front panel: å, >, SRC-, SRC+, VOL-, or VOL+ (see user option 8 for å... -
Page 23: Playing Discs
Playing discs This chapter describes how to use the CLASSIK’s CD functions. It begins with an explanation of the simpler functions for playing, pausing, stopping, and searching discs, using either the front panel or the handset. It then describes some of the more advanced features which are only available from the handset. -
Page 24: Choosing What Is Displayed
To stop the disc Press å å å å å (front panel) or STOP (handset). To change discs You can press å å å å å (front panel) or OPEN (handset) to open the drawer at any time, regardless of which source is selected, so you can change a CD without interrupting what you are listening to. -
Page 25: Playing From A Specific Track
Playing from a specific track You can skip between tracks using the SKIP keys. Alternatively you can select a track using the number keys on the handset. To skip between the tracks Press [ [ [ [ [ or ] ] ] ] ] (front panel) or SKIP ” ”... -
Page 26: Searching For A Position On The Disc
Note that if you enter a track number that doesn’t exist the last track will be selected. Searching for a position on the disc The CLASSIK allows you to search rapidly forwards or backwards through the tracks to locate a specific point on the disc. To search through the disc Press SEARCH ¯... -
Page 27: Playing A Disc Or Selection Repeatedly
Playing a disc or selection repeatedly The CLASSIK allows you to play the entire disc repeatedly, or to repeat a selection between two points on a disc. To repeat the entire disc Press REPEAT (handset). The REPEAT indicator will be lit, and the entire disc will play repeatedly. -
Page 28: Selecting Index Points
Selecting index points Some discs include index points, to allow you to select a specific point within a track. When you are playing a disc with index points the track index display will show the number of the current index point. -
Page 29: Advanced Cd Functions
Advanced CD functions This chapter describes the more advanced capabilities of the CLASSIK that allow you to programme how the tracks on a disc are played. Programme modes You can choose to play a specific selection of tracks in a specified order, or you can omit certain tracks when the disc is played. -
Page 30: Programming A Selection Of Tracks (Programme Mode A)
Programming a selection of tracks (programme mode A) In programme mode A you can choose to play a specific selection of tracks in a specified order. To create a programme Before starting, make sure you have inserted a disc and that it is stopped. - Page 31 To clear the programme Open the CD drawer, or put the CLASSIK into standby. The programme is also cleared if you use the IntroScan, Random, or Shuffle modes.
-
Page 32: Excluding Tracks (Programme Mode B)
Excluding tracks (programme mode B) In this programme mode you can omit one or more tracks when the disk is played. To create a programme Before starting make sure that you have inserted a disc and that it is stopped. Press and hold DISPLAY (handset) for about four seconds until the display shows P--b to indicate that programming mode B has been selected. - Page 33 New tracks you programme are added to the end of the existing omit list. To clear the programme Open the CD drawer, or put the CLASSIK into standby. The programme is also cleared if you use the IntroScan, Random, or Shuffle functions.
-
Page 34: Shuffle And Random Play
RANDOM (handset) to continue playing the disc in random order. The CLASSIK will then automatically stop and clear any existing programme, build a random play list, and start playing the disc. If the disc contains more than 20 tracks the programme will contain... -
Page 35: Playing The Introduction Of Each Track
It automatically plays 10 seconds of each track, in numerical order. To select IntroScan Press INTRO (handset). The CLASSIK will then automatically clear any existing programme, display IntroScan to show that the special mode has been selected, and start playing. To resume normal play Press >... -
Page 36: Using The Classik With Other Sources
Using the CLASSIK with other sources This chapter describes how to use the preamplifier and control sections of the CLASSIK to adjust the sound either from the integrated CD player, or from a source from one of the other inputs. -
Page 37: Changing The Volume And Balance
Changing the volume and balance By default, when the CLASSIK comes out of standby the volume is automatically limited to a maximum value of 30. If you prefer you can choose how the CLASSIK powers up from several alternatives; see Customising the CLASSIK , page 40. -
Page 38: Changing The Bass And Treble
BALANCE indicator will be lit. Changing the bass and treble The CLASSIK has individual bass and treble controls to allow you to adjust the sound to suit a wide range of speakers, sources, and room acoustics. You can adjust the bass and treble through a range of -14dB to +14dB in 2dB steps. - Page 39 To change the bass Press and hold ADJUST (front panel) for approximately 1.5 seconds, and release the key before the display bar reaches the centre of the display. The display will then show b followed by the current bass setting. Then press VOL- or VOL+ (front panel) to adjust the bass to the required setting.
-
Page 40: Recording A Source
Recording a source The CLASSIK allows you to record from the internal CD player and all the inputs except TP2. Pressing the RECORD key stops you accidentally changing the input while recording. When the RECORD indicator is lit you can only switch between the input you are recording and TP2, which is intended for monitoring the recording. -
Page 41: Using The Clock, Timer, And Alarm
Using the clock, timer, and alarm The CLASSIK includes a built in clock, so that you can check the time while listening to music. You can also choose to have the time displayed while the CLASSIK is in standby; see Customising the CLASSIK , page 40. - Page 42 To set the clock Turn off the CLASSIK, using the power switch on the front panel. Press and hold PLAY (front panel) while turning on the power. Keep the key depressed until the display shows Set clc. First set the hours using [ and ] (front panel).
-
Page 43: Using The Timer
Using the timer The timer allows you to put the CLASSIK to standby after a specified time. For example, you can drift off to sleep listening to your favourite CD without having to worry about switching it off. The timer delay can be set to 0 (off), 15, 30, 60, or 90 minutes. -
Page 44: Using The Alarm
Using the alarm The CLASSIK includes a daily alarm which can switch on the CLASSIK at a specified time each day, select an audio input at a volume setting of your choice, and if the CD input is selected, automatically start playing a particular CD track or activate the Random feature. - Page 45 To set the alarm time Press ALARM (handset). The display shows Set alarm and then prompts for you to enter the time. Use TIME- and TIME+ (handset) to set the hours. Then press ALARM and use TIME- and TIME+ (handset) to set the minutes.
- Page 46 To set up the source Press ALARM (handset) to indicate that you want to set up the source. The display shows Src?. Use TIME- and TIME+ (handset) to select the source you want to listen to, and press ALARM (handset) to select it. If you have chosen the CD source you can then also specify which track you want to play, and the display prompts Tr?.
- Page 47 To set the volume level Press ALARM (handset). The display shows Vol? followed by the initial volume setting of 15. Press TIME- or TIME+ if you want to choose a different volume level. Finally press ALARM (handset) to activate the alarm. The display will show the message Alarm set, and the alarm/timer indicator will be illuminated.
- Page 48 To switch off an alarm Press ALARM (handset). The display shows Set alarm and then prompts for you to set the time. Use TIME- and TIME+ (handset) to set the time to ----. Press ALARM (handset) again. The display will show off and the alarm is switched off.
-
Page 49: Customising The Classik
Customising the CLASSIK The CLASSIK includes a number of user options, to allow you to change the way the unit operates to suit your personal preferences. The user options are initially set to standard values, designed to suit most tastes, but this chapter describes how to change them if you prefer. - Page 50 To choose a specific user option Press VOL- (front panel) until the display shows the number of the user option you want to change, together with its current value. Each time you press the key the display shows the next user option, stepping back to U1 after U8.
-
Page 51: User Options
User options The following table lists the user options provided. In each case the default value is shown underlined. Number Name Description Values Explanation Default Volume The default volume setting 0 = Vol 15 Vol 15 on power up, or the default 1 = Vol 30 Vol 30 volume setting from 2 = Timed... - Page 52 Number Name Description Values Explanation Auto-Listen When the product receives 0 = Disabled The product will not any CD command (eg PLAY) respond to the CD or tuner in a non-CD mode (eg tuner function commands unless selected) it will select the CD the current source is CD or mode.
-
Page 53: Factory Default Settings
CD drawer will open. Factory default settings CLASSIK also supports a Reset to Factory Defaults option which allows you to reset the unit back to its original settings; see the default values in the above tables. - Page 54 Then press and hold the VOL+ key on the front panel while powering up the product until the text init appears on the display. Release the VOL+ key. The product will now power up configured with its default settings, as shown underlined in the above table.
-
Page 55: Troubleshooting And Maintenance
CLASSIK behave in an unfamiliar or unexpected way. The CLASSIK can be in one of three modes: amplifier, CD, or clock. CD mode is normally the default (it is a CD amplifier after all). If... - Page 56 Check that the MUTE indicator is not lit. Check that your audio source is actually playing and that the CLASSIK is powered up (not just in STANDBY) and the audio source is selected. I cannot change sources! RECORD LOCK is probably on.
-
Page 57: Maintenance
User options , page 42, before changing them. Maintenance The Linn CLASSIK is designed for a long life and any servicing should only be carried out by an authorised retailer. WARNING: disconnect the mains supply first. - Page 58 For technical support and product queries/information: Our address is: Linn Products Limited Floors Road Waterfoot Eaglesham Glasgow G76 0EP Scotland Telephone: 44-(0)-141 307 7777 UK Helpline: 0500-888909 E-mail: helpline@linn.co.uk Facsimile: 44-(0)-141- 644-4262 Web site: http://www.linn.co.uk/linn America: Linn Inc. Jacksonville Florida...
-
Page 59: Technical Information
Technical information Specifications General Dimensions 80mm x 320mm x 325mm (3.15" x 12.6" x 12.8") (H x W x D) Weight Power consumption 325W maximum in normal operational state. 25W typical use. < 3W in standby state. Main supply fuse 100/115V T6.3 A antisurge 230V T3.15 A antisurge Main supply tolerance Nominal ±... - Page 60 Preamplifier specification Inputs TUNER/TAPE1/TAPE2/AUX, 318mV RMS (sensitivity), 10K (load) Outputs Tape output: equal to auxiliary input level (unity gain) Output impedance: 100 Minimum load: 5K Line output Output impedance: 100 Minimum load on line outputs: 1K Headphone Output impedance: < 8 Output level: same as preamplifier output level Output current limit: 60mA Load impedance: 8 to 2K...
-
Page 62: Index
Index Symbols connections 7 M key 11, 28 headphones 8 å key 11, 14 loudspeakers 8 > key 11 mains supply 9 sources 7 [ and ] keys 11, 16 tape recorder 8 O key 11, 13 control section 2 copyright vii customising 40 acknowledgements vii... - Page 63 handling CDs 46 omit list 24 handset 12 omitting tracks 23 number keys 12 headphones, connecting 8 pausing a disc 14 play list 22 index points, selecting 19 play modes infra-red sensor 6 IntroScan 20, 26 inserting a disc 14 Random 20, 25 introduction 1 Shuffle 20, 25...
- Page 64 repeating standby modes 3 a section of the disc 18 stopping a disc 15 the entire disc 18 switching off the alarm 39 switching on 13 replacing the fuse iii resetting 44 from standby 13 switching to standby 13 safety instructions i, ii searching 17 tape monitor facility 4 sections...
- Page 65 user options (continued) user options (continued) Auto-Memory 42 Retain User CD Settings 44 CD Play on Power-up 43 changing 40 Default Volume 42 ventilation 6, 47 Disable Sleep Mode 42 VOL- and VOL+ keys 11, 28 resetting 44 voltage selection 5 Retain User Amplifier volume, changing 28 Settings 43...
- Page 66 PACK 325...
Need help?
Do you have a question about the CLASSIK and is the answer not in the manual?
Questions and answers