Korg Krome Quick Start Manual
Hide thumbs
Also See for Krome:
- Operation manual (142 pages) ,
- Manual (400 pages) ,
- Parameter manual (380 pages)
Table of Contents
Advertisement
Contents
Precautions . . . . . . . . . . . . . . . . . . . . . . . . . . . . . . .2
Regarding the LCD screen . . . . . . . . . . . . . . . . .2
Data handling . . . . . . . . . . . . . . . . . . . . . . . . . . . . .2
About this manual . . . . . . . . . . . . . . . . . . . . . . . . .3
Main Features. . . . . . . . . . . . . . . . . . . . . . . . 4
Front Panel . . . . . . . . . . . . . . . . . . . . . . . . . . 5
Rear Panel. . . . . . . . . . . . . . . . . . . . . . . . . . . . . . . . .6
Connecting the keyboard and
turning the power on . . . . . . . . . . . . . . . . . 7
Turning the power on . . . . . . . . . . . . . . . . . . . . .7
Turning the power off . . . . . . . . . . . . . . . . . . . . .8
About the display and the modes . . . . . 9
Display . . . . . . . . . . . . . . . . . . . . . . . . . . . . . . . . . . . .9
Selecting modes. . . . . . . . . . . . . . . . . . . . . . . . . 10
Playing sounds. . . . . . . . . . . . . . . . . . . . . . 11
Playing Programs and Combinations . . . . . 11
Using controllers to modify the sound. . . . 12
Performing with the arpeggiator . . . . . . . . . 13
Using the Drum Track. . . . . . . . . . . . . . . . . . . . 13
editing . . . . . . . . . . . . . . . . . . . . . . . . . . . . . . . . . . 14
Quick Start Guide
Using the sequencer . . . . . . . . . . . . . . . . . 15
Using effects . . . . . . . . . . . . . . . . . . . . . . . . 18
Saving and loading data . . . . . . . . . . . . . 19
Listening to the demo songs . . . . . . . . . 21
Specifications (summary) . . . . . . . . . . . . 23
Recording your performance. . . . . . . . . . . . . 15
Editing MIDI . . . . . . . . . . . . . . . . . . . . . . . . . . . . . 16
Template songs . . . . . . . . . . . . . . . . . . . . . . . . . 17
Routing and effect settings . . . . . . . . . . . . . . 18
Saving your edits . . . . . . . . . . . . . . . . . . . . . . . . 19
Writing . . . . . . . . . . . . . . . . . . . . . . . . . . . . . . . . . . 19
Saving and loading . . . . . . . . . . . . . . . . . . . . . . 19
Loading the demo song data. . . . . . . . . . . . . 21
Listening to the demo songs . . . . . . . . . . . . . 21
Playing multiple songs in succession . . . . . 22
Performing with RPPR . . . . . . . . . . . . . . . . . . . 22
ENGLISH
Advertisement
Table of Contents

Related Manuals for Korg Krome


Summary of Contents for Korg Krome
-
Page 1: Table Of Contents
ENGLISH Quick Start Guide Contents Precautions .......2 Using the sequencer ....15 Regarding the LCD screen . -
Page 2: Precautions
Thank you for purchasing the Korg KROME Music THE FCC REGULATION WARNING (for USA) Workstation. To help you get the most out of your new NOTE: This equipment has been tested and found to comply instrument, please read this manual carefully. with the limits for a Class B digital device, pursuant to Part 15 of the FCC Rules. These limits are designed to provide reason‐ able protection against harmful interference in a residential installation. This equipment generates, uses, and can radiate radio frequency energy and, if not installed and used in accor‐ Precautions dance with the instructions, may cause harmful interference to radio communications. However, there is no guarantee that Location interference will not occur in a particular installation. If this Using the unit in the following locations can result in a mal‐ equipment does cause harmful interference to radio or televi‐ function. sion reception, which can be determined by turning the equip‐ ment off and on, the user is encouraged to try to correct the • In direct sunlight interference by one or more of the following measures: • Locations of extreme temperature or humidity • Reorient or relocate the receiving antenna. • Excessively dusty or dirty locations • Increase the separation between the equipment and receiver. • Locations of excessive vibration • Connect the equipment into an outlet on a circuit different ... -
Page 3: About This Manual
About this manual Conventions in this manual The manuals and how to use them References to the KROME The KROME comes with the following manuals. The KROME is available in 88‐key, 73‐key, and 61‐key • Video Manual (approximately 60 minutes) models. The manuals refer to all models without distinction as “the KROME.” The front panel and rear • Quick Start Guide (printed and PDF) (this document) panel illustrations in the manual show the 61‐key model, but they apply identically to the other models. • Operation Guide (PDF) Abbreviations for the manuals: QS, OG, PG, • Parameter Guide (PDF) •... -
Page 4: Main Features
PCM sound data to be controlled. • The KROME 61 and 73 feature a Semi-Weighted Keyboard that provides a great-feeling way to play • Voicing technology developed for the KRONOS has... -
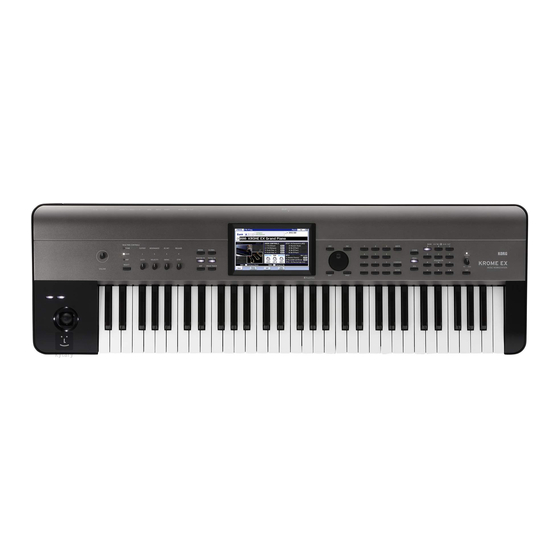
Page 5: Front Panel
Front Panel Front Panel 15 20 10 12 * The diagram shown is for KROME-61 Volume DRUM TRACK 1. VOLUME knob 7. DRUM TRACK button This knob adjusts the volume of the AUDIO OUTPUT This button turns the Drum Track function on or off. L/MONO, R outputs, as well as the volume of the This button also indicates the operating state of the headphone jack. drum track. (Unlit: off, Blinking: waiting for trigger, Lit: on. See page 13.) SW1, 2 and Joystick Effect buttons 2. SW1, SW2 buttons 8. -
Page 6: Rear Panel
24. Headphone jack Connect your headphones here. This jack will output the same signal as the AUDIO OUTPUT L/MONO and R jacks. The headphone volume is controlled by the VOLUME knob. Rear Panel 1. Power switch Power supply This switch turns the power on/off. Be sure to see the “Connecting the keyboard and 2. AC adapter connector turning the power on” section on page 7 and follow the correct procedure described there. The included AC adapter is connected here. Note: The KROME has an auto power‐off function that Connections must be made with the power turned automatically turns off the power when the keyboard off. Please be aware that careless operation may or front panel buttons have not been used for a certain damage your speaker system or cause length of time. With the factory settings, this is set to 4 malfunctions. hours (see “The auto power‐off function” on page 8). 3. Cable hook Use this to secure the cable of the included AC adapter. -
Page 7: Turning The Power On
MIDI Note: The USB connector of the KROME is only able to 6. MIDI IN connector, MIDI OUT connector transmit and receive MIDI data. MIDI lets you connect the KROME to a computer or other MIDI devices, for sending and receiving notes, controller gestures, sound settings, and so on. Connecting the keyboard and turning the power on Connect the power cord to the AC adapter. Turning the power on 2. Connect the KROME’s AUDIO OUTPUT L/MONO and R jacks to your mixer or powered Note: Check the following before you turn the power monitor speakers. • If you’re monitoring through headphones, connect • Make sure that you’re using an AC outlet that them to the headphone jack that’s located on the supplies the correct voltage for your unit. left side of the front of the KROME.This headphone • Use only the included AC adapter. -
Page 8: Turning The Power Off
Connecting the keyboard and turning the power on Changing the auto power-off setting Turning the power off Changing the settings in the start-up dialog box When you’ve finished using the KROME, turn off the If the auto power‐off function is enabled so that the power by pressing the power switch that’s located on power will turn off automatically, the currently the rear panel of the KROME. specified auto power‐off time is displayed immediately after the system starts up. When you turn off the power, any program, combination, or global settings you may have edited will return to its original state. If you want to keep the results of your editing, you must save (write) the edited settings. In the same way, the song data will also be lost when you turn off the power. If you want to use the song data again later, you must save it before ... -
Page 9: About The Display And The Modes
About the display and the modes About the display and the modes Display The KROME uses Korg’s TouchView graphical user interface. By pressing or dragging objects shown in the display, you can select programs or combinations, or edit For some parameters, you can press the parameter twice in succession or long‐press and then release it to parameter values. Here we’ll explain the names and functions of these objects. access an on‐screen edit pad where you can edit the value. see “Edit pad” on page 6 of the Operation a: Mode button Guide. b: Current page f: Menu command button e: Popup buttons When you press a popup button, the available Popup buttons parameter values will appear as a popup menu or a ... -
Page 10: Selecting Modes
The EXIT button corresponds to the Cancel button and • Record a single MIDI track at a time, or record as Done button. many as all sixteen tracks simultaneously. You can also record exclusive messages. • Use multiple tracks to record and play back performances generated by two arpeggiators. Selecting modes • Use one or more tracks to play back the patterns in The KROME provides a large number of functions, the drum track. such as playing or editing programs and combinations, • Edit songs. recording and playing back songs, and managing • Use the KROME as a 16‐track multi‐timbral sound media. These functions are grouped into “modes.” The module. KROME has five modes. To access a mode, press the • GM/GM2 playback is also supported. corresponding mode button (See page 5). • Use the Tone Adjust function to easily edit the Program mode program of each track. Programs are the basic sounds of the KROME. • Use up to five insert effects, two master effects, and In Program mode, you can: one total effect. • Select and play Programs. -
Page 11: Playing Sounds
Playing sounds Playing sounds Selecting Programs by Category (B) Playing Programs and There are other ways to select Programs, but here we’ll Combinations explain how to select programs by their category, such as keyboard, organ, bass, or drum sounds. Selecting Programs by bank and 1. In the LCD screen, press the Category/Program Select popup button. number (A) The Category/Program Select popup menu will Here’s how to select a program. appear. For more about the features and functions of Program In the illustration, the Keyboard category is selected. mode, see “Program mode” on page 10. The menu shows the program in that category. 1. Press the front‐panel PROG button (the LED will 2. If you want to select a different category, press the light up) to enter Program mode. tabs at the left and right side of the display. The upper left side of the LCD screen shows the name ... -
Page 12: Using Controllers To Modify The Sound
Playing sounds 4. If you want to choose programs by sub‐category, Using controllers to modify press the “Jump to Sub” button to access the Sub Category/Prog Select menu. the sound Press a tab on the left to select a sub category. Select a program as described in step 3. Joystick, SW1 and SW2 To confirm your choice, press the OK button. If you The joystick (see page 5) and SW1/SW2 (see page 5) want to cancel, press the Cancel button. You will return located on the left side of the KROME’s front panel are to the main category. controllers for you to use while performing. You can 5. If you’re happy with the selected program, press use these controllers to modify the sound. the OK button to close the menu. The effect produced by each controller will differ for If you press the Cancel button, your selection here will each Program or Combination. In addition to the be discarded, and you will return to the program that typical functions, the controllers in some cases might had been selected immediately before you opened the have the effect of emphasizing individual sounds, or menu. might apply a combination of several effects. So try Note: If you press the popup button to the left of ... -
Page 13: Performing With The Arpeggiator
Playing sounds Performing with the Using the Drum Track arpeggiator Turning the Drum Track on and off A program allows you to use a single polyphonic 1. Press the DRUM TRACK button. arpeggiator. When playing a combination or using the sequencer, you’ll be able to use two polyphonic Depending on various settings, the Drum Track may arpeggiators. begin to play immediately, or may wait until you start to play on the keyboard. If the button’s LED is blinking on and off, it’s waiting for you to play. Turning the arpeggiator on/off 2. Use the TEMPO knob or the TAP button to adjust 1. Select the program or combination that you want the tempo (see page 6). to play. 2. Press the ARP button to make the LED light up. Selecting the Drum Track pattern &... -
Page 14: Simple Program And Combination
Adjusting the EQ and volume balance For a program, the program’s EQ and master effect return amount can be adjusted in the P0: Play– Main page. In the P0: Play– Mixer & Drum Track page you can adjust the volume balance of oscillators 1 and 2, and the drum track. Here you can also adjust the EQ of the A.Piano A.Bass (Velocity SW) drum track program. Category/Timbre Program popup buttons Using Tone Adjust 3. Play the keyboard. Notes C4 and above will play an organ sound, and lower notes will play a bass The KROME’s Tone Adjust function assigns program sound. parameters that are useful for editing with buttons and 4. Now let’s adjust the pan (stereo position) and sliders in the display. You can use these to edit the volume of the organ and bass sounds. sound efficiently. In the lower part of the display, press the Mixer 1–8 tab. 1. Access the Program mode P0: Play– Tone Adjust Adjust the Pan knob and Volume slider of each timbre. page. Press the PROG button, and then the Tone Adjust tab. 5. Let’s try changing the split point that divides the ... -
Page 15: Using The Sequencer
Select the program that you want to use for recording. If desired, you can turn on the ARP or DRUM TRACK buttons to add an arpeggiator or drum kit performance. 1. While holding down the ENTER button, press the SEQUENCER REC ( ) button. The message “Do you continue?” will appear in the Multi REC Setup to Record dialog box in the display. 2. Press the REC ( ) button once again. (Alternatively, you can use the OK button or the ENTER button.) 2. Press the Prog 1–8 tab to access the P0–1: The KROME will automatically switch to Sequencer Play/REC– Program T01–08 page. mode and enter the record‐standby state, and the click will begin sounding in time with the tempo ( ). Adjust 3. Below the Song name, open the Track Select the tempo ( ) as desired (see “TEMPO controls” on popup and select MIDI Track 02. page 6.). This controls both the track that you play from the 3. Press the START/STOP ( ) button to start the keyboard, and (with Multi REC turned off) the track sequencer and begin recording. that’s recorded. With the default settings, there will be a two measure count‐down before recording starts. ... -
Page 16: Editing Midi
Using the sequencer Correcting or adding notes Editing MIDI You can edit your performance data by moving or erasing notes, modifying a note’s duration or strength, You can modify your performance after recording, if or adding notes. you wish. For instance, you can erase misplayed notes, It’s convenient to use Track View editing when you or correct their pitch and timing. want to erase, move, or copy data in units of entire Correcting the timing tracks or measures. Timing correction is done through Quantization. This 1. (Press the PAGE button; then in Page Select, press takes the notes you played and lines them up to the P6: Track Edit.) Then press the Track View tab to nearest beat or fraction of a beat, based on the access the P6: Track Edit– Track View page. resolution you select. It can also be used to add a 2. Using the tools, specify the start and end measures “swing” feel. Let’s try quantizing the MIDI track we to select the edit region. just recorded. 3. Use the tools to move, copy, or erase data. 1. Press the PAGE button; then in Page Select, press For details, see page 68 of the Operation Guide. P6 Track Edit. Then press the Track Edit tab to ... -
Page 17: Template Songs
Using the sequencer 6. In the To Track field, select the track to use for the Template songs pattern. Note: In each of the sixteen preset Template Songs, Template songs contain sounds and effects that are track 1 is always assigned to a Drum Program. (In suitable for a specific musical style, so you can some cases, other tracks may also have Drum immediately get started creating a song simply by Programs.) selecting an appropriate template. In addition to the 7. In the Measure field, set the measure where you’d preset templates, you can create your own original like the pattern to start. template songs containing your frequently‐used sounds. Following the names for each of the 605 preset patterns, the musical style and the name of the most The sixteen preset template songs (P00–P15) contain suitable Drum Programs are partially displayed. track parameter settings such as program, volume, and pan, as well as effect, arpeggiator, track parameter, and By loading a Drum Program and the corresponding tempo settings. preset pattern, you can instantly set up a drum track to match the Template Song. Note that Template Songs do not include MIDI data for song tracks and patterns, and so on. 8. To load the pattern, press the OK button. 1. In the Sequencer P0: Play/REC page, press the After the pattern is loaded, the Measure will count up page menu button and select the Load Template automatically. You can then copy another pattern if ... -
Page 18: Using Effects
Using effects Using effects You have a choice of 193 different digital effects. 3. “Send1” and “Send2” specify the send levels to the master effect for each track. “Send1” The KROME’s effect section consists of five insert corresponds to MFX1, and “Send2” corresponds to effects, two master effects, one total effect, and a mixer MFX2. that controls the routing between these effect processors. Each of these provides stereo input and In this page, “Send1” and “Send2” can be selected only output. if “Bus (IFX/Output) Select” is set to L/R or Off. You can freely control the effects via dynamic If “Bus (IFX/Output) Select” is set to IFX1–5, the send modulation (Dmod), which lets you use the KROME’s levels are specified by “Send1” and “Send2” after the controllers to control the effects in realtime while you signal has passed through the insert effects (P8: perform, as well as synchronize different types of Routing/IFX– Insert FX Setup page). modulation effects via the common LFO, or use 4. Seq P9: MFX/TFX/LFO– Routing page. Here you MIDI/Tempo Sync to produce tempo‐synchronized can select the master effects and the total effect effects. that will be used. This page also shows the signal flow. Routing and effect settings You’ll use routing to specify the effects to which the sound will be sent. Here’s an example of these settings for a song. -
Page 19: Saving And Loading Data
Note: If you turn off the power before you Write or written in the corresponding page. For details, see Save, the data you modified will be lost. Be sure to save page 113 of the Operation Guide. important data to internal memory or an SD card. Note: As an alternative to using the WRITE button, you “Writing” refers to saving data to the internal memory can also use the Write command in the page menu. of the KROME itself. You can use the Write operation Effect presets can only be written by using the Write for programs, combinations, arpeggio patterns, drum command. kits, and global settings. Note: Song data cannot be written to internal memory Saving and loading (see “Saving data on the KROME” on page 113 of the Operation Guide). “Saving” refers to saving data on an SD card. You can Saving data to an SD card use the Save operation to save the song data that Data you’ve created or edited on the KROME can be cannot be written to internal memory as well as the saved to an SD card. The KROME can handle several data that can be written to internal memory. types of files and data, but here we’ll explain two Note: The Save operation allows you to save individual common types of file: .PCG files and .SNG files. items of data as well as all of the KROME’s data PCG stands for “Program, Combination, and Global.” together. By saving the entire set of sound data (i.e., These files can also include user Arpeggio patterns, ... -
Page 20: Loading Data
Saving and loading data A dialog box will appear. A dialog box will appear, containing a number of options. 6. Select the “Load [filename].PCG too” check box. When these boxes are checked, the system looks for .PCG file with the same name as the main .SNG file. 7. Use “Select .SNG Allocation” to specify how the Songs will be loaded, and whether or not existing Songs will be erased. Append loads the Songs into the first free Song numbers following the song(s) which are already in memory. Clear will erase all songs from internal memory, and load the Songs into the exact numbers from which they 6. Press the text edit button (“T”) and enter a name were saved. for the files. 8. Press the OK button to load the data. All of the files will share the same name, with different Never turn off the power or remove the SD card suffixes to show the data type (.PCG, .SNG). while data is being loaded or saved. 7. Press the OK button to Save the data to the SD When loading Programs, Combinations, Songs, card. Drum Kits, or user Arpeggio patterns, make sure When the save is complete, the system returns to the that the Global Basic Setup page’s Memory Protect Save page, and the display will show the resulting settings are turned off (unchecked). If they are on, file(s). The amount of time required will depend on the you won’t be able to load the data. -
Page 21: Listening To The Demo Songs
Listening to the demo songs Listening to the demo songs Loading the demo song data Listening to the demo songs When you perform the following operation, the Here’s how to listen to the demo songs in Sequencer data stored within the KROME will be discarded mode. and overwritten by the preset program and 1. Press the SEQ button (the LED will light up) to combination data and the demo song data. If you enter Sequencer mode. don’t want to lose the data that you edited or 2. Access the P0: Play/REC– Program T01–08 page. created, you should save it to an SD card If this page is not displayed, you’ll need to press the (commercially available) before you proceed. EXIT button a few times. 1. Press the GLOBAL button (the LED will light up) to enter Global mode. Meter Tempo 2. -
Page 22: Playing Multiple Songs In Succession
C-1 ... C2 2. Press the SEQUENCER START/STOP ( ) Pattern button. Pattern Pattern Pattern You will hear the songs in the list in the assigned order. Pattern Pattern If you want to stop playback before you reach the end Pattern of the list, press the START/STOP ( ) button once This completes our quick start. again. Of the KROME’s wide range of functionality, this operation guide explains how to use some of the most typical operations. We highly recommend that you take the time to read it completely. Performing with RPPR In Sequencer mode, the RPPR (Realtime Pattern Play/Recording) function allows you to assign a preset pattern or user pattern (and a track to play it) to each key. This way, you can play a pattern simply by pressing the key where it is assigned. You can also record the resulting playback. The demo songs you loaded contain data that uses the RPPR function. Here’s how you can use it. 1. Access the P0: Play/REC– Program T01–08 page, and select S001. For details, refer to steps 6 and 7 on the preceding ... -
Page 23: Specifications (Summary)
73-note 8.2 kg/18.08 lbs 88-note 14.7 kg/32.41 lbs Power consumption: 13 W Included items: AC adapter KROME Quick Start Guide (this document) Accessory disc (PDF: KROME Operation Guide, Parameter Guide, Voice Name List, Movie: video manual, etc.) Options: XVP-10: Expression/volume pedal... - Page 24 IMPORTANT NOTICE TO CONSUMERS This product has been manufactured according to strict specifications and voltage requirements that are applicable in the country in which it is intended that this product should be used. If you have purchased this product via the internet, through mail order, and/or via a telephone sale, you must verify that this product is intended to be used in the country in which you reside. WARNING: Use of this product in any country other than that for which it is intended could be dangerous and could invalidate the manufacturer’s or distributor’s warranty. Please also retain your receipt as proof of purchase otherwise your product may be disqualified from the manufacturer’s or distributor’s warranty. 4015-2 Yanokuchi, Inagi-city, Tokyo 206-0812 Japan © 2012 KORG INC.
Need help?
Do you have a question about the Krome and is the answer not in the manual?
Questions and answers