Table of Contents
Advertisement
Quick Links
Instruction
manual
Model
HIOOOIS-W
Generator
J
To learn more about Porter-Cable
ws_t our webs_te at:
http://www.porter-cable.com
PORTEII*(IIBLE
IMPORTANT
Please make certain that the person who is
to use this equipment
carefully reads and
understands
these
fnstructfons
before
startfng operations.
The Model and Sernat No plate is located on the frame
Record these numbers in [he spaces below and retain for
future reference
Model No
Type
Serial No
Part No
A01296-042-0
Copyrnght © 2004 Porter-Cable Corporation
Advertisement
Table of Contents

Related Manuals for Porter-Cable H1000IS-W


Summary of Contents for Porter-Cable H1000IS-W
- Page 1 Instruction manual Generator Model HIOOOIS-W IMPORTANT To learn more about Porter-Cable Please make certain that the person who is ws_t our webs_te at: to use this equipment carefully reads and understands these fnstructfons before http://www.porter-cable.com startfng operations. The Model and Sernat No plate is located on the frame Record these numbers in [he spaces below and retain for future reference PORTEII*(IIBLE...
-
Page 2: Risk Of Electrocution
This manual contains information that is important for you to know and understand. This infor- mation relates to protecting YOUR SAFETY and PREVENTING EQUIPMENT PROBLEMS. To help you recognize this information, we use the symbols below. Please read the manual and pay attention to these sections. - Page 3 RISK OF ELECTROCUTION AND FIRE _',_F'4_ (Continued) HAZARD WHAT CAN HAPPEN HOW TO PREVENT IT Attempting to connect generator directly to the electrical system of any building structure. (Continued) Water is an excellent conductor Operation of Operate generator in a clean, dry, well ventilated area.
- Page 4 RISK OF ELECTROCUTION AND FIRE (Continued) HAZARD WHAT CAN HAPPEN HOW TO PREVENT IT Operation of unit Attempting to use the unit Do not operate generator with mechanical or electrical when damaged, when it has been damaged, or or with guards or when it is not functioning problem.
- Page 5 RISK OF FIRE _',_F'4_ (Continued) HAZARD WHAT CAN HAPPEN HOW TO PREVENT IT Overfilling the fuel tank - fuel spillage. RISK OFINJURY AND PROPERTY DAMAGE WHEN TRANSPORTING GENERATOR HAZARD WHAT CAN HAPPEN HOW TO PREVENT Fuel or oil can leak or spill and Fire, Inhalation, If generator is equipped with a...
-
Page 6: Risk Of Unsafe Operation
RISK OF UNSAFE OPERATION HAZARD WHAT CAN HAPPEN HOW TO PREVENT IT Operation of All sources of energy include the • Review and understand all of generator 3otentiaJ for injury. Unsafe the operating instructions careless manner operation or maintenance of your warnings in this manual. - Page 7 RISK OF HOT SURFACES HAZARD HOW TO PREVENT iT WHAT CAN HAPPEN Contact with hot engine and generator components, RISK OF MOVING PARTS _1_' HAZARD HOW TO PREVENT iT WHAT CAN HAPPEN The generator contains parts Contact with Never operate generator with guarding or cover plates moving parts which rotate at high speed during...
- Page 8 • Please read and follow these instructions for proper use and maintenance. * If you experience any problems and need assistance, please call us at our toll free number 1-888-559-8550, Monday through Saturday. * If repair or service part purchase is required, our many Authorized Warranty Service Centers are conveniently located and equipped to handle all in-...
- Page 9 Read this manual. Do not attempt to operate equipment until you have read this Manual for Safety, Operation, and Maintenance Instructions. NOTE: This manual is a general manual. Information in this manual may or may not pertain to your model. Please read carefully. NOTE: Left and right describes the location of a part with the operator facing the outlet panel.
- Page 10 On the muffler side of the engine, remove cap screws and flange nuts holding the heat shield (17) to the frame. Reassemble cap screws, heat shield, wheel bracket (3), and flange nuts (7) as shown. Tighten securely. On other side, assemble wheel bracket using cap screws and flange nuts supplied.
- Page 11 14. To make installation easier, submerge handle grips into warm soapy water. Remove handle grips from soapy water and slide onto handles. 15. Squeeze snap button (12), slide into handle, and release snap button through second hole. NOTE: V of snap button is inserted first. Repeat step on other handle.
- Page 12 ASSEMBLE SKYHOOK Tools needed: 1 - 1/2" socket or open end wrench 1 - 3/8" socket 1 - Torque wrench Parts bag contains: Skyhook Upper brackets 5 - Screws, 5/16-18x 7/8" Lockwashers 5 - Nuts, Whizlock 5/16" Close fuel shut-off valve on tank by turning clockwise until it stops.
- Page 13 Place skyhook on the fuel tank side of the frame and install upper bracket as shown. Wrap upper bracket around frame. Slide Iockwashers onto bolts, insert through brackets, and secure with whizlock nuts. NOTE: DO NOT tighten bolts at this time. Repeat steps 5-7 on other side.
-
Page 14: Battery Installation
BATTERY INSTALLATION The generator is equipped with a maintenance free battery. For packaging purposes the black negative battery cable and battery were secured with wire ties. Cut these wire ties. Connect black negative cable to negative (-) battery post. Tighten securely. -
Page 15: Extension Cords
OBTAINING ELECTRICITY FROM THE GENERATOR There are basically 2 ways to obtain electricity from a generator: Use of extension cords directly from the generator to the appliance, lights, tools, etc. Use of a double-throw transfer switch installed directly to the main electrical supply outside of house. -
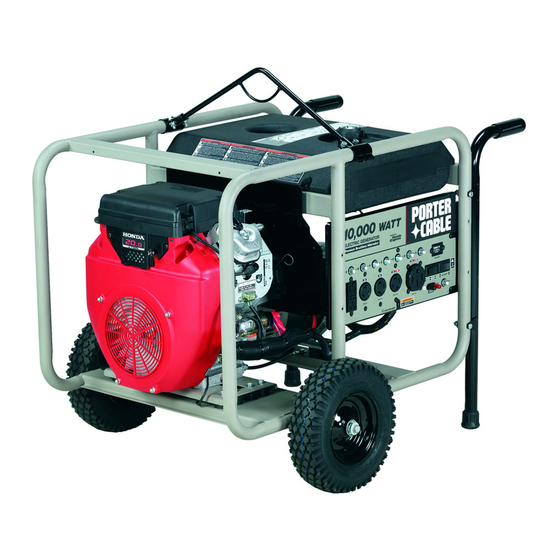
Page 16: Know Your Generator
OTHER LOOSE PARTS The locking plugs maybe used when needed or required. The locking plugs are to be installed and/or used in accordance with appropriate local electrical code regulations. Refer to instructions enclosed with each plug for proper installation. 12V DC cables to be used with the 12V DC outlets. See Operation section. IMPORTANT: Before any attempt to start your generator be sure to check engine oil (See Engine Operator's manual) -
Page 17: Idle Control
IDLE CONTROL Choose the correct application. For normal application such as power tools, small electric appliances, light bulbs, and radios: Place the idle control switch in the ON position. The generator will idle down when there is no load. This lowers the engine noise, saves on fuel consumption, and engine life. -
Page 18: To Start The Engine
_'_11 Never fill fuel tank indoors. Neverfill fuel tank when engine is running or hot. Do not smoke when tillingfuel tank. Never run engine indoors or in enclosed, poor ventilated areas, engine exhaust contains carbon monoxide, an odorless and deadly gas. Make sure generator is grounded in accordance with localrequirements. - Page 19 Voltage sensitive equipment should be the last equipment connected to the generator. Plug voltage sensitive appliances such at TV's, VOR's, micro- waves, ovens, computers, and cordless telephones into a UL listed voltage surge protector, then connect the UL listed voltage surge protector to the generator.
- Page 20 CUSTOMER RESPONSIBILITIES TABLE Before Every 25 Every 50 Every 100 each Hours of Hours of Hours of Every Every Every MAINTENANCE TASK Season Season Season Check oil level See Note 2 See Note I Change oil Clean Air Filter Assembly Check Spark Plug Prepare unit for storage if it is to remain Prepare Unit for Storage...
-
Page 21: Engine Preparation
If you are going to store your generator for more than 30 days, use the following information as a guide to prepare the generator for storage. Never store generator with fuel in the tank indoors or in enclosed, poorly ventilated areas, where fumes can reach an open flame, spark or pilot light as on a furnace, water heater, clothes dryer or other gas appliances. - Page 22 IMPORTANT Never exceed the rated capacity of your generator. Serious damage to the generator or appliance could result from an overload. 1. Starting and running wattage requirements should always be calculated when matching a generators wattage capacity to the appliance or tool. 2.
- Page 23 The running wattage of examples 1 & 2 totals 1150 watts. The starting wattage of the small refrigerator is 2000 watts which is 1500 watts more than the running watts. Take this difference of 1500 starting watts from the refrigerator and add to the total running watts of 1150. Example 3: 1500 Starting Watts 1150 Running Watts...
- Page 24 HOUSEHOLD WATTAGE CALCULATOR DEVICES WITH NIGH STARTING (INDUCTIVE)LOADS APPLIANCE TYPICAL DEVICE RUNWAYS T,MES_,STARTFACTOR I[LOADDEVIcE*ll WATTAGE** TOTAL I CAUTION !! I pLATE DO NOT CONNECT VOLTAGE SENS_TEVE TELEVISION EU'CTRONIC EQU=_ME_T (TV SET, COM_UT_R, ETC _ DmECTLY TO YOUR G_ERATOR =FYou USE YOU MUST USE A U L _TED VOLTAGE sURGE MICROWAVE...
- Page 25 PROBLEM CAUSE CORRECTION Engine will not Low on fuel or oil. Add fuel or oil. start Turn to "ON" position Ignition switch in "Off" position. Faulty spark plug. Replace spark plug. Choke in wrong position. Adjust choke accordingly. Fuel shut-off valve in Open fuel shut-off valve.
- Page 26 PORTER-CABLE CORPORATION warrants to the original purchaser that all products covered under this warranty are free from defects in material and workmanship. Products covered under this warranty include compressors, air tools, service parts, pressure washers, and generators, which have the following w_ranty periods: 3 YEARS...
- Page 27 27_ E NG ,_o_296...
-
Page 28: Operation
CALL 1-888-559-8550 TO FIND A LOCAL AUTHORIZED SERVICE CENTER NEAR YOU FOR REPAIRS AND SERVICE PART PURCHASES Refer to engine owner's manual for oil recommendations. ENGINE OIL Most generators are equipped with a low-oil shutdown. If the oil is low or if the Generator is not level, the engine will not start. Contact an electrician for any wiring instructions.
Need help?
Do you have a question about the H1000IS-W and is the answer not in the manual?
Questions and answers