Table of Contents
Advertisement
Patent Pending
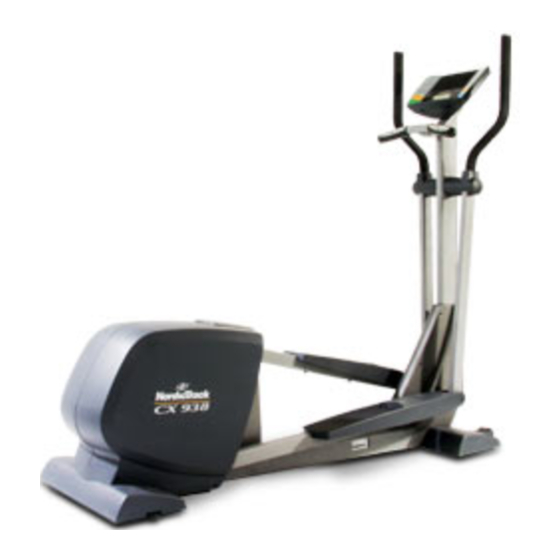
Model No. NEL5095.1
Serial No.
Serial Number
Decal
QUESTIONS?
As a manufacturer,
we are
com-
mitted
to providing complete
customer
satisfaction.
If you
have questions,
or if parts are
damaged
or missing,
PLEASE
CONTACT OUR CUSTOMER
SERVICE DEPARTMENT
DIRECTLY.
CUSTOMER
HOT LINE:
1-888-825-2588
Mon.-Fri.,
6 a.m.-6
p.m. MST
ON THE WEB:
www.nordictrackservice.com
A UAL
www.nordictrack.com
new products,
prizes,
fitness
tips, and much
more!
Advertisement
Table of Contents

Related Manuals for NordicTrack CX 938 NEL5095.1


Summary of Contents for NordicTrack CX 938 NEL5095.1
- Page 1 If you have questions, or if parts are damaged or missing, PLEASE CONTACT OUR CUSTOMER SERVICE DEPARTMENT DIRECTLY. CUSTOMER HOT LINE: 1-888-825-2588 Mon.-Fri., 6 a.m.-6 p.m. MST ON THE WEB: www.nordictrackservice.com www.nordictrack.com new products, prizes, fitness tips, and much more!
-
Page 2: Table Of Contents
HOW TO USE THE ELLIPTICAL EXERCISER ........... MAINTENANCE AND TROUBLESHOOTING ........... CONDITIONING GUIDELINES ............... PART LIST ................EXPLODED DRAWING ..............HOW TO ORDER REPLACEMENT PARTS ..........Back Cover LIMITED WARRANTY .............. Back Cover NordicTrack is a registered trademark of ICON IP, Inc. -
Page 3: Before You Begin
BEFORE YOU BEGIN Congratulations for selecting the new NordicTrack ® tions after reading this manual, see the front cover of CX 938 elliptical exerciser. The CX 938 is an incredi- this manual. To help us assist you, please note the... -
Page 4: Assembly
ASSEMBLY Assembly requires two persons. Place all parts of the elliptical exerciser in a cleared area and remove the packing materials. Do not dispose of the packing materials until assembly is completed. Assembly requires the included alien wrenches and your own phillips screwdriver rubber mallet ( As you assemble the elliptical exerciser, use the drawings below to identify the small parts used in assembly. - Page 5 Have another person hold the Upright (2) in the posi- tion shown. Connect the Upper Wire Harness (30) to the Lower Wire Harness (42). Insert the connectors on the Wire Harnesses up into the Upright (2). Carefully pull the upper end of the Upper Wire Harness to remove the slack from the Wire Harnesses.
- Page 6 Identify the Left Pedal (10), which has a notch near the right side. Place the Left Pedal on the Left Pedal Leg (4). Next, apply a generous amount of grease to the long side of an M8 x 79mm Bolt Set (65) and the faces of the two indicated Upper Body Arm Bushings (12).
-
Page 7: How To Use The Elliptical Exerciser
HOW TO USE THE ELLiPTiCAL EXERCISER HOW TO MOVE THE ELLiPTiCAL EXERCISER Handlebars Stand in front of the elliptical exerciser, hold the han- dlebars firmly, and place one foot against one of the wheels. Pull the handlebars until the elliptical exercis- er can be moved on the wheels, and carefully move Handgrip Pulse Sensor... - Page 8 CONSOLE DIAGRAM Cerlified Personal 15tepResistance Trainer Programs Target Pace Training Zones Too Fast Performance Auto Fan Time i Fit mmmmmm Odometer Endurance Personal Training Aerobic Pace Fat Burn WarmUp Auto Breeze Resistance Start Too Slow Cool Down •1,WARNING: Tu reduu, risk of serious it_jury, read and und_,rstand lhe user's manual, all instructions, and the warnings betore...
- Page 9 The Training Zones Training Zones bar--The Training Zones bar will show Performance the approximate inten- Endurance ress any button on the console or begin sity level of your exer- pedaling to turn on the console. cise. Aerobic A few seconds after the console is turned on, the Fat Burn displays will light.
- Page 10 Note: The console Note: If you continue to hold the handgrip pulse can show speed and sensor, the lower display will show your heart rate distance in either for up to 30 seconds. The display will then show miles or kilometers. your heart rate along with the other modes.
- Page 11 When the one of the "Too Fast" indicators lights, decrease your pace. When the "On Pace" indica- tor lights, maintain your current pace. ress any button on the console or begin pedaling to turn on the console. Target Pace Target Pace Target Pace See step 1 on page 9.
- Page 12 Monitor your progress with the displays. See step 4 on page 9. ress any button on the console or begin pedaling to turn on the console. Measure your heart rate if desired. See step 1 on page 9. See step 5 on page 10. Turn on the fan if desired.
- Page 13 Hold the handgrip pulse sensor. The Target Pace guide will prompt you to increase or decrease your pedaling pace during It is not necessary to hold the handgrip pulse the program. When one of the "Too Slow" indica- sensor continuously during a heart rate program; tors lights, increase your pace.
- Page 14 HOW TO CONNECT YOUR PORTABLE STEREO Note: If your stereo has an RCA-type AUDIO OUT jack, see instruction A below. If your stereo has a 1/8" LINE OUT jack, see instruction B. If your To use iFIT.com CDs, the elliptical exerciser must be stereo has only a PHONES jack, see instruction C.
- Page 15 HOW TO CONNECT YOUR HOME STEREO HOW TO CONNECT YOUR COMPUTER Note: If your stereo has an unused LiNE OUT jack, Note: If your computer has a 1/8" LiNE OUT jack, see instruction A below. If the LiNE OUT jack is see instruction A.
- Page 16 HOW TO CONNECT YOUR VCR B. Plug one end of the audio cable into the jack beneath the console. Plug the other end of the Note: if your VCR has an unused AUDIO OUT jack, cable into the adapter. Plug the adapter into an see instruction A below, if the AUDIO OUT jack is RCA Y-adapter (available at electronics stores).
- Page 17 The program will function in almost the same way as a preset program (see step 3 on page 11). However, an electronic "chirping" sound will alert you when the resistance setting and/or pace set- ting is about to change. To use an iFIT.com CD or video program, the elliptical exerciser must be connected to your CD player or Note: If the resistance of the elliptical exerciser...
-
Page 18: Maintenance And Troubleshooting
Follow the on-line instructions to start the program. When you start the program, an on-screen count- down will begin. Our Web site at www.iFIT.com allows you to play iFIT.com programs directly from the internet. To use Return to the elliptical exerciser and begin programs from our Web site, the elliptical exerciser pedaling. - Page 19 TO REMOVE THE SiDE SHIELDS AND THE HOW TO ADJUST THE REED SWITCH FLYWHEEL COVERS If the console does not display correct feedback, the The Left and Right Side Shields (15, 16) must be reed switch should be adjusted. To adjust the reed removed before the reed switch or the drive belt can switch, first see the instructions at the left and remove be adjusted.
-
Page 20: Conditioning Guidelines
CONDiTiONiNG GUiDELiNES During the first few minutes of exercise, your body uses easily accessible carbohydrate calories for ener- gy. Only after the first few minutes of exercise does your body begin to use stored fat calories for energy. If your goal is to burn fat, adjust the intensity of your exercise until your heart rate is near the lowest num- ber in your training zone as you exercise. -
Page 21: Part List
PART LISTmModel No. NEL5095.1 ROSOSA Key No. Qty. Description Key No. Qty. Description Frame Resistance Motor Upright Reed Switch Bracket Upright Endcap Clamp Left Pedal Leg Reed Switch/Wire Right Pedal Leg Return Spring Rear Stabilizer Guide Rod Rear Stabilizer Cover Resistance Cable Front Stabilizer Flywheel Axle... -
Page 22: Exploded Drawing
r"" r" ¢0 3>... - Page 23 1,,,,, ¢.94 i"rl r" ¢0 7251 3>...
-
Page 24: How To Order Replacement Parts
• The MODEL NUMBER of the product (NEL5095.1 • The NAME of the product (NordicTrack CX 938 elliptical exerciser) • The SERIAL NUMBER of the product (see the front cover of this manual) • The KEY NUMBER and DESCRIPTION...
Need help?
Do you have a question about the CX 938 NEL5095.1 and is the answer not in the manual?
Questions and answers