Table of Contents
Advertisement
Quick Links
Advertisement
Table of Contents

Related Manuals for Knoll DLP Kameleon HDP6000


Summary of Contents for Knoll DLP Kameleon HDP6000
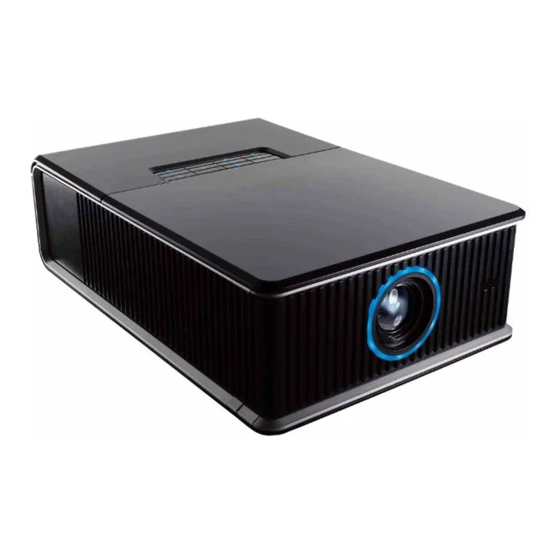
- Page 1 Kameleon HDP6000 1080p DLP™ Projector Users‟ Manual v1.1...
- Page 2 Windows are trademarks or registered trademarks of Microsoft Corporation. Adobe and Acrobat are trademarks or registered trademarks of Adobe Systems Incorporated. DLP® and the DLP logo are registered trademarks of Texas Instruments and BrilliantColor™ are a trademark of Texas Instruments. Knoll is a trademark of Pacific Sound & Signal Inc.
-
Page 3: Table Of Contents
TABLE OF CONTENTS Safety Warnings Introduction Positioning the projector Choosing the aspect ratio Video connectors Connecting a video device Composite (RCA) video connection S-video connection Component (RCA) connection SCART RGB connection Digital connections DVI connection HDMI connection Computer connections RS-232 connections Displaying an image Adjusting the image Shutting down the projector... -
Page 4: Safety Warnings
• Only use replacement parts specified by Knoll. Unauthorized substitutions may result in fire, electrical shock, or injury, and may void the warranty • Only genuine Knoll lamps are tested for use in this projector. Use of non Knoll lamps may cause electrical shock and fire, and may void the projector warranty. -
Page 5: Introduction
Congratulations and thank you for your choice of a superior digital image projection device. Your new Knoll projector is specifically designed for home cinema applications. The projector sets a high standard using the latest DLP™ technology and new DNX video processing from Pixelworks™. - Page 6 Power RS232 S-Video HDMI Rear Connector Panel 12 VDC triggers Composite video Component video Wired remote The projector provides the following connection options: • VGA computer. • Two HDMI™ (High Definition Multimedia Interface) • Three Component Video (RCA) • S-video •...
-
Page 7: Setting Up The Projector
When installing the projector on the ceiling, refer to the installation guide that comes with the Ceiling Mount Kit for more information. Knoll recommends use of the CM33 mount shipped with the projector or the deluxe swivel ceiling mount. The addition of a CM20+6 extension bar lowers the projector 6”... -
Page 8: Positioning The Projector
Projector Positioning The projected image becomes larger as the distance between the unit and screen increases. The manual zoom allows the distance from the screen to be within a minimum and maximum range. See the chart on the next page for details. The example below defines the screen height, width, diagonal, etc. -
Page 9: Choosing The Aspect Ratio
Choosing the aspect ratio Aspect ratio is the ratio of the image width to image height. HDTV and most DVDs are 16:9, which is the default for this projector. When in 4:3 mode the projector places black bars on both sides of the image. Native mode centers the image and turns off the internal scaler so that any resolution larger than the native projector resolution is cropped on the edges. -
Page 10: Video Connectors
Connecting a video device You can connect video devices such as VCRs, DVD players, camcorders, digital cameras, video game consoles, HDTV receivers, and TV tuners to the projector. Connect the audio from your video device to your stereo system to get sound. You can connect the projector to most video devices that can output video. -
Page 11: Computer Connections
Computer connections You can connect a computer‟s VGA connector to the VGA input on the projector using a VGA cable. RS-232 connections You can control the projector from an LCD control panel or computer by connecting an RS-232 cable to the projector‟s Serial control connector. Displaying an image Connect the power cord to the Power connector cord plug in power... -
Page 12: Shutting Down The Projector
Adjust the focus and zoom. If the image is square but not centered adjust focus adjust it using the lens shift dials. adjust zoom horizontal lens shift vertical lens shift Rotate the elevator feet if needed for granular adjustment of the projector‟s height. Avoid placing your hands near the hot exhaust vent at the side of the projector. -
Page 13: Troubleshooting Your Setup
Troubleshooting your setup If your image appears correctly on the screen, skip to the next section. If it does not, troubleshoot the setup. The LED on top of the projector indicates the state of the projector and can help you troubleshoot. The status indicator on the top of the projector can help you diagnose any problems the projector is experiencing. - Page 14 The following tables show common problems. In some cases, more than one possible solution is provided. Try the solutions in the order they are presented. When the problem is solved, you can skip the additional solutions. Problem Solution Result Plug in power and press the power button.
-
Page 17: Using The Remote Control
Still need assistance? If you need assistance, visit our website at www.knollsystems.com, or call us at 1 800 566 5579. during Pacific west coast time. This product is backed by a limited warranty. An extended warranty plan may be purchased from your retailer or dealer. When sending the projector in for repair, we recommend shipping the unit in its original packing material, or having a professional packaging company pack the unit. -
Page 18: Using The Keypad Buttons
Using the keypad buttons Most buttons are described in detail in other sections, but here is an overview of their functions: Power–turns the projector on and off (page 12). Auto Image–resynchronize the projector to the source. Presets–cycles through the available preset settings. Menu–opens the onscreen menus. -
Page 19: Optimizing Video Images
Optimizing video images Your projector has been factory optimized for very good performance no matter what the source. However, if you wish to make further changes you can optimize the image using onscreen menus. • Adjust the Keystone, Contrast, Brightness, Color, or Tint in the Picture menu. •... -
Page 20: Picture Menu
The menus are grouped by usage: • The Basic Picture menu provides common image adjustments. • The Advanced Picture menu provides more complex image adjustments. • The Setup menu provides set-up type adjustments that are not changed often. • The Status and Service menu provides information about the projector and source. Basic Picture menu To adjust the following settings, highlight the setting, press select, use the arrow buttons to adjust the values, then press Select to... - Page 21 Advanced Picture menu BrilliantColor™: Produces an expanded onscreen color spectrum that delivers enhanced color saturation for bright, true-to-life images. Choose Normal Look for most video sources and Bright Look for most computer sources. Iris/DynamicBlack: Select Auto to constantly adjust the aperture based on the amount of black in the current scene, or select a percentage for a fixed aperture size (100% is maximum size).
-
Page 22: Settings Menu
Setup menu Language: Allows you to select a language for the onscreen display. Key Click: Turns the key click sound on or off. When this setting is on, pressing keys on the keypad causes the projector‟s speaker to play a “click” sound. Custom Key: Allows you to assign a different function to the Custom button, allowing you to quickly and easily use the effect. - Page 23 Video Standard: When this feature is set to Auto, the projector attempts to automatically pick the video standard based on the input signal it receives. (The video standard options may vary depending on your region of the world.) If the projector is unable to detect the correct standard, the colors may not look right or the image may appear “torn.”...
-
Page 24: Maintenance
The LED on the top of the projector also blinks red twice to indicate that the lamp should be changed. Use only a replacement lamp with the same type and rating as the original lamp. Lamps can be purchased direct from Knoll or the dealer that sold the projector. -
Page 25: Replacing The Projection Lamp
WARNINGS • The projector uses a high-pressure mercury glass lamp. The lamp may fail prematurely, or it may rupture with a popping sound if jolted, scratched, or handled while hot. The risk of lamp failure or rupture also increases as the lamp age increases; please replace the lamp when you see the “Replace Lamp”... -
Page 26: Rs-232 Terminal Specs
RS-232 terminal specifications Communication configuration To control the projector from and LCD control panel, connect RS-232 cable to the serial control connector on the projector and set your computer‟s serial port settings to match this communication configuration. Setting Value Bits per second 115,200 Data bits Parity... - Page 27 Function Command Response Brightness (BRT10) Sets brightness to 10 Power (PWR0) Turns power off Power (PWR1) Turns power on Error Conditions Not all commands are supported for all projectors. If an unsupported command is issued, the command will be ignored. If a command is received that is not understood, a „?‟ character will be returned indicating the command was not understood.
- Page 31 SplitScreen Compatibility SplitScreen allows two distinct sources to be displayed simultaneously. Switch primary sources, make picture adjustments and choose one of multiple display options: either two side by side horizontal or vertical source regions or a small secondary source image displayed on top of the primary source in one of four placement options lets you show two different sources at the same time.
-
Page 32: Warranty Information
Product for personal or business use. Knoll‟s liability for the breach of the foregoing limited warranty is limited to the repair or replacement of the Product or refund of the purchase price of the Product, at Knoll‟ sole option. Replacement Product may be re-furbished in “like-new” condition, at Knoll‟ sole discretion. To exercise the Purchaser‟s rights under the foregoing warranty, the Product must be returned at the Purchaser‟s sole cost and...
Need help?
Do you have a question about the DLP Kameleon HDP6000 and is the answer not in the manual?
Questions and answers