Table of Contents
Advertisement
Quick Links
Download this manual
See also:
User Manual
Advertisement
Table of Contents

Related Manuals for Knoll HDP2100


Summary of Contents for Knoll HDP2100
- Page 1 PROJECTOR User’ s Manual HDP2100 High Definition Projector...
- Page 2 Copyright This publication, including all photographs, illustrations and software, is protected under international copy- right laws, with all rights reserved. Neither this manual, nor any of the material contained herein, may be reproduced without written consent of the author. © Copyright 2010 Disclaimer The information in this document is subject to change without notice.
-
Page 3: Important Safety Information
HDP2100 Users Manual Important Safety Information Important: It is strongly recommended that you read this section carefully before using the projector. These safety and usage instructions will ensure that you enjoy many years of safe use of the projector. Keep this manual for future reference. - Page 4 Preface Projector Installation Notice Place the projector in a horizontal position The tilt angle of the projector should not exceed 15 degrees, nor should the projector be installed in any way other than the desktop and ceiling mount, otherwise lamp life could decrease dramatically. Allow at least 50 cm clearance around the exhaust vent.
- Page 5 HDP2100 Users Manual Replacing the Lamp Replacing the lamp can be hazardous if done incorrectly. See Replacing the Projection Lamp on page 30 for clear and safe instructions for this procedure. Before replacing the lamp: Unplug the power cord. Allow the lamp to cool for about one hour.
-
Page 6: Table Of Contents
GETTING STARTED ................................1 ................................1 ACKING HECKLIST ............................... 2 IEWS OF ROJECTOR ARTS HDP2100 Front-right View ............................2 Top view—On-screen Display (OSD) buttons and LEDs ....................3 Rear view ..................................4 Bottom view..................................5 ..............................6 EMOTE ONTROL ARTS .......................... - Page 7 HDP2100 Users Manual ........................39 ROJECTION ISTANCE VS ROJECTION HDP2100 Series Projection Distance and Size Table ....................39 HDP2100 S ........................... 40 ERIES IMING ABLE ..............................42 ROJECTOR IMENSIONS REGULATORY COMPLIANCE ............................. 43 FCC W .................................. 43 ARNING .................................... 43 ANADA ..............................
-
Page 8: Getting Started
HDP2100 Users Manual ETTING TARTED Packing Checklist Carefully unpack the projector and check that the following items are included: HDP2100 SERIES DLP P ROJECTOR EMOTE CONTROL VGA CABLE OMPONENT CABLE OWER CORD (WITH TWO AA BATTERIES) HDMI CD-ROM CABLE ARRYING CASE ARRANTY ’... -
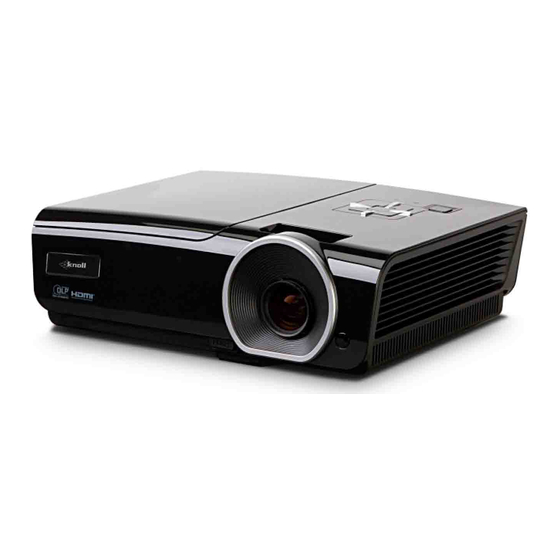
Page 9: Views Of Projector Parts
HDP2100 Users Manual Views of Projector Parts HDP2100 Series Front-right View ABEL ESCRIPTION EE PAGE Height-adjuster button Push to release height adjuster Height adjuster Adjusts level of projector Lens Projection Lens IR receiver Receive IR signal from remote control Focus ring... -
Page 10: Top View-On-Screen Display (Osd) Buttons And Leds
HDP2100 Users Manual Top view—On-screen Display (OSD) buttons and LEDs ABEL ESCRIPTION PAGE Turns the projector On or Off. (Power button) BLANK Displays a blank screen and mutes audio ◄ (Left cursor) / Navigates and changes settings in the OSD Volume- Quick Menu –... -
Page 11: Rear View
HDP2100 Users Manual Rear view ABEL ESCRIPTION EE PAGE AC IN Connect the POWER CABLE (USB) Connect the USB CABLE from a computer COMPONENT IN Connect a component video enabled device S-VIDEO IN Connect the S-VIDEO CABLE from a video device... -
Page 12: Bottom View
HDP2100 Users Manual Bottom view ABEL ESCRIPTION EE PAGE Tilt adjustor Rotate adjuster lever to adjust angle position. Ceiling support holes Contact your dealer for information on mounting the projector on a ceiling Height adjustor Adjuster drops down when adjuster button is pushed. -
Page 13: Remote Control Parts
HDP2100 Users Manual Remote Control Parts Important: 1. Avoid using the projector with bright fluorescent lighting turned on. Certain high-frequency fluo- rescent lights can disrupt remote control operation. 2. Be sure nothing obstructs the path between the remote control and the projector. If the path be- tween the remote control and the projector is obstructed, you can bounce the signal off certain reflective surfaces such as projector screens. - Page 14 HDP2100 Users Manual ABEL ESCRIPTION EE PAGE Power OFF Turns the projector off HDMI 2 Displays the HDMI 2 source selection S-VIDEO Displays the S-VIDEO source selection VIDEO Displays the VIDEO source selection Up cursor / Navigates and changes settings in the OSD Keystone+ Quick Menu –...
-
Page 15: Remote Control Operating Range
Remote Control Operating Range The remote control uses infrared transmission to control the projector. It is not necessary to point the remote directly at the projector. Provided you are not holding the remote perpendicular to the sides or the rear of the projector, the remote will function well within a radius of about 7 meters (23 feet) and 15 degrees above or below the projector level. -
Page 16: Setup And Operation
ETUP AND PERATION Inserting the Remote Control Batteries Remove the battery compartment cover by sliding the cover in the direction of the arrow. Insert the battery with the positive side facing up. Replace the cover. Caution: 1. Only use AA batteries (Alkaline batteries are recommended). 2. -
Page 17: Connecting Input Devices
HDP2100 Users Manual Connecting Input Devices A PC or notebook computer and video devices can be connected to the projector at the same time. Video devices include DVD, VCD, and VHS players, as well as movie camcorders and digital still cameras. -
Page 18: Starting And Shutting Down The Projector
– ’ – ’ – ’ Starting and Shutting down the Projector Connect the power cord to the projector. Connect the other end to a wall outlet. POWER LED will be on. Turn on the connected devices. Ensure the POWER LED displays a solid blue and not a flashing blue. - Page 19 HDP2100 Users Manual When the POWER OFF window ap- pears, press on the control panel or on the remote control. The projec- tor turns off. Caution: Do not unplug the power cord until the READY LED stops flashing–indicating the projector has cooled down.
-
Page 20: Adjusting The Projector Level
HDP2100 Users Manual Adjusting the Projector Level Take note of the following when setting up the projector: • The projector table or stand should be level and sturdy. • Position the projector so that it is perpendicular to the screen. -
Page 21: Control
HDP2100 Users Manual Adjusting the Zoom ring, Focus and Keystone Use the Image-zoom control (on the projector only) to resize the pro- jected image and screen size Use the Image-focus control (on the projector only) to sharpen the pro- jected image... -
Page 22: Adjusting The Volume
HDP2100 Users Manual Adjusting the Volume Press the Volume +/- buttons on the remote control. The volume control appears on the display. Press the Left or Right Cursor buttons on the keypad to adjust Volume +/-. Press the MUTE button to... -
Page 23: On-Screen Display (Osd) Menu Settings
HDP2100 Users Manual (OSD) M CREEN ISPLAY ETTINGS OSD Menu Controls The projector has an OSD that lets you make image adjustments and change various settings. Navigating the OSD You can use the remote control cursor buttons or the buttons on the top of the projector to navigate and make changes to the OSD. -
Page 24: Setting The Osd Language
HDP2100 Users Manual Setting the OSD Language Set the OSD language to your preference before continuing. 1. Press the MENU button. Press the cursor ◄► button to navigate to SYSTEM SETUP: Basic. 2. Press the cursor ▲▼ button until Language is highlighted. -
Page 25: Osd Menu Overview
HDP2100 Users Manual OSD Menu Overview Use the following illustration to quickly find a setting or determine the range for a setting. – 18 –... -
Page 26: Picture: Basic Menu
HDP2100 Users Manual PICTURE: Basic Menu Press the MENU button to open the OSD menu. Press the cursor ◄► button to move to the PICTURE: Basic menu. Press the cursor ▲▼ button to move up and down in the PICTURE: Basic menu. -
Page 27: Picture: Advanced Menu
HDP2100 Users Manual PICTURE: Advanced Menu Press the MENU button to open the OSD menu. Press the cursor ◄► button to move to the PICTURE: Advanced menu. Press the cursor ▲▼ button to move up and down in the PICTURE: Advanced menu. Press ◄► to change values for settings. -
Page 28: Hsg Adjustment
HDP2100 Users Manual HSG Adjustment Press the ENTER button to enter the HSG Adjustment sub menu. ESCRIPTION Press the ◄► buttons to set the Primary Color. Primary Color Notes: There are six sets (R/ G/ B/ C/ M/ Y) of colors to be customized. -
Page 29: Display Menu
HDP2100 Users Manual DISPLAY Menu Press the MENU button to open the OSD menu. Press the cursor ◄► button to move to the DISPLAY menu. Press the cursor ▲▼ button to move up and down in the DISPLAY menu. Press ◄► to change values for settings. -
Page 30: Pc Detail Adjustment
HDP2100 Users Manual PC Detail Adjustment Press the ENTER button to enter the PC Detail Adjustment sub menu. Note: Customizing the settings in PC Detail Adjustment menu is only available when PC input source (analog RGB) is selected. ESCRIPTION Press the ENTER/AUTO button on the control panel or the ENTER/AUTO button on the Auto remote control to automatically adjust frequency, phase, and position. -
Page 31: System Setup: Basic Menu
HDP2100 Users Manual SYSTEM SETUP: Basic Menu Press the MENU button to open the OSD menu. Press the cursor ◄► button to move to the SYSTEM SETUP: Basic menu. Press the cursor ▲▼ button to move up and down in the SYSTEM SETUP: Basic menu. -
Page 32: Menu Settings
HDP2100 Users Manual Menu Settings Press the ENTER button to enter the Menu Settings sub menu. ESCRIPTION Press the ◄► buttons to select from five OSD locations: Menu Position Top-Left/ Top-Right/ Center/ Bottom-Left/ Bottom-Right. Press the ◄► buttons to set the Menu Display timer before the OSD times out. -
Page 33: System Setup: Advanced Menu
HDP2100 Users Manual SYSTEM SETUP: Advanced Menu Press the MENU button to open the OSD menu. Press the cursor ◄► button to move to the SYSTEM SETUP: Advanced menu. Press the cursor ▲▼ button to move up and down in the SYSTEM SETUP: Advanced menu. -
Page 34: Audio
HDP2100 Users Manual Audio Press the ENTER button to enter the Audio sub menu. ESCRIPTION Volume Press the ◄► buttons to adjust the audio Volume. Bass Press the ◄► buttons to adjust the audio Bass. Treble Press the ◄► buttons to adjust the audio Treble. -
Page 35: Hdmi
HDP2100 Users Manual HDMI Press the ENTER button to enter the HDMI sub menu. ESCRIPTION Press the ◄► buttons to select from three HDMI display formats: HDMI Format Auto/ PC signal/ Video signal. HDMI Amplifier Gain Press the ◄► buttons to adjust HDMI Amplifier Gain. -
Page 36: Information Menu
HDP2100 Users Manual INFORMATION Menu Press the MENU button to open the OSD menu. Press the cursor ◄► button to move to the INFORMATION Menu. ESCRIPTION Source Displays the activated input source. Resolution Displays the native resolution of input source. -
Page 37: Maintenance And Security
HDP2100 Users Manual AINTENANCE AND ECURITY Replacing the Projection Lamp The projection lamp should be replaced when it burns out. It should only be replaced with a certified replacement part, which you can order from your local dealer. Important: a. The projection lamp used in this product contains a small amount of mercury. - Page 38 HDP2100 Users Manual Remove the three screws from the lamp module. Lift the module handle up. Pull firmly on the module handle to remove the lamp module. Reverse steps 1 to 5 to install the new lamp module. While installing, align the...
-
Page 39: Cleaning The Projector
HDP2100 Users Manual Cleaning the Projector Cleaning the projector to remove dust and grime will help ensure trouble-free operation. Warning: 1. Be sure to turn off and unplug the projector at least 30 minutes before cleaning. Failure to do so could result in a severe burn. -
Page 40: Using The Kensington Lock
HDP2100 Users Manual ® Using the Kensington Lock If you are concerned about security, attach the projector to a permanent object with the Kensington slot and a security cable. Note: Contact your vendor for details on purchasing a suitable Kensington security cable. -
Page 41: Troubleshooting
HDP2100 Users Manual ROUBLESHOOTING Common problems and solutions These guidelines provide tips to deal with problems you may encounter while using the projector. If the problem remains unsolved, contact your dealer for assistance. Often after time spent troubleshooting, the problem is traced to something as simple as a loose con- nection. -
Page 42: Led Error Messages
HDP2100 Users Manual LED Error Messages OWER EADY RROR ESSAGES LINK LINK LINK Lamp Ready Start Cooling FLASHING Over temperature Thermal Break Sensor error Lamp End of lamp life detected Burner Fan error Lamp Fan error Power Fan error DMD Fan error... -
Page 43: Lamp Problems
HDP2100 Users Manual Problem: The image is flat with no contrast Adjust the Contrast setting on the Image menu of the OSD. Problem: The color of the projected image does not match the source image. Adjust the Color Temperature and Gamma settings on the Image menu of the OSD. -
Page 44: Audio Problems
HDP2100 Users Manual Audio Problems Problem: There is no sound 1. Adjust the volume on the remote control. 2. Adjust the volume of the audio source. 3. Check the audio cable connection. 4. Test the source audio output with other speakers. -
Page 45: Specifications
HDP2100 Users Manual PECIFICATIONS Specifications HDP2100 Series Model Display type TI DLP DMD 0.65” Native Resolution 1920 x 1080 3.4 kg (7.5 lbs) Weight 1 meters ~ 10 meters Projection distance 25" ~ 300" Projection screen size Projection lens Manual Focus/Manual Zoom... -
Page 46: Hdp2100 Series Projection Distance And Size Table
HDP2100 Users Manual Projection Distance vs. Projection Size HDP2100 Series Projection Distance and Size Table 16:9 SCREEN PROJECTION DISTANCE VERTICAL DIAGONAL WIDTH HEIGHT OFFSET IN LENGTH LENGTH AVERAGE (WITH MAX (WITH MIN INCH ZOOM) ZOOM) 1056 1056 1162 1267 – 39 –... - Page 47 HDP2100 Users Manual HDP2100 Series Timing Mode Table The projector can display several resolutions. The following table outlines the resolutions that can be displayed by the projector. HDMI OMPOSITE IGNAL ESOLUTION OMPONENT / S-V IDEO ANALOG DIGITAL — NTSC —...
- Page 48 — — O: Frequency supported —: Frequency not supported The native resolution of the panel for the HDP2100 series is 1920 x 1080. Resolution other than native resolution may display with uneven size of text or lines. – 41 –...
-
Page 49: P Rojector D Imensions
HDP2100 Users Manual Projector Dimensions – 42 –... -
Page 50: Fcc W Arning
EGULATORY OMPLIANCE FCC Warning This equipment has been tested and found to comply with the limits for a Class B digital device pur- suant to Part 15 of the FCC Rules. These limits are designed to provide reasonable protection against harmful interference when the equipment is operated in a commercial environment. This equipment generates, uses, and can radiate radio frequency energy and, if not installed and used in accordance with the instruction manual, may cause harmful interference to radio communica- tions.
Need help?
Do you have a question about the HDP2100 and is the answer not in the manual?
Questions and answers