Table of Contents
Advertisement
Quick Links
Advertisement
Table of Contents
Troubleshooting

Related Manuals for Knoll HD102


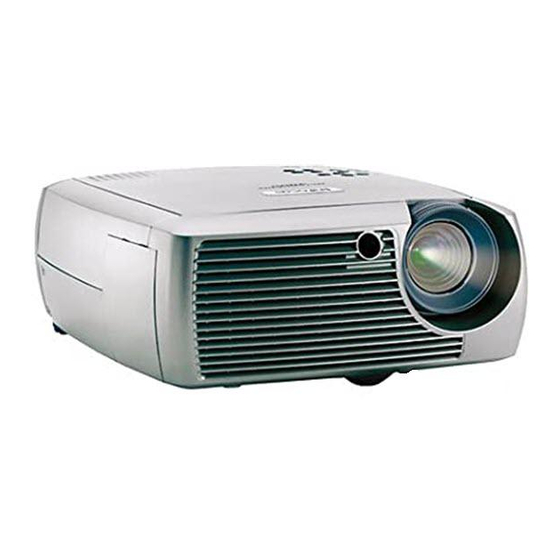
Summary of Contents for Knoll HD102
- Page 1 HD102 HDTV DLP Projector Users Manual v1.1...
-
Page 2: Safety Certifications
Other specific Country Approvals may apply. Please see product certification label. Declaration of Conformity Knoll Systems, 11791 Machrina Way #210, Richmond, BC V7A 4V3, Canada We declare under our sole responsibility that this projector conform to the following directives and norms:... -
Page 3: Table Of Contents
Red LED Behavior and Projector Errors If you are experienced in setting up projection systems, use the Quick Setup card that is included with the projector. For complete details on connecting and operating the projector, refer to this User’s Guide. - Page 4 For more information see www.eiae.org. Follow these instructions to help ensure image quality and lamp life over the life of the projector. Failure to follow these instructions may affect the warranty. For complete details of the warranty,...
-
Page 5: Introduction
Your new Knoll HD102 projector is specifically designed for home cinema applications. The HD102 sets a high standard using the latest DLP™ technology and new DCDi Plus video processing from Faroudja™. Whether you are watching... -
Page 6: Positioning The Projector
“Projected Image Size” on page 27. • The image offset is 127.3% when the projector is in 16:9 mode. This means that if you have an image 10’ high, the bottom of the image will be 2.73’ above the center of the lens. -
Page 7: Video Connections
The first step for connecting video is deciding what type of output connector you want to connect to the projector. If there is more than one output, select the one with the highest quality. The best quality ranking, with 1 being the highest and 3 being the lowest, is: 1. -
Page 8: Connecting A Computer Source
NOTE: Always use the power cord shipped with the projector. Optional computer connections To have sound with your presentation, connect an audio cable (not included) to your computer and to the red and/or white Audio In connectors on the projector. If Your Device Attached to Connector is... -
Page 9: Displaying A Computer Source Image
Many laptops do not automatically turn on their external video port when a projector is connected. Usually a key combination like FN + F8 or CRT/LCD key turns the external display on and off. -
Page 10: Using The Projector With Windows 98 For The First Time
Using the projector with Windows 98 for the first time The first time you connect a computer running Windows 98 to the projector, the computer recognizes the projector as “new hardware” and the Add New Hardware Wizard appears. Follow these instructions to use the Wizard to load the correct driver (which was installed with your Windows operating system). -
Page 11: Connecting A Video Device
Connecting a video device You can connect video devices such as VCRs, DVD players, camcorders, digital cameras, video game consoles, HDTV receivers, and TV tuners to the projector. There is also an audio input via the red and white A/V connectors. -
Page 12: Rca Composite Video Connection
Plug a white connector into the left audio out connector on the video device and plug a red connector into the right audio out connector on the video device. Plug the remaining white connector into the white audio in connector on the projector, and plug the remaining red connector into the red audio in connector on the projector. -
Page 13: Displaying Video
Displaying video Remove the lens cap. Toggle the Power switch on the side of the projector to the On position. The LED flashes green and the fans start to run. When the lamp comes on, the start-up screen is displayed and the LED is steady green. -
Page 14: Shutting Down The Projector
(1) minute before turning the projector on again. This allows the lamp to properly cool. However, if the remote was used to power the projector to the Off state you do not need to wait one minute to turn it on again. - Page 15 A fan or lamp failure has occurred. Make sure the vents aren’t blocked (see page 18). Turn off the projector and wait one minute, then turn the projector on again. If the projector exceeds its lamp life (page 25), replace the lamp and reset the lamp timer.
- Page 18 If you still need assistance, visit our website or call us. See the inside of the back cover for support contact information. This product is backed by a limited warranty. When sending the projector in for repair, we recommend shipping the unit in its original packing material, or having a professional packaging company...
-
Page 19: Using Projector’s Speakers
• Ensure the batteries are installed in the proper orientation and are not dead. Ensure you’re pointing the remote at the projector or the screen, not at the video device or the computer, and are within the remote range of 30 feet (9.14m). -
Page 20: Using The Keypad Buttons
Connecting external speakers The projector can be attached to external speakers that have their own power source by plugging a speaker cable (not included) into the projectors Audio Out connector. Using the keypad buttons Most buttons are described in detail in other sections, but here is an overview of their functions: Menu–opens the on-screen menus (page 21). -
Page 21: Customizing The Projector
For rear projection, turn rear mode on in the Settings>System menu. • For ceiling mounted projection, turn ceiling mode on in the Settings> System menu. • Specify which source the projector checks first for active video during power-up. • Turn the projector’s display messages on and off. •... -
Page 22: Picture Menu
Aspect Ratio: Aspect ratio is the ratio of the image width to image height. TV screens are usually 4:3. HDTV and most DVDs are 16:9. The projector’s default is 16:9. See “What is Aspect Ratio?” on page 11 for more information. - Page 23 Sync Threshold Adjust: If a hardware device, such as a DVD player, is not syncing properly with the projector, select this option to help it to sync when connected to the projector. The following four (4) options are for computer sources only.
-
Page 24: Settings Menu
If an active signal is received before the projector powers down, the image will be displayed. After an additional 10 minutes with no signal, the projector powers down and can be toggled off. If an active signal is received before the projector powers down, the image will be displayed. -
Page 25: Maintenance
Loosen the two captive screws that attach the lamp housing to the projector. Detach the lamp connector from the projector by depressing the locking tab on the connector and lightly pulling it free. -
Page 26: Cleaning The Lamp Housing Screens
WARNING: To avoid burns, allow the projector to cool for at least 30 minutes before you replace the lamp. Do not drop the lamp housing or touch the glass bulb! The glass may shatter and cause injury. Be extremely careful when removing the lamp housing. In the unlikely event that the bulb ruptures, small glass fragments may be generated. -
Page 27: Appendix 1: Hd102 Projection Throw Distance (16:9 Aspect Screen)
Screen diagonal size Red LED Behavior and Projector Errors If the projector is not functioning properly and the LED is blinking red, consult Table 3 to determine a possible cause. There are two-second pauses between the blinking cycles. Red LED Behavior The lamp won’t strike after five (5) attempts. -
Page 28: Limited Warranty
LIMITED WARRANTY Knoll Systems, Inc. (“Knoll”) warrants that each HD102 (“the Product”) sold hereunder will conform to and function in accordance with the written specifications of Knoll. Said limited warranty shall apply only to the first person or entity that purchases the Product for personal or business use and not for the purpose of distribution or resale.
Need help?
Do you have a question about the HD102 and is the answer not in the manual?
Questions and answers