Table of Contents
Advertisement
Quick Links
Advertisement
Table of Contents
Troubleshooting

Related Manuals for Knoll HD272


Summary of Contents for Knoll HD272
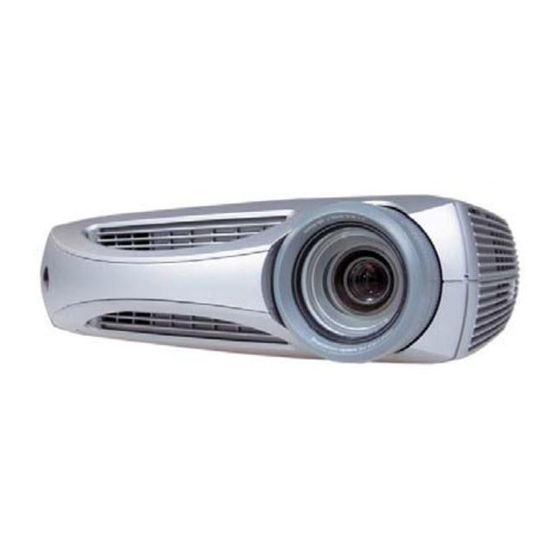
- Page 1 HD272 HDTV DLP Projector Users Manual v1.2...
-
Page 2: Safety Warnings
Declaration of Conformity Knoll Systems, 11791 Machrina Way, #120, Richmond, BC V7A 4V3 Canada We declare under our sole responsibility that the HD272 projector conforms to the following directives and norms: EMC Directive 89/336/EEC, Amended by 93/68/EEC EMC: EN 55022... -
Page 3: Table Of Contents
Optimizing video images Customizing the projector Using the menus Picture menu Settings menu Maintenance Cleaning the lens Replacing the projection lamp Specifications Red LED behavior and projector errors Source compatibility Projector dimensions for ceiling mount installations 29 RS-232 terminal specifications Warranty... -
Page 4: Safety Instructions
Warning: Don’t look directly into the lens when the lamp is turned on. Warning: To replace the lamp, turn off the projector and unplug the power cord. To avoid burns, wait 30 minutes before opening the lamp door. Follow all instructions provided in this User’s Guide. -
Page 5: Introduction/Usage Guidelines
DLP™ technology and new DCDi video processing from Faroudja™. Calibrated to D65 color mastering standards, the HD272 reproduces colors and details the way the director intended. Whether you are watching movies or High Definition broadcasts or playing the latest video game, you will enjoy breathtaking image quality. -
Page 6: Setting Up And Positioning The Projector
Position the projector on a flat surface at a right angle to the screen. The projector should be within 10 feet (3 m) of your power source and within 6 feet (1.8 m) of your video source(s), unless good quality extension cables are to be used. -
Page 7: Rear Connector Panel
HD272 Projection Distances 16:9 Image Screen 88.25" 103" Diagonal Min. Distance 115" Max. Distance 160" 7.8” Drop or Rise Note: Maximum distance to screen is about 1.81 x screen diagonal. Minimum distance to screen is about 1.29 x screen diagonal. -
Page 8: Connecting A Video Device
You can connect VCRs, DVD players, camcorders, digital cameras, video games, HDTV receivers, and TV tuners to the projector. (You cannot directly connect the coaxial cable that enters your house from a cable or satellite company; the signal must pass through a tuner first. Examples of tuners are digital cable boxes, VCRs, digital video recorders, and satellite TV boxes. - Page 9 If the video device uses a round, four-prong S-video connector, plug an S-video cable into the S-video connector on the video device and into the S-video connector on the projector. If the video device uses a yellow composite video connector, plug a composite video cable’s yellow connector into the video-out connector on the video device.
-
Page 10: Connecting The Power Cable
Press the Power button on the top of the projector or the power button on the remote The projector chimes if the chime feature is enabled. The LED flashes green and the fans start to run. When the lamp comes on, the startup screen displays and the LED is steady green. It can take a minute for the image to achieve full brightness. -
Page 11: Connecting To A Computer
If you are using a desktop computer, you first need to disconnect the monitor cable from the computer’s video port. You can control the projector from an LCD control panel or computer by connecting an RS-232 cable to the projector’s Serial connector. Specific RS-232 commands can be found in the Appendix... -
Page 12: Shutting Down The Projector
Turning off the projector To turn off the projector, press the Power button. The lamp turns off and the LED blinks green for about one minute while the fans continue to run to cool the lamp. When the lamp has cooled, the LED lights green and the fans stop. - Page 13 The following table shows some potential problems. In some cases, more than one possible solution is provided. Try the solutions in the order they are presented. When the problem is solved, you can skip the additional solutions.
-
Page 15: Using The Keypad Buttons
Menu–opens the on-screen menus. Select–confirms choices made in the menus. Up/down arrows–navigates to and adjusts settings in the menus. Auto image–resets the projector to the source. Presets–cycles through the 3 available user preset settings. Keystone–adjusts squareness of the image. Brightness–adjusts intensity of the image. -
Page 16: Using The Remote Control
+ and - ends of the batteries, sliding them into place, and then replacing the cover. To operate, point the remote at the projection screen or at the projector (not at the video device or computer). The range of optimum operation is 1 to 30 feet (9.14m). -
Page 17: Optimizing Video Images
Make sure your DVD player is set for a 16:9 television. See your DVD player’s user’s guide for instructions. Customizing the projector You can customize the projector for your specific setup and needs. For rear projection, turn Rear mode on in the Settings>System menu. -
Page 18: Picture Menu
16:9. The goal is to show the most detail on the screen while preserving the ratio of width to height. The native resolution of the projector is 1280x720. Use Native, 4:3 or Naural Wide for 4:3 input sources; use Native, 16:9 or Letterbox for 16:9 input. - Page 19 Native: this mode bypasses the internal scaler, displaying the image with no resizing. Since the native resolution is 1280x720 and 4x3 video images are approximately 640x480, 4x3 images will always be smaller than the display and will be centered in the display.
- Page 20 Natural Wide: this mode stretches a 4:3 image to fill the entire 16:9 screen. The center two-thirds of the image is unchanged; the edges of the image are stretched. Presets: This allows you to customize settings and save the settings to be restored later. To restore the factory default settings, choose Factory Reset in the Settings>Service menu.
-
Page 21: Advanced Settings
When Auto is selected, the projector automatically determines the standard. To choose a different setting, turn off Auto, then choose RGB for computer sources, choose REC709 for component 1080i or 720p sources, or choose REC601 for component 480p or 576p sources. -
Page 22: Settings Menu
(The video standard options may vary depending on your region of the world.) If the projector is unable to detect the correct standard, the colors may not look right or the image may appear “torn.”... - Page 23 Power Save: when On, the lamp is automatically turned off after no signals are detected for 20 minutes. After 10 additional minutes with no signal, the projector powers down. If an active signal is received before the projector powers down, the image will be displayed.
-
Page 24: Service Menu
Abrasive cleaners, solvents or other harsh chemicals might scratch the lens. Lightly wipe the cleaning cloth over the lens in a circular motion. If you don’t intend to use the projector immediately, replace the lens cap. -
Page 25: Replacing The Projection Lamp
4. Loosen the captive screw on the lamp module. WARNINGS: To avoid burns, allow the projector to cool for at least 60 minutes before you replace the lamp. Do not drop the lamp module. The glass may shatter and cause injury. -
Page 26: Specifications
The projector has a security lock for use with a PC Guardian Cable Lock System. This lock needs to be order from Knoll Systems. Refer to the information that comes with the lock for instructions on how to use it. -
Page 27: Red Led Behavior And Projector Errors
Red LED behavior and projector errors If the projector is not functioning properly and the red LED is blinking, consult the table below to determine a possible cause. There are two second pauses between the blinking cycles. -
Page 30: Rs-232 Terminal Specifications
RS232 Terminal Specifications and Commands To control the projector from an LCD control panel, connect an RS-232 cable to the serial control connector on the projector and set your computer’s serial port settings to match this communication configuration: Command format All commands consist of 3 alpha characters followed by a request, all enclosed in parentheses. -
Page 34: Warranty
LIMITED WARRANTY Knöll Systems, Inc. (“Knöll”) warrants that each HD272 (“the Product”) sold hereunder will conform to and function in accordance with the written specifications of Knöll. Said limited warranty shall apply only to the first person or entity that purchases the Product for personal or business use and not for the purpose of distribution or resale.
Need help?
Do you have a question about the HD272 and is the answer not in the manual?
Questions and answers