Advertisement
Quick Links
Tools required:
Phillips screwdriver, awl, or drill with
Crossbars
Parts Included:
Upper back
A
2pcs
Lower back
Front
Footrest
Fixed top
Side Frames, Left & Right
I
2pcs
Hinges
M
1pc
Drawer Unit
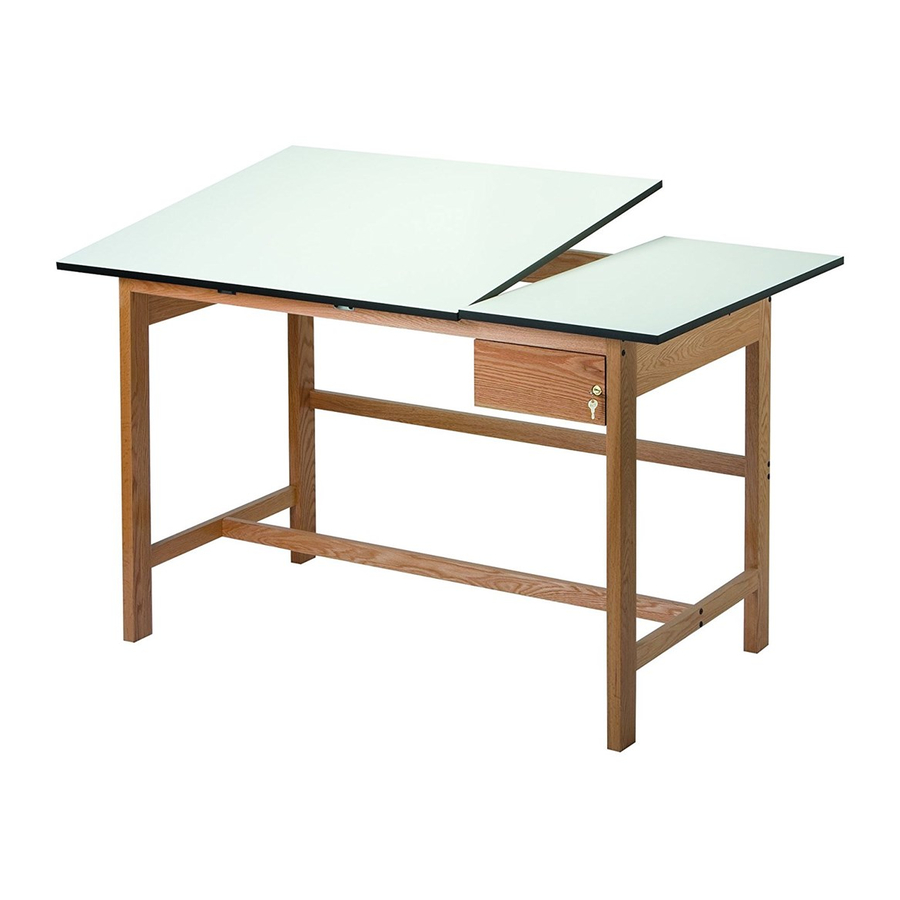
Titan II Split Top Drafting Tables
Assembly Instructions
B
1pc
Crossbars
Upper back
Crossbars
Upper Rear Crossbar (47½" long)
Upper back
Lower back
Lower back
D
1pc
Front
Front
Footrest
Front Crossbar (47½" long)
Footrest
Fixed top
F
1pc
Fixed top
Fixed Top, 37½" x 18"
J
2pcs
Tilt Mechanisms
N
1pc
Drawer Face
⁄
⁄ " bit.
⁄
⁄
1
1
1
16
16
Crossbars
Upper back
C
Crossbars
1pc
Upper back
Lower back
Lower Rear Crossbar (47½" long)
Lower back
Front
Front
E
1pc
Footrest
Footrest
Fixed top
Footrest Crossbar (48½" long)
Fixed top
G
16pcs
2" Allen Bolts
K
4pcs
Angle Brackets
O
2pcs
1" Phillips Screws
For WSB60
H
1pc
Allen Wrench Key
L
28pcs
3/4" Phillips Screws
P
6pcs
Hole Plugs
1
Advertisement

Subscribe to Our Youtube Channel
Related Manuals for Alvin Split Top Drafting Tables Titan II


Summary of Contents for Alvin Split Top Drafting Tables Titan II
- Page 1 Titan II Split Top Drafting Tables Assembly Instructions Tools required: Phillips screwdriver, awl, or drill with Crossbars Parts Included: Upper back Crossbars 2pcs Upper back Crossbars Lower back Upper back Lower back Front Lower back Front Front Footrest Footrest Footrest Fixed top Fixed top Fixed top...
- Page 2 To Assemble Base Frame Unpack and inspect contents to confi rm you have all the parts listed. Use care to differentiate the four crossbars from each other, as shown in the parts list. Also use care to differentiate left side frame from right, as shown in the parts list.
- Page 3 Attach both tilt mechanisms ( ) to upper rear crossbar using 3/4" Phillips screws ( ) into pre-drilled holes, as shown in diagram. Keep these screws slightly loose for time being. Hint: Use elastic bands to keep tilt mechanisms in the folded-close position for time being. Base frame assembly is now complete.
- Page 4 Please save these instructions for future reference. Thank you for purchasing an Alvin Drafting Table. ©2008 ALVIN & COMPANY, INC. • P.O. Box 188, Windsor, CT 06095-0722 Phone: 860-243-8991 • Toll-Free: 800-444-2584 • Fax: 860-242-8037 • Toll-Free Fax: 800-777-2896 Attach Tilt Mechanisms...
Need help?
Do you have a question about the Split Top Drafting Tables Titan II and is the answer not in the manual?
Questions and answers