
Related Manuals for Grundig GPVR1250


Summary of Contents for Grundig GPVR1250
- Page 1 Digital TV Recorder GPVR1250 Grundig Helpline: 1800 509 394 Australia Grundig Helpline: 0800 450 259 New Zealand...
-
Page 2: Table Of Contents
Table of Contents Table of Contents ------------------------------------------------------------------------- 1 Introduction------------------------------------------------------------------------------- 2 Safety Information------------------------------------------------------------------------ 3 Remote Control--------------------------------------------------------------------------- 4 Front and Rear Panel Illustration------------------------------------------------------- 6 Connecting to Television Aerial and RF cable---------------------------------------- 7 Connecting to a Television ----------- --------------------------------------------------- 8 Connecting to a Surround Sound System--------- ---------------------------------- 9 Getting Started -------------------------------------------------------------------------- 10 Channel Setting-------------------------------------------------------------------------- 10 System Setting -------------------------------------------------------------------------- 12... -
Page 3: Introduction
Introduction About This Manual This User Guide contains all the information you need to know about how to setup and watch free view channels using your set top box. What is DVB-T? It works like traditional TV, but because the signals are digital you need a set top box to convert them. -
Page 4: Safety Information
Safety Information Safety is Important To ensure your safety and the safety of others, please ensure you read the Safety Instructions before you operate this product. Keep this information in a safe place for future reference. Please read all the safety information before use. Safety Considerations Position the cables so that they cannot be walked on or pinched by items placed on or against them. -
Page 5: Remote Control
Remote Control Remote Key Function: 1) STANDBY Used to switch the set top box to on or standby. 2) AUDIO Used to set the sound output, the available settings are STEREO, LEFT, RIGHT, MONO. 3) SUBTITLE: Used to switch among different subtitles that are broadcasted. - Page 6 Installing the Batteries Remove the battery cover from the remote control and put place 2 x AAA size batteries inside the compartment. Make sure to match the + and - of the batteries with the marks inside the battery compartment 1.Open the cover 2.Install batteries 3.Close the cover...
-
Page 7: Front Panel And Rear Panel Illustration
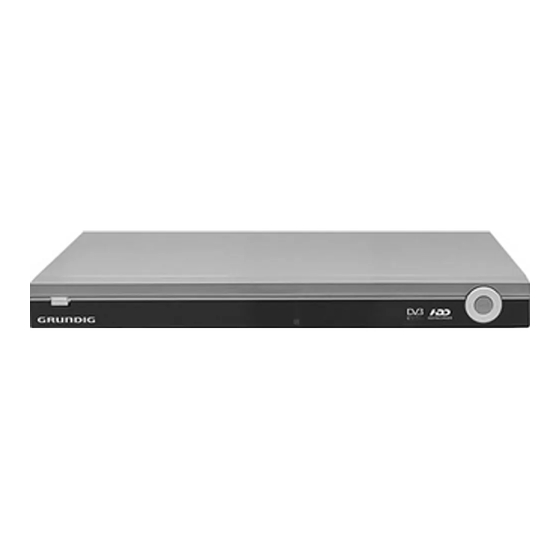
Front Panel and Rear Panel Illustration 1. Front panel 1) POWER BUTTON: Used to switch the main power of the set top box to on and off. 2) REMOTE CONTROL SENSOR: Used to receive the signal from the remote control. 3) LED DISPLAY: Used to display the channel number and time information and other play states. -
Page 8: Connecting To Television Aerial And Rf Cable
Connecting to Television Aerial and RF cable There are 2 kinds of connections for the TV aerial and RF cable presented below: TV Aerial 100-240V~ 50/60Hz VIDEO R R F F LOOP LOOP R R F F LOOP LOOP R R F F R R F F THROUGH THROUGH... -
Page 9: Connecting To A Television
Connecting to a Television 100-240V~ SERIAL NO.: 50/60Hz MODEL NO: TPVR2511 DVB-T RECEIVER/HDD RECORDER VIDEO POWER SOURCE: 100-240V ~ 50/60HZ POWER CONSUMPTION: 15W MADE IN CHINA COAXIAL S-VIDEO RS-232 VIDEO DIGITAL AUDIO/VIDEO OUT COMPONENT OUT AUDIO OUT Component video... -
Page 10: Connecting To A Surround Sound System
Connecting to a Surround Sound System 100-240V~ SERIAL NO.: 50/60Hz ODEL NO: TPVR2511 VB-T RECEIVER/HDD RECORDER VIDEO OWER SOURCE: 100-240V ~ 50/60HZ OWER CONSUMPTION: 15W ADE IN CHINA COAXIAL S-VIDEO RS-232 VIDEO DIGITAL AUDIO/VIDEO OUT COMPONENT OUT AUDIO OUT AUDIO IN Coaxial Digital Amplifier VOLUME... -
Page 11: Getting Started
Getting Started Switching On for the First Time Ensure all connections have been made following the diagrams on the previous pages for reference. To switch on the set top box, press the button on the set top box. (To turn the set top box to standby mode, press button on the remote control). - Page 12 Select the Auto Scan tab by using the arrow and the buttons on the remote control. Press the button when the Start Search tab is highlighted. The following menu will display. Scan Process Channel No: Frequency: 474MHz System Setting Scan Process: Search Type Auto Scan TV 0...
-
Page 13: System Setting
2. System Setting From here you can set the Time, Sleep timer, Language, Parental settings, A/V settings, PVR setting or revert to the factory settings. Time Setting Press the MENU button and select System Setting option using the arrow buttons. Press the button when selected. -
Page 14: Sleep Timer Setting
Time Zone Setting Select Time Zone Setting option using the arrow button. Press the button when selected. The following menu will display. TimeZone Setting Time Setting Time Setting GMT+0 Language Settings TimeZone GMT+0 Slep GMT+1 Parental Setting A/V Setting GMT+2 PVR Setting GMT+3 Factory Setting... -
Page 15: Language Setting
Language Setting Select the Language Setting option using the arrow buttons. Press the button when selected. The following menu will display. Language Settings Time Setting English Menu English Language Settings Audio English Parental Setting A/V Setting PVR Setting Factory Setting System Info Exit Confirm... - Page 16 Change Pin Code The Change Pin Code menu allows you to change the password, which currently defaults as 6666 . Enter you new PIN code using the numerical buttons on the remote control. Press the button and enter the new PIN code again. Press the button to confirm the new PIN code.
- Page 17 If NTSC is chosen for your televisions you may experience interference and picture rolling. Video Output The Video Output setting is used to set the colour signal to your TV. There are 3 different settings available on your set top box: S-Video, CVBS, YCbCr. If you are unsure which setting to use consult the manufacturer s manual for your television.
-
Page 18: Factory Setting
Factory Setting Select the Factory Setting option using the arrow buttons. Press button when selected. The following menu will display. Factory Setting Time Setting Language Settings Parental Setting A/V Setting PVR Setting Restore Default Factory Setting Clear Channels System Info Exit Confirm Restore Default... -
Page 19: Channel List
3. Channel List The channel list is used to look at all the broadcasting TV or Radio channels received by the set top box. To access the channel list press the button in the non-menu state To edit the channel list, press the MENU button and select Channel List using the arrow keys, press the button when it's highlighted. -
Page 20: Favourite List
4. Favourite List The favourite list is used to store your frequently watched channels without having to search them in the Channel List or EPG menus. To edit the favourite list, press the MENU button and select Favourite List using the arrow keys, press the button when it's highlighted. -
Page 21: Booking List
5. Booking List The booking list is used to display all the booking events you have in the EPG menu or you have added manually. The booking list menu is displayed below: Booking List No Items Start Time 2005.12.28 23:59 Duration(Mins) Type Playback... -
Page 22: Epg Menu
6. EPG Menu (Electronic Programme Guide) The EPG menu is used to look at what is being broadcast on a TV or Radio channel later in the day. To access the EPG menu, press the MENU button and select the EPG menu using the arrow keys. -
Page 23: Record Operations
Record Operations Before using the record operations, please check the two tuner(TV/PVR tuner) connections in connection pages. Watch One Channel While Recording Another The recording will receive the digital TV signal from the PVR tuner and the watching will receive the digital TV signal from TV tuner, this makes it possible to watch one channel while recording another channel. -
Page 24: Help And Advice
Help and Advice Problem Probable cause What to do Mains lead unplugged Check mains lead Standby light not lit Mains fuse blown Check fuse Aerial is disconnected Check aerial lead No signal found Aerial is damaged/misaligned Check aerial Out of digital signal area Check with dealer AV connect error No picture or sound... -
Page 25: Technical Specifications
Technical Specifications Power Supply Input Voltage 100-240V~ 50/60Hz. Power Consumption Maximum 15W, Standby 5W. Decoder SD, 4:3/16:9 Switchable. Video Formats Audio Format MPEG Layer l & ll,32/44.1/48Khz. Video Outputs CVBS, S-Video, YCbCr Connections Fixed Type Main Power Cable 2 Antenna Input/ 2 Therefore Output Tuner 1 for software upgrade RS-232... -
Page 26: Guarantee
If guarantee is required please contact the Grundig Helpline 1800 509 394 (within Australia) or 0800 450 259 (within New Zealand). Have your receipt of purchase on hand This guarantee is subject to the following provisions: l It is only valid within the boundaries of the country of purchase.
Need help?
Do you have a question about the GPVR1250 and is the answer not in the manual?
Questions and answers