Grandstream Networks DP715 User Manual
Dect cordless ip phone
Hide thumbs
Also See for DP715:
- User manual (58 pages) ,
- Quick start manual (34 pages) ,
- Configuration manual (6 pages)
Table of Contents
Advertisement
Advertisement
Table of Contents

Related Manuals for Grandstream Networks DP715


Summary of Contents for Grandstream Networks DP715
- Page 1 Grandstream Networks, Inc. DP715/DP710 DECT Cordless IP Phone...
-
Page 2: Table Of Contents
DP715/DP710 USER MANUAL Index GNU GPL INFORMATION ................. 5 CHANGE LOG ................... 6 CHANGES FROM 1.0.0.5 USER MANUAL ....................6 WELCOME ....................7 SAFETY COMPLIANCES .......................... 7 WARRANTY ............................... 7 CONNECT YOUR DP715/710 ..............9 EQUIPMENT PACKAGING ........................9 CONNECTING THE DP715 BASE STATION .................... 9 CONNECTING THE DP710 CHARGER UNIT .................. - Page 3 REBOOTING THE DP715 BASE STATION FROM REMOTE ..............48 CONFIGURING THE DP715 BASE STATION THROUGH A CENTRAL SERVER ......... 48 SOFTWARE UPGRADE ................49 FIRMWARE UPGRADE THROUGH TFTP/HTTP/HTTPS ............... 49 INSTRUCTIONS FOR UPLOAD FROM LOCAL DIRECTORY ..............50 INSTRUCTIONS FOR LOCAL FIRMWARE UPGRADE USING TFTP SERVER ........50 CONFIGURATION FILE DOWNLOAD.....................
- Page 4 Table 13: ADVANCED SETTINGS ....................39 Table 14: PROFILE SETTINGS ..................... 42 Table 15: HANDSETS SETTINGS ....................47 GUI I ONFIGURATION NTERFACE XAMPLES DP715/DP710 U ANUAL (http://www.grandstream.com/products/dp_series/dp71x/documents/dp715_gui.zip) 1. S CREENSHOT OF DVANCED ONFIGURATION 2. S CREENSHOT OF ASIC ETTINGS ONFIGURATION 3.
-
Page 5: Gnu Gpl Information
The DP715/710 firmware contains third-party software licensed under the GNU General Public License (GPL). Grandstream uses software under the specific terms of the GPL. Please see the GNU General Public License (GPL) for the exact terms and conditions of the license. -
Page 6: Change Log
CHANGE LOG This section documents significant changes from previous versions of DP71x user manuals. Only major new features or major document updates are listed here. Minor updates for corrections or editing are not documented here. CHANGES FROM 1.0.0.5 USER MANUAL ... -
Page 7: Welcome
If you purchased your DP715/710 from a reseller, please contact the company where you purchased your device for replacement, repair or refund. If you purchased the product directly from Grandstream, contact your Grandstream Sales and Service Representative for an RMA (Return Materials Authorization) number before you return the product. - Page 8 Reproduction or transmittal of the entire or any part, in any form or by any means, electronic or print, for any purpose is not permitted without the express written permission of Grandstream Networks, Inc. Firmware version 1.0.0.8 DP715/DP710 User Manual...
-
Page 9: Connect Your Dp715/710
CONNECT YOUR DP715/710 EQUIPMENT PACKAGING Table 1: EQUIPMENT PACKAGING DP715 DP710 1 Base unit 1 Handset including 2 rechargeable batteries (AAA, 1.2V / 500 mAh, NiMH) 1 Handset including 2 rechargeable batteries (AAA, 1.2V / 500 mAh, NiMH) 1 Charger unit ... -
Page 10: Table 2: Definitions Of The Dp715 Connectors
Table 2: DEFINITIONS OF THE DP715 CONNECTORS DC 6V Power adapter connection. NETWORK PORT 10/100Mbps RJ-45 port to connect to the network. (RJ-45) RESET Factory Reset button: Press for 7 seconds to reset factory default settings. Table 3: BASIC DEFINITIONS OF THE DP715 LEDS PATTERN LEDs POWER LED Indicates Power. -
Page 11: Connecting The Dp710 Charger Unit
CONNECTING THE DP710 CHARGER UNIT To setup the DP710, follow the steps below: Plug the 7V DC power adapter into an electrical outlet to start using the charger unit. 1 Underside of the charger unit 2 Power supply plug Figure 2: CONNECTING THE DP710 CHARGER UNIT SETTING UP THE DP715/710 HANDSET To setup the handset, follow the steps below: 1. -
Page 12: Product Overview
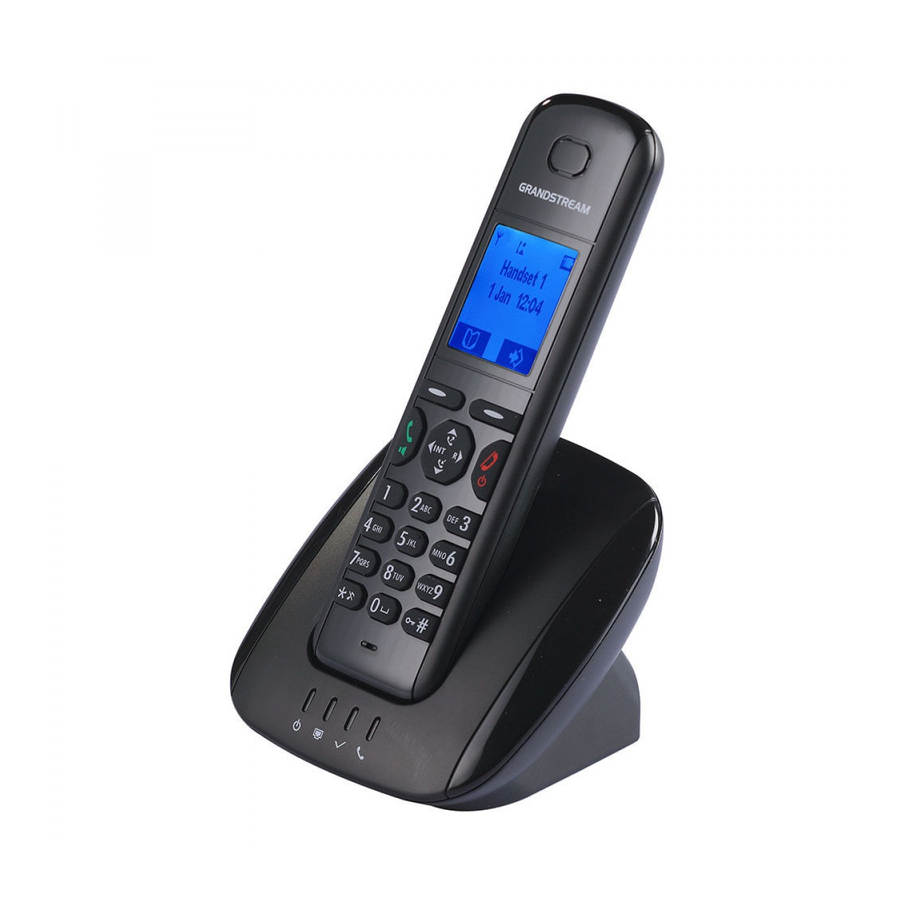
PRODUCT OVERVIEW The DP715/710 is the next generation of powerful, affordable, high quality and simple to configure DECT Cordless IP Phone for small business and residential users. Their compact size, superb voice quality, rich feature set, market leading price-performance and wide range radio coverage enable consumers to maximize the power of IP voice application and mobility for a minimum investment. -
Page 13: Hardware Specifications
200 numbers (up to 24 digits) with an associated name (up to 16 characters); Phonebook 10 outgoing call entries; (Per Handset) 30 incoming calls entries Base Station Web UI: English; Voice Prompt : English, Spanish; Multi-language Handset LCD Menu (15): English, French, German, Spanish, Dutch, Italian, Czech, Danish, Greek, Norwegian, Polish, Portuguese, Russian, Swedish, Turkish. -
Page 14: Using The Dp715/710 Handset
USING THE DP715/710 HANDSET GETTING FAMILIAR WITH THE HANDSET The DP715/710 Handset has a dynamic screen. The screen displays differently depending on whether the handset is idle or in use (active screen). HANDSET KEYS DESCRIPTION 1. Display 2. Right display button (display functions) 3. - Page 15 Power Key : Turn on / Off the handset On-hook: Terminate calls. Redial List : Display your 10 last Outgoing calls Up Navigation key Increase the volume during the call. Recall-Key/hook-flash key used to place call on hold toggle between calls. Call List : Display your 30 last Incoming calls/Missed calls Down Navigation key Decrease the volume during the call.
-
Page 16: Handset Display Structure (Lcd)
HANDSET DISPLAY STRUCTURE (LCD) Icon Line Text Line Display Menu/Options Menu Figure 5: HANDSET DISPLAY STRUCTURE BATTERY DISPLAY • The batteries are fully charged. • The batteries are 75% charged. • The batteries are half charged (50%). • The batteries are only 25% charged. •... -
Page 17: Handset Menu Structure
Keypad Locked: ON when the keypad is locked. Range Icon : Solid when it’s within the base unit coverage range. Flashing when it’s out of the base unit coverage range (The handset will display “Searching”). HANDSET MENU STRUCTURE The handset has an easy-to-use menu structure. -
Page 18: Handset Menu Overview
HANDSET MENU OVERVIEW Display Definition Phonebook Displays the contact entries Ring Tone Internal: Allows you to specify the ring tone for internal calls. External: Allows you to specify the ring tone for external calls. Note: The Handset support up to 18 different ring tones. ... -
Page 19: Handset Menu Description
Set Time Format 12Hour: Time will be displayed in 12 Hours format i.e. 3:00pm 24Hour: Time will be displayed in 24 Hours format i.e. 15:53 Appointement: Allows you to set up reminders. Tools Stop Watch: Allows you to measure a time interval. HANDSET MENU DESCRIPTION TURNING THE HANDSET ON/OFF 1. - Page 20 Deleting a Call 1. Press to access the calls list. 2. Use to search for the number you need. 3. Press Option Softkey. 4. Press repeatedly, select Delete. 5. Press to confirm. 6. The call is deleted and the next call appears on the display. Delete all Calls 1.
- Page 21 5. Once the number you require appears in the display and is highlighted, press Option. 6. Press repeatedly and select Edit Entry. 7. Press to confirm. 8. Press to delete each letter individually and use the alphanumeric keys to enter the correct name.
- Page 22 SELECTING THE MENU LANGUAGE The Handset has a number of menu languages, see software overview features. Proceed as follows to set the language: 1. Press 2. Scroll with to Handset and press to confirm. 3. Scroll with to Language and press to confirm.
- Page 23 SETTING THE RINGER VOLUME ON THE HANDSET You can adjust the ringer volume for an incoming call (internal or external) to one of 6 levels (level 1 to 5 and Off). If you select Off, the icon appears in the display. The handset will not ring for incoming calls. Level 5 is the highest level.
- Page 24 SETTING THE KEY LOCK You can lock the keypad against unintentional entries. It is, however, still possible to pick up incoming calls even with the keypad locked. Enable the Keypad Lock: 1. Press and hold for approximately 2 seconds. 2. The display shows Keypad Locked briefly and the key lock icon appears in the display.
- Page 25 EDIT HANDSET NAME The procedure for changing the name of your handset shown in the display in standby mode is as follows: 1. Press 2. Press repeatedly, select Handset. 3. Press to confirm. 4. Press repeatedly, select Handset Name. 5. Press to confirm.
- Page 26 APPOINTMENTS You can set five appointments or reminders to which you can assign a name and an alarm by date and time. 1. Press 2. Press repeatedly, select Tools. 3. The Appointment menu item is already highlighted. Press 4. Scroll with to one of the five appointments and press 5.
-
Page 27: Basic Operations
BASIC OPERATIONS UNDERSTANDING DP715/710 VOICE PROMPT DP715 Base Station has a built-in voice prompt menu for simple device configuration. The IVR menu work with any Handset registered to the base. Pick up the handset and dial “***” to use the IVR menu. Table 9: DP715/710 IVR MENU DEFINITIONS Menu Voice Prompt... -
Page 28: Registering A Handset To The Dp715 Base Station
“Device not registered” This prompt will be played immediately after off hook If the device is not register and the option “Outgoing Call without Registration” is in Five Success Tips when using the Voice Prompt 1. “*” shifts down to the next menu option 2. - Page 29 If you want to register a handset to a new base, it has to be first de-registered from the existing base by selecting "desubscribe handset " option under the Handsets tab on the web GUI and then repeat the above steps. Register any Handset to multiple Bases 1.
-
Page 30: Completing Calls
COMPLETING CALLS There are three ways to complete a call: A. Dial 1. Press 3. Dial the number you want once you hear the dial tone. 4. The number appears on the display wait for 4 seconds (Default “No Key Entry Timeout”); or press # to dial the number directly (Use # as dial key”... -
Page 31: Internal Calls
Note: You can switch off the ringer temporarily by pressing Silent Soft key. When you receive a call the Handset will automatically sync up the date and time from the base station. INTERNAL CALLS In some cases a user may want to make phone calls between the handsets registered to the same DP715 Base Station when it is used as a standalone unit, without the use of a SIP server. -
Page 32: Call Hold
Examples of Direct IP Calls: a) If the target IP address is 192.168.0.160, the dialing convention is *47 or Voice Prompt with option 47, then 192*168*0*160. followed by pressing the “#” key if it is configured as a send key or wait 4 seconds. In this case, the default destination port 5060 is used if no port is specified b) If the target IP address/port is 192.168.1.20:5062, then the dialing convention would be: *47 or Voice Prompt with option 47, then 192*168*0*160*5062 followed by pressing the “#”... -
Page 33: 3-Way Conferencing
3-WAY CONFERENCING The DP715 supports Bellcore style 3-way Conference. Instructions for 3-way conference: Assume that parties are in conversation. Party wants to bring into a 3-way conference: presses RECALL (on the Handset) to get a dial tone. dials C’s number then # (or wait for 4 seconds). 3. -
Page 34: Call Features
CALL FEATURES The DP715/710 supports all the traditional and advanced telephony features. Table 10: DP715/710 CALL FEATURE DEFINITIONS Call Features Forcing a Codec (per call) *027110 (PCMU), *027111 (PCMA), *02723 (G723), *02729 (G729), *0272632 (G726-r32),*027201 (iLBC) Enable SRTP Disable SRTP Block Caller ID (for all subsequent calls) Send Caller ID (for all subsequent calls) Direct IP Calling. -
Page 35: Dp715 Base Station - Configuration Guide
DP715 BASE STATION - CONFIGURATION GUIDE CONFIGURING THE BASE STATION THROUGH VOICE PROMPTS DHCP M Select voice menu option 01 to enable DP715 to use DHCP. STATIC IP M Select voice menu option 01 to enable DP715 to use STATIC IP mode, then use option 02, 03, 04, 05 to set up IP address, Subnet Mask, Gateway and DNS server respectively. -
Page 36: Important Settings
“ADVANCED SETTINGS”, “HANDSET SETTINGS” and “PROFILE SETTINGS” configuration pages. Please refer to the GUI pages using the following link: http://www.grandstream.com/products/dp_series/dp71x/documents/dp715_gui.zip Note: If you cannot log into the configuration page by using the default password, please check with the VoIP service provider. It is most likely the VoIP service provider has provisioned the device and configured for you therefore the password has already been changed. -
Page 37: Table 11: Basic Settings
G726-32 Table 11: BASIC SETTINGS End User Password Password to access the Web Configuration Menu. This field is case sensitive with a maximum length of 25 characters. Web Port By default, HTTP uses port 80. This field is for customizable web port. Telnet Server Default is set to YES. -
Page 38: Dp715/Dp710 User Manual
Allow DHCP server to Default No. Let the DHCP server handle the Time Zone set Time Zone Language Languages supported with voice prompt and web interface, except Spanish that it is only in IVR. • Full Reset: This will make a full reset Reset Type •... -
Page 39: Advanced User Configuration
Handset Status Displays relevant information regarding the Handset status. Handset Hook Forward Busy Delayed Registration Forward Forward Handset 1 On Hook Registered • Handset 1 is registered with SIP Server. • Handset 1 user has set Do Not Disturb. • Handset 1 user has set his calls to be unconditionally forwarded to ext 613. •... - Page 40 The URL for the HTTP/HTTPS server used for firmware upgrade and configuration via Server HTTP. For example, http://provisioning.mycompany.com:6688/Grandstream/1.0.0.67“:6688” is the specific TCP port where the HTTP or HTTPS server is listening; it can be omitted if using default port 80.
- Page 41 SSL Private Key The user specifies SSL private key used for SIP over TLS in X.509 format. SSL Private Key The user specifies password to protect the private key above. Password The user specifies the Auto Configuration Server’s URL (TR-069 protocol) ACS URL ACS Username The user specifies the ACS Username...
-
Page 42: Table 14: Profile Settings
Syslog Level Select the DP715 to report the log level. Default is NONE. The level is one of DEBUG, INFO, WARNING or ERROR. Syslog messages are sent based on the following events: product model/version on boot up (INFO level) NAT related info (INFO level) sent or received SIP message (DEBUG level) SIP message summary (INFO level) inbound and outbound calls (INFO level) - Page 43 If the NAT Traversal field is set to “Yes” with no specified STUN server, the DP715 will periodically (every 20 seconds or so) send a blank UDP packet (with no payload data) to the SIP server to keep the “hole” on the NAT open. Advance Configuration One from the 3 modes are available for “DNS Mode”...
- Page 44 Default is No. Check the incoming SIP messages. If they don’t come from the SIP proxy, Allow Incoming SIP Messages from SIP they will be rejected. If this option is enabled, the device will not be able to make direct IP Proxy Only calls.
- Page 45 xx+ - at least 2 digit numbers xx. - only 2 digit numbers ^ - exclude [3-5] - any digit of 3, 4, or 5 [147] - any digit of 1, 4, or 7 <2=011> - replace digit 2 with 011 when dialing | - the OR operand •...
- Page 46 Session Expiration is the time (in seconds) at which the session is considered timed out, provided no successful session refresh transaction occurs beforehand. The default value is 180 seconds. Min-SE Defines the minimum session expiration (in seconds). Default is 90 seconds. If set to “Yes”, the phone will use session timer when it makes outbound calls if remote Caller Request Timer party supports session timer.
-
Page 47: Saving The Configuration Changes
Table 15: HANDSETS SETTINGS Page All Handsets This button will allow you to ring all the Handsets registered with the DP715 Base Station Desubscribe All This button is used to de-register all the handset previously registered with the DP715 Handsets Base Station Enable Subscription This button will allow you to set the DP715 into subscription mode in order to register a... -
Page 48: Rebooting The Dp715 Base Station From Remote
HTTP (thus no NAT issues) and other communication protocols to communicate with each individual Grandstream device for firmware upgrade, remote reboot, etc. Grandstream provides GAPS service to VoIP service providers. Use GAPS for either simple redirection or with certain special provisioning settings. At boot-up, Grandstream devices by default point to Grandstream provisioning server GAPS, based on the unique MAC address of each device, GAPS provision the devices with redirection settings so that they will be redirected to customer’s TFTP or HTTP/HTTPS server for... -
Page 49: Software Upgrade
LAN. It is recommended to conduct firmware upgrade in a controlled LAN environment if possible. For users who do not have a local firmware upgrade server, Grandstream provides a NAT-friendly TFTP server on the public Internet for firmware upgrade. -
Page 50: Instructions For Upload From Local Directory
When a Grandstream device boots up or reboots, it will issue a request for a configuration file “cfgxxxxxxxxxxxx”, where “xxxxxxxxxxxx” is the MAC address of the device, i.e., “cfg000b820102ab”. In addition, device will also requests a XML configuration file “cfgxxxxxxxxxxxx.xml”. -
Page 51: Managing Firmware And Configuration File Download
In addition, when the field “Check New Firmware only when F/W pre/suffix changes” is set to “Yes”, the device will only issue firmware upgrade request if there are changes in the firmware Prefix or Postfix. MANAGING FIRMWARE AND CONFIGURATION FILE DOWNLOAD When “Automatic Upgrade”... -
Page 52: Restore Factory Default Setting
Restoring the Factory Default Setting will DELETE all configuration information of the phone. Please BACKUP or PRINT out all the settings before you approach to following steps. Grandstream will not take any responsibility if you lose all the parameters of setting and cannot connect to your VoIP service provider. -
Page 53: Firmware Version 1.0.0.8 Dp715/Dp710 User Manual
VOIP Data: This will reset only the data related with a service provider like SIP server, sip user ID, provisioning and others. Note: 1. Factory Reset will be disabled if the “Lock keypad update” is set to “Yes”. 2. If the DP715 was previously locked by your local service provider, pressing the RESET button will only restart the unit.
Need help?
Do you have a question about the DP715 and is the answer not in the manual?
Questions and answers