Table of Contents
Advertisement
Use And Care
4450569
Table of Contents
...................
2
A Note to You .................
3
Oven Safety .................
4-5
......................
6
Using Your Oven ........... 7
Using the
Cycle ..... 36
....................
42
.......... 45
or Service
.....................
47
.............................
51
.......................
52
1-800-253=1301
In the U.S.A., call us with
questions
or comments.
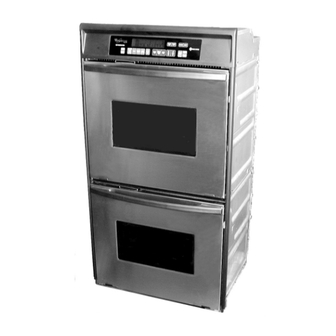
ELECTRIC BUILT-IN CONVECTION
OVENS
MODELS
RBS277PD
RBS307PD
RBD277PD
RBD307PD
Advertisement
Table of Contents

Related Manuals for Whirlpool RBD277PDB4


Summary of Contents for Whirlpool RBD277PDB4
-
Page 1: Table Of Contents
Use And Care Table of Contents (complete) ....A Note to You ....Oven Safety ....Getting to Know Your Oven ...... Using Your Oven ... 7 Using the Self-Cleaning Cycle ..36 Caring Your Oven ....Troubleshooting ..45 Requesting Assistance or Service... -
Page 2: (Complete)
Table of Contents A Note to You ........... Broiling tips ........Oven Safety ........... Energy saving tips ......Getting to Know Your Oven ..... 6 Using the electronic MEALTIMER* control ..........Using Your Oven ........The oven vent(s) ....... The electronic oven control ....7 Using the Self-Cleaning Cycle .... -
Page 3: A Note To You
WHIRLPOOL* appliance. Because your life is getting busier and more complicated, WHIRLPOOL ovens are easy to use, save time, and help you manage your home better. To ensure that you enjoy years of trouble-free operation, we developed this Use and Care Guide. It is full of valuable information about how to operate and maintain your appliance properly and safely. -
Page 4: Oven Safety
Oven Safety Your safety is important to us. This symbol alerts you to hazards such as This guide contains safety statements under fire, electrical shock, warning symbols. Please pay special or other injuries. attention to these symbols and follow any instructions given. - Page 5 oKeep oven vents unobstructed. Care and cleaning oDo not heat unopened containers. eSmall amounts of formaldehyde They could explode. The hot and carbon monoxide are given contents could cause burns and off in the Self-Cleaning cycle container particles could cause from fiberglass insulation injury.
-
Page 6: Getting To Know Your Oven
Getting to Know Your Oven This section tells you what features your oven has and where they are located. Please review this information before using your oven. To help you find information on specific parts or features quickly, page references are included. Feature |ocations (Mode|s... -
Page 7: Using Your Oven
Using Your Oven To obtain the best cooking results possible, you must operate your oven properly. This section gives you important information for efficient and safe use of your oven. The eJectronic oven contro| (NIode|s RBD277PD and RBD307PD shown} NOTE: Displays shown are from single/upper ovens. Command pads shown are from double ovens. -
Page 8: Starting A Function
Command pads Using the control lock The command pads tell the oven what to do The control lock prevents unwanted use of and in what order. Some command pads the oven by disabling most of the control have an Indicator Light. The Indicator Light panel command pads (except CLOCK and comes on when you press the command TIMER SET/OFF). -
Page 9: Setting The Clock
Setting clock NOTE: These examples are for double upper ovens only. Other ovens may look slightly different. 1. Press Clock pad. PRESS YOU SEE (last time of day remembered) 2. Set time. PRESS YOU SEE Press the "up" (A) or "down" (V) pad(s) until the correct time shows on the display. -
Page 10: Using The Electronic Minute Timer
Using the e|ectronic Minute Timer The Minute Timer does not start or stop the oven. It works like a kitchen timer. It can be set in hours and minutes up to 12 hours 59 minutes. The Minute Timer will display minutes and seconds for settings under 1 hour. -
Page 11: Audible Signals
4. Turn off Minute Timer. PRESS YOU SEE (time of day) To cancel the Minute Timer: PRESS YOU SEE Press Timer Off pad. (time of day) Disabling the timer reminder tones: NOTE: To disable the reminder tones, press and hold the Timer Set pad for 5 seconds. -
Page 12: Oven Settings
Oven settings This chart tells you when to use each setting. It also explains what elements heat up for each setting. SETTING DIAGRAM SETTING INFORMATION BAKE • The bottom element and top Use this setting for stan- element heat up. dard baking and roasting. -
Page 13: Positioning Racks And Pans
Positioning racks and pans General guidelines Rack placement for specific foods: = Before turning on the oven, place oven racks where you need them. FOOD RACK POSITION • To move rack(s), lift rack(s) at front Frozen pies, large Lowest level or and pull out. -
Page 14: For Best Air Circulation
For best air circulation Use the following as a guide to determine where to place the pans: One pan Place in the center of the oven rack. Two pans Place in opposite corners of the oven rack. Three or four pans Place in opposite corners on each oven rack. -
Page 15: Convection Baking/Roasting
Convection baking/roasting NOTE: These examples are for double upper ovens only. Other ovens may look slightly different. 1. Position racks. For more information, see "Positioning racks and pans" on page 13. PRESS YOU SEE 2. Choose convection setting. to select oven (for double... - Page 16 4. When roasting or cooking casseroles, put food in oven. You do not have to preheat the oven when roasting or cooking casseroles. NOTE: To set your oven to cook in € Celsius instead of Fahrenheit, press and hold the Custom Broil pad for 5 seconds. 5.
-
Page 17: Convection Cooking Tips
6. When baking, put food in oven I.." after oven is preheated. During baking/roasting, the elements will turn on and off to keep the oven tempera- ture at the setting. NOTE: The top element helps heat during baking/roasting, but does not turn red. -
Page 18: Adjusting The Oven Temperature Control
Adjusting the oven temperature control Although your new oven is properly adjusted NOTE: DO NOT measure oven temperature to provide accurate temperatures, it may with a thermometer. Opening the oven door cook faster or slower than your old oven. will lower the oven temperature and give you If, after using the oven for a period of time, an inaccurate reading. -
Page 19: Broiling
PRESS YOU SEE 3. Enter the adjustment. (time of day) to determine the amount of adjustment needed The chart at the right tells you how much to ADJUST BY THIS adjust the offset temperature to get the NUMBER OF desired cooking results. You can determine TO MAKE FOOD... - Page 20 2. Put food on broiler pan and place in center of oven rack. NOTES: • Place food 3" or more from the broil element. • To ensure adequate grease drainage, do not use cookie sheets or similar pans for broiling. •...
- Page 21 PRESS YOU SEE 6. When broiling is done, turn off oven. (single ovens) (time of day) (double ovens) To custom broil at a lower PRESS YOU SEE temperature: • If food is cooking too fast, press the Custom Broil pad and press the • Temp pad until "325°F '' shows on the small display.
- Page 22 Broiling rack position chart • • RACK POSITION TYPE OF FOOD/ FROM BOTTOM DONENESS Quickly searing food, hamburger patties, and thin steaks, ½" thick or less, rare steaks Medium steaks, € medium patties, ham slices, fish steaks, frankfurters, well-done steaks and patties, lamb chops, split chicken, pork steaks and chops, whole fish...
-
Page 23: Broiling Tips
Broiling tips ,, Use the broiler pan and grid for broiling. ,, After broiling, remove the broiler pan They are designed to drain excess liquid from the oven when you remove the food. and grease away from the cooking surface Drippings will bake on the pan if you leave it in the heated oven. -
Page 24: Using The Electronic Mealtimer
MEALTIMER* control Using the electronic The electronic MEALTIMER control will turn Before using the electronic MEALTIMER the oven on and off at times you set, even control, make sure the clock is set to the when you are not around. correct time of day. - Page 25 PRESS YOU SEE 3. Set temperature (optional). Do this step if you want to set a tem- perature other than 350°F. Press • to raise the temperature or • to lower the temperature in 5°F amounts. Use these pads until the desired temperature (example shows Bake at 375°F shows on the small display.
- Page 26 Disabling the cook time reminder tones NOTE: To disable reminder tones, press and hold the Cook Time pad for 5 seconds. To reactivate tones repeat this step. 8. Turn off oven. PRESS YOU SEE NOTE: You can do this step any time to cancel the MEALTIMER* control setting.
- Page 27 PRESS YOU SEE 3. Set temperature (optional). Do this step if you want to set a tempera- ture other than 350°F. Press • to raise the temperature or • to lower the temperature in 5°F amounts. Use these pads until the desired temperature shows (example shows Bake at 375°F on the small display.
- Page 28 7. When cooking is done: YOU SEE The oven will turn off automatically and beep four times. You will also hear four 1-second tones every minute (unless they have been disabled [page 11]) until you press the Off/Cancel pad. 8. Turn off oven. PRESS YOU SEE NOTE: You can do this step any time...
- Page 29 PRESS YOU SEE 2. Choose setting. NOTE: On single/upper ovens, you can set the oven for convection cooking by pressing CONVECT instead of BAKE. to select oven (for double ovens) PRESS (example for bake) PRESS YOU SEE 3. Set temperature (optional).
- Page 30 7. Set start time, PRESS YOU SEE Press the "up" (A) or "down" (V) pad(s) until the correct time shows on the display Example at right shows a desired start time of 2 o'clock. The oven will auto- matically shut off at 2:30 (the set start (example shows 2 o'clock start...
- Page 31 Method 2 - Using Delay Start Time and Stop Time: 1. Prepare oven. Position the oven rack(s) properly and put food in the oven. For correct rack placement, see "Positioning racks and pans" on page 13. PRESS YOU SEE 2. Choose setting. NOTE: On single/upper ovens, you can set the oven for convection cooking by pressing CONVECT instead of BAKE.
- Page 32 PRESS YOU SEE 6. Press Stop Time pad. PRESS YOU SEE 7. Set stop time. Press the "up" (A) or "down" (V) pad(s) until the correct time shows on the display. Example at right shows a desired stop time of 2:30. This provides a (example shows 2:30 stop...
- Page 33 11. Turn off oven. PRESS YOU SEE NOTE: You can do this step any time to cancel the MEALTIMER* control setting. (single ovens) (time of day) (double ovens Method 3-Using Cook Time Stop Time: 1. Prepare oven. Position the oven rack(s) properly and put food in the oven.
- Page 34 PRESS YOU SEE 4. Press Cook Time pad. 5. Set cook time. PRESS YOU SEE [ 11 Press the "up" (A) or "down" (V) pad(s) until the correct time shows on the display. (example shows 30-minute baking/roasting time) 6. Press Stop Time pad. YOU SEE 7.
-
Page 35: The Oven Vent(S)
9. When start time is reached: YOU SEE A 1-second tone will sound. The display will count down the cooking time in hours and minutes (if cook time is more than 1 hour) or in minutes and seconds (if cook time is less than 1 hour). (display counts down cook time) YOU SEE... -
Page 36: Self-Cleaning Cycle
Using the Self-Cleaning Cycle The Self-Cleaning cycle saves you from the toil and mess that often come with hand-cleaning the oven interior. Like the other functions of your oven, you operate the Self-Cleaning cycle with the easy-to-use electronic control. Please review the instructions in this section to keep our oven spotless. -
Page 37: Before Setting The Controls
ill==¸¸ Before setting the controls • Make sure clock is set to correct time of day. (See "Setting clock" on page 9.) ,,Make sure the oven door is completely closed. Setting the controls NOTE: These examples are for double upper ovens only. Other ovens may look slightly different. - Page 38 3. Start oven. PRESS YOU SEE YOU SEE 4. After Self-Cleaning cycle starts: LOCKED lights up on the display. The door cannot be opened when LOCKED is on. YOU SEE 5. After Self-Cleaning cycle ends: (example for 5:30 stop time) YOU SEE To delay start...
- Page 39 PRESS YOU SEE 2. Set cleaning time (optional). If you want a Self-Cleaning cycle longer or shorter than 3Y2hours, use the Hour pad to set the desired cleaning time. Press the "up" (A) or "down" (V) pad(s) until a time between 2½-41½ hours shows (example for 41/2-hour cycle) on the display.
-
Page 40: Special Tips
YOU SEE 7. After Self-Cleaning cycle ends: NOTES: = The stop time will be the start time plus the cleaning time. . The fan may stay on after the Self- Cleaning cycle ends, until the oven (example for 7:00 stop time) cavity reaches a certain temperature. -
Page 41: How The Cycle Works
i==, How the cycle works The Self-Cleaning cycle uses very high heat to burn away soil and grease. During the cycle, the oven gets much hotter than it CLEANING CYCLE does for normal baking or broiling. This high heat breaks up the soil or grease and burns OVEN SHUTS OF i_... -
Page 42: Caring For Your Oven
Caring for Your Oven Your oven is designed for easy care. You can do most cleaning with items found around your home. Cleaning your oven whenever spills or soiling occurs will help to keep it looking and operating like new. Cleaning chart Use the following table to help you clean your oven. -
Page 43: Removing The Oven Door
PART WHAT TO USE HOW TO CLEAN • Make sure oven is cool. Oven door glass Paper towel and spray glass cleaner • Follow directions provided with the cleaner. Warm, soapy water and • Wash, wipe with clean water, and dry thoroughly. -
Page 44: The Oven Lights
To replace: 3. Remove the door removal pins from each hole. 4. Close the door. NOTE: If the door does not operate freely, you have not installed it properly. Repeat Steps 1-4. 1. Fit hinge arms into slots in frame. Push in at lower corners to insure that hinge arms are fully engaged. -
Page 45: Troubleshooting
Troubleshooting Most cooking problems often are caused by little things you can find and fix without tools of any kind. Check the lists below and on the next page before calling for assistance or service. If you still need help, see "Requesting Assistance or Service" on page 47. If nothing operates, check... -
Page 46: Requesting
PROBLEM CAUSE Cooking results are not • The oven is not level. (See Installation Instructions.) what you expected • The oven temperature seems too low or too high. See "Adjusting the oven temperature control" on page 18 to adjust oven temperature. •... -
Page 47: Requesting Assistance Or Service
To locate FSP replacement parts in your recommend a qualified service company in area, refer to Step 2 or call the Whirlpool your area. Consumer Assistance Center number If you prefer, write to: in Step 1. - Page 48 in Canada: Inglis Limited** Appliance Service - Consumer Services Direct service branches: BRITISH COLUMBIA Vancouver Inglis Limited Appliance Service (604) 291-6426 3627 E. 4th Avenue 1-800-665-6788 Victoria Ingtis Limited Appliance Service (604) 383-2280 3! 17 Steele Street 1-800-665-6788 ALBERTA Edmonton Inglis Limited Appliance Service (403) 453-3900 11653 163rd Street...
-
Page 51: Index
Index This index is alphabetical. It contains all the topics included in this manual, along with the page(s) on which you can find each topic. TOPIC PAGE TOPIC PAGE ASSISTANCE ........47, 48 FEATURES ..........BAKING LIGHTS ............ Aluminum foil ........LOCK Pans ............ -
Page 52: Warranty
C. Pickup and delivery. Your built-in oven is designed to be repaired in the home. D. Damage to your built-in oven caused by accident, misuse, fire, flood, acts of God, or use of products not approved by Whirlpool. E. Repairs to parts or systems caused by unauthorized modifications made to the appliance.
Need help?
Do you have a question about the RBD277PDB4 and is the answer not in the manual?
Questions and answers