
Related Manuals for Fantasea FP7000


Summary of Contents for Fantasea FP7000
- Page 1 Fantasea Line FP7000 Housing (Cat. No. 1118) For Nikon Coolpix P7000 Instruction Manual Fantasea FP7000 Housing Instruction Manual 20110201...
-
Page 2: Table Of Contents
CCESSORIES ..........................21 OUSING TRAP ................... 21 ONNECTOR FOR IGHTING CCESSORIES LEAK DETECTOR ............................22 FP7000 H ......................22 OUSING CCESSORY YSTEM CARE & MAINTENANCE ........................... 23 FANTASEA PRODUCT CONSUMER LIMITED WARRANTY ............24 Fantasea FP7000 Housing Instruction Manual 20110201... -
Page 3: Disclaimer
While every effort has been made in order to ensure that the information included in this instruction manual is accurate and complete, no liability will be accepted for any errors or omissions. Fantasea Line reserves the right to change product specifications and features described herein at any time without prior notice. -
Page 4: Features & Specifications
Weight (with camera on land): 1.1 kg Weight (with camera in 3.6% salt water): -0.3 kg Dimensions: 18 x 15 x 13.5 cm \ 7.2 x 6 x 5.4 inch (W x D x H) Fantasea FP7000 Housing Instruction Manual 20110201... -
Page 5: Included In Package
2. Removable flash diffuser with secure line 6. Silica gel packs 3. Hand lanyard 7. O-ring remover 4. Silicone grease 8. Spare back door O-ring seal 9. Diffuser quick release secure string (housing side) Fantasea FP7000 Housing Instruction Manual 20110201... -
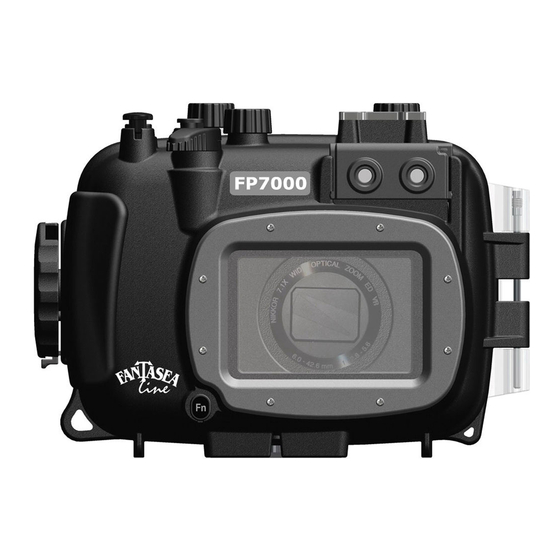
Page 6: Identification Of Housing Parts
6. Mode Dial 3. Hot-Shoe Connector 7. Command Dial 8. Fiber Optic Cable Plate 9. On/Off 10. AV/TV 2. Shutter Release 11. Lens Port 1. Zoom Control 12. Function 13. Tripod Mounting Screw Hole (bottom) Fantasea FP7000 Housing Instruction Manual 20110201... - Page 7 In order to switch modes, apply slight downward pressure on the mode dial as you rotate it in order to create enough contact pressure to accurately reach the desired mode. Fantasea FP7000 Housing Instruction Manual 20110201...
- Page 8 9. Hot-Shoe Mount for Lighting Accessories- Enables mounting a flash, night dive torch or focus light on top of the housing by using a dedicated connector. For further information regarding such connectors, please visit the Fantasea website – www.fantasea.com 10. Fiber Optic Cable Plate- a.
- Page 9 11. Lens Port- The housing lens port is compatible with a wide variety of accessory filters and lenses. For a selection of lens accessories available, please visit the Fantasea website – www.fantasea.com 12. Tripod Mounting Screw Hole – Enables mounting the housing on a tray, thereby allowing for the addition of various image enhancement accessories to your underwater photo system (such as strobes, lights and more).
- Page 10 20. AF Area Mode / Right - Pushing this control activates the camera AF area mode/right button. 21. Focus Mode / Down - Pushing this control activates the camera focus mode/bottom button. 22. Self-Timer / Left – Pushing this control activates the camera self-timer/left button. Fantasea FP7000 Housing Instruction Manual 20110201...
-
Page 11: The Nikon Coolpix P7000 Digital Camera
Tracking to automatically track and auto focus on a moving subject, video recording with optical zoom and stereo sound and 18 scene modes, including the Auto Scene Selector, which automatically recognizes any shooting situation and optimizes all the settings for that scene. Fantasea FP7000 Housing Instruction Manual 20110201... -
Page 12: Setting Up The Housing
3. It is recommended to program the camera to the most frequently used underwater photo mode, lighting and other key settings prior to installing the camera in the housing. Fantasea FP7000 Housing Instruction Manual 20110201... -
Page 13: Preparing The Housing
(image #4 on the following page). There is no need to apply any force. 3. Carefully open the back side of the housing. Fantasea FP7000 Housing Instruction Manual 20110201... -
Page 14: Checking The O-Ring
3. Cleaning the O-ring is a simple matter of wiping it with a damp, soft cloth to remove the foreign matter. Be careful the cloth you use does not leave any of its own material behind as this can also affect the effectiveness of the seal. Fantasea FP7000 Housing Instruction Manual 20110201... -
Page 15: Installing The Camera
MODE DIAL Image #7 Image #8 6. Once the camera is inserted inside the housing, push the housing mode dial back down, so it touches the camera mode dial. Fantasea FP7000 Housing Instruction Manual 20110201... -
Page 16: Closing The Housing
It is vital that the lens does not disturb this rubber seat. 7. Test housing control buttons to make sure that the camera was properly installed inside the housing and that nothing interferes with normal operation of the camera. It is recommended to Fantasea FP7000 Housing Instruction Manual 20110201... -
Page 17: Removing The Camera From The Housing
3. The removable flash diffuser included assists with softening the built-in flash output, increasing its angle of coverage and decreasing the amount of backscatter in the images (the unattractive snowstorm affect of the flash reflecting off suspended particles in the water). Fantasea FP7000 Housing Instruction Manual 20110201... - Page 18 Scroll down to “Off” and push the OK control again to make the selection. f. In order to reactivate the built-in camera flash, repeat steps a-d and then select “Auto”. Push the OK control again to make the selection. Fantasea FP7000 Housing Instruction Manual 20110201...
-
Page 19: Optional Accessories
The FP7000 Housing can be used with underwater slave flashes. These external flashes feature a slave sensor which triggers the external flash to fire in sync with the internal camera flash. For the full selection of Fantasea flashes and lighting sets compatible with the FP7000 Housing, please refer to the Fantasea website –... - Page 20 Once the fiber optic cable has been installed on the Fiber Optic Cable Plate, install the Fiber Optic Cable Plate by inserting it inside the dedicated slot on the housing and pushing it all the way in. Image #16 Fantasea FP7000 Housing Instruction Manual 20110201...
-
Page 21: Lens Accessories
EyeGrabber Lens Holders: Attach to Flex or Ball & Joint arms, enabling safe, secure and easily accessible storage for your lens accessories when not in use during the dive. For a selection of lens accessories available, please visit the Fantasea website – www.fantasea.com HOUSING HAND STRAP The FP7000 Housing features two hand strap loops on the “latch”... -
Page 22: Leak Detector
Follow the instructions included with the Leak Detector in order to install it inside the housing. For Fantasea Leak Detectors available, please visit the Fantasea website – www.fantasea.com... -
Page 23: Care & Maintenance
CARE & MAINTENANCE The Fantasea FP7000 Housing requires only a minimum amount of care for safe and reliable performance. The following tips will enable you to get the best results: 1. Always rinse your housing in streaming fresh water and if possible soak the housing in a fresh water tub or rinse tank for about 20 minutes after every dive in order to dissolve the salt water crystals from around the controls and openings of the housing. -
Page 24: Fantasea Product Consumer Limited Warranty
ONE (1) YEAR, (two years, where required by law as determined by the origin of the authorized dealer). This warranty is effective from the date of retail purchase from Fantasea or an authorized Fantasea dealer, by the original end-user purchaser (“Warranty Period”). This warranty does not cover any commercial use of the product.
Need help?
Do you have a question about the FP7000 and is the answer not in the manual?
Questions and answers