Table of Contents
Advertisement
Quick Links
Advertisement
Table of Contents

Related Manuals for Fantasea Remora Flash


Summary of Contents for Fantasea Remora Flash
-
Page 2: Table Of Contents
Table of Contents 1. Introduction ......................3 2. Included in the Kit .................... 3 3. Identification of Parts ..................4 4. Installing and Removing Batteries ............. 5 5. Setting the Proper Pre-Flash Program for Your Camera ....6 6. Closing the Back Port of the Remora Flash ..........8 7. -
Page 3: Introduction
1. Introduction The Remora Flash has been especially designed for compact digital housings. It is a slave flash which triggers in sync with the camera’s internal flash, and features 4 different pre-flash settings, to cover the needs of all compact digital cameras in the market. -
Page 4: Identification Of Parts
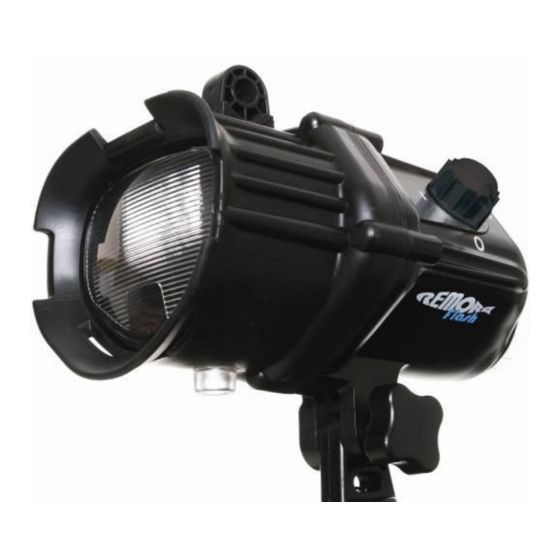
3. Identification of Parts Y-S Mount Power Switch Back Port Flash See image below Diffuser (Removable) Flash Slave Sensor Y-S Connector Nano Fiber Optic Adaptor Output Control Ready Light Pre-flash Settings Battery Compartment... -
Page 5: Installing And Removing Batteries
4. Installing and Removing Batteries A. Make sure that the power switch is set to the OFF (0) position. B. Turn the back door of the flash counterclockwise until it can be removed. C. To open the battery compartment, gently slide the knob on the battery compartment door all the way to the left. -
Page 6: Setting The Proper Pre-Flash Program For Your Camera
compartment, aligning the markings on the battery compartment door with those on the left side of the battery compartment, and proceed by carefully pushing the door against the batteries. Once the door is properly aligned, gently slide the knob to the right side in order to secure the closure. - Page 7 Remora to the correct pre-flash setting so it fires in sync with the primary flash of the camera. The Remora Flash features 4 different pre-flash settings: 0 – For cameras with no pre-flash 1 – For cameras with 1 pre-flash (and cameras with rapid-fire pre-flash) 2 –...
-
Page 8: Closing The Back Port Of The Remora Flash
E. Slide the pre-flash setting knob to the proper position, according to your testing results. Please note that as long as you are using the Remora Flash with the same camera, there is no need to perform this test again and the pre-flash setting knob should be left in the same position. -
Page 9: Mounting The Remora Flash On A Flex Or Ball & Joint Arm
dislodged. More grease is not better, and could in some cases interfere with the watertight seal of the flash. D. When replacing any of the seals, place them back into the same groove you have taken them out of. Be sure they are completely positioned in the channel for a proper seal. -
Page 10: Taking Photographs With The Remora Flash
B. Position the Remora Flash on top of the Flex or Ball & Joint Arm Set so that the Y-S Mount on top of the arm is aligned with the Y-S Connector at the bottom of the flash. C. Install the screw all the way through the Remora Flash and arm. -
Page 11: Using A Fiber Optic Cable With The Remora Flash (Optional)
The Remora Fiber Optic Cable Kit (#6315) can be separately ordered. For further information, Please refer to the Fantasea website, www.fantasea.com. In order to use a fiber optic cable with the Remora Flash,... - Page 12 A. Attach the fiber optic cable to the Remora Flash: Insert the exposed end of the fiber optic cable (the end without the fitting) into the small hole of the Nano Adaptor unit until the fiber optic cable reaches the end of the adaptor. Using the tool that comes with the Nano Adaptor kit, tighten the screw on the adaptor.
-
Page 13: Using A Focus Light With The Remora Flash (Optional)
For the different Fantasea focus lights available, please refer to our website, www.fantasea.com. To mount a focus light on top of the Remora Flash: A. Remove the screw from the Y-S Connector at the bottom... -
Page 14: Care & Maintenance
B. Position the focus light over the Remora Flash so that the Y-S Mount on top of the flash is aligned with the Y-S Connector at the bottom of the focus light. D. Install the screw all the way through the focus light and Remora Flash connectors. -
Page 15: Specifications
enough to allow it to slip into place without friction, so it does not twist or become dislodged. More grease is not better, and could in some cases interfere with the watertight seal of the flash. E. Do not use any lubrication on the Gasket seal. F. -
Page 16: Related Items
13. Related Items The following items are useful when using the Remora Flash, in order to take full advantage of its functions. For further information please contact us at www.fantasea.com/contact or visit our website www.fantasea.com.
Need help?
Do you have a question about the Remora Flash and is the answer not in the manual?
Questions and answers