Troy-Bilt TB144 Operator's Manual
4-cycle garden cultivator
Hide thumbs
Also See for TB144:
- Operator's manual (72 pages) ,
- Operator's manual (56 pages) ,
- Operator's manual (26 pages)
Table of Contents
Advertisement
Available languages
Available languages
Quick Links
®
m
m
/
_llmmmiBvw
AmmmlY
_m_m
Operator's Manual
4-Cycle Garden Cultivator
TB144
TABLE OF CONTENTS
Service Information
..............................
1
Rules for Safe Operation
..........................
2
Know Your Unit .................................
4
Assembly Instructions
............................
5
Oil and Fuel Information ...........................
6
Starting/Stopping
Instructions
......................
8
Operating Instructions
............................
9
Maintenance and Repair Instructions
...............
10
Cleaning and Storage
...........................
14
Troubleshooting
Chart ...........................
15
Specifications
.................................
16
Warranty Information
............................
18
Parts List ....................................
E17
[,_
ARNING:
When using the unit, you must follow
the safety rules. Please read these instructions
before operating the unit in order to ensure the
safety of the operator and any bystanders. Please
keep these instructions for later use.
P/N 769-02831
SAVE THESE INSTRUCTIONS
For service
call 1-800-828-5500
in the United
States,
or
1-800-668-1238
in Canada to obtain a list of authorized service
dealers near you.
For more details about your unit, visit our
website at www.troybilt.com
DO NOT RETURN THE UNIT TO THE RETAILER.
PROOF OF
PURCHASE WILL BE REQUIRED
FOR WARRANTY
SERVICE.
THIS
PRODUCT
IS COVERED
BY ONE OR MORE
U.S.
PATENTS. OTHER PATENTS PENDING.
Service on this unit both within and after the warranty period
should
be performed
only by an authorized
and approved
service dealer.
SPARK ARRESTOR NOTE
NOTE: For users on U.S. Forest Land and in the states of
California,
Maine, Oregon and Washington.
All U.S. Forest
Land and the state of California (Public Resources Codes 4442
and 4443), Oregon and Washington
require, by law that certain
internal combustion
engines operated
on forest brush and/or
grass-covered
areas be equipped
with
a spark
arrestor,
maintained
in effective
working
order,
or the engine
be
constructed,
equipped
and maintained
for the prevention
of
fire. Check with your state or local authorities for regulations
pertaining
to these
requirements.
Failure
to follow
these
requirements could subject you to liability or a fine. This unit is
factory
equipped
with
a spark
arrestor.
If it requires
replacement,
ask your LOCAL SERVICE DEALER to install the
Accessory Part #791-180890
Spark Arrestor Kit.
CALIFORNIA
PROPOSITION
65 WARNING
THE ENGINE EXHAUST FROM THIS PRODUCT
CONTAINS
CHEMICALS
KNOWN TO THE STATE OF CALIFORNIA
TO
CAUSE CANCER,
BIRTH DEFECTS OR OTHER
REPRODUCTIVEHARM.
All information,
illustrations,
and specifications
in this manual
are based on the latest product
information
available
at the
time of printing. We reserve the right to make changes at any
time without notice.
Copyright©
2007 MTD SOUTHWEST INC, All Rights Reserved.
(1/07)
Advertisement
Table of Contents

Related Manuals for Troy-Bilt TB144


Summary of Contents for Troy-Bilt TB144
- Page 1 ® _llmmmiBvw AmmmlY _m_m Operator's Manual 4-Cycle Garden Cultivator TB144 SAVE THESE INSTRUCTIONS For service call 1-800-828-5500 in the United States, 1-800-668-1238 in Canada to obtain a list of authorized service dealers near you. For more details about your unit, visit our website at www.troybilt.com DO NOT RETURN THE UNIT TO THE RETAILER.
-
Page 2: Safety Instructions
• IMPORTANT SAFETY INSTRUCTIONS ° READ ALL INSTRUCTIONS BEFORE OPERATING position while starting. See Starting/Stopping Instructions. • Use the right tool. Only use this tool for the purpose intended. • Read the instructions carefully. Be familiar with the controls and proper use of the unit. •... - Page 3 SAFETY AND INTERNATIONAL SYMBOLS This operator's manual describes safety and international symbols and pictographs that may appear on this product. Read the operator's manual for complete safety, assembly, operating and maintenance and repair information. SYMBOL MEANING SYMBOL MEANING ' SAFETy ALERT SYMBOL ON / START / RUN •...
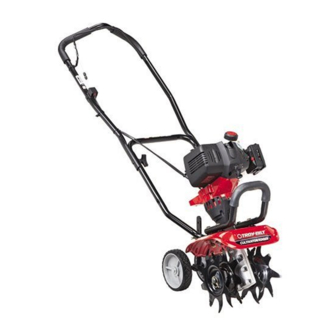
- Page 4 APPLICATIONS • Cultivating sod and light to medium soil • Cultivating in garden areas, around trees, etc. • Edging STOP/OFF Throttle Control Primer Bulb START/ON Handlebar Handlebar Knob Muffler Starter Rope Grip_ Tine Guard Choke Control Wheel Support Bracket Cultivator Tines Wheel...
-
Page 5: Positioning The Handlebars
NOTE: B efore s etting upyourcultivator / edger, disconnect ADJUSTING TINE DEPTH the spark plug wire from the spark plug. To adjust the wheel support bracket proceed as follows: POSITIONING THE HANDLEBARS Stop engine and disconnect spark plug to avoid accidental Loosen the two knobs on the inside of the handlebars (Fig. -
Page 6: Recommended Oil Type
CAUTION:OVERFILLING OIL CRANKCASE MAY CAUSE PRODUCT DAMAGE. Check a nd maintain theproper oillevel inthecrank case; itis important and cannot beoveremphasized. Check theoilbefore e ach useand change i tasneeded. Changing the Oil. Funnel Spout_ RECOMMENDED OIL TYPE Using the proper type and weight of oil in the 4-Cycle Motor crankcase is extremely important. -
Page 7: Recommended Fuel Type
RECOMMENDED FUEL TYPE FUELING THE UNIT Old fuel is the primary reason for improper unit NOTE: Fill or add fuel to the tank only when the cultivator is in performance. Be sure to use fresh, clean, a horizontal position (Fig. 9). unleaded gasoline. -
Page 8: Starting Instructions
ON (I) ventilated outdoor area. Carbon monoxide exhaust fumes can be lethal in a confined area. ARNING: Operate this unit only in a well- WARNING: Avoid accidental starting. Make sure OFF (O) you are in the starting position when pulling the starter rope (Fig. -
Page 9: Transporting The Unit
OPERATING TIPS injury when operating this unit, Do not wear loose clothing or jewelry, Wear eye and ear/hearing protection. Wear heaw long pants, boots and gloves, ARNING: Dress properly to reduce the risk of Do not wear short pants, sandals or operate barefoot. Move the cultivator to the work area prior to starting the engine. - Page 10 Some maintenance procedures may require special tools or skills, If you are unsure about these procedures, perform maintenance or repairs with unit running. take your unit to a Troy-Bilt or other qualified service Always service and repair a cool unit. Disconnect the dealer. Call 1-800-520-5520 for more information.
-
Page 11: Changing The Oil
O-Ring Fill Level Oil Fill 4-Cycle Motor Oil I Oil Fill Hole Fig. 16 Fig. 18 NOTE: Make sure the O-ring is in place on the oil fill plug!dipstick AIR FILTER MAINTENANCE when checking and changing the oil (Fig. 16). Cleaning the Air Filter CHANGING THE OIL... -
Page 12: Carburetor Adjustment
• the engine hesitates or stalls on acceleration • there is a loss of engine power Fig. 21 Have the carburetor adjusted by a Troy-Bilt or other qualified service dealer. Squeeze the filter to spread and remove excess oil (Fig. 21). - Page 13 Remove the screw behind the engine cover (Fig. 24). Slide the feeler gauge between the rocker arm and the valve return spring. Measure the clearance between the valve stem and rocker arm. Measure both the intake and exhaust valves (Fig. 26 & 27). Screw Adjusting RockerArm...
-
Page 14: Replacing The Spark Plug
REPLACING THE SPARK P LUG CLEANING THE UNIT Use a replacement Champion RDZ19H spark plug. The correct air gap is 0.025 in. (0.635 mm.). Remove the plug after every always turn the unit off and allow it to cool before 25 hours of operation and check its condition. - Page 15 CAUSE ACTION On!Off control inthe STOP Turn On/Off control to ON p osition Primer bulb wasn't pressed enough Press primer bulb fully and slowly 10 times Fouled spark plug Replace or clean the spark plug Engine is flooded Pull starter rope repeatedly with throttle control fully engaged and with the choke lever in Position 3 CAUSE ACTION...
- Page 16 Engine T ype................Air-Cooled, 4-Cycle Displacement ................1.6 cu.in.(26.2 cc) IdleSpeed R PM................3,000-3,600 rpm Operating RPM................7,200-8,800 Clutch T ype..................Centrifugal Ignition T ype..................Electronic On/Off Stop Control ................ Positive On/Off Switch Valve c learance (intake andexhaust) ..........0.003-0.006 in.(0.076-0.0152 Spark P lug Gap ................
- Page 18 MANUFACTURER'S LIMITED WARRANTY FOR: ® 'qmmmlmmlmv ,_mmw m_n=m===_ The limited warranty set forth below is given by Troy-Bilt LLC No implied warranty, including any implied warranty ("Troy-Bilt") with respect with new merchandise purchased and merchantability or fitness for a particular purpose, applies used in the United States, its possessions and territories.
-
Page 19: Manuel De L'utilisateur
® _llmmmiBww AmmmlY Manuel de L'utilisateur Cultivateur de Jardin b 4-temps TB144 CONSERVEZ CES INSTRUCTIONS Obtenez la liste des concessionnaires agre6s appelez le 1-800- 828-5500 aux 12tats-Unis ou le 1-800-668-1238 au Canada. Pour de plus amples informations a propos de votre appareil, visitez www.troybilt.com. - Page 20 • IMPORTANTES CONSIGNES DE SI_CURIT¢: o LISEZ TOUTES LES INSTRUCTIONS AVANT UTILISATION amples, de bi oux, de pantalons courts, de sandales et ne soyez pas pieds nus. Veillez & ce que vos cheveux restent au- • Lisez soigneusement cette notice. Familiarisez-vous avec les dessus du niveau des epaules.
- Page 21 SYMBOLES DE S¢:CURIT¢: ET INTERNATIONAUX Ce manuel de IIutilisateur decrit les symboles et pictogrammes de securite et internationaux pouvant apparaitre sur ce produit. Consultez manuel de I'utilisateur pour les informations concernant la securite, le montage, le fonctionnement, I'entretien et les reparations. SYMBOLE SIGNIFICATION SYMBOLE...
- Page 22 USAGE Cet appareil sert & travailler le sol avant de le gazonner ainsi que des sols & texture legere ou moyenne. II peut aussi _tre utilise pour cultiver dans les jardins, autour des arbres, etc. STOP/AR RI_T (O) Manette des gaz Poire d'amor£age ON/MARCHE...
- Page 23 REMARQUE : Cet appareil est expedie sans essence ou huile. REGLAGE DE LAPROFONDEUR DES DENTS Pour eviter tout dommage & I'appareil, consultez les Procedez de la fa(_on suivante pour ajuster le support de la roue : informations sur I'huile et I'essence pour mettre I'huile Coupez le moteur et debrancher la bougie pour eviter tout et I'essence dans le carter-moteur...
- Page 24 DANGER:LEREMPLISSAGE EXCESSIF CARTER-MOTEUR PEUT A NTRAINER BLESSURES GRAVES. Nous n esaurions trop insister surI'importance delaverification duniveau d'huile ducarter-moteur etdesonmaintien. Verifiez I'huile a vant c haque u tilisation etchangez- laaubesoin t elqu'indique clans l asection Changment d'Huile. d, enBtUoSnen TYPE D'HUILE RECOMMANDI_ 4-Cycle Motor II est extr6mement important d'utiliser les bons...
- Page 25 TYPE CARBURANT RECOMMANDI_ Ajour de Carburant En gen6ral, si IIappareil ne fonctionne pas Deposez le bouchon & essence. correctement, cIest que le carburant est vieux ou REMARQUE : Remplissez ou ajoutez du carburant dans le mal melang6. Prenez soin d'utiliser du carburant reservoir uniquement Iorsque le cultivateur est en sans plomb frais et propre.
- Page 26 dans un endroit bien a6re. Les emanations d'oxyde de AVERTISSEMENT n'utiliser I'outil qu'a I'exterieur, carbone dans un endroit confine peuvent 6tre mortelles. MARCHE (I) Se tenir en position de demarrage pour lancer le moteur ARRI_T (O_ (Fig. 12). Lors du demarrage, I'operateur et I'outil doivent 6tre en position d'equilibre afin d'eviter le risque de VERTISSEMENT eviter le demarrage accidentel.
-
Page 27: Conseils D'utilisation
CONSEILS D'UTILISATION AVERTISSEMENT : Portez des v_tements appropries pour diminuer les risques de blessures durant I'utilisation de I'appareil. Ne portez pas de v_tements amples ni de bijoux. Portez des lunettes de securite et des prot_ge-oreilles. Portez des pantalons epais et longs, des bottes et des gants. Ne marchez pas pieds nus et evitez les pantalons courts et les sandales. -
Page 28: Programme D'entretien
PROGRAMME D'ENTRETIEN REMARQUE: I'entretien, leremplacement oulareparation dispositifs etsyst_mes antipollution peuvent &tre effectu6s L'entretien doltrespecter lafrequence indiquee dans letableau par t out a telier, technicien ouconcessionnaire agr6e ci-dessous. IIdoltegalement faire partie detoute mise aupoint specialis6 dans l esreparations demoteurs d'outils saisonniere. mecaniques deplein air. -
Page 29: Entretien Du Filtre A Air
Si le niveau est trop bas, ajoutez un peu d'huile par I'orifice et reverifiez (Fig. 16). Continuez jusqu'a ce que le niveau d'huile atteigne le haut de la jauge. REMARQUE: Ne remplissez pas trop I'appareil. Niveau de remplissage Joint torique 4_Cycle Motor Oil I Bouchon de... - Page 30 Lavez le filtre dans un melange d'eau et de detergent Nettoyage du filtre a air (Fig. 20). Rincez le filtre abondamment et laissez-le secher. L'etat du filtre a air est tres important pour le fonctionnement I'appareil. Un filtre a air sale restreint le debit d'air et affecte le melange de carburant/air.
- Page 31 Enlevez la vis derriere le couvercle du moteur (Fig. 24). • Les deux culbuteurs se deplacent librement et les deux soupapes sont fermees Si ce n'est pas le cas, rep6tez la procedure. Glissez la jauge d'epaisseur entre le culbuteur et le ressort de rappel de la soupape.
-
Page 32: Remplacement Delabougie
REMPLACEMENT DELABOUGIE NETTOYAGE DE L'APPAREIL Utilisez une bougie 180852. L'ecartement correct est de 0,635 mm (0,025 po). Retirez la bougie apres 25 heures de graves, eteignez toujours la desherbeuse fonctionnement et verifiez son etat. AVERTISSEMENT : pour eviter des blessures laissez-la refroidir avant tout nettoyage ou Arr_tez le moteur et laissez-le refroidir. - Page 33 CAUSE SOLUTION La commande Marche/Arr6t Stop est en position ARRI_T Mettez-ia en position MARCHE La poire d'amor(_age n'a pas 6te pressee assez fort Pressez-la compietement et lentement de 10 fois Bougie encrassee Remplacez ou nettoyez-la Moteur noye Placez le levier d'etranglement bleu en position 3, pressez-la completement et lentement de 10 fois CAUSE...
- Page 34 Type de moteur ..............................Refroidi par air, 4-temps Cylindree ..................................26,2 cc (1,6 po 3) Regime ralenti ................................3.200-3.600 tr/min Regime de fonctionnement ............................7.200-8.800 tr/min Type d'embrayage ..................................Centrifuge Type d'allumage ..................................121ectronique Contact d'allumage ..............................Interrupteur berceau Jeu de soupape d'admission ......................
- Page 36 Aucune autre garantie ou caution expresse, _crite ou orale, Troy-Bilt garantit ce produit contre tout vice de matiere ou de I'exception de celle mentionnee ci-dessus, accord_e par toute far,on pendant une p@iode de deux (2) ans a compter de la date...
-
Page 37: Manual Del Operador
® _lmlf Manual del Operador Cultivador para Jardines de 4 Ciclos TB144 CONSERVE ESTAS INSTRUCClONES Llame 1-800-828-5500 en EE.UU. o al 1-800-668-1238 Canada para obtener una lista de distribuidores de servicio Iocalizados cerca de usted. Para obtener mas detalles sobre su unidad, visite nuestro sitio en www.troybilt.com. -
Page 38: Informacion De Seguridad
• IMPORTANTE INFORMACION DE SEGURIDAD • LEA TODAS LAS INSTRUCCIONES ANTES DE OPERAR LA cortos, sandalias, ni este descalzo. AsegQrese el cabello por UNIDAD encima del nivel de los hombros. • Lea las instrucciones cuidadosamente. Familiarfcese con • Esta unidad tiene un embrague. Las pQas permanece estacionario cuando la unidad esta en marcha en vac[o. - Page 39 SIMBOLOS DE SEGURIDAD E INTERNACIONALES Este manual del operador describe los simbolos y figuras de seguridad e internacionales que pueden aparecer en este producto. Lea el manual del operador para obtener informaci6n completa acerca de la seguridad, ensamble, operaci6n y mantenimiento y reparaci6n.
- Page 40 APLICAClON Use esta unidad para cultivar tierra herbosa y tierra negra ligera a mediana. Tambien se utiliza para cultivar Areas de jardines, alrededor de arboles, etc. OFF/ APAGADO (O) Control del regulador Bombilla del cebador ENCENDIDO Perillas del manubrio Manubrio Silencia( Mango de la cuerda de arranque...
-
Page 41: Ajuste De La Profundidad
NOTE: Desde la posicidn de funcionamiento, se observa la AJUSTE DE LA PROFUNDIDAD referencia a la derecha o a la izquierda de la Para ajustar la mensula de soporte de la rueda proceda de la cultivadora / bordeadora. siguiente manera: COLOCACION DEL MANUBRIO Detenga el motor y desconecte... -
Page 42: Tipo De Aceite Recomendado
ADVERTENCIA: EL LLENAR DEMA- SIADO EL CARTER PUEDE CAUSAR LESIONES PERSONALES GRAVES No podemos exagerar la importancia del control y mantenimiento del nivel correcto de aceite en el cig0eSal. Verifique el aceite antes de cada uso y cambiele cuando sea necesarie segL_nse indica en la secci6n de Cambio de! aceite. -
Page 43: Carga De Combustible
TIPO DE COMBUSTIBLE RECOMENDADO CARGA DE COMBUSTIBLE EN LA UNIDAD El combustible viejo es la causa principal del mal Saque la tapa de la gasolina. funcionamiento de la unidad. AsegL_rese de usar NOTA: Llene o aSada combustible al tanque L_nicamente combustible nuevo, limpio y sin plomo. -
Page 44: Instrucciones De Apagado
ADVERTENCIA: Use esta unidad s61o en un Area exterior bien ventilada. Los gases de escape de mon6xido ENCENDIDO / ON de carbono pueden ser letales en un Area cerrada. ADVERTENClA: Evite los arranques accidentales. Col6quese en posici6n de inicio cuando tire de la cuerda de arranque (Fig. - Page 45 CONSEJOS PARA LA OPERACION pare reducir el riesgo de lesiones cuando opere esta unidad. No use rope holgada ni alhajas. Use protecci6n ocular y auditiva. Use pantalones largos J VERTISSEMENT : Vista en forms adecuada y gruesos, botas y guantes. No use pantalones cortos, sands as n traba e desca zo.
-
Page 46: Mantenimiento
PROGRAMA DE MANTENIMIENTO NOTA: El mantenimiento, la sustituci6n o arreglo de dispositivos para el control de emisiones y sistemas pueden ser Estos procedimientos requeridos para el mantenimiento deben hechos per cualquier establecimiento de reparaci6n, ser realizados con la frecuencia indicada en la tabla. Deben set persona o proveedor de servicio autorizado que arregle incluidos como parte de toda puesta a punto de cada motores para use fuera de la carretera. -
Page 47: Cambio Del Aceite
Si el nivel esta bajo, agregue una peque_a cantidad de aceite en el orificio de Ilenado de aceite y vuelva a medir (Fig. 16). Repita hasta que el nivel de aceite Ilegue hasta la parte superior de la varilla de medici6n. NOTA: No Ilene demasiado la unidad. -
Page 48: Ajuste Del Carburador
cambiara la mezcla de aire y combustible. Con frecuencia esto se confunde con un carburador fuera de ajuste. Inspeccione la condici6n del filtro de aire antes de ajustar el tomillo de velocidad minima. Consulte la secci6n de Mantenimiento del Filtro de Aire. Ajuste del Tornillo de Velocidad Minima los ajustes del carburador. - Page 49 • Ambos brazos oscilantes se mueven con libertad, y ambas Saque el tornillo que esta detras de la cubierta del motor valvulas estan cerradas (Fig, 24), De no set as[, repita este paso. Deslice la galga entre el brazo oscilante y el resorte de retorno de la valvula.
- Page 50 LIMPIEZA DE LA UNIDAD CAMBIO DE LA BUJIA DE ENCENDIDO Use una bujia de encendido Champion RDZ19H. La separaci6n correcta es de 0,635 mm (0,025 pulgadas). Retire la bujia luego personales, apague siempre su unidad y espere de cada 25 horas de operaci6n e inspeccione su estado.
- Page 51 CAUSA ACCION Elcontrol deapagado On/Off esta enposici6n deOFF Gire el control de apagado On/Off a ON Labombilla d ecebado n o fue oprimida Io suficiente Oprima la bombilla de cebado total y lentamente de 10 veces La buj[a de encendido esta arruinada Cambie o limpie la bujia de encendido El motor esta inundado Coloque la palanca azul del obturador en la Posici6n 3, oprima la...
- Page 52 Tipo de motor ................Enfriado por aire, 4 ciclos Desplazamiento ..............26,2 cc (1.6 pulgadas cQbicas) R.P.M. de velocidad mfnima ..............3.000-3.600 r.p.m. R.P.M. de operaci6n ................7.200-8.800 r.p.m. Tipo de embrague ................... Centrifugo Tipo de encendido .................. Electr6nico Interruptor de encendido ...............
- Page 53 REPLACEMENT PARTS - MODEL TB144 4-CYCLE GAS CULTIVATOR...
- Page 54 REPLACEMENT PARTS - MODEL TB144 4-CYCLE GAS CULTIVATOR Item Part No. Description Item Description 753-04028 Engine Cover Assembly (includes 3 & 4) 753-04288 Palnut 753-1202 Plate Screw 791-181930 Engine Cover Screw 753-05074 791-182651 Star_er Rope Eyelet Pressure Plate Assembly (includes 50) 753-05072 791-182652 Eyelet Nut...
- Page 55 REPLACEMENT PARTS - MODEL TB144 4-CYCLE GAS CULTIVATOR Item Item Part No. Description Description 753-04060 753-04042 Trottle Control Cap Screw 753-04061 Lock Nut 753-04043 Torsion Spring 753-04062 791-182673 On/Off Switch Cap Push 753-04063 753-04044 Wheel Support Bracket Assembly Foam Grip 753-04501 Wheel 753-04147...
- Page 56 Troy-Bilt. Troy-Bilt LLC Troy-Bilt se reserva el derecho a cambiar o mejorar el diseRo de cualquier producto Troy-Bilt, sin asumir ninguna obligaci6n para modificar ningQn producto fabricado con anterioridad. RO. Box 361131 Cleveland, OH 44136-0019...
Need help?
Do you have a question about the TB144 and is the answer not in the manual?
Questions and answers