Troy-Bilt TB144 Operator's Manual
Troy-bilt 4-cycle garden cultivator operator's manual
Hide thumbs
Also See for TB144:
- Operator's manual (56 pages) ,
- Operator's manual (26 pages) ,
- Operator's manual (57 pages)

Related Manuals for Troy-Bilt TB144


Summary of Contents for Troy-Bilt TB144
- Page 1 Operator’s Manual 4-Cycle Garden Cultivator TB144 CAUTION: Before using this product, read this manual and follow all safety rules and operating instructions. P/N 769-02190A (5/06)
-
Page 2: Table Of Contents
TABLE OF CONTENTS Rules for Safe Operation .....3 Know Your Unit ......6 Assembly Instructions . -
Page 3: Rules For Safe Operation
RULES FOR SAFE OPERATION The purpose of safety symbols is to attract your attention to possible dangers. The safety symbols, and their explanations, deserve your careful attention and understanding. The safety warnings do not by themselves eliminate any danger. The instructions or warnings they give are not substitutes for proper accident prevention measures. -
Page 4: While Operating
• Always stop the engine and allow it to cool before filling the fuel tank. Never remove the cap of the fuel tank, or add fuel, when the engine is hot. Never operate the unit without the fuel cap securely in place. Loosen the fuel tank cap slowly to relieve any pressure in the tank. -
Page 5: Safety And International Symbols
RULES FOR SAFE OPERATION SAFETY AND INTERNATIONAL SYMBOLS This operator's manual describes safety and international symbols and pictographs that may appear on this product. Read the operator's manual for complete safety, assembly, operating and maintenance and repair information. SYMBOL MEANING •... -
Page 6: Know Your Cultivator
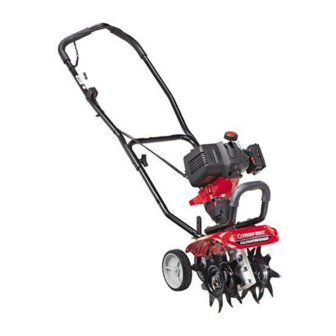
KNOW YOUR CULTIVATOR Applications • Cultivating sod and light to medium soil • Cultivating in garden areas, around trees, etc. • Edging Muffler Starter Rope Grip Front Handle Tine Guard Cultivator Tines KNOW YOUR UNIT Primer Bulb START/ON (I) Wheel Support Edger Wheel STOP/OFF (O) -
Page 7: Positioning The Handlebars
NOTE: Before setting up your cultivator / edger, disconnect the spark plug wire from the spark plug. POSITIONING THE HANDLEBARS 1. Loosen the two knobs on the inside of the handlebars (Fig. 1). 2. With the unit upright, swing the handlebars up into the operating position (Fig. -
Page 8: Recommended Oil Type
CAUTION: CAUSE PRODUCT DAMAGE. Check and maintain the proper oil level in the crank case; it is important and cannot be overemphasized. Check the oil before each use and change it as needed. See Changing the Oil. RECOMMENDED OIL TYPE Using the proper type and weight of oil in the crankcase is extremely important. -
Page 9: Recommended Fuel Type
OIL AND FUEL INFORMATION RECOMMENDED FUEL TYPE Old fuel is the primary reason for improper unit performance. Be sure to use fresh, clean, unleaded gasoline. NOTE: This is a four cycle engine. In order to avoid damage to the unit, do not mix oil with gasoline. Definition of Blended Fuels Today's fuels are often a blend of gasoline and oxygenates such as ethanol, methanol or MTBE (ether). -
Page 10: Starting/Stopping Instructions
STARTING/STOPPING INSTRUCTIONS WARNING: outdoor area. Carbon monoxide exhaust fumes can be lethal in a confined area. WARNING: you are in the starting position when pulling the starter rope (Fig. 12). To avoid serious injury, the operator and unit must be in a stable position while starting. -
Page 11: Operating Tips
OPERATING TIPS WARNING: injury when operating this unit. Do not wear loose clothing or jewelry. Wear eye and ear/hearing protection. Wear heavy long pants, boots and gloves. Do not wear short pants, sandals or operate barefoot. 1. Move the cultivator to the work area prior to starting the engine. -
Page 12: Maintenance And Repair Instructions
MAINTENANCE AND REPAIR INSTRUCTIONS MAINTENANCE SCHEDULE Perform these required maintenance procedures at the frequency stated in the table. These procedures should also be a part of any seasonal tune-up. NOTE: Some maintenance procedures may require special tools or skills. If you are unsure about these procedures, take your unit to a Troy-Bilt or other qualified service dealer. -
Page 13: Checking The Oil Level
MAINTENANCE AND REPAIR INSTRUCTIONS CHECKING THE OIL LEVEL To prevent extensive CAUTION: engine wear and damage to the unit, always maintain the proper oil level in the crankcase. Never operate the unit with the oil level below the bottom of the dipstick. The importance of checking and maintaining the proper oil level in the crankcase cannot be overemphasized. -
Page 14: Air Filter Maintenance
MAINTENANCE AND REPAIR INSTRUCTIONS AIR FILTER MAINTENANCE Cleaning the Air Filter Clean and re-oil the air filter every 10 hours of operation. It is an important item to maintain. Failure to maintain your air filter properly can result in poor performance or can cause permanent damage to your engine. -
Page 15: Rocker Arm Clearance
MAINTENANCE AND REPAIR INSTRUCTIONS NOTE: Ensure the tines are not in contact with the ground when adjusting the idle. 2. Release the throttle trigger and let the engine idle. If the engine stops, insert a small phillips or flat blade screwdriver into the hole in the air filter/muffler cover (Fig. - Page 16 MAINTENANCE AND REPAIR INSTRUCTIONS 7. Pull the starter rope slowly to bring the piston to the top of its travel, (known as top dead center). Check that: • The piston is at the top of its travel while looking in the spark plug hole (Fig.
-
Page 17: Replacing The Spark Plug
MAINTENANCE AND REPAIR INSTRUCTIONS REPLACING THE SPARK PLUG Use a replacement Champion RDZ19H spark plug. The correct air gap is 0.025 in. (0.655 mm.). Remove the plug after every 25 hours of operation and check its condition. 1. Stop the engine and allow it to cool. Grasp the plug wire firmly and pull the cap from the spark plug. -
Page 18: Cleaning And Storage
MAINTENANCE AND REPAIR INSTRUCTIONS Cleaning the Unit WARNING: always turn the unit off and allow it to cool before you clean or perform any maintenance on it. • Use a small brush to clean off the outside of the unit and to keep the air vents free of obstructions. -
Page 19: Troubleshooting Chart
ENGINE WILL NOT START C A U S E Empty fuel tank Primer bulb wasn't pressed enough Engine is flooded Old fuel Fouled spark plug Plugged spark arrestor On/Off Control is in the OFF (O) position ENGINE WILL NOT IDLE C A U S E Air filter is plugged Old fuel... -
Page 20: Specifications
SPECIFICATIONS ENGINE* Engine Type ..............Air-Cooled, 4-Cycle Displacement . -
Page 21: Carb / Epa Warranty Information
California / EPA Emission Control Warranty Statement The California Air Resources Board, the Environmental Protection Agency and MTD LLC (MTD) are pleased to explain the emission control system warranty on your 2005 and later small off-road engine. New small off-road engines must be designed, built and equipped to meet stringent anti-smog standards. -
Page 22: Warranty
MANUFACTURER’S LIMITED WARRANTY FOR: The limited warranty set forth below is given by Troy-Bilt LLC (“Troy-Bilt”) with respect with new merchandise purchased and used in the United States, its possessions and territories. Troy-Bilt warrants this product against defects in material and workmanship for a period of two (2) years commencing on the date of original purchase and will, at its option, repair or replace, free of charge, any part found to be defective in... - Page 23 Manuel de L'utilisateur Cultivateur de Jardin à 4-temps TB144 IMPORTANT : LISEZ LES RÈGLES ET CONSIGNES DE SÉCURITÉ SOIGNEUSEMENT P/N 769-02190A (5/06)
- Page 24 TABLE DES MATIÈRES Consignes de sécurité ..... .F3 Familiarisez-vous avec votre appareil ..F6 Instructions de montage .
-
Page 25: Importantes Consignes De Sécurité
Les symboles de sécurité attirent votre attention sur des dangers potentiels. Ces symboles et leurs détails explicatifs méritent que vous les lisiez et compreniez bien. Les avertissements de sécurité ne peuvent éviter les dangers de par eux-mêmes. Les consignes ou mises en garde qu'ils donnent ne remplacent pas des mesures préventives appropriées contre les accidents. -
Page 26: Autres Avertissements De Sécurité
• Évitez de créer une source d'allumage pour le carburant déversé. Ne démarrez pas le moteur avant que les vapeurs de carburant ne se soient dissipées. • Mélangez et ajoutez le carburant dans un endroit bien aéré et propre en plein air à l'abri des étincelles ou des flammes. -
Page 27: Symboles De Sécurité Et Internationaux
SYMBOLES DE SÉCURITÉ ET INTERNATIONAUX Ce manuel de l'utilisateur décrit les symboles et pictogrammes de sécurité et internationaux pouvant apparaître sur ce produit. Consultez le manuel de l'utilisateur pour les informations concernant la sécurité, le montage, le fonctionnement, l'entretien et les réparations. SYMBOLE SIGNIFICATION •... -
Page 28: Familiarisez-Vous Avec Votre Appareil
FAMILIARISEZ-VOUS AVEC VOTRE APPAREIL USAGE Cet appareil sert à travailler le sol avant de le gazonner ainsi que des sols à texture légère ou moyenne. Il peut aussi être utilisé pour cultiver dans les jardins, autour des arbres, etc. STOP/ARRÊT (O) Manette des gaz Poire... -
Page 29: Instructions De Montage
REMARQUE : Cet appareil est expédié sans essence ou huile. Pour éviter tout dommage à l’appareil, consultez les informations sur l’huile et l’essence pour mettre l’huile et l’essence dans le carter- moteur avant d’essayer de le faire démarrer. REMARQUE : Avant de monter votre cultivateur/coupe- bordures, débranchez le câble de bougie de la bougie et mettez-le à... -
Page 30: Informations Sur L'huile Et Le Carburant
INFORMATIONS SUR L'HUILE ET LE CARBURANT DANGER: LE REMPLISSAGE EXCESSIF DU CARTER-MOTEUR PEUT ANTRAÎNER DES BLESSURES GRAVES. Nous ne saurions trop insister sur l'importance de la vérification du niveau d'huile du carter- moteur et de son maintien. Vérifiez l'huile avant chaque utilisation et changez-la au besoin tel qu'indiqué... - Page 31 INFORMATIONS SUR L'HUILE ET LE CARBURANT TYPE CARBURANT RECOMMANDÉ En général, si l'appareil ne fonctionne pas correctement, c'est que le carburant est vieux ou mal mélangé. Prenez soin d'utiliser du carburant sans plomb frais et propre. REMARQUE : ceci est un moteur à quatre temps. Pour éviter d’endommager l’appareil, ne mélangez pas l’huile avec l’essence.
-
Page 32: Instructions De Démarrage Et D'arrêt
INSTRUCTIONS DE DÉMARRAGE ET ARRÊT AVERTISSEMENT: dans un endroit bien aéré. Les émanations d’oxyde de carbone dans un endroit confiné peuvent être mortelles. AVERTISSEMENT: accidentel. Se tenir en position de démarrage pour lancer le moteur (Fig. 12). Lors du démarrage, l’opérateur et l’outil doivent être en position d’équilibre afin d’éviter le risque de blessures graves. -
Page 33: Conseils D'utilisation
CONSEILS D’UTILISATION AVERTISSEMENT: vêtements appropriés pour diminuer les risques de blessures durant l'utilisation de l'appareil. Ne portez pas de vêtements amples ni de bijoux. Portez des lunettes de sécurité et des protège-oreilles. Portez des pantalons épais et longs, des bottes et des gants. -
Page 34: Entretien Et Réparations
REMARQUE : certaines procédures d'entretien nécessitent des compétences ou des outils particuliers. Si vous n'êtes pas sûr de pouvoir les entreprendre, emmenez votre appareil dans un atelier, chez un technicien ou un concessionnaire agréé spécialisé dans les réparations de moteurs d’outils mécaniques de plein air. -
Page 35: Vérification Du Niveau D'huile
ENTRETIEN ET RÉPARATIONS VÉRIFICATION DU NIVEAU D’HUILE MISE EN GARDE: user le moteur ou endommager l'appareil, maintenez toujours l'huile du carter à un bon niveau. N’utilisez jamais l'appareil si le niveau est en dessous du bas de la jauge. Nous ne saurions trop insister sur l'importance de la vérification du niveau d'huile du carter moteur et de son maintien. -
Page 36: Réglage Du Carburateur
ENTRETIEN DU FILTRE Á AIR Nettoyage du filtre à air Nettoyez et relubrifiez le filtre à air à toutes les 10 heures de fonctionnement. Son entretien est très important. Si vous ne le faites pas, cela ANNULERA la garantie. AVERTISSEMENT: blessures graves, éteignez toujours l'appareil et laissez-le refroidir avant tout nettoyage ou entretien. - Page 37 ENTRETIEN ET RÉPARATIONS Réglage de la vis de réglage de ralenti AVERTISSEMENT: pendant le réglage de la vitesse de ralenti. Portez des vêtements protecteurs et respectez toutes les consignes de sécurité pour éviter des blessures graves. Si le moteur ne se met toujours pas au ralenti après vérification du carburant et nettoyage du filtre à...
- Page 38 ENTRETIEN ET RÉPARATIONS 3. Déconnectez le câble de la bougie. 4. Nettoyez toute saleté de la bougie. Retirez la bougie de la culasse en tournant la douille de 5/8 po à gauche. 5. Déposez le couvercle du moteur. 6. Nettoyez toute saleté autour du cache-culbuteur. Retirez la vis retenant le cache-culbuteur à...
-
Page 39: Remplacement De La Bougie
REMPLACEMENT DE LA BOUGIE Utilisez une bougie 180852. L'écartement correct est de 0,655 mm (0,025 po). Retirez la bougie après 25 heures de fonctionnement et vérifiez son état. 1. Arrêtez le moteur et laissez-le refroidir. Saisissez fermement le câble de la bougie et retirez le capuchon de celle-ci. -
Page 40: Nettoyage De L'appareil
ENTRETIEN ET RÉPARATIONS NETTOYAGE DE L’APPAREIL AVERTISSEMENT: blessures graves, éteignez toujours la désherbeuse et laissez-la refroidir avant tout nettoyage ou entretien. • Nettoyez les évents ou l’extérieur de l’appareil avec une petite brosse. • N'employez pas de détergents concentrés ou de nettoyants à... -
Page 41: Dépannage
LE MOTEUR REFUSE DE DÉMARRER C A U S E Réservoir de carburant vide La poire d'amorçage n'a pas été pressée assez fort Carburant vieux Bougie encrassée Pare-étincelles colmaté Le levier de démarrage à froid est en position FERME lorsque la température dehors dépasse 4°C (40°F) Le levier de démarrage à... -
Page 42: Caractéristiques
MOTEUR* Type de moteur... Refroidi par air, 4-temps Cylindrée ... 26,2 cc (1,6 po Type d'embrayage ... Centrifuge Régime ralenti ... 3.200-3.600 tr/min Régime de fonctionnement ... 7.200-8.800 tr/min Type d'allumage... Électronique Contact d'allumage ... Interrupteur berceau Jeu de soupape d’admission... 0,076-0,152 mm (0,003-0,006 po) Jeu de soupape d'échappement ... - Page 43 REMARQUES...
- Page 44 REMARQUES...
- Page 45 Garantie de la California et de l'Agence de Protection de l'Environnement Concernant les normes antipollution Vos droits et obligations envertu de cette garantie Le California Air Resource Board, l’Agencie de Protection de l’Environnement et Troy-Bilt LLC ont le plaisir de vous informer au sujet de la garantie sur le dispositie antipollution des petits moteurs à...
-
Page 46: Garantie
GARANTIE LIMITÉE DU FABRICANT POUR: La garantie limitée énoncée ci-après est accordée par Troy-Bilt LLC (« Troy-Bilt ») et concerne les marchandises neuves achetées et utilisées aux États-Unis, ainsi que dans leurs possessions et territoires. Troy-Bilt garantit ce produit contre tout vice de matière ou de façon pendant une période de deux (2) ans à... - Page 47 Manuel del Dueño/Operador Cultivador para Jardines de 4 ciclos TB144 IMPORTANTE: LEA LAS REGLAS DE SEGURIDAD E INSTRUCCIONES DETENIDAMENTE P/N 769-02190A (5/06)
-
Page 48: Proposición 65 De California
INDICE DE CONTENIDOS Normas para una operación segura ... .E3 Conozca su unidad ......E6 Instrucciones de ensamble . -
Page 49: Operación
NORMAS PARA UNA OPERACION SEGURA Los símbolos de seguridad se utilizan para llamar su atención sobre posibles peligros. Los símbolos de seguridad y sus explicaciones merecen toda su atención y comprensión. Los símbolos de seguridad no eliminan ningún peligro por sí mismos. Las instrucciones o advertencias que ofrecen no substituyen las medidas adecuadas de prevención de accidentes. - Page 50 NORMAS PARA UNA OPERACION SEGURA • Mezcle y cargue el combustible en un área exterior bien ventilada donde no haya chispas ni llamas. Quite lentamente la tapa del combustible sólo después de apagar el motor. No fume mientras carga o mezcla el combustible.
- Page 51 NORMAS PARA UNA OPERACION SEGURA SIMBOLOS DE SEGURIDAD DE INTERCACIONALES Este manual del operador describe los símbolos y figuras de seguridad e internacionales que pueden aparecer en este producto. Lea el manual del operador para obtener información completa acerca de la seguridad, ensamble, operación y mantenimiento y reparación. SIMBOLO SIGNIFICADO •...
-
Page 52: Conozca Su Unidad
CONOZCA SU UNIDAD Silenciador Mango de la cuerda de arranque Protección de las púas Púas CONOZCA SU UNIDAD APLICACION Use esta unidad para cultivar tierra herbosa y tierra negra ligera a mediana. También se utiliza para cultivar áreas de jardines, alrededor de árboles, etc. Bombilla del cebador ENCENDIDO (I) -
Page 53: Instrucciones De Ensamble
INSTRUCCIONES DE ENSAMBLE NOTE: Desde la posición de funcionamiento, se observa la referencia a la derecha o a la izquierda de la cultivadora / bordeadora. COLOCACIÓN DEL MANUBRIO 1. Afloje las dos perillas del lado interior del manubrio (Fig. 1). 2. -
Page 54: Información Del Aceite Y Del Combustible
INFORMACION DEL ACEITE Y DEL COMBUSTIBLE ADVERTENCIA: SIADO EL CÁRTER PUEDE CAUSAR LESIONES PERSONALES GRAVES No podemos exagerar la importancia del control y mantenimiento del nivel correcto de aceite en el cigüeñal. Verifique el aceite antes de cada uso y cámbielo cuando sea necesario según se indica en la sección de Cambio del aceite . -
Page 55: Tipo De Combustible Recomendado
INFORMACION DEL ACEITE Y DEL COMBUSTIBLE TIPO DE COMBUSTIBLE RECOMENDADO El combustible viejo es la causa principal del mal funcionamiento de la unidad. Asegúrese de usar combustible nuevo, limpio y sin plomo. NOTA: Este es un motor de cuatro ciclos. Para evitar dañar su unidad, no mezcle el aceite con la gasolina. -
Page 56: Instrucciones De Arranque Y Apagado
INSTRUCCIONES DE ARRANQUE Y APAGADO ADVERTENCIA: exterior bien ventilada. Los gases de escape de monóxido de carbono pueden ser letales en un área cerrada. ADVERTENCIA: accidentales. Colóquese en posición de inicio cuando tire de la cuerda de arranque (Fig. 12). El operador y la unidad deben estar en una posición estable al arrancar la unidad para evitar graves lesiones personales. -
Page 57: Instrucciones De Operación
INSTRUCCIONES DE OPERACION CONSEJOS PARA LA OPERACIÓN ADVERTENCIA: adecuada para reducir el riesgo de lesiones cuando opere esta unidad. No use ropa holgada ni alhajas. Use protección ocular y auditiva. Use pantalones largos y gruesos, botas y guantes. No use pantalones cortos, sandalias ni trabaje descalzo. -
Page 58: Instrucciones De Mantenimiento Y Reparación
INSTRUCCIONES DE MANTENIMIENTO Y REPARACION NOTA: Algunos procedimientos de mantenimiento pueden requerir el uso de herramientas o habilidades especiales. Si no está seguro acerca de estos procedimientos, lleve su unidad a un establecimiento de reparación, persona o distribuidor de servicio autorizado que arregle motores para uso fuera de la carretera. -
Page 59: Cambio Del Aceite
INSTRUCCIONES DE MANTENIMIENTO Y REPARACION INSPECCIÓN DEL NIVEL DE ACEITE PRECAUCION: excesivo del motor y el daño de la unidad, mantenga siempre el nivel de aceite correcto en el cárter del cigüeñal. No opere nunca la unidad con el aceite debajo del extremo inferior de la varilla de medición. -
Page 60: Mantenimiento Del Filtro De Aire
INSTRUCCIONES DE MANTENIMIENTO Y REPARACION MANTENIMIENTO DEL FILTRO DE AIRE Limpieza del filtro de aire Limpie y vuelva a aceitar el filtro de aire cada 10 horas de operación. Es un elemento cuyo mantenimiento es importante. Si no realiza el mantenimiento del filtro de aire, su garantía será... -
Page 61: Mantenimiento Del Amortiguador De Chispas
INSTRUCCIONES DE MANTENIMIENTO Y REPARACION ADVERTENCIA: durante los ajustes del carburador. Use ropa que lo proteja y cumpla con todas las instrucciones de seguridad para prevenir graves lesiones personales. 2. Suelte el gatillo del regulador y deje que el motor funcione en marcha lenta. -
Page 62: Huelgo Del Brazo Oscilante
INSTRUCCIONES DE MANTENIMIENTO Y REPARACION HUELGO DEL BRAZO OSCILANTE El espacio libre del brazo oscilador pudiera necesitar ajuste si su unidad experimenta una pérdida de potencia de rendimiento o tiene problemas al arrancar. Para ajustar el espacio libre del brazo oscilador se requiere desarmar el motor. - Page 63 INSTRUCCIONES DE MANTENIMIENTO Y REPARACION 7. Tire lentamente de la cuerda de arranque para traer el pistón hacia la parte superior de su recorrido (conocido como punto muerto superior). Verifique que: • El pistón se encuentre en la parte superior de su recorrido mientras mira dentro del orificio de la bujía de encendido (Fig.
-
Page 64: Limpieza De La Unidad
INSTRUCCIONES DE MANTENIMIENTO Y REPARACION LIMPIEZA DE LA UNIDAD ADVERTENCIA: lesiones personales, apague siempre su unidad y espere que se enfríe antes de limpiarla o realizar cualquier tipo de mantenimiento. • Use un cepillo pequeño para limpiar la parte exterior de la unidad y para mantener los respiraderos libres de obstrucciones. -
Page 65: Resolución De Problemas
RESOLUCION DE PROBLEMAS EL MOTOR NO ARRANCA C A U S A El interruptor de encendido está APAGADO El tanque de combustible está vacío La bombilla del cebador no fue oprimida lo suficiente El motor se ha inundado La gasolina es vieja La bujía de encendido está... -
Page 66: Especificaciones
MOTOR* Tipo de motor ..............Enfriado por aire, 4 ciclos Desplazamiento . - Page 67 NOTAS...
-
Page 68: Parts List
PARTS LIST ENGINE PARTS - MODEL TROY-BILT CULTIVATOR 4-CYCLE GAS CULTIVATOR 18 19 24 25... - Page 69 ENGINE PARTS - MODEL TROY-BILT CULTIVATOR 4-CYCLE GAS CULTIVATOR Item Part No. Description 753-04028 Engine Cover Assembly (includes 3 & 4) 791-181930 Engine Cover Screw 791-182651 Starter Rope Eyelet 791-182652 Eyelet Nut 791-181025 Valve Cover Screw 791-182098 Valve Cover 791-182099 Valve Cover Gasket 791-182340 Rocker Adjustment Nut...
- Page 70 LOWER CULTIVATOR PARTS - MODEL TROY-BILT CULTIVATOR 4-CYCLE GAS CULTIVATOR Item Part No. Description 753-04042 Trottle Control 753-04043 Torsion Spring 791-182673 On/Off Switch 753-04044 Foam Grip 753-04147 Throttle Cable 753-04498 Upper Handle 791-182899 Bolt 753-04049 Cable Tie 753-04499 Flex Shaft 791-182677 Knob 753-04052...
- Page 71 Declaración de Garantía de Control de Emisiones de la EPA / California La Junta de Recursos del Aire de California, la Agencia de Protección Ambiental y Troy-Bilt LLC (Troy-Bilt) se complacen en explicar la garantía del sistema de control de emisiones para su pequeño motor para uso fuera de la carretera del 2005 y posterior. Los nuevos motores pequeños para uso fuera de la carretera tienen que diseñarse, construirse y equiparse para cumplir las normas contra smog más estrictas.
-
Page 72: Garantía
GARANTÍA LIMITADA DEL FABRICANTE PARA: La garantía limitada establecida a continuación es dada por Troy- Bilt LLC (“Troy-Bilt”) con respecto a mercancía nueva que sea comprada y usada en los Estados Unidos, sus posesiones y territorios. Troy-Bilt garantiza este producto contra defectos en el material y la mano de obra durante un período de dos (2) años, a partir de la fecha de compra original y a su entera opción, arreglará...
Need help?
Do you have a question about the TB144 and is the answer not in the manual?
Questions and answers