Table of Contents
Advertisement
Available languages
Available languages
Advertisement
Table of Contents

Related Manuals for Samsung DV456EWHDSU/AA


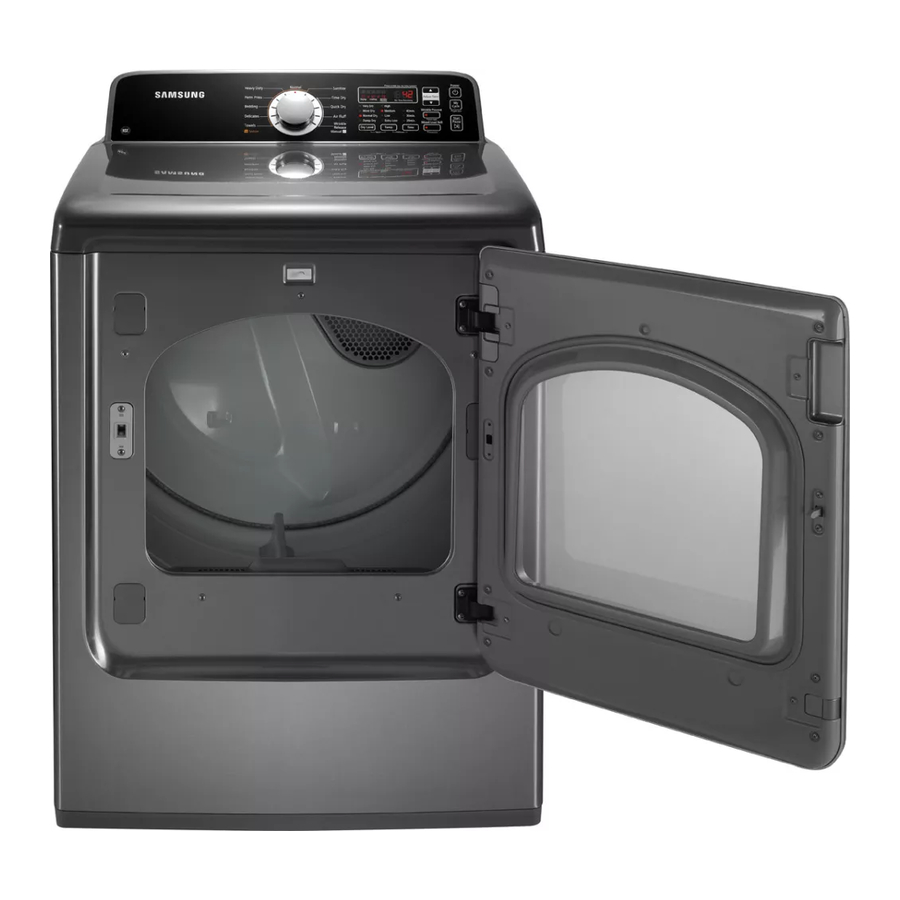
Summary of Contents for Samsung DV456EWHDSU/AA
- Page 1 100% Recycled Paper the possibilities Thank yob for ourchasing this Samsung product. To receive more comu_e_e serwce or accessor www.samsung.com/register paris, p_ease register your product at or comac_ 1-800-SAMSUNG (726-78641 DV400-03170A EN HUDSON-PJT vl.indd 2012-01-20 N 1:58:08...
- Page 2 Precision drying has never been easier than with Samsung. Time Saving Our cycles are designed with you in mind. All our dryers are designed to dry your clothes in less time.., just 42 minutes! Giving you time for more important things in life.
- Page 3 7. Easy Reversible Door The direction of our reversible door can be changed easily. 8. 4-way Vent (electric model only) You can install the exhaust vent in the following four (4) positions: back, either side, bottom. 9. Smart Care [DV456 ONLY] This function diagnoses problems...
- Page 4 Congratulations on your new Samsung Dryer. This manual contains valuable information on the installation, use, and care of your appliance. Please take the time to read this manual to take full advantage of your dryer's many benefits and features.
- Page 5 persons your WARNING: To reduce the risk of fire, electric shock, or injury to when using ..appliance, follow basic precautions, including the following: 1. Read all instructions before using this appliance. 2. Do not dry articles that have been previously cleaned in, washed in, soaked or spotted...
- Page 6 WARNING - Risk of Fire Clothes dryer installation must be performed by a qualified installer. • Install the clothes dryer according to the manufacturer's instructions and local codes. Do not install a clothes dryer with flexible plastic venting materials. If flexible metal (foil type) duct is installed, it must be of a specific type identified by the appliance...
- Page 7 Do not allow children or pets to play on, in, or in front of the appliance. Close supervision necessary when the appliance is used near children and pets. Before discarding or removing your dryer from service, remove the door to the drying compartment to prevent children or animals from becoming trapped...
- Page 8 cont nt,s iNSTALLiNG YOUR DRYER Unpacking your dryer Basic requirments Ducting requirements Important to installer Location considerations Alcove or closet installation Mobile home installation Exhausting Gas requirements Commonwealth of Massachusetts installation instructions Electrical requirements Grounding Electrical connections Installation - General procedure Final installation checklist...
- Page 9 Make sure you have received all of the items shown below. If your Dryer was damaged during shipping, or you do not have all of the items, contact 1-800-SAMSUNG (726-7864). To prevent personal injury or strain, wear protective gloves whenever lifting or carrying the dryer.
- Page 10 DUCTING REQUIREMENTS Use a 4-inch (10.2 cm) diameter rigid aluminum or rigid galvanized steel duct. Do not use a smaller duct. Ducts larger than 4 inches (10.2 cm) in diameter can cause increased lint accumulation. Lint accumulation should be cleaned regularly.
- Page 11 If the new dryer is being installed into an existing exhaust system, you must make sure: The exhaust system meets all local, state, and national codes. That a flexible plastic duct is not used. To Inspect and clean all lint buildup from inside the existing duct. The duct is not kinked or crushed.
- Page 12 Locate the dryer in an area that has adequate fresh air. A minimum of 72 in2 (465 cm 2) of unobstructed space is required. Call 1-800-SAMSUNG(726-7864) for information on purchasing the Floor Anchoring Kit as an accessory. All mobile home installations...
- Page 13 GAS REQUIREMENTS Use only natural or LP (liquid propane) gases. THE INSTALLATION MUST CONFORM WITH LOCAL CODES, OR IN THE ABSENCE OF LOCAL CODES, WITH THE NATIONAL FUEL GAS CODE ANSVZ223.1, LATEST REVISION (FOR THE UNITED STATES), OR WITH THE CAN/CGA-B149 INSTALLATION CODES (FOR CANADA).
- Page 14 ELECTRICAL REQUIREMENTS diagram plate panel Wiring is located below the control frame back. Improper connection of the equipment grounding conductor can result in a risk of electric shock..Check with a qualified electrician or serviceman if you are in doubt as to whether your dryer is properly grounded.
- Page 15 ELECTRICAL CONNECTIONS Before operating or testing, follow all grounding instructions in the Grounding section. An individual branch (or separate) circuit serving only your dryer is recommended. DO NOT USE AN EXTENSION CORD. Gas models - U.S. and Canada A 120 volt, 60 Hz AC approved electrical service, with a 15-ampere...
- Page 16 INSTALLATION - GENERAL PROCEDURE For proper installation, we recommend that you hire a qualified installer. Read these instructions completely before you begin the installation. To install the dryer, follow these steps: Move your dryer to an appropriate location for installation. Consider installing the dryer and washer side- by-side...
- Page 17 Review the Electrical Requirements section, then follow the 3 Wire system connection instructions (Step 7) or 4 Wire system instructions (Step 8) below. Three Wire system instructions: Ao External ground connector IBo Neutral grounding wire (green/yellow) Co Center silver-colored terminal block screw IDo Neutral wire (white or center wire) I_o %"...
- Page 18 U.S. MODELS: IMPORTANT - All U.S. models are designed for a 3-WIRE SYSTEM CONNECTION. The dryer frame is grounded to the neutral conductor at the terminal block. A 4-WIRE SYSTEM CONNECTION is required for new or remodeled construction, mobile homes, or if local codes do not permit grounding through neutral.
- Page 19 FINAL INSTALLATION CHECKLIST The dryer is plugged into an electrical outlet and grounded properly. The exhaust ductwork is hooked up and the joints are taped. You have used rigid or stiff-walled flexible metal duct material, not plastic flexible duct. The dryer is level and is sitting firmly on the floor. For gas models: The gas is turned on and there are no gas leaks.
- Page 20 DRYER EXHAUST TiPS Plastic or non-metal flexible duct presents a potential fire hazard. WARNING Make sure your dryer is installed properly so it exhausts easily. Use 4" diameter rigid metal duct. Tape all joints, including the dryer. Never use lint-trapping screws.
- Page 21 DOOR REVERSAL Unplug the power cord. Remove the four hinge screws from the door Remove the door by lifting it Remove the two screws from the holder-lever and then remove the cover-holder. 5. Assemble the holder-lever on the opposite side using the screws that were removed from the holder-lever-in Step 4.
- Page 22 t 0. Remove the holder-glass. t 1. Change position with each other. : Cover-hinge to handle-door : holder-hinge to guider-holder glass t2, Remove the hinge-door and then assemble on the opposite side, icture for you reference the process of assemble. t 3.
- Page 23 To reduce the risk of fire, electric shock, or injury to persons, read the IMPORTANT SAFETY ..INSTRUCTIONS before operating this appliance. OVERVIEW OF THE CONTROL PANEL Power Heavy Duty Normal ........Sanitize a Very Dry n High More m Medium m 40 rain.
- Page 24 op r t n tnA tion Time Dry - Time Dry allows you to select the desired cycle time in minutes. Turn the Cycle Selector dial to Time Dry, then press the Adjust Time up arrow to set the drying time. Press the arrow repeatedly to scroll through the time settings.
- Page 25 Adjust Time - You can add or subtract time from the automatically set times in the Wrinkle Release cycle and the Manual Dry cycles (Time Dry, Quick Dry, or Air Fluff cycles.) To add or subtract time from the cycle, press the Adjust Time arrow pad up or iiiiiiiiiiiiiiiiiiiiiiiiiiiiiiiiiiiiiiiiiii!i:i:i:i down until the desired time is displayed.
- Page 26 op r t n tnA tion CHILD LOCK A function to prevent children from playing with your d_er. Setting/Releasing If you want to set or release the Child Lock, press the Temp. and Time buttons simultaneously for 3 seconds. Child Lock Details You can set Child Lock while your dryer is running.
- Page 27 Galaxy $2 Users: To download the application, run SamsungApps on the home screen of the smartphone and enter the Samsung AppStore. Using the application on the Galaxy S or $2 running android version 2.2 is recommended. Precautions when using Smart Care If a lighting device (e.g.
- Page 28 CLEAN THE LINT FILTER • After each load. To shorten drying time. To operate more energy efficiently. without the lint filter in [_Do not operate your dryer place. Filter Door LOAD THE DRYER PROPERLY Place only one washload in your dryer at a time. •...
- Page 29 CONTROL PANEL Clean with a soft, damp cloth. Do not use abrasive substances. Do not spray cleaners directly on the panel. The control panel finish may be damaged by some laundry pre-treatment soil and stain remover products. Apply such products away from your dryer and wipe up any spills or overspray immediately.
- Page 30 Special laundry tips Please follow the care label or manufacturer's instructions for drying special items, if care label instructions are not available, use the following information as a guide. Bedspreads & Comforters Follow the care label instructions or dry using the Bedding cycle.
- Page 31 troLAbe hootna CHECK THESE POINTS IF YOUR DRYER... Doesn't run. Make sure the door is latched shut. Be sure the power cord is plugged into a live electrical outlet. Check your home's circuit breakers or fuses. Press the Start/Pause button again if the door is opened during the cycle.
- Page 32 Invalid power source Frequency Try restarting the cycle. If the problem continues, call for service. Electronic Control Problem Call for service. (Communication Error) For any codes not listed above, call 1-800-726-7864 (1-800-SAMSUNG) 32 troubleshooting DV400-03170A EN HUDSON-PJT vl.indd Sec4:32 2012-01-20 N 1:58:32...
- Page 33 appendx FABRIC CARE CHART The following symbols provide garment care directions. The Clothing care labels include symbols washing, bleaching, drying and ironing, or dry cleaning when necessary. The use of symbols ensures consistency among garment manufacturers of domestic and imported items.
- Page 34 a.ppondx PROTECTING THE ENVIRONMENT This appliance is manufactured from recyclable materials. If you decide to dispose of this appliance, please observe local waste disposal regulations. Cut off the power cord so that the appliance cannot be connected to a power source. Remove the door so that animals and small children cannot get trapped inside the appliance.
- Page 35 CYCLE CHART (e : factory setting, _ : selectabl¢ Normal Cottons, Work clothes, Linen Normal dry Heavy Fabrics such as jean, corduroys, Normal dry heavy work clothes Shirts, Synthetic Fabrics, Knits, Wrinkb-free Perm Press Normal dry cottons, Permanent Bulky items such as blankets, Sheets, Sensor Dry Bedding Normal dry...
- Page 36 In-home service is not available in all areas. To receive in-home service, product must be unobstructed and accessible to the service agent. If service is not available, SAMSUNG may elect to provide transportation of the product to and from an authorized service center. SAMSUNG...
- Page 37 Nor shall recovery of any kind against samsung...
- Page 38 How-to Videos and Live Shows *Requires reader to be _nstaLLed on your smartphone Scan this with your smartphone QUESTIONS OR COMMENTS? U.S.A 1 800 SAMSUNG(726 7864) www.samsung.com MEXICO 01 800 SAMSUNG(726 7864) www.samsung.com Code No. DC68-03170AEN DV400-03170A EN HUDSON-PJT vl.indd Sec7:38 2012-01-20...
- Page 39 _i_ as posibilidades Graclas Dor adqulrlr este Droducto Samsung. Para recibir un sew_c_omils comuleto o los accesorlos, reglstre su D_oducto en o corltacte con www.samsung.comiregister 1-800-SAMSU NG(726-7864) _C 11:36:21 HUDSON DV400-03170A MES.mdd 2012-02-02...
- Page 40 La precisi6n en el secado nunca fue mils sencilla que con Samsung. 4. Ahorro de tiempo Los ciclos estfin diseflados pensando en usted. Todas nuestras secadoras estfin disefladas para secar su ropa en menos tiempo..,...
- Page 41 7. Puerta fficilmente reversible La direcci6n de la puerta reversible puede modificarse f_cilmente. 8. Ventilaci6n de 4 direcciones (modelo electrico solamente) Puede instalar la ventilaci6n del drenaje en las siguientes cuatro (4) posiciones: atrfis, en cualquiera de los laterales, en la parte inferior. 9.
- Page 42 Felicitaciones por la compra de la nueva secadora Samsung. Este manual contiene informaciOn importante acerca de la instalaciOn, el uso y el cuidado del electrodomestico. Lea detenidamente estas instrucciones a fin de aprovechar al maximo los m01tiples beneficios y funciones de la secadora.
- Page 43 ADVERTENC[A: Para reducir el riesgo de incendio, descargas el6ctricas o lesiones fisicas ..cuando usa este electrodom_stico, siga las instrucciones de seguridad bfisicas que figuran a continuacidn: 1. Lea todas las instrucciones antes de usar este electrodom6stico. No seque prendas que han sido previamente limpiadas, lavadas, remojadas...
- Page 44 ADVERTENCIA - Riesgo de incendio La insta[ad6n de [a secadora de ropa debe estar a cargo de un insta[ador ca[ificado. Instab [a secadora de ropa segOn [as instrucdones del fabrbante y los c6digos locales. No instale una secadora de ropa con materiabs para ventilaci6n de p[_stico flexible. Si se insta[a un conducto de metal flexible (tipo I_mina mete[ha), debe ser de un tipo especifico identificado por e[ fabricante del ebctrodom_stbo come adecuado para uti[izar con secadoras de ropa.
- Page 45 No permita que los ni_os o las mascotas jueguen sobre el ebctrodom6stico, dentro de 61o frente a 6J. Se requiere de supervisi6n cuando eJe[ectrodom@tbo es utiJizado cerca de ni_os y mascotas. Antes de desechar [a secadora o de refirarJa de servicio, quite [a puerta deJcompartimiento de secado para evitar que los ni_os y [as mascotas queden atrapados dentro de [a secadora.
- Page 46 c©nt nido INSTALACION DE LA SECADORA Desembalaje de la secadora Requisitos bfisicos Requisitos para el tendido de conductos Importante para el instalador Consideraciones acerca de la ubicaci6n Instalaci6n del electrodom6stico en un gabinete o en un hueco Instalaci6n en casas rodantes Drenaje Requisitos...
- Page 47 Si la secadora sufrid da[_os durante el transporte, o si faka algOn elemento, comuniquese con el 1-800-SAMSUNG(726-7864). Para evitar lesiones fisicas o firones, use guantes protectores cada vez que bvante o transporte la secadora. Los materiales...
- Page 48 REQUISITES PARA EL TENDIDO DE CONDUCTOS • Utilice un cenducto de acere galvanizade @de e de aluminie @do, de 4 pulgadas (10,2 cm) de di_metre. • No ufilice un cenducto de mener tamale. • Los conductes de m_s de 4 pulgadas (10,2 cm) de di_metro pueden causar una mayor acumuladdn de pelusa. Pedddicamente, debe retirar la pelusa acumulada.
- Page 49 Si la nueva secadora se estfi instalando dentro de un sistema de drenaje existente, debe asegurarse de que: el sistema de drenaje cumpla con todos los cddigos locales, estaduales y nacionales; no se utilice un conducto flexible de pDstico; se controle y limpie toda la pelusa acumulada del interior del conducto existente;...
- Page 50 _rea en la que circule suficiente aire fresco. Se requiere un espacio mfnimo de 72 pulg 2 (465 cm 2) sin obstrucciones. Llame al 1-800-SAMSUNG (728-7864) para obtener mils informacidn acerca de la compra del kit de anclaje al piso como accesorio.
- Page 51 REQUISITOS EN CUANTO AL GAS Utilice Onicamente gas natural o gas LP (gas licuado de propano). LA INSTALACION DEBE REAUZARSE EN CONFORMIDAD CON LOS CODIGOS LOCALES, O EN AUSENClA DE ELLOS, CON EL CODIGO NACIONAL PARA GAS Y COMBUSTIBLES ANSI/Z223.1, REVISION M_,S REClENTE (PARA LOS ESTADOS...
- Page 52 REQUISITOS ELE_CTRICOS EI diagrama del cableado se encuentra en la placa debajo del panel de control o en la parte posterior del armaz6n. La conexi6n inadecuada del conductor de conexi6n a tierra del equipo puede generar una descarga el_ctrica. AD_RT_O_ Consulte a un electricista o t6cnico...
- Page 53 CONEXIONES ELE_CTRICAS Antes de poner al electrodom_stico en funcionamiento o realizar pruebas, siga las instrucciones conexi6n a tierra de la secci6n Conexi6n a tierra. Se recomienda que se destine un circuito derivado individual (o separado) s61o para la secadora. UTILICE UN CABLE PROLONGADOR.
- Page 54 INSTALACION - PROCEDIMIENTO GENERAL Para realizar una instalaci6n adecuada, recomendamos contratar a un instalador calificado. Lea estas instrucciones en su totalidad antes de iniciar la instalacidn. Para instalar la secadora, siga estos pasos: Mueva la secadora al lugar adecuado para la instalaci6n. Considere instalar la secadora y la lavadora...
- Page 55 Consulte la seccidn Requisitos EI6ctricos, luego siga las instrucciones para conexidn de sistemas de 3 cables (Paso 7) o las instrucciones para el sistema de 4 cables (Paso 8) a continuacidn. Instrucciones para el sistema de tres cables: A° Conector a tierra externo IB°...
- Page 56 MODELOS ESTADOUNIDENSES: IMPORTANTE - Tedos los modelos estadounidenses est_n diseflados para una CONEXION DE SISTEMAS DE 3 CABLES. El armazdn de la secadora est_ conectade a tierra al conductor neutre del bloque de terminabs. Se requiere una OONEXION DE SISTEMAS DE 4 CABLES para las construcciones nuevas e remedeladas, las casas redantes e si los c6digos locales no permiten la conexi6n a tierra a travBs del neutre.
- Page 57 LISTA DE VERIFICACION FINAL DE LA INSTALACION La secadora est_ enchufada a un temacorriente y est_ conectada a tierra correctamente. Los cenductos de drenaje est_n conectados y se ha celocado cinta alas uniones. Usted usd conducto rfgido o flexible con un recubrimiento de metal resistente, no conducto flexible de...
- Page 58 SUGERENCIAS ACERCA DEL DRENAJE DE LA SECADORA Un eonducto flexible de plAstico o de un material que no sea el metal presenta un poteneial ..riesgo de incendio. AsegOrese de que su secadora est6 instalada correctamente para que extraiga el aire fAcilmente. Secadora_ Pared I _i...
- Page 59 INVERSION DE LA PUERTA Desconecte el cable de alimentaci6n. Retire los cuatro tornillos de la bisagra de la puerta. Retire la puerta levantfindola. Retire los dos tornillos de la placa de apoyo y luego retire la placa de apoyo de la cubierta C:-[ 22:22 122 _2:C>...
- Page 60 t0o Retire el vidrio de la puerta. t 1, Intercambie las posiciones. : Bisagra de la cubierta a manija de la puerta : Bisagra de apoyo a gufa del vidrio de la puerta t2. Retire la puerta de la bisagra y vuelva a montarla del lado opuesto.
- Page 61 Pare reducir el riesgo de incendio, descarga el6ctrica o lesiones personales, lea las INSTRUCCIONES ..DE SEGURIDAD IMPORTANTES antes de poner en funcionamiento el aparato. DESCRIPCION GENERAL DEL PANEL DE CONTROL Power Heavy Duty Normal ........Sanitize []__!! Very Dry High Bedding Quick Dry...
- Page 62 Time Dry (Secado con temporizador) : este cblo le permite sebcdonar el tiempo de1 cblo deseado en minutes. Gire el disco Sebctor de ciclos a Time Dry (Secado con tempodzador), a continuad6n, presione la flecha hacia ardba de Adjust Time (Ajustar tbmpo) para determinar el tiempo de secado.
- Page 63 Adjust Time (Ajustar tiempo) - puede agregar o restar tiempo a los tiempos configurados autom&ticamente en los cities Wrinkle Release (Desarrugar) y Manual Dry (Secado manual) (cities Time Dry (Secado con temporizador), Quick Dry (Secado r_pido) o Air Fluff (Secado a temperatura ambbnte)). Para agregar o restar tbmpo al ciclo, presione la teda Adjust Time (Ajustar tiempo) con la flecha hacia arriba o hacia abajo hasta que aparezca el tbmpo deseado.
- Page 64 SEGURO PARA NII_OS Una funci6n para evitar que los niSos jueguen con la secadora. Config uraci6n/Liberaci6n Si desea configurar o liberar esta funci6n, presione simultfineamente los botones Temp. (Temp.) y Time (Tiempo) durante 3 segundos. Detalles del Seguro para niRos Puede configurar el Seguro para ni_os mientras su secadora...
- Page 65 Smart Care. Descarga de la aplicaci6n Smart Care Usuarios de Galaxy S: Para descargar la aplicaci6n, sebccione el menLi Samsung AppStore en Android Market (presionando el bot6n Menu (Men0) en Android Market) o con@tese a http://mobile.kr.samsungmobib.com/apps instale Samsung AppStore.
- Page 66 LIMPIE EL FILTRO PARA PELUSAS Despu6s de cada carga. Para reducir el tiempo de secado. Para hacer uso de la energfa con mayor eficacia. No haga funcionar la secadora sin el filtro para pelusas colocado. Filtro Marco delantero Puerta CARGUE LA SECADORA DE MANERA ADECUADA Coloque...
- Page 67 y impi@7 PANEL DE CONTROL Limpie con un paBo suave y h0medo. No utilice sustancias abrasivas. No rocfe el panel directamente con limpiadores en aerosol. El acabado del panel de control puede daBarse a causa de algunos productos removedores de suciedad manchas de tratamiento previo al lavado.
- Page 68 cucjorono a_¢ Sugerencias para prendas especiales Siga las instrucciones del fabricante o de la etiqueta de indicaciones para secar prendas especiales. Si no se dispone de etiquetas con indicaciones, use la siguiente informaciOn como guia. Cubrecamas y edredones Siga las instrucciones de la etiqueta con indicaciones o seque...
- Page 69 CONTROLE ESTOS PUNTOS SI SU SECADORA... No funciona. AsegOrese de que la puerta est6 cerrada con traba. AsegOrese de que e[ cane de alimentad6n est6 enchufado a un tomacorriente que funcione. Contro[e los disyuntores o fusibles de su casa. Presione el bot6n Start/Pause ([nicio/Pausa) nuevamente si [a puerta se abre durante el cic[o.
- Page 70 Si el problema continOa. Ilame al servicio t@nico. Probbma con el control ebctrdnico Oomuniquese con el servicio t@nice. Falla de cernunicacidn) Para los cddigos que no figuran mils arriba, Ilame al 1-800-726-7864 (1-800-SAMSUNG). guia de solucidn de problemas HUDSON DV400-03170A MES.indd...
- Page 71 ap ndice TABLA DE INDICACIONES SOBRE LA TELA Los siguientes sfmbolos ofrecen indicaciones acerca del cuidado de las prendas. La etiqueta de indicaciones de la prenda incluye sfmbolos para lavado, blanqueado, secado y planchado, o limpieza a seco cuando sea necesaria. El uso de sfmbolos garantiza la consistencia...
- Page 72 ,Noj PROTECCION DEL MEDIO AMBIENTE Este electrodom6stico se fabrica con materiales reciclables. Si decide desechar este electrodom6stico, siga la normativa local relacienada con la eliminacidn de desechos. Corte el cable de alimentacidn para que el electrodom_stico no pueda conectarse a una fuente de alimentacidn. Quite la puerta para que los animales y los nines peque_os no puedan quedar...
- Page 73 TABLA DE CICLOS (o : configurado en f_brica, _ : seleccionable) Normal Secado normal AIgoddn, ropa de trabajo, ropa de cama y de mesa Telas resistentes, tales como jeans, cord®roy y ropa de Potencia extra Secado normal trabajo pesedo PDncha Camisas, telas sint6ticas, tejidos, prendas de algoddn Secado normal permanente...
- Page 74 SECADORA SAMSUNG GARANT[A L[MITADA PARA EL COMPRADOR ORIGINAL El presente producto de la mama SAMSUNG, tal como Io provee y distribuye SAMSUNG ELECTRONICS AMERICA, INC. (SAMSUNG) y Io entrega nuevo, en su embalaje de cart6n original al comprador...
- Page 75 Ning0n resarcimiento de ninguna fndole contra samsung superar_ el precio de compra del producto vendido por samsung y causante del presunto da_o.
- Page 76 How-to Videos and Live Shows *Requires reader to be _nstaLLed on your smartphone Scan this with your smartphone sTIENE PREGUNTAS O COMENTARIOS? U.S.A 1-800-SAMSUNG(726-7864) www.samsung.com MEXICO 01-800-SAMSUNG (726-7864) www.samsung.com N. ° de cddigo: DC68-03170A _C 11:37:54 HUDSON DV400-03170A MES.mdd Sec7:38 2012-02-02...
Need help?
Do you have a question about the DV456EWHDSU/AA and is the answer not in the manual?
Questions and answers
TUMBLER DOES NOT BEGIN TURNING WHEN START BUTTON IS PUSHED. I DO NOT HEAR THE TUMBLER MOTOR RUNNING. TUMBLER DOES NOT START TURNING IN ANY SETTING OR TEMP. I HAVE TRIED OPENING AND CLOSING THE DOOR AND THE DOOR SWITCH BEHAVES AS EXPECTED.