Table of Contents
Advertisement
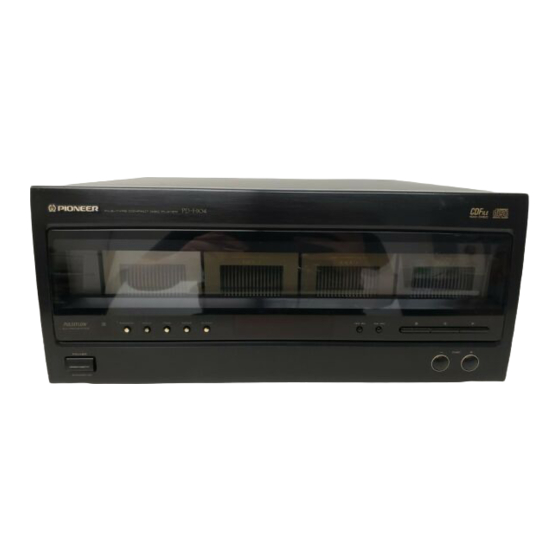
FILE-TYPE COMPACT
DISC PLAYER
PD-F904
[
I
,',',.
O0
_. ZS . " , _CJ
_i " , LJ C.J
IOD-DISC
DIGITAL
AUDIO
POWER ON DEMO display]
POWER ON DEMO display mode allows you
To cancel the POWER ON DEMO
display
to see variations of the display. To enter the
mode, press any button.
POWER
ON
DEMO
display
mode,
press
POWER and then _
_
within
1 second
after turning on the power.
l hank you for buying this Pioneer product.
Please read through
these operating
instructions
so you
will know how to operate your model properly.
After you
have finished reading the instructions,
put them away in a
safe place for future reference.
In some countries or regions, the shape of the power plug
and power outlet may sometimes differ from that shown in
the explanatory
drawings.
However,
the
method
of
connecting and operating the unit is the same.
WARNING:
TO PREVENT FIRE OR SHOCK HAZARD, DO
NOT EXPOSE THIS APPLIANCE TO RAIN OR MOISTURE.
IMPORTANT
NOTICE
[For U.S. and Canadian models]
The serial number for this equipment
is located on the rear panel.
Please write
this serial number on your enclosed
warranty
card
and keep it in a secure area. This is for your security.
[For Canadian model]
CAUTION:
TO PREVENT ELECTRIC SHOCK DO NOT USE
THIS
(POLARIZED)
PLUG
WITH
AN EXTENSION
CORD,
RECEPTACLE OR OTHER OUTLET UNLESS THE BLADES CAN
BE FULLY INSERTED TO PREVENT BLADE EXPOSURE.
ATTENTION:
POUR PREVENIR LES CHOCS ELECTRIQUES
NE PAS
UTILISER
CETTE
FICHE
POLARISEE
AVEC
UN
PROLONGATEUR,
UNE PRISE DE COURANT
OU UNE AUTRE
SORTIE DE COURANT,
SAUF SI LES LAMES PEUVENT ETRE
INSEREES
A FOND SANS EN LAtSSER
AUCUNE
PARTIE
A
DECOUVERT.
CAUTION:
This product satisfies FCC regulations when shielded cables and
connectors are used to connect the unit to other equipment.
To
prevent electromagnetic
interference
with electric appliances
such as radios and televisions, use shielded cables and con nectors
for connections.
[For Canadian
model]
This digital apparatus
does not exceed
the Class B limits
for
radio noise
emissions
from
digital
apparatus
set out in the
Radio Interference
Regulations
of the Canadian
Department
of Communications.
POWER-CORD CAUTION
Handle the power cord by the plug. Do not pull out the plug by tugging
the cord and never touch the power cord when your hands are wet
as this could cause a short circuit or electric shock. Do not place the
unit, a piece of furniture,
etc., on the power cord, or pinch the cord.
Never make a knot in the cord or tie it with other cords. The power
cords should be routed such that they are not likely to be stepped on.
A damaged power cord can cause a fire or give you a n electrical shock.
Check the power cord once in a while. When you find it damaged, ask
your nearest PIONEER authorized service center or your dealer for a
replacement.
]
This player is for consumer use. If the player is used in a business
(for example, in a restaurant), the player will not be covered
under warranty.
PIONEER
The Art of Entertainment
Advertisement
Table of Contents

Related Manuals for Pioneer PD-F904


Summary of Contents for Pioneer PD-F904
- Page 1 A damaged power cord can cause a fire or give you a n electrical shock. CAUTION: TO PREVENT ELECTRIC SHOCK DO NOT USE Check the power cord once in a while. When you find it damaged, ask your nearest PIONEER authorized service center or your dealer for a THIS (POLARIZED) PLUG...
- Page 2 SERVICE - The appliance supporting structure, grounding of the lead-in wire structions should be followed should be serviced by a Pioneer authorized service to an antenna discharge unit, size of grounding WATER AND MOISTURE - The appliance should not center or qualified...
- Page 3 [FOR U.S. MODEL] CAUTION • Use of controls or adjustments or performance of procedures other than those specified herein may result in hazardous radiation exposure. • The use of optical instruments with this product will increase eye hazard. This equipment has been tested and found to comply with the limits for a Class B digital device, pursuant to Part 15 of the FCC Rules.
-
Page 4: Table Of Contents
TRANSPORTATIONSCREW CONTENTS In order to protect the inside of this unit from vibration and shocks CONFIRM SUPPLIED ACCESSORIES ........ during transportation, the internal mechanism is fixed with PUT BATTERIES INTO THE REMOTE transportation screws. CONTROL UNIT ..............Before using the player, remove the three transportation screws REMOTE CONTROL OPERATIONS ........ -
Page 5: Confirm Supplied Accessories
CONFIRM SUPPLIED ACCESSORIES I PUT BATTERIESINTO THE REMOTE CONTROLUNIT Open the lid of the battery compartment on the rear of the remote control unit, and insert the batteries, taking care to align the _) and (_ polarities correctly. ® NOTES: •... -
Page 6: Cautions Regarding Handling
• Never insert more than one disc in the groove of the Rack. nearest PIONEER authorized service center. Lens cleaners for CD • When carrying or tilting this unit, remove all discs stored in the players are corn mercially available, but special care should be exercised Rack. -
Page 7: Connections
CD-Deck synchro function If you have a Pioneer cassette deck provided with the CD-Deck synchro function, connect the CD-DECK SYNCHRO jacks of the CD player and cassette deck. -
Page 8: Names And Functions Of Parts
NAMES AND FUNCTIONS OF PARTS FRONT PANEL indicates the page where the control is explained. When the front panel is closed. When the front panel i< open. REMOTE CONTROL UNIT POWER STANDBY/ON switch Remote sensor Receives the signal from the remote control unit. ADLC button _3_--------- ------rg) -
Page 9: Beforeoperatingthe Player
BEFOREOPERATINGTHE PLAYER Insert discs into the Rack (only 12-cm discs) Insert desired discs into the Racks (1 - 4). Up to 25 discs may be inserted into each rack, and a total of 100 discs can be inserted into the player. The disc grooves are numbered from the left side of the rack. -
Page 10: Basicoperation
BASICOPERATION To play a compact disc UTurn on the power of the player. []Insert discs into the Rack, and close the rack i I wlmlmlw front panel. • Insert discs to be played into the Racks beforehand. (Refer ..I oo,:z=_J- to "BEFORE OPERATING THE PLAYER"... -
Page 11: Changing Discs During Playback
BASICOPERATION Selecting the playing mode Changing discs during playback This unit lets you change up to 75 discs without interrupting playback, MODE but please be aware of the following points. MODE • Do not press the Rack EJECT (A) button in the following situations. 1. -
Page 12: Direct Search - To Search For A Particular Disc Or Track
I:IA_IL;UPI:HAi ION Direct search - To search for a particular disc or I Track search - To search a particular track track (with remote control unit) in playback or pause mode in playbackor stop mode [Example] To search for track No. 5 on disc No. 37: DISC TRACK When _... -
Page 13: Various Operations
VARIOUS OPERATIONS I To play only the desired discs (CUSTOM playback) I All discs (1 - 100) can be divided into 3 CUSTOM modes as your preference. Discs can be selected and stored in memory by music type or artists, etc. Example: enter disc No. -
Page 14: To Repeat Playback (Repeat Play)
VARIOUSOPERATIONS • When the PGM button is pressed in random playback mode, To repeat playback (repeat play) random playback is cancelled and the player enters program mode. NOTE: REPEAT During random playback, the CUSTOM mode cannot be selected with the MODE button. •... -
Page 15: To Play Onlydesired Tracks/Discs
TO PLAY ONLYDESIRED TRACKS/DISCS Program playback - To program tracks/discs in desired order You can perform this operation in either stop or playback mode. However, and _ cannot be used to select tracks during playback. Be sure toselect stop or playback mode before programming •... -
Page 16: To Reserve The Program
TOPLAYONLY DESIREDTRACKS/DISCS To clear all of the program contents and to J I To reserve the program cancel program mode Press the PGM button during normal playback. The unit enters program mode and you can program while the You can clear all of the program contents and cancel the program song is playing back.Program play starts when either the current mode by any of the following... -
Page 17: Troubleshooting
If the trouble cannot be rectified even after exercising the checks listed below, ask your nearest PIONEER authorized service center or your dealer to carry out repair work. Probable cause Remedy Symptom •... -
Page 18: Specifications
SPECIFICATIONS 1. General Switching Display Disc/Track Number, Time Consumed (track/disc), and Total Time Type ........... Compact disc digital audio system Power requirements ..........AC 120 V, 60 Hz ADLC Power consumption ..............12 W Automatic Digital Level Controller Operating temperature .......... -
Page 19: Index Card
NO. 1 1 ~ 50 INDEX CARD Copy or cut off these index cards, and fill in the titles of the discs in order inserted in the player. It is useful to search for the desired discs if these cards are inserted in the first or last page of the supplied CD liner notes file. - Page 20 4 Repeat steps 2 and 3 to select the buttons and TRACK SET. desired tracks. ___d TRACK Press ,,-. Published by Pionee[ Electronic Corpolatlon. Copyright © 1994 Pioneer Electronic Corporat,on All rights reserved. PIONEER ELECTRONIC CORPORATION 4-1, Meguro 1-Chome, Meguro-ku, Tokyo 153, Japan PIONEER ELECTRONICS [USA] INC.
Need help?
Do you have a question about the PD-F904 and is the answer not in the manual?
Questions and answers