Advertisement
Safety • Assembly • Operation • Tips & Techniques • Maintenance
• Troubleshooting • Parts Lists • Warranty
OF
A
O
AL
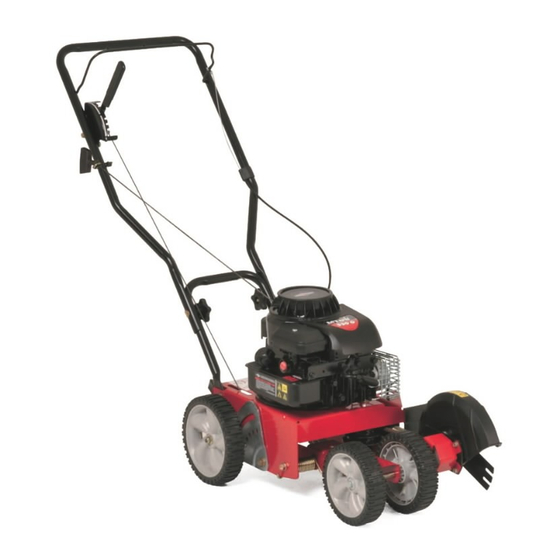
Gas Lawn Edger-
Model Series 550
iMPORTANT
READ SAFETY
RULES AND iNSTRUCTiONS
CAREFULLY
BEFORE
OPERATION
Warning:
This unit is equippedwith an internal combustionengineand shouldnot be usedon or nearany unimproved forest-covered, b rush-
coveredor grass-covered land unlesstheengine'sexhaustsystemis equippedwith a sparkarrestermeetingapplicablelocalor statelaws(if any).
If a sparkarresteris used,it shouldbe maintainedin effectiveworkingorder by the operator.In theState of Californiathe aboveis requiredbylaw
(Section4442 of the CaliforniaPublicResources Code). Otherstatesmay havesimilarlaws.Federallaws applyon federallands.A sparkarrester
for the muffleris availablethroughyour nearestengineauthorizedservicedealeror contactthe servicedepartment,RO. Box361131 Cleveland,
Ohio 44136-0019.
PRINTEDIN U.S.A
MTD LLC, P.O. BOX 361131 CLEVELAND,
OHIO 44136-0019
FORMNO. 769-02351
1/26/2006
Advertisement
Table of Contents

Summary of Contents for MTD 25B-551A700
- Page 1 If a sparkarresteris used,it shouldbe maintainedin effectiveworkingorder by the operator.In theState of Californiathe aboveis requiredbylaw (Section4442 of the CaliforniaPublicResources Code). Otherstatesmay havesimilarlaws.Federallaws applyon federallands.A sparkarrester for the muffleris availablethroughyour nearestengineauthorizedservicedealeror contactthe servicedepartment,RO. Box361131 Cleveland, Ohio 44136-0019. PRINTEDIN U.S.A FORMNO. 769-02351 MTD LLC, P.O. BOX 361131 CLEVELAND, OHIO 44136-0019 1/26/2006...
-
Page 2: Customer Support
This Operator's iVlanual is an important part of your new Edger. it will help you assemble, prepare, and maintain the unit for best performance. Please read and understand what it says. Table of Contents 1. Safety Labels ..........6. iVlaintainance &... - Page 3 Please take a moment to review your safety labels. WARNING Thissymbolpoints out importantsafety instructions which, if not followed, could endangerthe personal $321 safety and/or propertyof yourself and others.Read and follow all instructions in this manual before attempting to operate this machine. Failure to complywith these instructions may result in personalinjury.When...
- Page 4 WARNING: Engine Exhaust, some of its constituents, and certain vehicle compo- nents contain or emit chemicals known to State of Californiato cause cancer and birth defects or other reproductiveharm. DANGER: This machine was built to be operated according to the rules for safe operation in this manual.
- Page 5 which can ignite.Washeryour skinand changeclothes the originalequipmentmanufacture's (O.E.M.)bladeonly, listedin this manual. " Useof partswhichdo not meetthe immediately. originalequipmentspecificationsmay leadto improper 10.Do not put handsor feet near rotatingparts.Contactwith performance and compromisesafety!" the rotatingbladecan amputatehandsandfeet. 4. Lawnedgerbladesare sharpand can cut.Wrapthe blade 11.The bladecontrol handle is a safetydevice.Neverbypass or weargloves,and use extracautionwhenservicingthem.
- Page 6 IMPORTANT: T his unit is shipped WITHOUTGASO- LINE. Aftersettingup the unit, serviceenginewith gasolineas instructedin the separateengine manual packedwith your unit. Also be sure to service engine with the oil enclosed with this unit as instructedin the enginemanual. NOTE: Referenceto right or left hand side of the Assembling edger is observedfrom the operatingposition.
- Page 7 Blade Control Blade Depth Control Lever (Transport Position Shown) Recoil Starter Belt Guard WARNING Be familiar with all controlsand their proper operation.Know how to Figure4-1:The maincomponentson the edger. stop the machine and disengage them quickly. Bevel Adjustment Lever (if so equipped) WARNING: Be familiar with all controlsand their properoperation.
- Page 8 Edging The operationof any edgercan result in foreign objectsbeingthrown intothe beginedging,proceedasfollows: eyes, whichcan result in severeeye Movethe unit overto thearea to be edged,making damage. Alwayswearsafety glassesor eye shields. surethat the left rearwheelis on a hard surfaceand Werecommend wide visionsafety mask for over the bladeis overthe area to be cut, Figure5-1.
- Page 9 Trenching (Optional) In order to createa widercuttingpathfor such thingsas layingwirefor landscapelightingor invisible f ences,you can utilizethe edger'soptionaltrenchingfeature. ARNING:Disconnectthe sparkplug wire and ground against the engine before performing the following steps. Engine ARNING: The edger blade is sharp. Wear k,,Rywheel Pulley Belt Guard leather work gloves to protect your hands Figure 5-4:Remove t hebeltfromaround thepulley.
- Page 10 Figure 5-8: Edging/TrenchingPosition. Fiat ifCurb Height "_ Tri-starBlade Adjustment Figure 5-7:The optionalTri-star blade andwasher. Lever iMPORTANT:Makecertainthat the drive belt is seated correctlyon the bladespindle and that it is riding smootMy on the spindle sheaves and is not iMPORTANT: U sea torque pinchedbetween them.
-
Page 11: Replacing The Blade
,_1_ WARNING:Disconnect t he spark plug wire and groundagainst the enginebefore performingany adjustment, repairsor maintenance. Lubrication Engine Maintaining Refertothe Engine Manual p acked withyouredgerfora detailed description of all engine-related s ervicespecs. Wheels Lubricatethe wheelsand bearingsat least oncea seasonwith a lightoil. Also if thewheels are removedfor any reason,lubricatethe surfaceof the axle boltand the inner surfaceof the wheelwith lightoil. -
Page 12: Replacing The Drive Belt
3. Removethespindlesheavesbeltguard by removing Replacing the Drive Belt the two self-tappingscrewswhichsecure itto the iMPORTANT: T o aid in reassembly,note the orienta- bladeplateassembly. tionof the drivebelt on thetwo idler pulleysand 4. Carefullyremovethe belt fromoff of the pulleys,again the engine flywheel pulleypriorto performingthe makingsureto notethe orientationof the belt. -
Page 13: Troubleshooting Guide
Troubleshooting Guide Engine runserratic Spark plug wire loose Connect andtighten sparkplug wire. Stalefuel in gasolinetank Draingasoline& refilltank with clean,fresh gasoline. Ventin gas cap plugged Clear vent of any debris. Drainfuel tank. Refill withfreshfuel. Wateror dirt infuel system Dirty air cleaner Referto the EngineManualpackedwith yourunit. - Page 14 ,,J_i Trencher K it (optional)
-
Page 15: Parts List
746-04052 34-inchControlCable 746-04036 WheelAdjustmentCable 720-0142 Grip 732-0369 Compression Spring 749-04234 LowerHandle 710-3180 HH CapScrew5/16-18x 1.75 787-01304 Frame 781-0741A Depthindex Bracket 736-0452 BellWasher.396x 1.14x .095 781-0742 Depthindex Lever 712-04065 FlangeLock Nut3/8-16 712-04063 FlangeLockNut 5/16-18 Parts List 738-0929 ShoulderScrew 747-0976A OperatingBail 731-05063 DebrisGuard 710-1143A HH CapScrew5/8-18x 4... -
Page 16: Limited Warranty
To locate the dealer in your area, check your Yellow Pages, lasts,sothe aboveexclusions or limitations m aynot applyto you. or contact MTD LLC at RO. Box 361131,Cleveland, Ohio 44136- In no event shallrecoveryof any kindbe greaterthanthe amountof the 0019, or call 1-800-800-7310 or 1-330-220-4683 or log on to our purchasepriceof the productsold.Alterationof safety features of...


Need help?
Do you have a question about the 25B-551A700 and is the answer not in the manual?
Questions and answers