Table of Contents
Advertisement
Advertisement
Table of Contents

Related Manuals for Mitsubishi CS-40805


Summary of Contents for Mitsubishi CS-40805
- Page 2 RISK OFELECTRIC SHOCK DONOT OPEN CAUTION: TO REDUCE THE RISK OF ELECTRIC SHOCK, DO NOT REMOVE COVER (OR BACK). NO USER-SERVICEABLE PARTS INSIDE. REFER SERVICING TO QUALIFIED SERVICE PERSONNEl... The lightning flash with arrowhead symbol, within an equilateral triangle, is intended alert the user to the presence of uninsulated "dangerous...
-
Page 3: Table Of Contents
Table of Contents MITSUBISHI OWNER'S GUIDE Chapter 1: Getting to Know Your Television .......... Overview of the Control Panel ............... Ove_ew of the Remote Control ............. Getting ready to use the remote control ........... Remote control buttons and functions .......... - Page 4 Table of Contents (cont.) Chapter 3: Using the Special Features ............. Understanding the On-Screen Displays ..........Using the Off-Timer ................Setting the off-timer ................Changing or canceling the off-timer ..........Using the Advanced Picture-in-Picture (PIP) Mode,_ ......Activating the PIP image ..............Changing the picture in the PIP image ...........
- Page 5 Panel • Overview of the Remote Control *"StarSight" is a subscription service offered by S_;arSight Telecast, Inc., not a service of Mitsubishi Consumer Electronics America, Inc. Yo_ must obtain and maintain a subscription from StarSigbt _?elecast to use the StarSight features of your television.
-
Page 6: 1: Getting To Know Your Television
Overview of the Control Panel Press here to open the control panel ® power/program timer indicator This indicator lights up in green when you turn television on; it lights up in red when the timer is set and the television's power is off;... - Page 7 ® audio input terminals Use to connect the audio output from a VCR or other equipment. ® input button (INPUT) Use to select the input source you wish to watch: • Antenna • Antenna B, or • Input 1, 2, or 3. (Z) volume controls (VOLUME)
- Page 8 Overview of the Control Panel (cont.) ® adjust buttons (ADJUST) After selecting an audio or video function, use these bul:tons to adjust it. These buttons can be used to: increase or decrease the function (e.g., color), - shift from one end of a scale to the other (e.g., balance), - change a setting (e.g., stereo).
-
Page 9: Of The Remote Control
t Overview of the Remote Control Getting ready to use the remote control installing the batteries Take the box containing four AA size batterLes from the packing bag. Remove the back cover of the remote contrd by pushing the tab in the direction of the arrow and lifting off the cover. - Page 10 Getting ready to use the remote control (cont.) some do's and don'ts To ensure that your remote control will continue working properly, follow these guidelines: • Don't press two or more buttons at the same time, unless are specifically instructed to do so in this c,wner's guide.
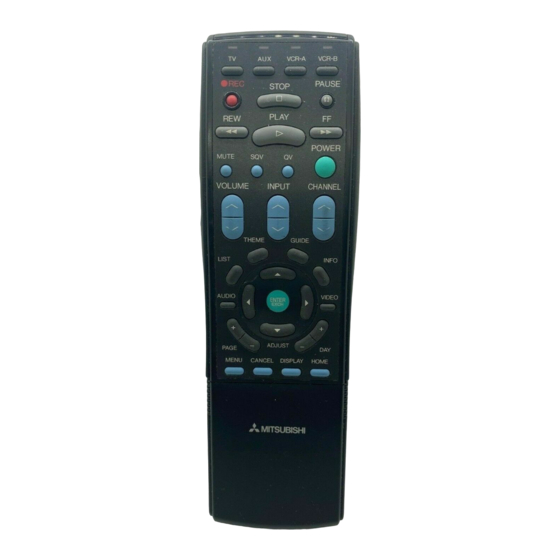
- Page 11 Remote control buttons and functions This section provides you with an overview of the remote control's buttons and the features that they control. This section does not provide detailed explanal_ions on the use of these buttons. To determine which buttons arc_ used with a particular feature,...
-
Page 12: Remote Control Buttons And Functions
VOLUME INPUT CHANNEL ® ® ® ® MENU CANCEL DISPLAY HOME CZb CZ) (Z) (D Q ® c!:S CHANNEl VCFffTV o®Q® 1:!3® ® ® INDEX SWAPj } SOURCE (:ZZZ_ (_) C_ CZ3 =,t=MITSUBISHI Chapter 1: Getting to Know Your Television... - Page 13 Use these buttons to control most (_) enter button (ENTER / EXCH) Use this button after ,_e]ecting a channel Mitsubishi VCRs, or set up the remote use them to control other brands of VCRs. number, after selecting an item from...
- Page 14 (cont,,) VCR-A VCR-B CZ_ C:_ CZ_ CZ_ • STOP PAUSE PLAY _C2b_ MUTE /" ©©© VOLUME INPUT CHANNEL 8_88 ® © MENU CANCEL DISPLAY HOME CZ_ CZ_ CZ:) CZ_ ® ® _,, MITSUBISHI Chapter 1: Getting to Know Your Television...
- Page 15 Use to control the special picture-in- For information on how 1;osubscribe picture (PIP) function. (See pages 66 - 74.) to StarSight, please see Booklet "Mitsubishi Installation and Setup • PIP button (PIP) -- Press to turn on Guide." To learn how to operate...
-
Page 16: Getting Started
• _CHAPTER Operating Your Television This chapter will explain how to operate your Le]evision, first focusing on functions that are basic and easy and then explaining some of the advanced features. Please see Booklet #3, "StarSight Operatir_g Guiding" _Important: information on using the StarSight feature. -
Page 17: Menus
€ Getting Started This section is designed to get you started enjo_4ng your new television. If you follow these procedures one by one, you will soon begin discovering everything your television can do. You'll find information • Adjusting the color purity, •... -
Page 18: Adjusting The Color Purity
Adjusting the color purity Because your Mitsubishi color television has a large-screen picture tube, the earth's magnetic field can produce discolored patches the edges of your screen. To avoid this problem, follow these instructions when you first install your telex4sion: O Turn off the TV set. - Page 19 If there is still color impurity after adjusting the switches, please contact your Mitsubishi Authorized Warranty Center. _Important: Color impurity can also be caused by unshielde_ speakers strong magnets.
- Page 20 • channel control • PIP control_ • enter button • PLAY bul_tcn • audio and video controls If you have a cable box, a non-Mitsubishi VCI_:, a Mitsubishi laserdisc player, or a Mitsubishi A2¢" receiver, you can "set up" the...
- Page 21 If your Vl ...enter'this If your VCR is thisbrand... code is this bral is this brand... code code Scot 03, 10, 11 Magnavox Mitsubishi (A) Multitech Sharp Mitsubishi (B) Canon Sony 17, [8___ Panasonic Emerson Sylvania 04, 05 03, 101_11...
- Page 22 While holding in the POWER button on tbe remote control., enter the code number listed in the chart below for your brand of cable box. Be sure to enter both digits o:_the code number. more than one number is listed, try the first one..enter this ...enterthis ...enter this...
- Page 23 While holding in the POWER button on the remote conl_rol, enter one of these code numbers: • For a Mitsubishi A/V receiver: 30 or 31 • For a Mitsubishi laserdisc player: 32 or 33 Be sure to enter both digits of the code number.
- Page 24 AN receiver: TV or AUX. Point the remote control at the A/V receiver and press the desired buttons. If you are using a Mitsubishi HTS-100, you can use the POWER, VOLUME, and MUTE buttons to operate the receiver. If you are using...
-
Page 25: Turning The Television On/Off
Turning television on/off F> Important: Before using the remote control to operate the television, press the "TV" select button at the top the remote contrd. Use the POWER button on either the control panel or the remote control to turn the television on and off. -
Page 26: Selecting The Input Source
Selecting the input source If you connected components such as VCRs, camcorders, or laserdisc players to your television, you will need to change the input source to view the signals from these components. To select an input source, press the input button (INPUT) on the... -
Page 27: Changing Channels
Changing channels Your television offers you four ways of changin G ' channels once their numbers have been programmed into channel memory: • selecting channels one-by-one with the chan:ael controls, • directly accessing a channel by pressing the number buttons, •... - Page 28 changing channels one-by-one To change charmels: ooo0 O Press one of the channel controls (CHANNEL) on the control panel or on the remote control. The television will automaticaLy tune to the, next memorize,i[ channel. You cannot change channels one-by-one unti! available channels D Important: have been programmed...
- Page 29 Changing channels (cont.) using the Quick View option Quick View allows you to memorize a particular channel and switc]] to it quickly. O Tune to the channel you wish to memorize. Press and hold the QV button for about 2 seconds. When you release tile button,...
-
Page 30: Understanding The Viewpoint
Understanding the ViewPoint III on-screen menus One of the distinctive features of this television is Mitsubishi's exclusive ViewPoint On-Screen Operating Sy,_tem. Unlike other television menus systems, ViewPoint inc]udes a special Picture-in- Picture screen to let you view the TV picture while you are using the menu. -
Page 31: Memorizing Channels
Memorizing channels You can use the menus to automatically memorize the channels your television can receive. Once channels are memorized, you can scan through them using the channel controls on the remote control and control panel. O Press the: MENU button on the MAIN MENU... - Page 32 If you select Antenna MEMORIZE CHANNELS antenna O Use the ADJUST buttons ndoor/outdeor Cable antenna choose the type of antenna connec_;ed: an indoor/outdoor What kind of antenna is connected antenna or a cable antenna. to your TV on Antenna A (Ant-A)? Press ENTER.
-
Page 33: Setting The Clock
Setting clock Your television contains an internal clock. If you can receive an XDS time signal from a broadcaster in your area, or if you subscribe to StarSight, then your TV can automatically set its clock. Otherwise, you can set the clock yourself. (If you subscribe StarSight, the "Set the Clock"... - Page 34 using autoraatic clock setting Use the ADJUST buttons SET THE CLOCK select, the time zone you live in. O Which time zone are you in? Atlantic The available time zones are: Do you follow daylight saving time? Atlantic, Eastern, Central, Current Time: Not set...
- Page 35 Setting the clock (cont.) setting the dock yourself • Use the AI)JUST buttons to set SET THE CLOCK Automatic "Automatic setting" to "Off." setting Press ENTER. Time Use these buttons on the remote: -'_--] ADJUST to turn automatic setting I-_l ENTER to set the day MENU to go back...
-
Page 36: Adding And Deleting Channels
Adding deleting channels After all available channels have been memorized with the "Memorize channels" feature, channels with weaker signals can be added or deleted with the following procedure. Important: If you subscribe to StarSight, you can only add and delete channels on Antenna A with this menu. -
Page 37: Setting The A/V Network
Setting the A/V Network The A/V Network is a special system that Mitsubishi developed make it easier to operate many products with one remote control. When the A/V Network is connected between t:wo Mitsubis:hi products, you can point the remote... - Page 38 "A/V Network" "Off," or there may be problems selecting channels on your TV. _Important: If you are using a Mitsubishi VCR with A/V Network or Active A!V Network, you should have connected it to th,_ ]NPUT-1 of your TV.
-
Page 39: Selecting The Menu Type
Selecting the menu type You can display the on-screen menus in one of two ways. The "Standard Menu," which is illustrated in this manual, provides step-by-step instructions for all features. The "Advanced Menu" lets you select each feature directly by its name and icon. - Page 40 If youselect t he Standard Menu,the screen will returnto the Customize Displaymenu. I f youselected t heAdvanced Menu,the screen will showtheAdvanced Menu(showJl below.) The Advanced Menu Select Menu Type First Time Setup - StarSight Program Guide Customize Display • StarSight SeLup •...
-
Page 41: Renaming The Inputs
Renaming the inputs This feature allows you to rename the inputs so that you can keep track of components you have connected to your TV. For example, you might name one input '_VCR," and another one "DISC." After renaming, the new name will appear on the screen display. -
Page 42: Naming The Channels
Naming the channels You can name the channels your television r_ceives, helping keep track of the many channels available. _._ter you enter a name, it will appear on-screen, next to the channel number. O Press tile MENU button on the CUSTOMIZE DISPLAY remote... -
Page 43: Locking A/V Functions
Locking A/V functions You can lock some of the audio and video ihnctions (such as "Treble" or "Contrast") to their current setting_. Once you lock a particular function, it will not be displayed on-screen until you unlock it. This will prevent others from accidently changing... -
Page 44: Adjusting The Sound
Adjusting the sound Your TV allows you to customize and adjust the settings of its audio functions. This section _ves you de_criptions of each audio function, then explains how to adjust the ihnctions. descriptions of audio functions The "Listen to" function allows you to determine how your TV will receive an audio signal and play back the _ound that you hear. - Page 45 Adjusting sound (cont.) The "Speaker" function allows you to select how the television's speakers will be used. • Choose "Internal" if you want to play the television's sound through its built-in speakers. • Choose "Internal Center Channel" if you connected your TV to a surround sound proces,';or and you want to use the q,v's...
-
Page 46: To Starsight
adjusting audio functions When ad/u,_ting the audio functions, _ou can use tile buttons on the remote control or on the control panel. 0 Press the AUDIO button repeatedly until the function you want to adjust appears on-screen. (The functions appear at the center of the bottom of the screen.) -
Page 47: Adjusting The Picture
Adjusting the picture Your TV allows you to customize and adjust the settings of its video functions. This section gives :you descriptions of each video function, then explains how to adjust the functior.s. descriptions of video functions The "Tint" function provides a scale that adjusts... - Page 48 "Color bias" function is used to help your TV reproduce colors, especially skin tones, as realistically as poss,ible. You can set this function to "Average," "Accurate," or "Skin tone." • The "Average" setting will adjust the skin tones based on the other colors on the screen.
-
Page 49: Using The Closed Caption Decoder
Using the closed caption decoder Many broadcasters now supply closed captioning :information along with their regular broadcasts. Your TV can decode that informa- tion and display it on the TV screen. There are two types of captioning that broadcasters can send: "standard"... - Page 50 adjusting the closed caption decoder When adj_asLing the closed caption QO© decoder, yon can use the buttons on the reraote control or on the control panel. To use the closed caption decoder: O Press the VIDEO button until the clo:sed caption display appears on the screen.
-
Page 51: Using The Advanced Features
€ Using the Advanced Features This section explains how to use the more advanced features your Mitsubishi television. For information on operating StarSight, please .._ee Booklet _Important: "StarSight Operating Guide." In this chapter, you will learn about. • Setting the timer, •... -
Page 52: Displays
Setting timer This special feature allows you to program tile television T_o turn on automatically at a time that you set. To set the timer: O Press the MENU button on the MAiN MENU remote control. The Main Menu will appear on the scr,een. - Page 53 Using parental lock IIPI This special feature allows you to lock the entilre TV during certain time period or to lock up to ten indivi!dual channels. (You cannot lock the TV and lock individual channels at the same time.) When you turn on the lock, you enter a 4-digit secret code t:hat will allow you to turn off the lock later.
- Page 54 locking the TV by time • Enter a four-digit secret code using the number buttons (0-9); press the ENTER button. [] O SecretbyLock USE t ime t hePARENTAL cede TV: OFF: ..LOCK After you turn the TV You can cancel the code if you OFF, you will not be able to watch the TV press...
- Page 55 Using the parental lock (cont.) locking the TV by channel LOCK USE PARENTAL Lock the TV • Enter a four-digit secrel: code by channel O Secret code : ..using the number buttons (0-9); After you turn the TV press ENTER. OFF, you will not be able to watch the TV...
- Page 56 canceling or changing parental lock O Press the MENU button. Main Menu will appear on the screen. O Select "Advanced Features" using the .._DJUST buttons; press ENTER. You will see this Select :J_e Parental Lock" USE PARENTAL LOCK screen if you locked using the ADJUST buttons;...
- Page 57 Using Super Quick View if you have,n't subscribed to StarSight Super-Quick-View allows you to cycle through a list of up to ten numbers with the SQV button. You use the menus to add channels to the list or to remove channels f_om the list.
- Page 58 O Use the ADJUST buttons SET SUPERQUICKVIEW select an antenna (Ant-.A or Ant. Channel Ant. Channel iiiii i Ant-B}. Press ENTER. You can clear the antenna [] ..[] ..pressing: CANCEL. Use these buttons on the remote: DJUST to CANCEL to cancel select an input...
- Page 59 Using Super Quick View if you've subscribed StarSight When you subscribe to StarSight, you can use the SQV button cycle through a list of channels. You can creal;e this list yourself, using the "Customize Channels" option in the menus, or you can use a "theme list"...
- Page 60 Use the AI)JUST buttons CUSTOMIZE CHANNELS select an antenna (Ant-A or Ant. Channel Ant. Channel Ant-B). Press ENTER. O Ant-A _'} ..You can clear the input [] ..[] ..pressing CANCEL. Use these buttons on the remote: DJUST CANCEL to cancel select an input...
- Page 61 Selecting an advanced functio:a I ol When you are using the PIP features, there are special functions you that can occur when you press the PAUSE button. Before using these advanced functions, you need to choose one in the menu system.
- Page 62 esett n the soun andt p e,u e This feature allows you to reset all audio and video functions their factory level or settings. to:," Certain settings will not reset, including volume, "Listen speaker, monitor out, and closed captioning. O Press the MENU button on the ADVANCED FEATURES...
-
Page 63: Chapter 3: Using
CHAPTER THREE Using the Spec-ial Features In addition to the basic and advanced features explained in the previous chapter, this television offers the user several special features not generally available on other brand televisions. This chapter will explain how to use these distinctive features. -
Page 64: Understanding
t Understanding the On-Screen Displays Your television provides an on-screen summary, of the current settings for the TV or cable channels, as well as the information related to Extended Data Services (XDS). XDS allows broadcasters to supply you with the current time, channel information (suc:h as... -
Page 65: Setting
Using the Off-Timer This special feature allows you to set the television to turn off automatically. You can set the TV to turn off after a period of time ranging from 10 to 120 minutes, in ten minute intervals. In this section you will learn: •... - Page 66 Setting off-timer _]} Press the OFF-T button on the remote control. The off-timer display will appear on the screen, shcw:mg that the timer is currently _et for 120 minutes. OOO_ _000 _000_ Select how long you want the TV Off timer 120 min. television to stay on by repeat- edly pressing...
-
Page 67: The Off-Timer
Changing or canceling off-timer O Press the OFF-T button on the TV Off timer 10 min. remote control. An on-screen display will indicate amount of time remaining until the television turns off. O Repeatedly press the OFF-T button to change remaining l;ime or to cancel the off-timer. -
Page 68: Using The Advanced Picture-In-Picture
€ Using Advanced Picture-in-Picture (PIP), Modes One of the special features of the TV is the adwnced picture-in- picture (PIP) mode, which allows you to view two different pictures at the same time. In this section you'll learn: • Activating the PIP image, •... - Page 69 Activating the PIP image O Select the number of the TV channel you want to view with the channel[ control. O Press the PIP button. O A PIP image will appear in the _=Ant-A 023 ESPN corner of the screen. Stereo &...
-
Page 70: In The Pip Image
Changing picture in the PIP image When you first activate the PIP image, as described on the previous page, you will probably see the same picture in Lhe small image as you do on the main image. This is because both images have the same "source."... - Page 71 changing the source of the PIP image These instructions explain a common way to see a different; source in the PIP image: using a VCR connected to Input-1 as a PIP source. Turn your VCR on and select a channel on the VCR that is different than the channel...
- Page 72 Exchanging picture sound of the PIP image the main image exchanging the picture Press the ENTER/EXCH button exchange the picture of the main (background.) image and the PIP image. D Important DO NOT exchange images when the main ima_:e is Antenna-B the PIP image is Antenna-A.
- Page 73 Moving image Press and hold down the _J3JUST buttons to move the PIP image. ooo0 CD c_ c:_ _ O00C= _o00n _O00U czzz_0 o E>Important: If you move the PIP image and then turn it off, it will remain in its new position when you turn it on again.
- Page 74 Freezing image Select "Use Advanced PIP" in USE ADVANCED the "Advar_:ce d Features" menu Current setting and set it to "TV Still." (See :TV Still "Selecting an advanced The picture in the PIP window will function," page 583 freeze when the PAUSE button is pressed.
- Page 75 Using Snap-shot feature q[])Select "Use Advanced PIP" in USE ADVANCED the "Advanced Features" menu Current setting and set it _o "Snap-shot." (See :Snap-shot A snapshot of the "Selecting an advanced picture in the PiP window win be recorded each time the function,"...
- Page 76 Using Replay feature O Select 'ffJse Advanced PIP" in USE ADVANCED the "Advanced Features" menu Current setting and set it 1;o"Replay." (See :Replay Three images "Selecting an advanced previous scenes will be shown on the screen after the PAUSE function," page 58.) button is pressed.
- Page 77 "pa_s" the remote control command to the other components. Additionally, if you have a Mitsubishi VCR with Active A/V Net- work, it is easier and faster VCR's play command (Auto Play). DImportant: The A/V Network...
- Page 78 This chapter offers solutions to some of the common problems you may encoun- ter. We suggest that you consult this chart before contacting Mitsubishi service representative.
- Page 79 Troubleshooting (cont.) For More Information Possible Solutions Problems See "Getting ready to use Check that the batteries The remote control doesn't the remote control" in installed correctly. work. Chapter 1 for an explanation of how t_ install batteries the rem,)te control. See "Remote control buttons Check that the select button...
- Page 80 For More Information Possible Solutions Problems See "Understanding the On- • This is part of the normal On-screen displays appear Screen Displays" in Chapter operation of the TV. each time you adjust 3 for a full explanation function. the or-screen displays.
- Page 81 Troubleshooting (cont.) For More Information Possible Solutions Problems • See "Using the Advanced You should not exchange You have problems when Picture-in-Picture (PIP) images when the main you "exchange" the picture Mode_" on page 66. of the PIP image and the image is Antenna-B and the PIP image is Antenna...
- Page 82 Cleaning Normally, light dusting with a non-scratching duster will keep your TV clean. If you want to wipe down your TV, turn it off an,ii unplug it. Then, wipe it gently with a soft cloth slightly moiste:aed with water. You can add a few drops of mild liquid detergent; to the water for oily dirt on the cabinet ONLY.
- Page 83 This distortion, however, will not harm the picture tubes. For maximum enjoyment and safe operation o Fyour Mitsubishi Color TV, please read the "IMPORTANT SAFEGUARDS" carefully and apply them properly. (Please see Booklet #1, "Mitsubishi Installation Setup Guide.")
-
Page 84: For Service
Calling for service If you are unable to correct a problem with your television, consult your Mitsubishi dealer or Mitsubishi Authorized Warranty Service Center. Do not adjust any controls not described in this owner's guide. Do not remove the protective back cover of this unit. -
Page 85: Procedure For Bypassing The
APPENDIX Procedure for Bypassing the Parental Lock Cut along dotted line and file after reading. After you set the lock, you will need the secret code in order to: • view a locked channel, • view the locked TV, or •... -
Page 86: Index
Index channel(s) A/V functions, locking ..40 adding ....... "13 hall ........A/V Network home button ......changing ......active ........ controls ......3, 9 setting ......deleting ......"33 A/V receiver, operating with lock ........information button ....remote ...... - Page 87 remote control naming the channels ... 39 text ........number buttons ....about ......... theme but Lon ....... buttons ....... time operating audio lock ........component ....20, 21 setting ....... off-timer ....... operating cable box ..18, lq timer reset button ....
-
Page 88: Warranty
All parts used for replacement are warranted for the remainder of the original warranty period d. Labor. For one year from tire date of original purchase at retail we will provide the labor for a warranty repair by an a_ thorized MITSUBISHI service center without charge. - Page 89 _= MITSUBISHI ]YIITSUBISHI CONSUMER ELECTRONICS AMERICA, INC. 6100 Atlantic Blvd. ZNorcross, GA 30071-1305 © 1995 Mitsubishi Consumer Electronics America, Inc. Printed in U.S.A 871 C908A7...
Need help?
Do you have a question about the CS-40805 and is the answer not in the manual?
Questions and answers