Table of Contents
Advertisement
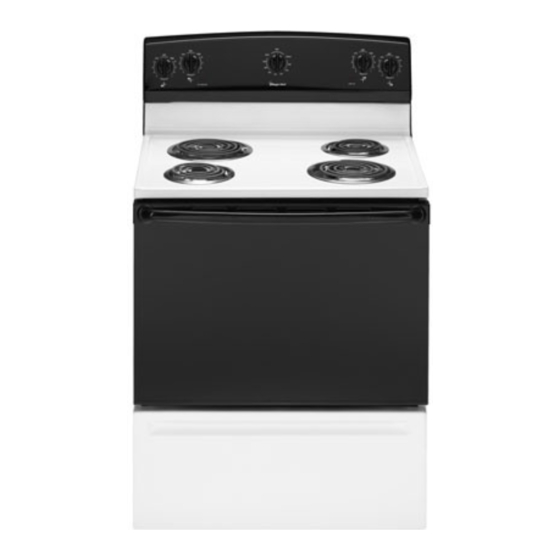
Coi| E|ectric
Range
_ontents
g .......................
4=6
U res
.......................
8=9
g ..................
10-11
Oven
Cooking
.......................
11 =18
Nianual Clean Oven Control
Clock
Baking
Timer
Broiling
Manual Clean Oven Knob Control
Baking
Broiling
Self=Clean Oven Control
Clock
Delay Bake
Timer
Keep Warm
Baking
Broiling
Cook & Hold
Oven Racks
Warranty
& Service
....................
19
Form No, A/07/06
Part No. 8113P661-60
(©2006 Maytag
Appliances
Sales Co.
All rights
reserved.
Litho U.S.A.
Advertisement
Table of Contents

Related Manuals for Magic Chef CER1115AAT


Summary of Contents for Magic Chef CER1115AAT
- Page 1 Coi| E|ectric Range _ontents Oven Cooking ....... 11 =18 Nianual Clean Oven Control g ....... Clock Baking Timer Broiling Manual Clean Oven Knob Control U res Baking Broiling Self=Clean Oven Control Clock Delay Bake Timer Keep Warm Baking Broiling ....... Cook &...
-
Page 2: To Prevent Fire Or Smoke Damage
To ensure proper and safe operation: Appliance must be properly installed and grounded by a qualified technician. Do not attempt to adjust, repair, service, or replace any part of your appliance unless it is specifically recommended in this guide. All other servicing should be referred to a qualified servicer. -
Page 3: Child Safety
Cooking Safety Child Safety Never heat an unopened food container in the oven. Pressure build-up may cause container to burst resulting in serious personal injury or damage to the appliance. Use dry, sturdy potholders. Damp potholdels may cause burns from steam. Dish towels or other substitutes should never be used as potholdels because they can trail across hot elements and ignite or get caught on appliance parts. -
Page 4: Important Safety Notice And Warning
Cleaning Safety Turn pan handle toward center of cooktop, not out into the room or over another surface element. This reduces the risk Clean cooktop with caution. Turn off all controls and wait for of burns, ignition of flammable materials, or spillage if pan is appliance parts to cool before touching or cleaning. - Page 5 ¢leanln 6. Wipe up sugary and acidic spillovers such as sweet Self-Clean Oven (:select models:) potatoes, tomato, or milk-based sauces. Porcelain enamel is acid-resistant, not acid-proof. The porcelain finish may Important: For manual clean oven, see page 6. discolor if acidic spills are not wiped up before a self-clean cycle.
-
Page 6: Cleaning Procedures
Sounds 3. Press the CLEAN pad. CLEAN • "CLEAN" will flash. As the oven heats, you may hear sounds of metal parts expanding and contracting. This is normal and will not 4. Press the A or V pad. damage the oven. •... - Page 7 Broiler Pan and Insert Manual Clean: • Clean frequently using mild abrasive cleaners and a Never cover insert with aluminum foil as this prevents the plastic pad. fat from draining to the pan below. • Do not use metallic scouring pads because they will scratch •...
-
Page 8: Oven Light
Oven Door Oven Light To Replace Oven Light Bulb: 1. When oven is cool, hold bulb cover in place, then slide wire retainer off cover. To remove: Important: Bulb cover will fall if not held in place while removing wire retainer. 1. -
Page 9: Storage Drawer
Storage Drawer To replace: 1. Fit the ends of the drawer glides into tile rails in tile range. 2. Lift up the front of the drawer and gently push in to the first stop position. 3. Lift drawer up again and push until drawer isclosed. Convenience Outlet The storage drawer can be removed to allow you to clean under... - Page 10 Oven did not clean properly (select models). Fault Codes (select models] • Longer cleaning time may be needed. • BAKE or LOCK may flash rapidly in the display to alert you if there is an error or a problem. If BAKE or LOCK appear in •...
-
Page 11: Surface Controls
¢ookln Surface Controls Medium (5=7): Use to maintain slow boil for large amounts of liquids and for most frying operations. Use to turn on the surface elements. An infinite choice of Meal. High (8=9): Use to brown meat, heat oil for deep fat heat settings is available from Low to High. - Page 12 Coil Elements Drip Bowls • When an element is on, it will cycle on and off to maintain The drip bowls under each surface element catch boilovers the heat setting. and must always be used. Absence of drip bowls during cooking may damage wiring.
- Page 13 3. Press the ,I, pad to select Hi (high) broil or the Baking, Roasting and Broiling V pad to set Lo (low) broil. Setting the Controls For Baking or Roasting: ° Select Hi breff for normal broiling. 1. Press BAKE pad. •...
- Page 14 Self-Clean Oven Control When electrical power is supplied or after a power interruption, the last clock time before power was (select models]) interrupted will flash. To recall the time of day when another time function is BROIL Use for broiling and top browning. showing, press the CLOCK pad.
-
Page 15: Locking The Controls
Locking the Controls 5. Place food in center of oven, allowing a minimum of two inches between utensil and oven walls. The touchpad controls can be locked for safety, cleaning, or 6. Check cooking progress. Cook longer if needed. to prevent unwanted use. They will not function when locked. 7. - Page 16 To set a Delay when Cook & Hold has already been programmed: 1. Press the DELAY pad. DEWY • "DELAY" flashes. After one hour in HOLD WARM: • 00:00 appears in the display..• "End" will display. 2. Press the A or V pad to set the delay time. •...
- Page 17 • Select ttl broil (550 ° F] for normal broiling. Select Notes: LO broil (450° F'Jfor low-temperature broiling of longer cooking foods such as poultry. • For optimal food quality, oven cooked foods should be kept 3. After four seconds, the oven will start. warm for no longer than 1 to 2 hours.
-
Page 18: Automatic Shut-Off/Sabbath Mode
Automatic Shut-Off/Sabbath Adjusting the Oven Temperature Mode Oven temperatures are carefully tested for accuracy at the factory. It is normal to notice some baking or browning The oven will automatically turn off after 12 hours if you differences between a new oven and an old one. As ranges accidentally leave it on. -
Page 19: Rack Positions
Oven Vent To replace: 1. Place rack on the rack support in the oven When the oven is in use, the area near the vent may become hot enough to cause burns. Never block the vent opening. 2. Tilt the front end up slightly• Slide rack back until it clears the lock-stop position•... -
Page 20: Warranty
Warranty What is Not Covered By These Warranties 1. Conditions and damages resulting from any of the following: a. Improper installation,delivery, or maintenance. b. Any repair, modification, alteration, or adjustment not authorized by the manufacturer or an authorized servicer. c. Misuse, abuse, accidents, or unreasonable use, or acts of God. d.
Need help?
Do you have a question about the CER1115AAT and is the answer not in the manual?
Questions and answers