
Related Manuals for Nikon One touch zoom


Summary of Contents for Nikon One touch zoom
-
Page 1: Contents
Nikon » * * m » m * 1 « ® « • # # # m • r* • a # * * * « <•« » # * # # * • * * * « • • * Qne«To... -
Page 2: Product View
$938 ®- -®... -
Page 4: Table Of Contents
Nous tenons avant tout a vous remercier pour avoir porti votre Red-eye reduction mode choix sur le Nikon OneTouch Zoom/OneTouch Zoom QD. Pour A d v a n c e d p h o t o g r a p h y... - Page 5 Table des matieres [FrangaisJ Contenido s p a n o l _ Partes de la camara Descriptif Precauciones Precautions a prendre Instalacidn de las pilas Installation de la pile Comprobacion del estado de las pilas Verification de letat de la pile Introduction de la pelicula Chargement du film Fotografia basica...
-
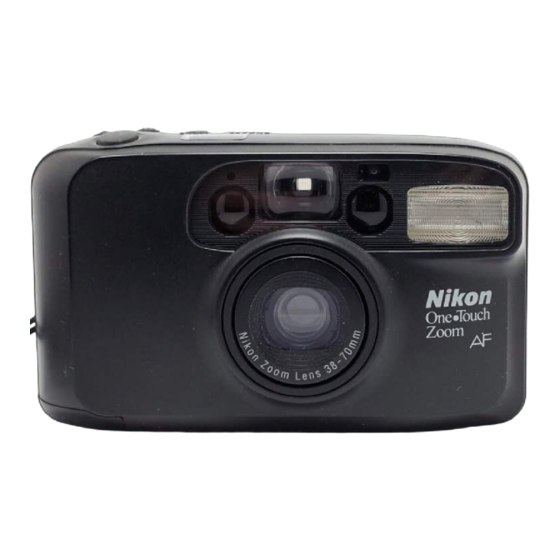
Page 6: Camera Parts
Camera parts Mode control button W-zoom button T-zoom button Shutter release button LCD panel Exposure sensor Neckstrap slot Mid-roll rewind button Power switch Viewfinder window Sell-timer indicator/red-eye reduction lamp Flash Autofocus windows Zoom lens Flash mode indicator Red-eye reduction indicator Sell-timer indicator Insufficient battery power indicator Frame counter... -
Page 7: Partes De La Camara
[Fr| Descriptif Partes de la camara Boton de control de modo Touche de commande de mode Boton de zoom W Poussoir zoom W (cadrage large) Poussoir zoom T (cadrage serrej Botdn de zoom T Declencheur Boton para liberar el obturador Ecran d'affictiage a cristaux liguides Pantalla LCD Capteur du posemetre... -
Page 8: Precautions
In the event of camera failure, do not attempt to repair the camera yourself. Try replacing the battery first. If that does not work, take the camera to an authorized Nikon dealer or service center. Please make sure that you are familiar with the operation and features of your new camera before using it for special occasions (holidays, weddings, etc.). -
Page 9: Precauciones
Reemplace primeramente las pilas. Si aun asi no remplacez la pile. Si cela n'opere pas, rapportez votre funcionara, lleve la camara a un distribuidor Nikon autorizado, appareil chez un concessionnaire ou chez un reparateur o a un centra de servicio tecnico. -
Page 10: Installing The Battery
Installing the battery • Open the battery chamber lid by pushing it in the direction of the arrow. • Insert the 3V lithium battery provided (CR-123A) by matching the +/- symbols as indicated in the battery chamber. • Close the lid securely. -
Page 11: Instalacidn De Las Pilas
Instalacion de las pilas Installation de la pile <~ • Abra la cubierta del compartimento de pilas empujandola en • Ouvrir le couvercle du compartiment de la pile en le faisant el sentido de la flecha. glisser dans le sens indique" par la fleche. •... -
Page 12: Checking Battery Power
Checking battery power After pressing the power switch, check the display in the LCD panel. Replace the battery when the insufficient battery power indicator starts to blink. • Do not attempt to recharge, short, disassemble, or heat the battery. • Do not dispose of the battery by throwing it into an open fire. Notes: The insufficient battery power indicator may blink under the following condition. -
Page 13: Comprobacion Del Estado De Las Pilas
Comprobacion de la tension de la pila Verification de I'etat de la pile Apres avoir sollicite le commutateur de mise sous tension, Despues de pulsar el conmutador de tension, verifique la verifier ce qu'indique I'affichage a cristaux liquides. Remplacer pantalla de visualizacion LCD. Reemplace la pila cuando el indicador de pila agotada este en modo intermitente. -
Page 14: Loading Film
Loading film Use DX-coded 35mm film (IS0100,200,400 or 1000). The film speed is set automatically. With non DX-coded film, film speed is set at ISO 100. 1 Open the camera back in the direction of the arrow. 2 Insert the film cartridge in the direction shown in the figure, putting the bottom part in first. -
Page 15: Introduction De La Pelicula
Introduccidn de la pelicula Chargement du film Utiliser un film 35 mm code DX (ISO 100, 200, 400 ou Utilice una pelicula de 35 mm. con codigo DX (ISO 100,200, 1000). La sensibilite du film se regie automatiquement. 400 o 1000). La sensibilidad de la pelicula se ajusta de manera Si vous chargez un film non code DX, sa sensibilite sera automatica. -
Page 16: Basic Photography
Basic photography Make sure that the power switch is ON, and then take a picture by pressing the shutter release button with the camera set in auto flash mode. If there is insufficient light, the flash will operate automatically. For more details about the various photographic modes, please refer to the "Advanced photography"... -
Page 17: Fotografia Basica
> r j Fotografia basica Principes de base de prise de vue Bien s'assurer que le commutateur de mise sous tension se Asegurese de que el conmutador se encuentra en posicion ON, trouve sur ON, et prendre une photo en pressant sur le y realice una toma pulsando e! boton del obturador con la declencheur, I'appareil fitant en mode flash auto, en cas de camara ajustada en modo flash automatico. -
Page 18: Viewfinder
Viewfinder 1. Picture frame 2. Parallax compensation marks for close-up shooting: distance of approx. 0.8 to 11 m (approx. 2.6 to 3.6 ft) 3. Autofocus frame marks Look through the eyepiece and compose your picture so that the autofocus frame marks cover your main subject. The camera will automatically focus on whatever subject this frame covers. -
Page 19: Visor
Visor Viseur 1. Toma 1 Cadre de la photo 2 Reperes de la correction de la parallaxe pour les plans 2. Marcas de compensation de paralaje para tomas en primer piano: distancia de aproximacion 0,8 a 1,1 m. rapproches: distance d'environ 0,8 a 1.1 m. 3. -
Page 20: Zooming
Zooming When the T-zoom button is pressed, the lens zooms to the telephoto position. Zooming to the wide-angle position is done by pressing the W-zoom button. Press the zoom button until the desired composition is achieved, then release the shutter button. -
Page 21: Zooming
Zoom Z o o m i n g Lorsque le poussoir du zoom T est sollicite, I'objectif se Cuando se pulsa el boton de T-Zoom, la lente zoom se encuentra positionne en cadrage serre (teleobjectif). Le poussoir W en posicion de teleobjetivo. Para realizar una toma con la lente (grand angle) permet le cadrage large. -
Page 22: Mode Selection
Mode selection 1. Auto flash AUTO 2. Auto flash with red-eye reduction 3. Auto flash with self-timer/red-eye reduction 4. Flash cancellation 5. Anytime flash AUTO When the camera is first switched ON, it is set in the default auto flash mode. To select another mode, press the mode control button. -
Page 23: Selection De Modo
Seleccion de modo Choix du mode flash 1. Flash automStico 1 Flash automatique 2. Flash automatico con reduccion de ojos rojos 2 Flash automatique avec attenuation des yeux rouges 3 Flash automatique avec retardateur/attenuation des 3. Flash automatico con temporizador/reduccion de ojos rojos yeux rouges 4. -
Page 24: Red-Eye Reduction Mode
Red-eye reduction mode Try this mode to minimize the red-eye effect in your pictures. Simply press the mode control button until the red-eye reduction indicator appears. To cancel this mode, press the mode control button again. The red-eye effect can occur when using flash for low-light photography. -
Page 25: Modo De Reduccidn De Ojos Rojos
Mode attenuation des yeux rouges Modo de reduccion de ojos rojos Essayer ce mode afin d'attenuer I'effet des yeux rouges qui est Con este modo, trate de minimizar el efecto de ojos rojos en sus susceptible de gacher vos images. Pour ce (aire, il suffit de fotografias. -
Page 26: A D V A N C E D P H O T O G R A P H Y
Advanced photography Auto flash mode This is used for taking pictures under normal conditions. In low light the flash operates automatically. • Check that the "AUTO" indicator appears in the LCD panel. • Press the shutter release button halfway. When the indicator LED (red) lights up, fully press the shutter release button to take the picture. -
Page 27: Fotografia Avanzada
Fotografia avanzada Pour les photographies confirmes ITI] Mode flash automatique Modo de flash automalico Ce mode est tout indique pour la prise de vues dans des Este modo se utiliza para realizar fotografias bajo condiciones conditions normales. Par faible luminosite, le flash se normales. -
Page 28: Anytime Flash Mode
Anytime flash mode When shooting a subject in the shade or against a bright window, anytime flash is recommended. Also, when shooting a subject at dawn/dusk, or against an evening background, use the flash to brighten the picture. • Select anytime flash mode by pressing the mode control button. -
Page 29: Modo Flash Continuo
Mode flash impose en toute Modo flash de apoyo circonstance Cuando realiza la fotografia de un sujeto situado en la sombra, En prenant un sujet en photo dans I'ombre ou contre une o contra un fondo claro, se recomienda utilizar el modo flash de fenetre bien eclairee, il est recommande d'operer en mode flash apoyo. -
Page 30: Self-Timer Operation
§nj Self-timer operation Select the self-timer mode by pressing the mode control button. Press the shutter release button. • If the flash is not fully charged, the self-timer will not function. • When the indicator LED (red) lights up, press the shutter release burton again. -
Page 31: Funcionamiento Del Obturador Automata)
Funcionamiento del obturador automatico Fonctionnement du retardateur Pour selectionner le mode retardateur, presser la touche de Seleccione el modo de obturador automatico pulsando el boton commande de mode. de selection de modo. Pulse el obturador. Presser le declencheur de I'oblurateur. •... -
Page 32: Focus Lock
Focus lock When your subject is not in the center of the viewfinder, use focus lock. 1 Place the main subject within the autofocus frame marks, and press the shutter release button halfway. 2 While keeping your finger on the half-depressed shutter release button, move the camera to recompose the picture, and fully press the shutter release button. -
Page 33: Bloqueo Del Enfoque
Memorisation de la mise au point Bloqueo del enfoque Lorsque votre sujet ne se trouve pas au centre du viseur, Cuando el sujeto a fotografiar no se encuentre en el centra del servez vous de la memorisation de la mise au point. visor, utilice la funcion de bloqueo del enfoque. -
Page 34: Removing Film
Removing film The film automatically rewinds after the last picture has been taken. When the film has rewound completely, the motor stops, the power is turned OFF, and the LCD panel indication shuts itself off. Open the camera back and remove the film. To rewind the film before you reach the end of the film roll, press the mid-roll rewind button gently with the tip of a pointed object. -
Page 35: Retirar La Pelicula
Retirar la pelicula Comment enlever le film? Le film se rembobine automatiquement apres la derniere prise La pelicula se rebobina automaticamente una vez que se ha realizado la ultima toma. Cuando la pelicula esta completamente de vue. Apres le rebobinage du film, le moteur s'arrete, I'alimentation electrique est couple, et les indications de rebobinada, se detiene el motor, se desconecta la tension (OFF), I'affichage a cristaux liquides disparaissent. -
Page 36: Troubleshooting
Troubleshooting Problem Solution Subject out of focus If the subject is not in the center of the viewfinder, use focus lock. See "Focus lock". The subject must be 0.8m or more away from the camera. Flash pictures are too dark. Make certain your fingers are not obstructing the flash. -
Page 37: Guia De Problemas
Guia de problemas Depannage Probleme Solution Problema Solucion Sujeto fuera de foco Si el sujeto a fotografiar no Miseau point Si le sujet ne figure pas au centre estuviera en el centra del visor, incorrecte du viseur, memoriser la mise au utilice la funcion de bloqueo del point. -
Page 38: Specifications
Specifications 35mm lens shutter camera with built-in flash, zoom lens, and auto-focus Type: Film format: 24mm x 36mm, 135 film magazine Lens: 38—70mm zoom lens, F4.7—F8 (6 elements in 6 groups) Automatic (with focus lock) Focusing: Focusing range 0.8m (2.6 ft)-infinity Shutter: Programmed electronic control Auto exposure range (IS0100):... -
Page 39: Especificaciones
Especificaciones Tipo: Carrara con lente obturador de 35 mm. con flash incorporado, lente zoom y enfoque automatico. Formato de pelicula: 24 mm. x 36 mm., cartucho de 135 mm. Lente: Lente zoom 38 - 70 mm., f4.7 - f8 {6 elementos en 6 grupos) Enfoque: Automatico (con bloqueo de enfoque) Alcance de enfoque:... -
Page 40: Caracteristiques Techniques
Caracteristiques techniques Appareil compact pour film 35mm avec flash incorpore, lentille de zoom, et mise au point automatique Type: Format du film: 24mm x 36mm, sur film cartouche 135 Objectif zoom 38-70mm, F4.7-F8 (6 lentilles en 6 groupes) Objectif: Automatique (avec memorisation) Mise au point: 0,8m-infini Plage de mise au point:... - Page 41 Notes...
- Page 42 Notes...
- Page 43 Notes...
- Page 44 Toute reproduction, en tout ou partie, de ce manuel est, sauf pour de breves citations dans des bancs d'essai ou des articles de presse, interdite sans I'autorisation ecrite de NIKON CORPORATION. NIKON CORPORATION FUJI BLDG., 2-3, MARUNOUCHI 3-CHOME, CHIYODA-KU, TOKYO 100, JAPAN PHONE: 81-3-3214-5311 TELEX: NIKON J22601 FAX: 81-3-3201-5856...
Need help?
Do you have a question about the One touch zoom and is the answer not in the manual?
Questions and answers