Table of Contents
Advertisement
Available languages
Available languages
Quick Links
Kenmore
0 WNER'S
MANUAL
MODEL
NO.
9tl.
30168_
_0
91t.
30169
_qO
CAUTION:
Read and Follow All Safety
Rules and Operating
hTstructions Before First
Use of This Product
911o 30169
L
• Safety Instructions
o Features
° Operation
° Care and Cleaning
• Problem Solving
° Easy Adjustment
° Consumer
Service
Sears_
Roebuck
and Co., Hoffrnan
Es,a_es,
IL 60179
U.S.A.
229c4020P066 ( SRIO2gl)
Advertisement
Table of Contents

Related Manuals for Kenmore 911.30169690


Summary of Contents for Kenmore 911.30169690
- Page 1 Kenmore 0 WNER'S MANUAL MODEL 9tl. 30168_ 91t. 30169 911o 30169 • Safety Instructions o Features CAUTION: ° Operation Read and Follow All Safety ° Care and Cleaning Rules and Operating hTstructions Before First • Problem Solving Use of This Product °...
-
Page 2: Table Of Contents
Oven Temperature Adjustment ..........12,21 Oven Burner Ignitiion ....Range Safety ......Power Failure ....... Baking ........How To Set Bake ......13 How To Set Time Bake ....13 Features of Your Range ..How To Set Delay Bake ..... Removal of Packing Tape .... - Page 3 &4FETY To insure safety for yourseff, family and home, please read ,your Owner's Manual carefully Keep it handy for reference Pay close attention to the Safety sections BE SURE_ your oven is installed and grounded injury, ordeath. by a qualified technician tlMPORTANT SAFETY...
- Page 4 SAFETY continued TEACH CHILDREN NEVER HEAT unopened food containers Pressure buildup can cause the container Not to play with controls or any part of the burst and cause injury. appliance. NEVER &EA VE jars or cans of fat or • Not to sit, climb or stand on the oven door drippings in or near your appliance.
-
Page 5: Features Of Your Range
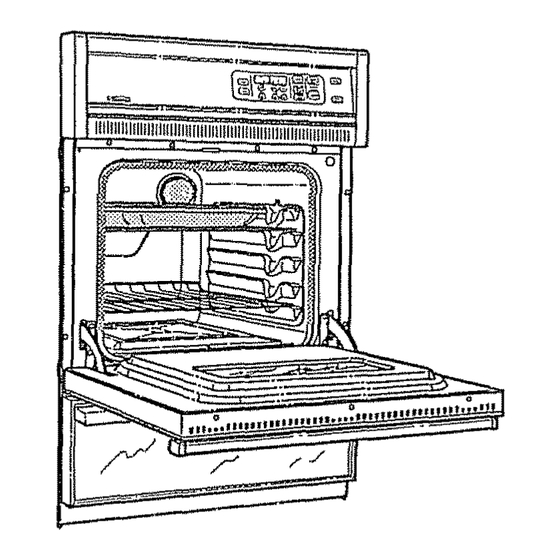
FEATURES OF YOUR 24" GASBUILF/N WALLOVEN IIlllllllllllllllIlllllllllllllIlllllll To remove the adhesive left from packaging tape, use household dishwashing liquid, mineral oil or cooking oil, With a soft cloth, rub into the area and aflow to soak, Rinse and dry well Repeat procedure'using an appliance... -
Page 6: Oven Control
YourNew OvenControl, Clock and Kitchen Timer J ,ll TIMED OVEN KITCHEH Q QQ TIMER TEMP HOUR Q GQ Your new touch pad control will allow you to set oven functions with ease Below are the different types of functions and a description of each BAKE Cook foods in the traditional... - Page 7 OVEN CONTROL, CLOCK andKITCHEN continued CONTROL DISPLAY OVENTEMPERATURE INDICATOR TOLETYOUKNOW INDICATOR THE OVEN HASTURNED ON _e_# _--_. Zo _.:--Z -T- CLOCK, KITCHEN TIMER,DELAY TO A LERT TO S K A"-i TL! L! L! 1_1 TL! L! L! L!! START "ME, OVENCOOKINa, TEMPERATURE OR A TIME ,1 DELAY B AKE CLEAN _ START CLOCK CLEAM i...
- Page 8 CONTROL, C LOCK and K/TCHEIV TIMER ATTENTION TONE This tone will sound if you make an error or an oversight is made while setting an oven Your new control has a series of tones that will function, sound at different times, These tones may Examples...
-
Page 9: Power Failure
, CLOCK and KITCHENTIMER The Kitchen Timer is used to time cooking The clock must be set for the correct time of processes or other household activities. day before a delayed oven function can work does not control the oven, It can be set for up properly. -
Page 10: Oven Coomng Tips
OVEN COOKING TIPS It is normal to have some odor when using your Let the oven preheat thoroughly when recipes oven for the first time, This is caused by the call for preheating Preheating is bringing heating of new parts and insulation_ temperature up to the temperature you will be... - Page 11 OVENCOOKIN6TiPS As the oven heats, the change in temperature During any oven operation you may hear a fan inside the oven causes water droplets to form noise This is the intemal cooling fan that on the oven door glass To prevent this, open keeps all electrical parts from overheating.
-
Page 12: Power Failure
continued The oven racks You may feel that your oven cooks are designed with differently than the oven it replaced. stop locks, a recommend that.you use .your new oven a few convenience nz_cK weeks to become more familiar with well as a safety GUIDE""... -
Page 13: Baking
BAKING t, Press the BAKE pad. specific time and turn off automatical!yo To set the oven to delay the start, cook for a 1. Press the BAKE 2, Press the Temp UP and DO WN arrow pads to set TEMP the oven temperature prefer to use 2, Press the Temp... -
Page 14: Broiling
BROILING The US. Department of Agriculture notes that meat cooked rare is popular, but meat cooked to only 140° F (rare) means that some Broiling is cooking by direct poisoning organisms may survive. heat from the broil burner Moving meats away from the burner wilt allow The oven door should remain the meat to cook to the center while browning closed during broiling. -
Page 15: Features
SPECIAL 81: YOUR COHTROL Your new touch pad controt has additional features thatyou may choose to use.. After making your selection, if you want to change the setting, follow the steps until the display shows your choice Your control is set to use the 12 hour clock_ If The control is automatically set to turn off the .you prefer... - Page 16 SETTbYG SPECN L URES Your new control has a temperature hold This special Feature will allow .you to change feature that will keep hot cooked foods warm the speed, #i means speed of change is slow up to 3 hours after the cooking operation up to #5 which means speed of change is fast.
-
Page 17: Glass
C[EANIHG CLEANING MATEROALS TO USE: CLEANING MATERIALS TO USE: Glass cleaner o Dishwashing detergent . Warm water ,' Paper towels . Soft cloth e Baking soda TO CLEAN: Do not use abrasive clearaers_ industrfal cleaners_ or bleach. For everyday cleaning, use glass cleaner and a paper towel For stubborn... -
Page 18: Oven Bottom
TG F_EPL_CE: 1 Slip the oven bottom into the oven so the tabs in the rear of the oven bottom fit into the slots in the oven back, Lower the front of the oven bottom into BULB SOCKET place, Slide the tab at the front of the oven bottom into place REPLACE THE LIGHT... - Page 19 CALLING F ORSERVICE To save you time and money, before making a service call, check the list below for any problem you may feel you have with the performance of your range. If the problem is something you cannot repair, use the Consumer Service Numbers located at the back of this manual.
-
Page 20: Oven Door
continued POSSIBLE SOLUTION PROBLEM POSSIBLE CAUSE ..,,,,;......Check broil pan placement, Foods do not a. Improper rack broil properly. position. broiling section b. Oven preheated, Do not preheat when broiling, Use broiler pan and grid supplied with c. Improper utensil used. - Page 21 "DOiT TEMPERATURE ADJUSTMENT You may feel that your oven cooks differently than the oven it replaced, recommend that you use .your new oven a few weeks to become more familiar with Press and hold down both following the times given in your recipes as a the BAKE andBROll.pads guide,...
- Page 22 Fortherepairorreplacement parts youneed © delivered directly to yourhome Call7 am - 7 pro, 7 daysa week 1 .S00o366°PART (1°800°386-7278) Forin-home major brand repairservice Call24 hoursa day,7 daysa week t °8OO-4-R (1-800-473=7247) Forthelocation of a SearspartsandRepairCenter inyourarea Call24 hours a day, 7 daysa week BBBBBB 1 o800o488ol Forinformation o npurchasing a Sears...
- Page 23 "We Service What We Sell" is our assurance to you that you can depend on Sears for service because Sears service Is nationwide, Your Kenmore Oven has added value when you consider that Sears has a service unit near you staffed by Sears trained technicians.., professional technicians specifically trained on Sears appliances, having the parts, tools and equipment to ensure that we meet our pledge to you -- "We Service What We Sell!"...
- Page 24 Kenmore MANUAL DEL CONSUMIDOR MODELO NO. 911. 30168 {_q_ 911. 30169 _ q-_ 911. 30169 oInstrucciones de Seguridad PR_CAUCHON: o Caracteristicas Lea y siga todas tas reglas oFuncionamiento y las instrucciones para el funcionamiento antes ° Cuidado y Limpieza de usar este producto °...
- Page 25 24"BE INDICE C6mo asar a la parrilBa ..... Reglas generates ......Cdmo preparar tas cames para asar a la parrilla ......... Seguridad en e! uso de la estufa,. Posicidn de fas patrillas ....Dispositivo contra volcaduras ... 4 C6mo asar a la parrifta ....C6r_e seBeccHe_ar pregran_as...
- Page 26 P_R_ OAR_N_'_Z_R su seguridad, la de su familia y fa de su hogar, por favor lea su Manual del iiADV£RTENCIA!!!S/lamformaci6neneste Consumidor cuidadosamente, Mant_ngafo a la _! _ _ manual no se sigue exactamento, podda :ii! mano para referencias Ponga mucha atencidn !_ _ result_r un incendio, una explosion, o un i! fas secciones...
- Page 27 ENSE_E A LOS N_OS _unca oMien_e contenedores de alimentos cerrados El aumento de la presidn podrfa causar o Nojugarcon los controles o cualquierparte que el contenedor explore y cause heridas. la estufao Hunca ¢Be]efrascos o latas de grasa o goteaduras •...
- Page 28 IIIIIIIUlIIIIIIIIIIIII Para sacar el residuo det adhesivo de la cinta de empaque, use detergente Ifquido para platos, aceite mineral o aceite para cocinar Con un paf_o suave fr6telos sobre el _rea,y permita que se remoje Enjuague y seque bien Esto se deberia hacer antes...
- Page 29 KITCHEN @ @@ T_MER TEMP HOUR ® ®® Su nuevo controf a botones le permitir_ programar las funciones del homo con facitidad, M4s abajo est#n los diferentes tipos de funciones y una descripci6n de cada uno. NORNEAR Y ASAR. Cocina los alimentos en el Los botones UP y DOWN ponen la hora def dfa, tiempo de coccidn, , homo tradicional a una temperatura entre 170_Fy...
- Page 30 PANEL DE CONTROL INDICADOR Q UELE INDICADDR DE AVISA QUEELHOR#O 7EMPERATURA SEHAENCENDIDO UBICACION P ARA LAHORA DELDIA ENELRELOJ, C RONOMETRO DELA COCINA, HORA DECOMIENZO DEMORADO, COCCION E NELHORNO AVISAQUEPROGRAMEUNA 0 TIEMPO DELIMPIEZA_ TEMPERATURA 0 UN TIEMPO INDICADORDE FUNCIONES INDICADOR DEFUNCION AUTOMAT/CAS DELHORNO El panel es una referencia...
- Page 31 Y CRONOMETRO D ELA COCIHA COHTROL D £L HORHO, R ELOJ TONO DE ATENCION Este tono sonar_ si hace un error u omite algo mientras programa una funcidn del homo, El nuevo control tiene una serie de tonos que Unos ejemplos serfan: sonar_n a tiempos diferentes.
- Page 32 CONTROL D £LHORNO, R ELOJY CRONOMETRO D £ LA COCINA Et crondmetro de la cocina se usa para medir el El reloj debe ponerse a la correcta hora del dfa tiempo de los procesos para cocinar u otras antes que una funcide demorada del horno funcione actividades del hogar.
- Page 33 FAP COCINAR ENELHORNO Permita que el homo se precaliente bien cuando Es normal sentir un poco de olor cuando use su recetas requieren precalentamiento, homo por primera Esto es causado por el precalentamiento es subir fa temperatura a la calentamiento de las partes nue vas y del aistante temperatura que va a usar cuandohomee,...
- Page 34 COCIN dR contJnuacidn A medida que el homo se calienta, el cambio Durante cualquier operacidn del horno usted podrfa temperatura dentro del homo causa que gotas de ofr un ruido de ventilador. Esto es el ventilador agua se formen sobre et vidrio de la puerta intemo para enfriar y prevenir que todas las partes...
- Page 35 CO#SEJO$ COCg#AR E # EL (continuacidn) Las parrillas del homo est_n Usted podrfa pensar que su homo nuevo cocina diser_adas con topes, una diferentemente at homo reemplazd, convenienciaytambi_nuna Topt_ t_J recomendamos que use su homo nuevo por varias precaucidn de seguridad GU_AS --- PAPA LAS_.
- Page 36 COMOHORNEAR Para programar que el homo empiece en forma Empuje el botdn BAKE. demorada, cocine por un tiempo especffico y se apague autom_ticamente, Empuje los botones con las flecha UP y DOWN, para Empuje el Botdn BAKE, programar la temperatura TEMP det homo que desea usar Empuje...
- Page 37 COMO ASARA El Departamento de Agricultura de los Estados Unidos nota que las carries cocinadas crudas son populares, pero que ta came que se cocina Asar es cocinar al calor directo del hasta sr_lo 140_F, (cruda) significa que algunos organismos venenosos podrfan sobrevivir.
- Page 38 El nuevo control a botones tiene programas adicionales que usted puede seleccionaL Su control est8 programado para usar el retoj en 12 horas Si usted prefiere usar Hora Mifitar de 24 El control se programa autom_ticamente para horas o poner el dial en blanco, se hace asZ apagarse despu_s de hornear por t2 horas o despues de asar a la parrilta por 3 horas en caso...
- Page 39 El nuevo control tiene un programa de mantencidn de temperatura para cocinar autom_ticamente Este Programa Especial le permitirb cambiar sofamente que mantendr_ la comida que ha sido velocidad # 1 significa que el cambio de velocidad cocinada tibia hasta 3 horas despu_s que el cocinado...
- Page 40 MATERIALES DE LNMPIEZA USAR: QUB _A TERIIALES DE LBMPIIEZA USAR: o Limpiador para vidrio • Detergente Ifquido para platos, • Toaltas de papet • Agua tibia, ° Soda para hornear o Patio suave PAFtA LIMPIAR: iimpiadores abrasivos, nBmpHadores Hndustriales, o bSanquedores Para fimpieza diaria, use un limpiador para vidrios (ctoroJ.
- Page 41 COMO REEMPLAEAR: Deslice el fondo del homo en el homo manera que las aletillas en la parte posterior del fondo cafcen en tas ranuras en la parte de atrbs del homo SOQUETE FOCO Baje el frente del fondo del homo a su Iugar Desfice la manilta...
- Page 42 Paraahorrartiempoy dinero,antesde Ilamarparaunservicio,revisela tistadem_sabajoparacualquier problemaqueustedcrea quetieneconel funcionamiento de su estufa Siefproblemaes algo queusted no puede reparar,uselos Ndmerosde Serviciopara el Consumidor que se encuentran at finalde este manual, Cuando haga un llamado, tenga disponible el n_mero de rnodelo, Iista de parses para reparacienes, manual...
- Page 43 continuacidn POSIBLE SOL UCiON PROBLEMA POSIBLE CA USA LOS alin_entos ao Posici6n incorrecta de la a, Revise la posicidn de las cacerolas; se asaN vea la seccidn para asar a la parrilla. parrilla adecuadamente Noprecaliente cuando ase a la parrillao El homo se precalent6 la parrilla.
- Page 44 AJUSTES DE TEMPERATURA = "HAGALOS U STEB MISMO" Usted podrfa pensar que su nuevo homo cocina diferentemente al homo que reemplaz6. Recomendamos que use su homo nuevo unas pocas semanas para que se familiarice con _t, siguiendo los tiempos que se dan en las recetas Empuje y sujete los botones...
- Page 45 Parapartes dereparaciones o de reemplazo quenecesita Llamede7 am- 7 pm,7 dfasa lasemana t °800o366oPA (1-800-366-7278) Para reparaciones y serviciode rnarcas mayoresensu casa Llame24 horasal dia, 7 dfasa la semana 1.800-4-R Paraubicarun Centrode Servicio de Reparaciones ensu _rea Llame24 horasal dia, 7 diasa la semana 1-800-488-,t Parainformaciones acercadeContratos de Mantencion S ears o parapreguntas a cerca...
- Page 46 Io qua vendemos!" PARA AMPLIAR EL VALOR DE SU ESTUFA_ COMPRE UN CONTRATO DE MANTENIMIENTO SEARS. Las Homo Kenmore estdn dtse_adas, fabricadas 1Drat_o 2_aho 3ora_o Ahosde cobortura de laprop;edecf y probadas para brlndarte afios de operaci6n conflab!e. Stn embargo_...
Need help?
Do you have a question about the 911.30169690 and is the answer not in the manual?
Questions and answers