Table of Contents
Advertisement
Available languages
Available languages
Advertisement
Chapters
Table of Contents

Related Manuals for Hoover SteamVac F7412-900


Summary of Contents for Hoover SteamVac F7412-900
- Page 1 Owner's Manual Operating and Servicing Instructions www,hoover.com SI;eaazxVac ® Dual V Carpet Cleaner Englishpp. 1-23 Espa_olpag. 24-39 Please review this manual before operating your Hoover® product. ©2008 Healthy Gain Investments, Ltd. All rights reserved. #56518217. 6/08...
-
Page 2: Table Of Contents
............ Service ..............If you need assistance: Visit our website at hoover.com. Follow the service center link to find the service outlet nearest you OR Call 1-800-944-9200 for an automated referral of authorized service outlet locations (U.S. only} OR Call 1-800-263-6376... -
Page 3: Important Safeguards
WARNING: To reduce the risk of fire, electric shock, or injur.y: • To avoid interna] component damage, use on_ Hoover cleaning products intended for use with this Appliance. (See Cleaning Products section of this manuaL) • Use only on surfacesmoistened by the cleaning process or small spills. Do not immerse product. -
Page 4: Parts Needed For Assembly
C. Pernos y tuercas del mango (Puede haber tres pueden comprarse por separado, visitando www. tuercas en la bolsa, pero s61o se necesitan dos hoover.corn, o su Centro de servieio local de HOOVER. para el ensamblaje. Los pernos y las tuercas se ACCESORIOS OPCIONALES encuentran en la bolsa con la manguera.) - Page 5 Revise el tanque para asegura- rse de que estd bien trabado. 4. Attach hose/cord hook Instale el gancho para la manguera/cord6n 4.a) Snap hook onto cleaner. Encaje el gancho en la limpiadora. www,hoover.com...
- Page 6 6.a) Start 6.b) Wrap manguera y el tubo de soluci6n (E y en- carte). lnicio Envuelva See 0wner's Manual for 7. Store optional tools Guardelos accesorios complete operating instructions. Vea el manual del propietario para obtener las instrucciones completas. www.hoover.com...
-
Page 7: General Operation
Helpful Reminders Recordatorios tiles Unplug the cleaner before doing any of the following. Desenchufe la aspiradora antes de hacer Io siguiente. • Use HOOVER brand detergents; others may foam too much or cause leaking. Usedetergentes de marca HOOVER, otrospueden producir demasiada espuma o causar fugas. -
Page 8: Filling The Clean Water Tank
Grounding Instructions This appliance must be grounded. If it should mal_nction or breakdown, grounding provides a path of least resistance electrical current to reduce the risk of electric shock. This appliance is equipped with a cord having an equipment-grounding conductor (C) and grounding plug (A). -
Page 9: Cleaner Description
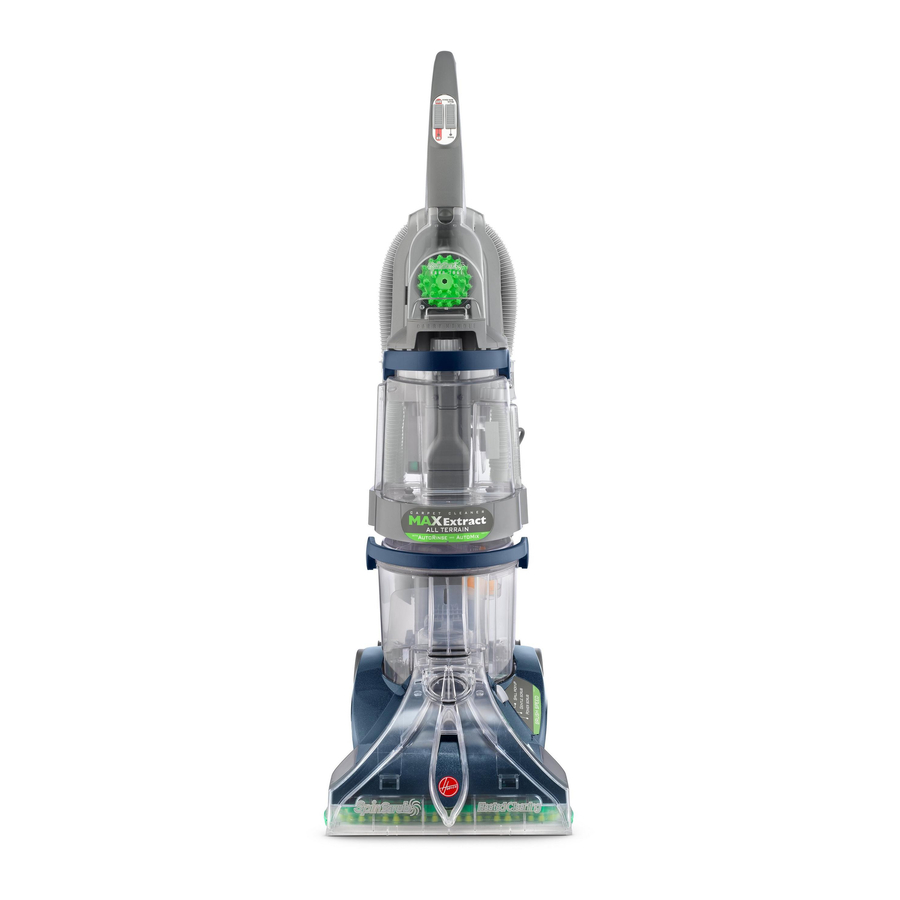
2. How to use Cleaner description Operate cleaner only at voltage specified on data plate on bottom of cleaner. The assembled cleaner will look like the drawing. I. Hand grip 2. Solution trigger: press to release cleaning solution 3. ONIOFF switch 4. -
Page 10: Spinscrub Mode Selector
Handle release pedal ON/OFF switch To turn cleaner ON, Step on pedal {A) to lower handle to push switch down. To turn cleaner operating posi- tion. Handle does OFF, push switch not ]ock into a single position but "floats" to allow convenient opera- tion. - Page 11 NOTE: Use only HOOVERSteamVac detergents. They are specially formulated for use with your SteamVaU_ cleaner. Non-Hoover clean- ing solutions may harm the machine and void the warranty. CAUTION: Detergents contain Anionic and Nonionic Surfactants. Avoid contact with eyes and skin. In case of contact with eyes,flush with cold water for 15 minutes.
-
Page 12: Emptying The Recovery Tank
Position bottom of Push up on the handle once the tank onto cleaner tank is back to latch using one hand on it to the unit, each side of the tank to center it on Check tank to make the unit. sure it is securely latched. -
Page 13: Automatic Shut-Off
Check clean water tank also; it may need to be refilled. Do not use without float and float retainer in place. If broken or dis- lodged, take to an Authorized Hoover Service Center or Dealer for repair. 3. How to clean Before you begin cleaning a. -
Page 14: Cleaning Carpet
Read "Before you begin cleaning" instructions on page 13. I. Fill clean water tank according to instruc- AUTO tions for Figs. 2.B-2.10 2. Fill detergent container with Hoover Carpet/Upholstery Detergent according instructions for Figs. 2.10-2.12 3. Select proper SpinScrub" mode (see pg. 10). -
Page 15: Cleaning Hard Floors
1. Fill clean water tank according to instruc- tions for Figs. 2-9 to 2-10. Rinsing is not necessary, but will help 2, Fill detergent container with HOOVER remove detergent residue from the floor. Hard Floor Cleaner according to Bare Floor 10. Empty recovery... -
Page 16: After Cleaning
Rinse it in clear water. Picking up spills mode selector to SP1LL PICK-UP or OFF. Your HOOVER SteamVac cleaner may also be used to pick up sma]l liquid spills on car- If a spot is left, the stair/upholstery... -
Page 17: Maintenance
Align posts (A) on both ends of brush assem- bly with slots {B) in cleaner housing. Make sure that the square post {C) also aligns with the square hole (D). Turn brushes slightly until post fits easily into hole. Press brush assembly firmly to snap into place. www,hoover.com... -
Page 18: Usingthe Tools
Free if it is reposition pushed open tool, reverse this far. procedure. reattach, align hinges of cover with holes on sides of tool storage area. Snap door into place. www.hoover, com... - Page 19 2. Grasp the sides of the brush module and tions For Figs. 2,9 to 2.10. lift it from the base {J}. 4. Fill detergent container with HOOVER 3. Snap scrub module onto the base. Hard Floor Cleaning Solution according to...
-
Page 20: Cleaning Carpeted Stairs
Pad must be completely dry before reattaching to module. Replavcement pads may also be purchased. Ask for HOOVER part no. 40308001. Cleaning carpeted stairs Read "Before you begin cleaning" instruc- tions on page 13. 1. Attach hose and solution... -
Page 21: Cleaning Upholstery
Figs. 2.9 to 2.10. 12. For heavily soiled areas, it may be neces- 4. Fin detergent container with HOOVER sary to repeat the cleaning process. Make Carpet/Upholstery Detergent according crisscrossing strokes to the original pattern;... -
Page 22: Fyou Have A Problem
Ive2. Turnvalve cap {A) counterclockwise and remove. Soak valvecap in warm water for at least 15 minutes. Wipe cap dry. 3. Align slots (B) on cap with tabs (C) in opening. Turn cap clockwise nk. clean to tighten. www.hoover.com... -
Page 23: Service
• calling 1-800-944-9200 for an automated referral of authorized service outlet locations (U.S. only). Do not send your cleaner to Hoover, Inc., Company in Glenwillow for service, this will only result in delay. www.hoover.com... - Page 24 Manual del Propietario Instrucciones de Funcionamiento y Servicio www.hoover.com Stem Vac : ® Aspiradora para alfombras DualV Por favor, lea este manual antes de hacer funcionar su producto Hoover®. _2008 Hea]thy Gain Investments, Ltd. Todos los derechos reservados. N°56518217. 6/08...
- Page 25 Mantenimiento ............Si necesita ayuda: Visite nuestro sitio web en hoover.com. Siga el enlace de1centro de servicio para encontrar el centro de servicio mils cercano o llame al 1-800-944-9200 para que le indiquen de manera automltica ]a ubicaci6n de los centros autorizados de servicio (0nicamente en los EE. UU.) o ]lame al 1-800-263-6376 para hablar con un representante del Centro de atenci6n al cliente, de lunes a viernes, de 8 a.m.
- Page 26 }a intemperie, ose dej6 caer dentTo del agua, ll6velo a un Centro de ventas y de servicio de Hoover o a un Concesionado autorizado servicio de garantia de Hoover.
- Page 27 En Canada, el C6digo El_ctTico Canadiense a tierra adecuada (Fig. 2), se puede usar (Canadian Electrical Code) no permite el uso un adaptador temporal {D) para conectar de adaptadores temporales. este enchuFe a un recept_culo de 2 polos [E). E1 adaptador temporal debe utilizarse www.hoover.com...
-
Page 28: Descripci6N De La Aspiradora
Use estas instruccionesen espafiol junto con las figuras paso-a-paso Interruptor para eneender/apagar provistasen el manual de ingles. Para encender la aspiradoTa, empuje el inter- ruptor haeia abajo. 2. Funcionamiento Para apagar la aspiradora, empuje el inter- ruptor hacia arriba. Descripci6n de la aspiradora Haga funcionar la limpiadora solamente con el voltaje especificado en la plaea de datos, Pedal para soltar el mango... - Page 29 Use este interruptor para seleceionar la • Lirnpiador Ultra Hoover posicidn de lavado con enjuague o posici6n • Limpiador para lirnpieza profunda Hoover de enjuague solarnente. • Limpiador para lirnpieza profunda perfume ni colorante Hoover WASH-AutoRinse" (LAVAD0 AutoRinse • Lirnpiador Floor-to-Floor"...
-
Page 30: Apagado Automfitico
[no su lugar. Si estfi roto o fuera de lugar, ll_velo a un Centro o Concesionario autorizado apoye el tanque sobre un mueb]e). servicio de Hoover para que 1o reparen. 2,16 Gire las trabas del tanque de recuper- www.hoover.eom... -
Page 31: Antes De Comenzar
1as alfombras (p. ej., pl_stieo), antes de limpiarlas. A. Aspire bien. En el case de alfombras, use una aspiradora Hoover con un agitador para Vea las p_ginas 14-18 para obtener instruc- obtener los mejores resultados. Limpie los clones sobre distintas tareas de limpieza. -
Page 32: Limpieza De Suelosduros
Limpieza de suelosduros con las instrucciones que aparecen clesde la C6mo eonectar el accesorio para suelossin Fig. 2.9 hasta la 2.11. alfombra (Disponible a un costo adieional, si no viene ineluido con su aspiradora). www,hoover.com... - Page 33 2. Llene e] contenedor para detergente Limpiador para suelos duros HOOVER de acuerdo con ]as instrueeiones para la Aspira- Para obtener los mejores resultados, aspire los derrames inmediatamente coloeando la dora de suelos sin alfombra de la Fig. 2-11.
-
Page 34: Uso De Los Accesorios
La boquilla debe estar en la posici6n adec- de Tamanguera con las ranuras del misrno uada para que el tanque de recuperaci6n tamaflo en el orificio de conexi6n. encaje correctamente. 3. Empuje la manguera en el orificio y fijela www.hoover.com... - Page 35 en su lugar. que se suelte si se empuja demasiado para 4. Enchufe con fuerza el tubo de soluciOn en abrirla. Para volver a colocarla, alinee ]as bisagras de el orificio de eonexiOn para la soluciOn (B]. ]a tapa con los orificios en los costados de ]a 3.14 zona de almacenaje del aecesorio.
-
Page 36: Limpieza De Escaleras Alfombradas
4. Llene el contenedor usfindolo eomo se describe a continuaci6n. Detergente para alfombras/tapizados HOOVER de aeuerdo con las instrucciones 1. Conecte la manguera y el tubo de soluei6n ]a Fig. 2.11. como se indica desde la Fig. 3.14 hasta la 3.15. -
Page 37: Limpieza De Tapizados
Detergente para alfombras/tapizados del accesorio lentamente sobre la alfombra HOOVER de acuerdo con las instrucciones {segunda pasada hfimeda). Suelte el gatillo la Fig. 2.11. No use soluci6n de limpieza para al final de ]a pasada. -
Page 38: Lubricaci6N
1. Retire el tanque de agua limpia. • Fusible quemado o se dispar6 el 2. Gire la tapa de la vfilvula (A) en sentido disyuntor. antihorario y retirela. • Reemplace el fusible o reajuste el Ponga en remojo la tapa de la vfilvula en disyuntor. www.hoover.com... - Page 39 Para obtener un servicio aprobado HOOVER y piezas de HOOVER genuinas, encuentre el Centro de ventas y de servioio de Hoover o el Concesionario autorizado de servieio de garantla de Hoover (Depot) m_s cercanos: • consultando las P_ginas amarinas en ]a secci6n "Aspiradoras - uso domestico"...
- Page 40 HOOVER and are registered trademarks HOOVER y ('_ son marcas registradas...
Need help?
Do you have a question about the SteamVac F7412-900 and is the answer not in the manual?
Questions and answers